22 Carved Pumpkin Ideas, From Easy Faces to Showstoppers

Jump to an idea (22)
- Before you start
- 1. Classic triangle-eyed jack-o'-lantern
- 2. Surprised face with a small round mouth
- 3. Drilled polka-dot pumpkin
- 4. Big and little jack-o'-lantern pair
- 5. Hungry pumpkin eating a gourd
- 6. Lopsided goofy faces
- 7. House number pumpkin
- 8. Crescent moon and stars
- 9. Etched cat face on a pale pumpkin
- 10. Wide-eyed owl
- 11. Corner spiderweb with a hanging spider
- 12. Bat colony
- 13. Weeping jack-o'-lantern
- 14. Shaved leaf pattern
- 15. Haunted house in relief
- 16. Bare tree with crows
- 17. Wrought-iron gate
- 18. Mermaid relief sculpture
- 19. Painted ghost pattern
- 20. Painted patchwork monster
- 21. Fairy-light pumpkin pile
- 22. Mummy pumpkin
- Final tips
These 22 carved pumpkin ideas run from a 20-minute grin to a weekend relief sculpture. Each idea gives a time estimate, a cut order or method, and the one measurement that keeps it from caving in.
You get six beginner faces, eight intermediate designs, four advanced projects and four no-carve ideas. More front-step ideas live in the Halloween hub and our porch and door ideas.
Before you start
You need a serrated pumpkin saw or small utility knife, a metal scoop, a washable marker, painter's tape, newspaper and a battery candle. Some designs also use a drill or a loop tool.
Cut the lid with the blade angled 45 degrees inward so it rests on a ledge instead of dropping in. Scoop out the seeds and scrape the carving side down to about 1 inch thick. Draw the design first. Cut small inside shapes before big outer ones so the pumpkin stays strong, and saw with the blade moving away from your body.
An adult does every knife cut. Kids under 6 draw and scoop, and everyone washes hands after. Keep spare button-cell batteries from tea lights out of reach. Use battery candles only, especially near straw, cornstalks or paper decor, because open flames ignite dry decor and pets can knock a lit pumpkin over. Keep pumpkins off the ground, where dogs chew them, and keep the candy bowl out of reach too, since raisins and xylitol are toxic to dogs.
1. Classic triangle-eyed jack-o'-lantern
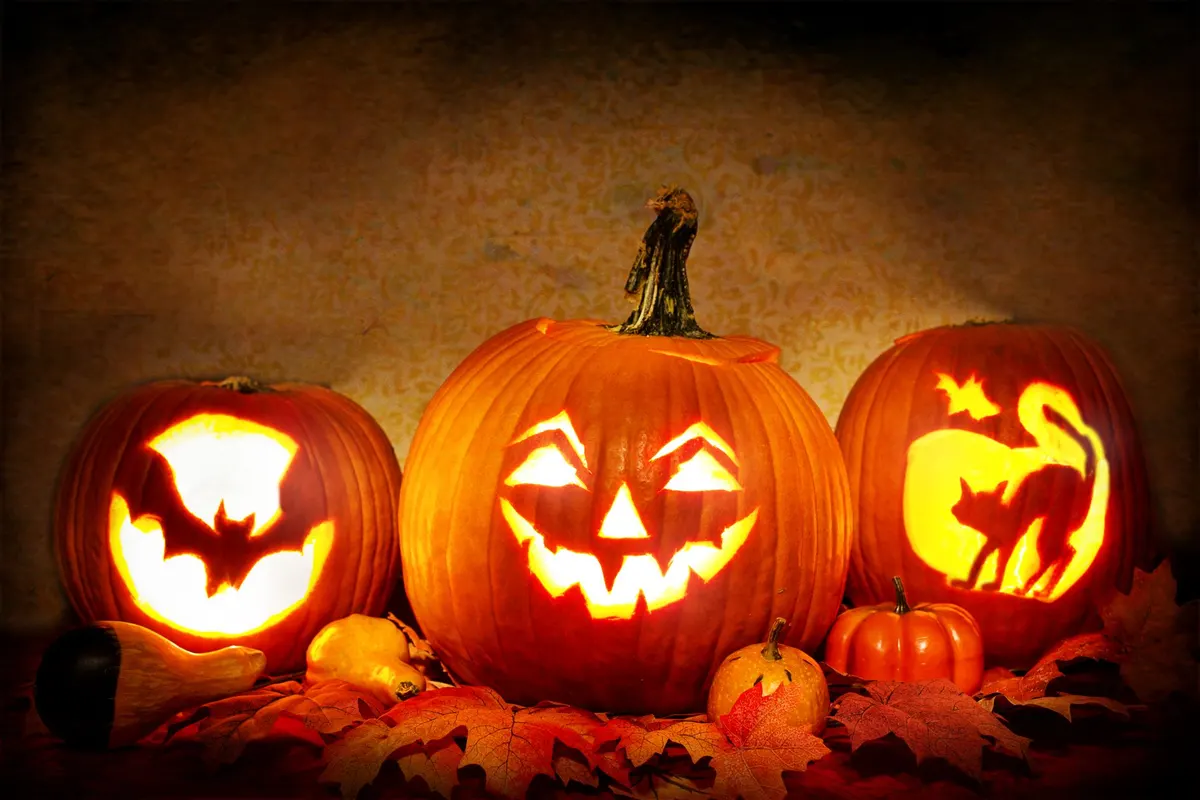
The classic face is quick and forgiving. Draw two triangle eyes tilted slightly toward the nose, a smaller triangle nose, and a wide crescent mouth with three or four square teeth. Cut the eyes first, then the nose, then the mouth, pushing each piece out from the inside so the edges stay clean.
Leave at least 1 inch of pumpkin between the nose and the top of the mouth, since that strip is the first to snap. On a pumpkin about 10 inches across, eyes 2 inches wide look balanced. Beginner, about 30 minutes.
2. Surprised face with a small round mouth
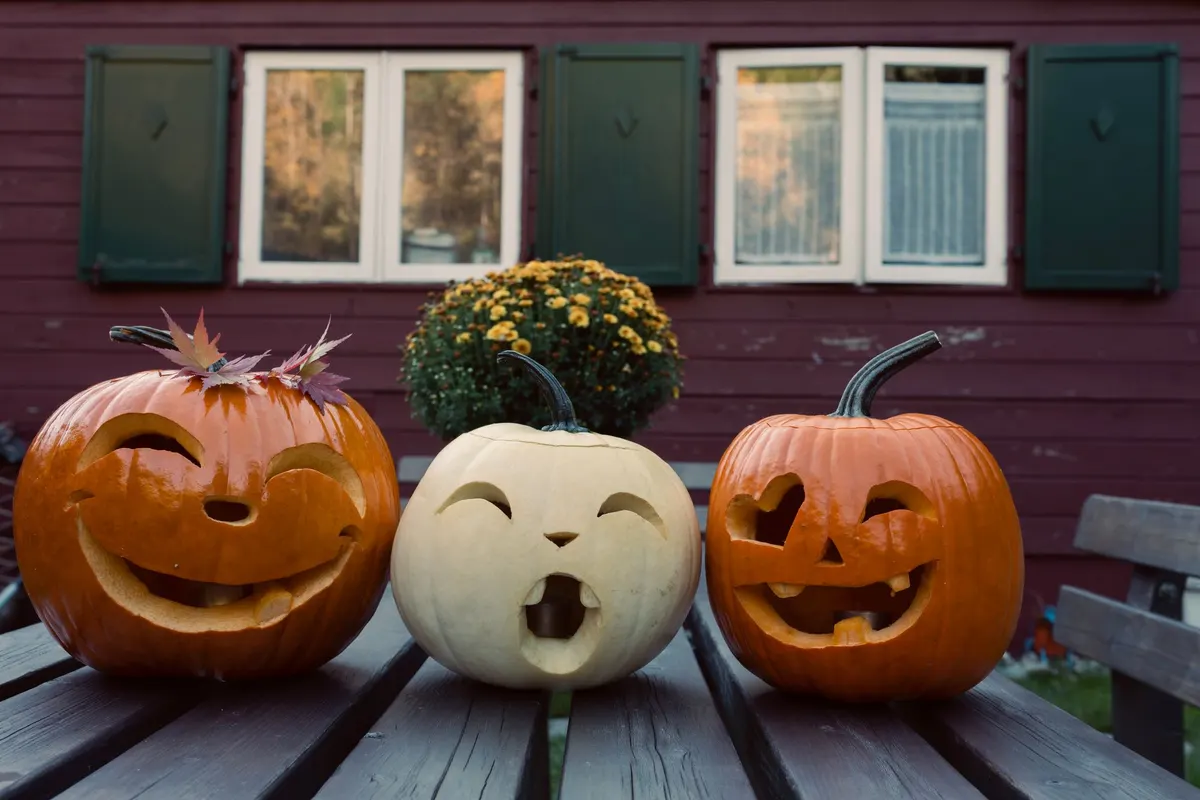
For a friendlier pumpkin, carve two crescent eyes that curve upward like closed, happy eyes, then a small round "o" mouth set low on the face. With only two tiny teeth and no thin strips, it survives a bumpy ride from the patch and a few small hands.
Keep the mouth no wider than 2 inches so it reads as surprise rather than a scream. It looks sweetest on a white pumpkin, with a small pot of mums beside it for color. Beginner, about 20 minutes.
3. Drilled polka-dot pumpkin
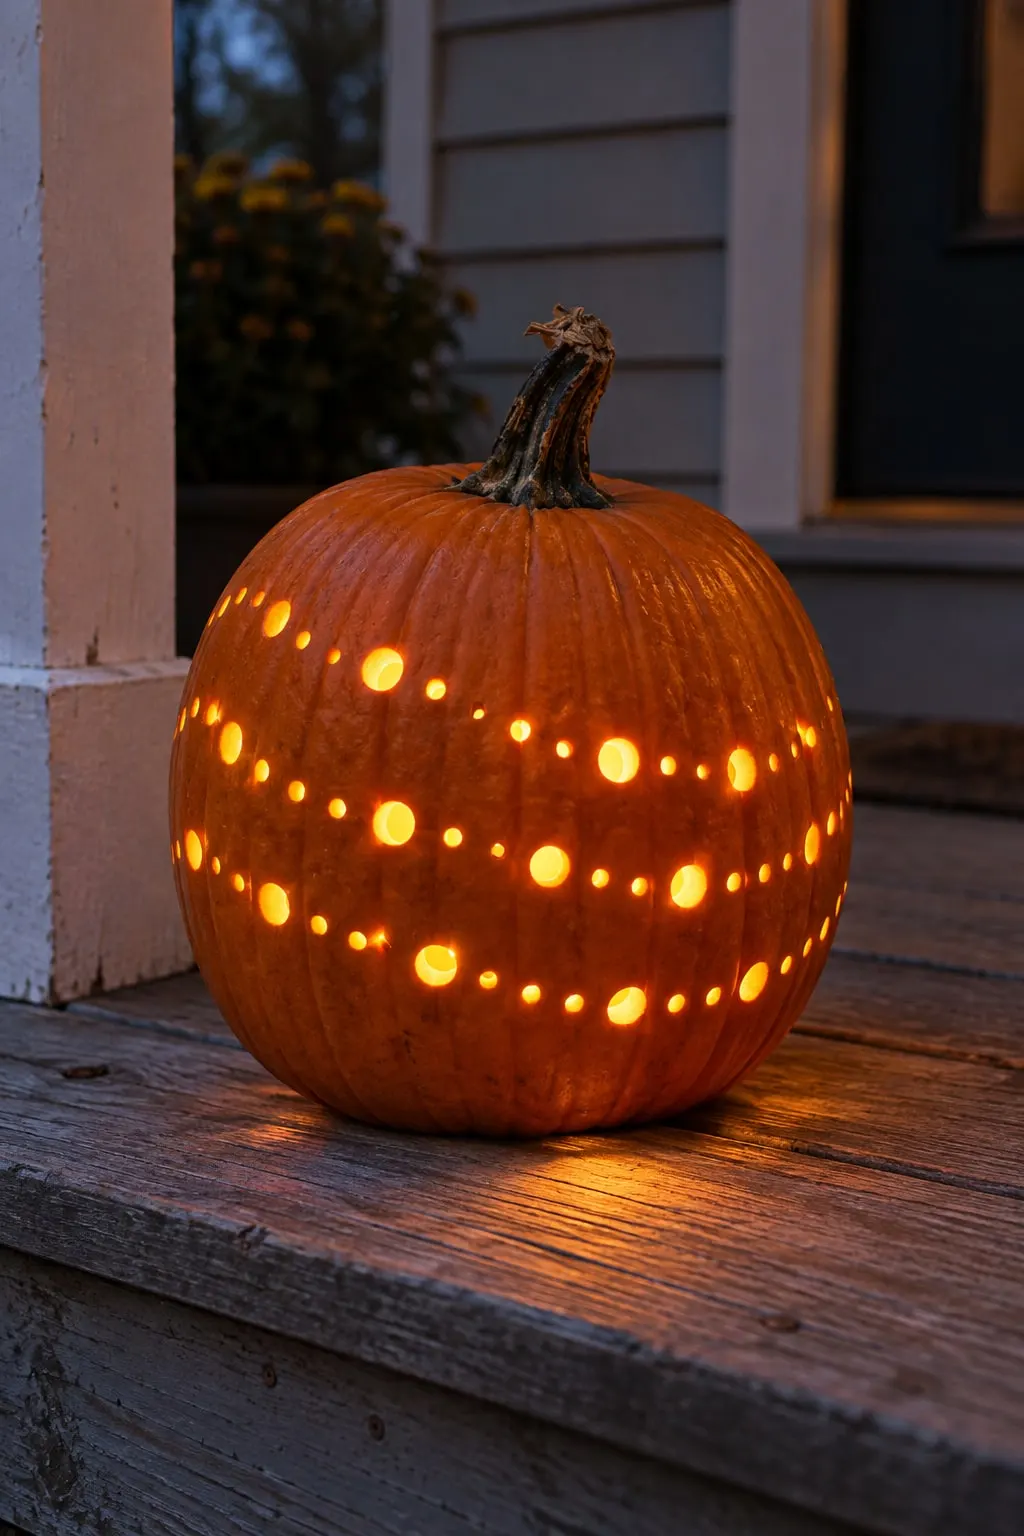
Using a washable marker, draw three wavy bands of dots that wrap around the pumpkin, about 1 1/2 inches apart. Drill straight through the wall with a 1/2-inch bit for the main dots, then add a few 1/4-inch holes between them.
Rest the pumpkin on a folded towel so it cannot roll, and brush away loose shavings with a dry paintbrush. A 10-inch pumpkin takes about 50 holes and 25 minutes. Beginner. Older kids can hold the marker and plan the pattern while an adult runs the drill.
4. Big and little jack-o'-lantern pair
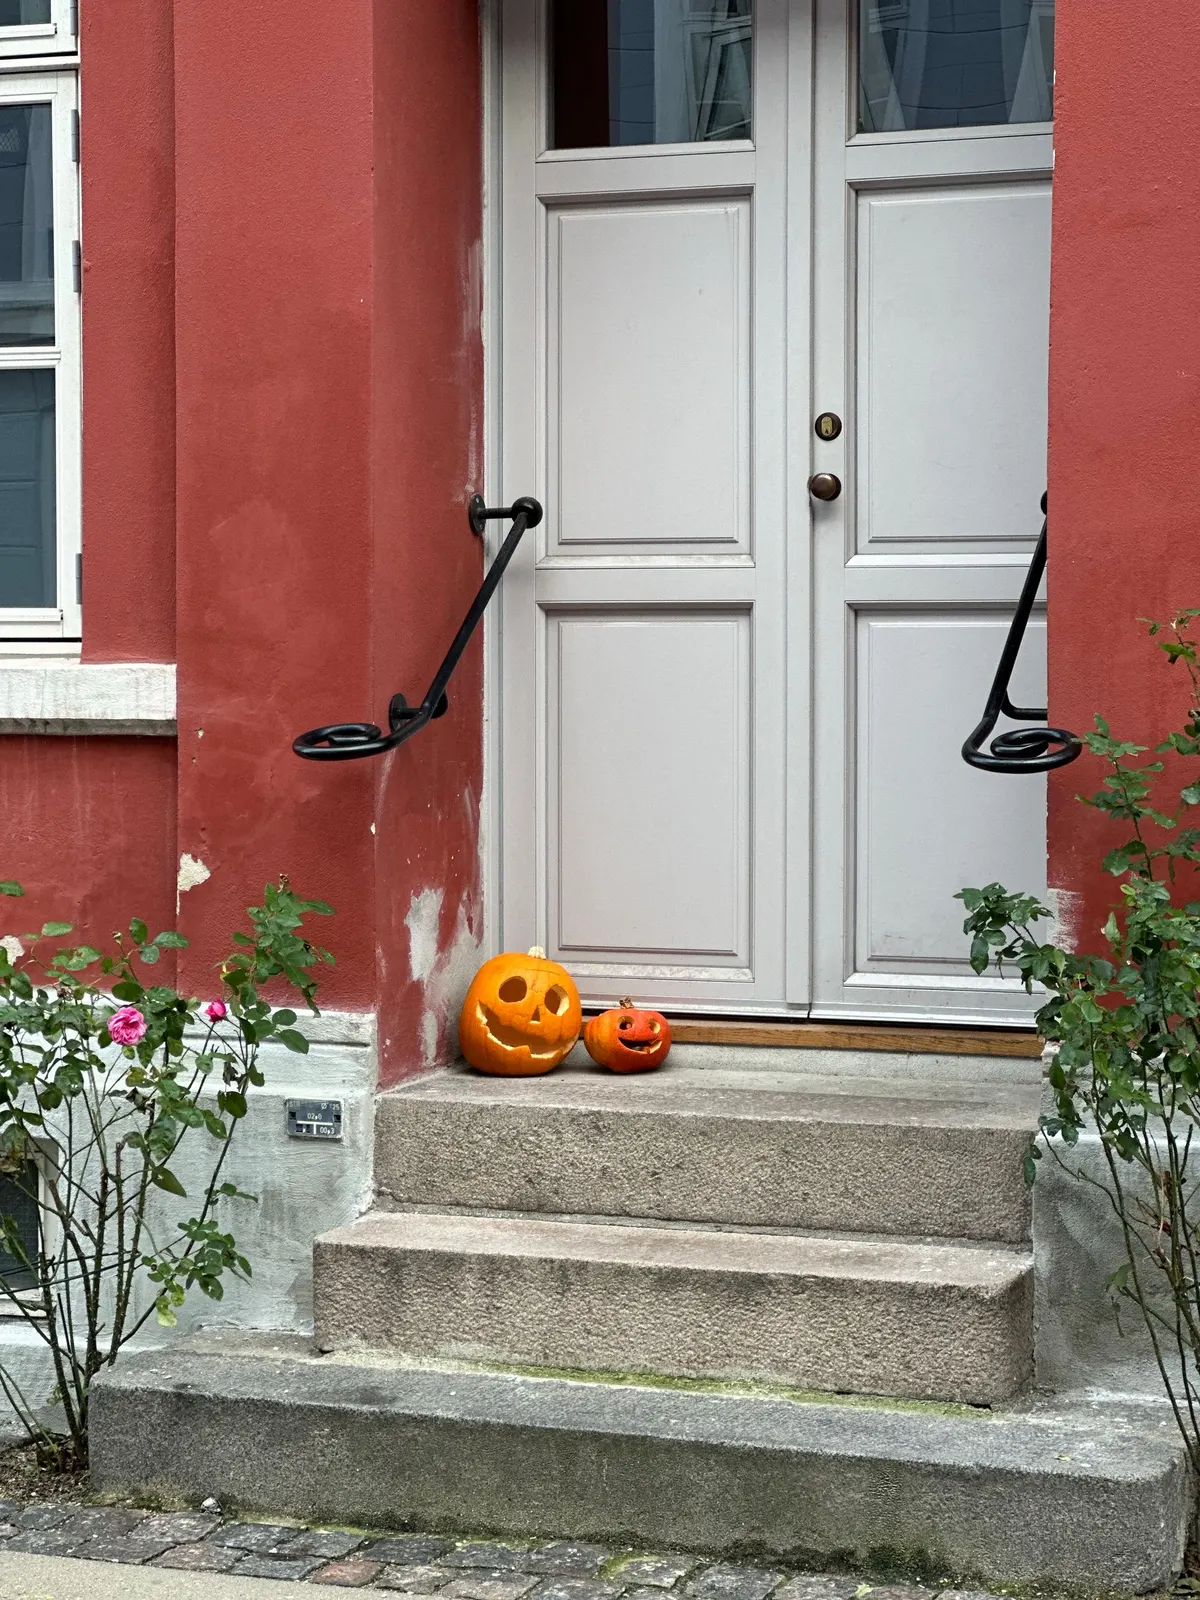
Two pumpkins in very different sizes look better on a step than two matching ones. Pick one about 12 inches across and one about 6 inches, and give both the same simple face so they read as a parent and child.
Carve the big one first, then scale the eyes down by half for the small one. Small pumpkins have thinner walls, so you can skip most of the scraping and cut straight through. Set the pair on the top step to one side of the door, the large one closer to the wall. Beginner, about 40 minutes for both.
5. Hungry pumpkin eating a gourd
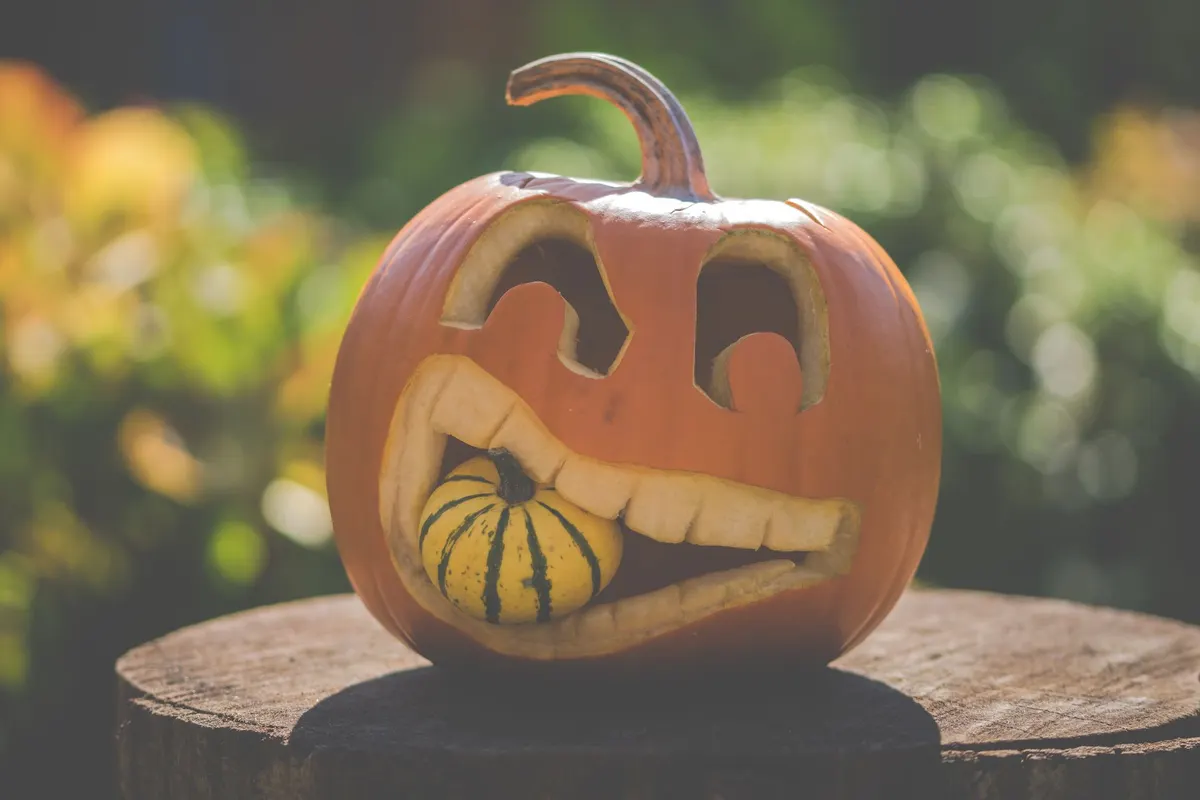
Give a pumpkin a wide, toothy grin, then push a small striped gourd into the mouth so it looks like a snack. Kids like picking the "food."
Cut the mouth about 1/4 inch narrower than the gourd and press it in gently, so it wedges in without a skewer. Cut arched eyes with a small uncut pupil in each for a cartoon feel, and press the gourd in after the pumpkin is lit so you don't knock the candle over. Beginner, about 30 minutes. Swap the gourd for a mini pumpkin, an apple or a pinecone, and set it on a stump or a low crate.
6. Lopsided goofy faces
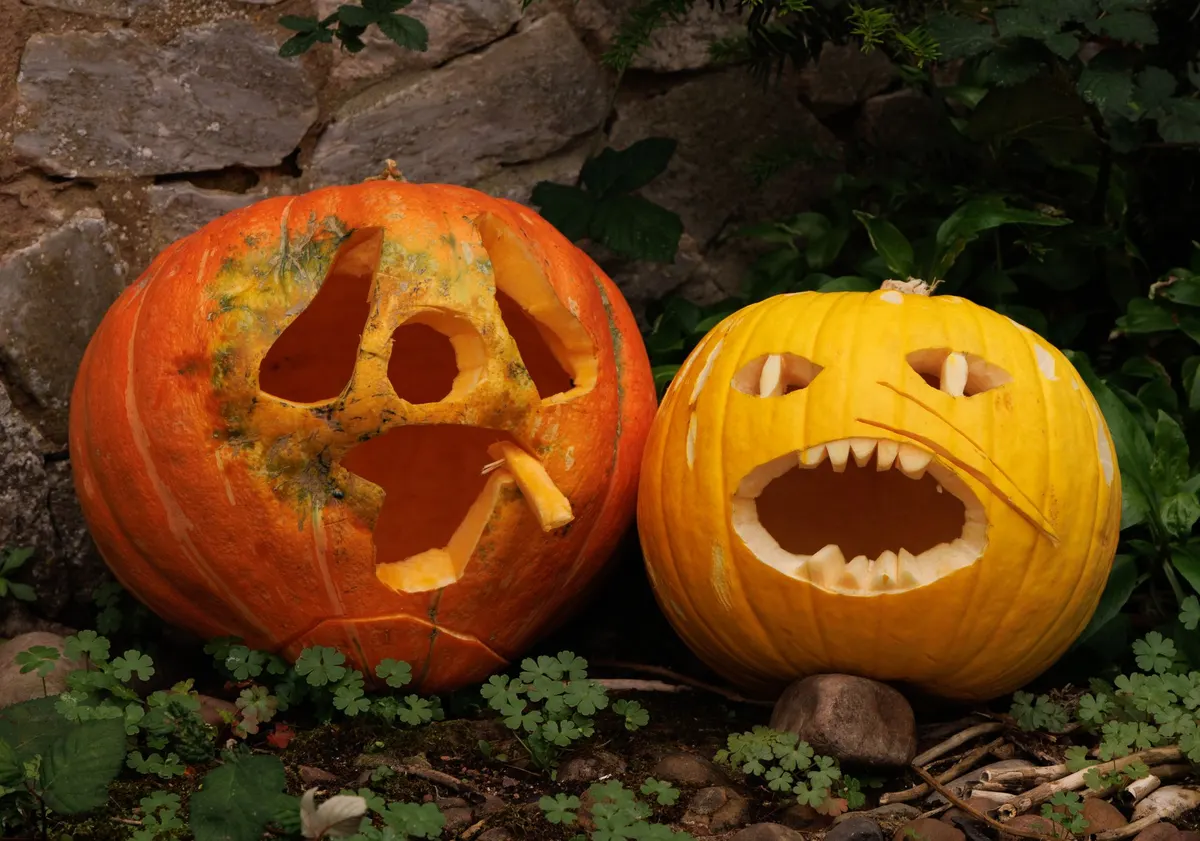
Not every pumpkin needs a perfect grin. Draw one droopy eye lower than the other, a wobbly open mouth and a crooked nose, then cut freehand without a pattern. Blotchy or pale yellow pumpkins suit this style, since they already look a little odd.
Cut the mouth last and leave one strip of flesh hanging in the middle for a silly tooth. Kids aged 7 to 10 can draw the face while an adult cuts. Beginner, about 25 minutes. Two side by side, each pulling a different expression, look funnier than one alone.
7. House number pumpkin
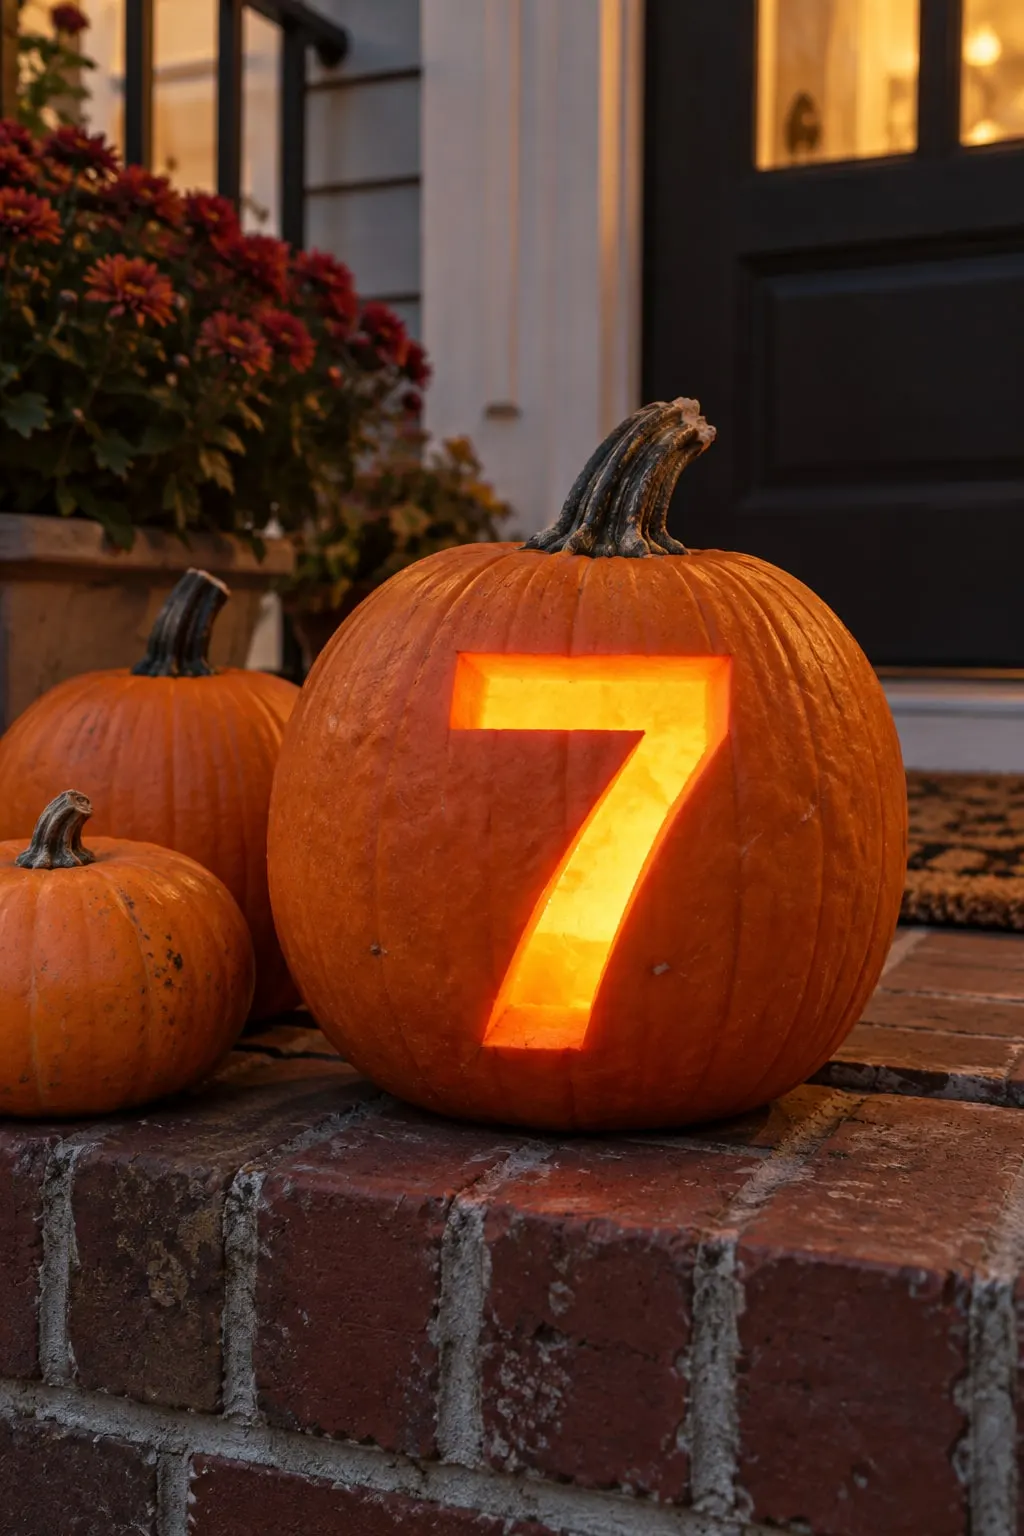
A pumpkin carved with your house number is useful on Halloween night, when trick-or-treaters are looking for the right door. Print the number in a bold font about 6 inches tall, tape it to the pumpkin, and poke along the outline every 1/4 inch with a pin.
Remove the paper, connect the holes with a marker, and cut. Straight-sided numbers cut fastest and cleanest. For closed loops in 0, 4, 6, 8 and 9, leave two small bridges for every center, so an 8 needs four. Intermediate, about 45 minutes per digit.
8. Crescent moon and stars
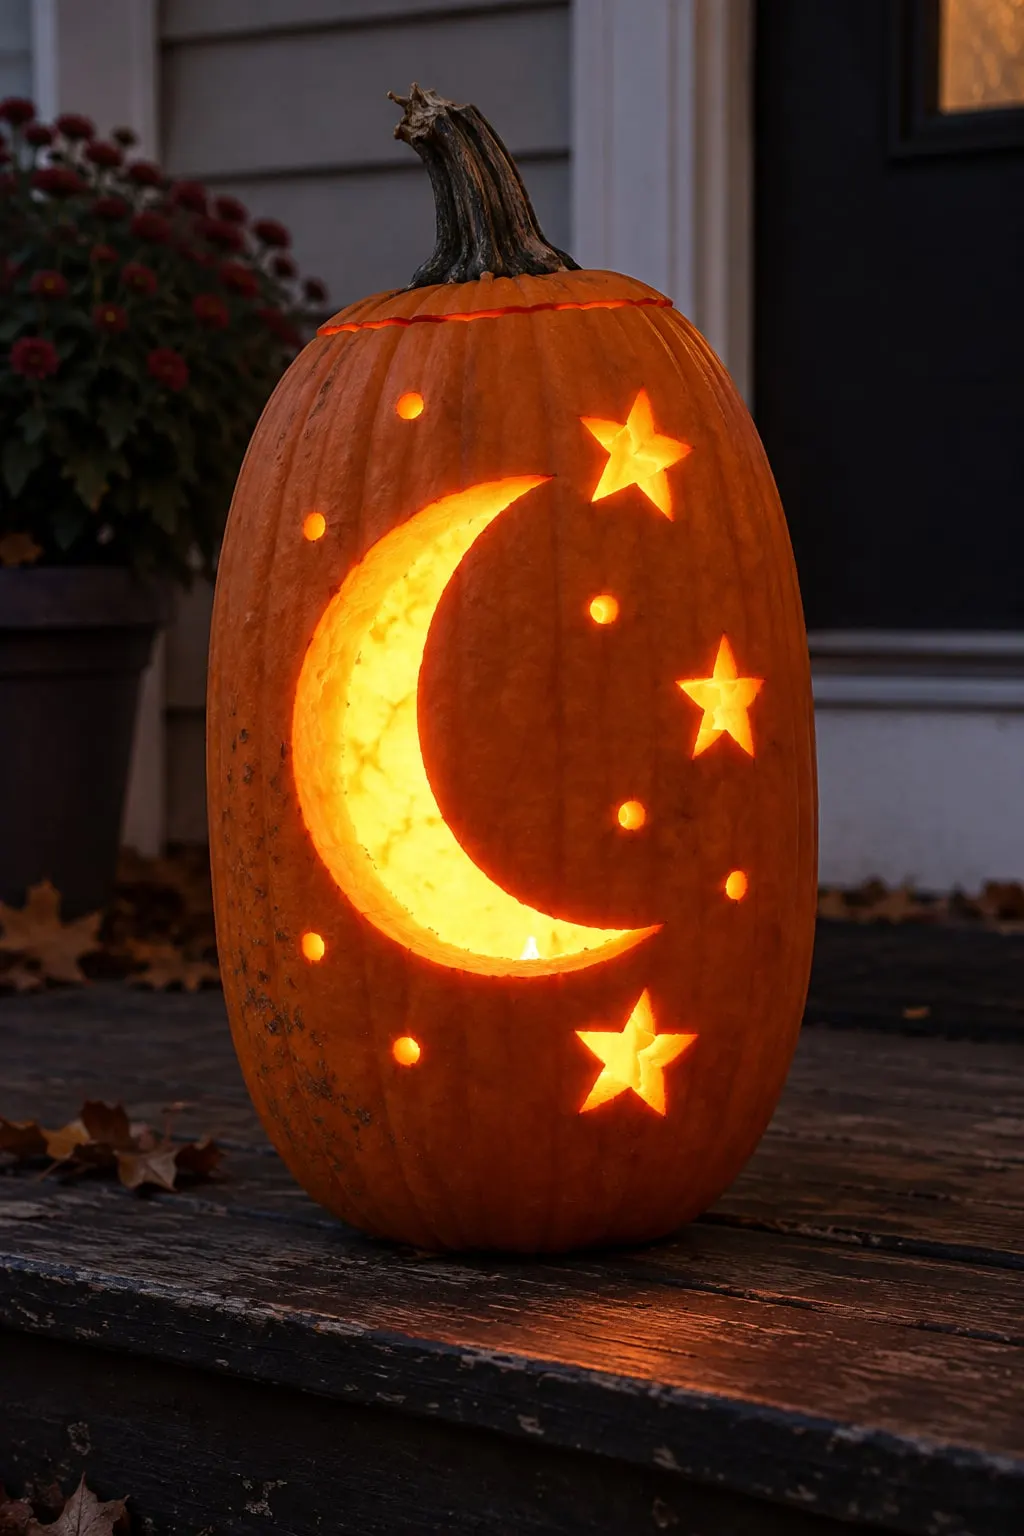
Tall, narrow pumpkins work best for a night-sky design. Draw one large crescent moon in the upper half, then four or five five-point stars and a few small round dots scattered around it.
Cut the stars and dots first, then the moon, sawing the curve in short strokes. Leave at least 1 inch of pumpkin between the moon and the nearest star, or that strip can crack. If a piece snaps off, a toothpick pushed in from behind holds it back in place. Intermediate, about 45 minutes. Carve a second one with the moon facing the other way and put one on each side of the door.
9. Etched cat face on a pale pumpkin
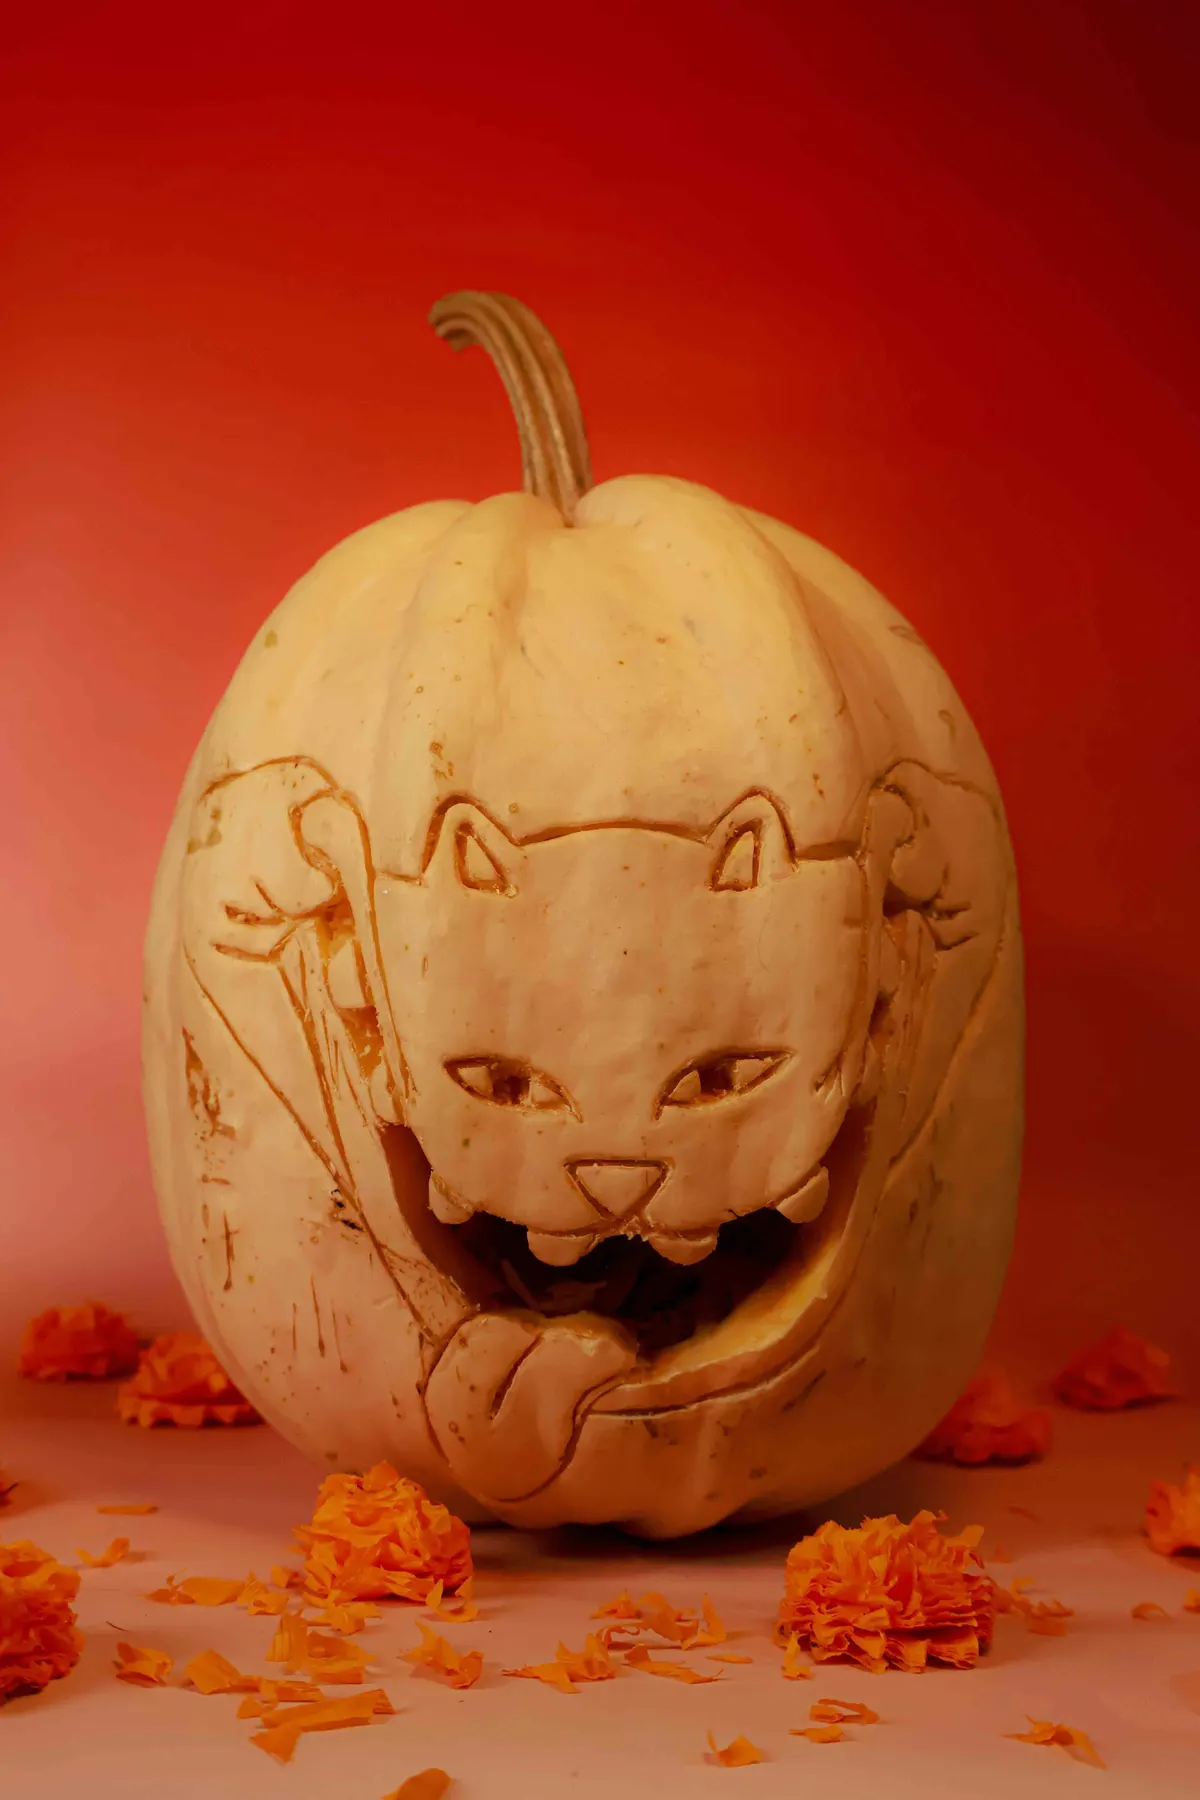
Instead of cutting through, etch the design into the skin with a craft knife and a small loop tool. Draw a big cat face with pointed ears, almond eyes, a grinning mouth and a paw on each side, then score the lines about 1/8 inch deep and scrape the skin away inside them.
Pale cream pumpkins show etched lines best. Cut the mouth all the way through if you want a little glow. Intermediate, about an hour. Etched skin dries faster than cut edges, so carve this a day or two before you show it and rub petroleum jelly on the carved areas.
10. Wide-eyed owl
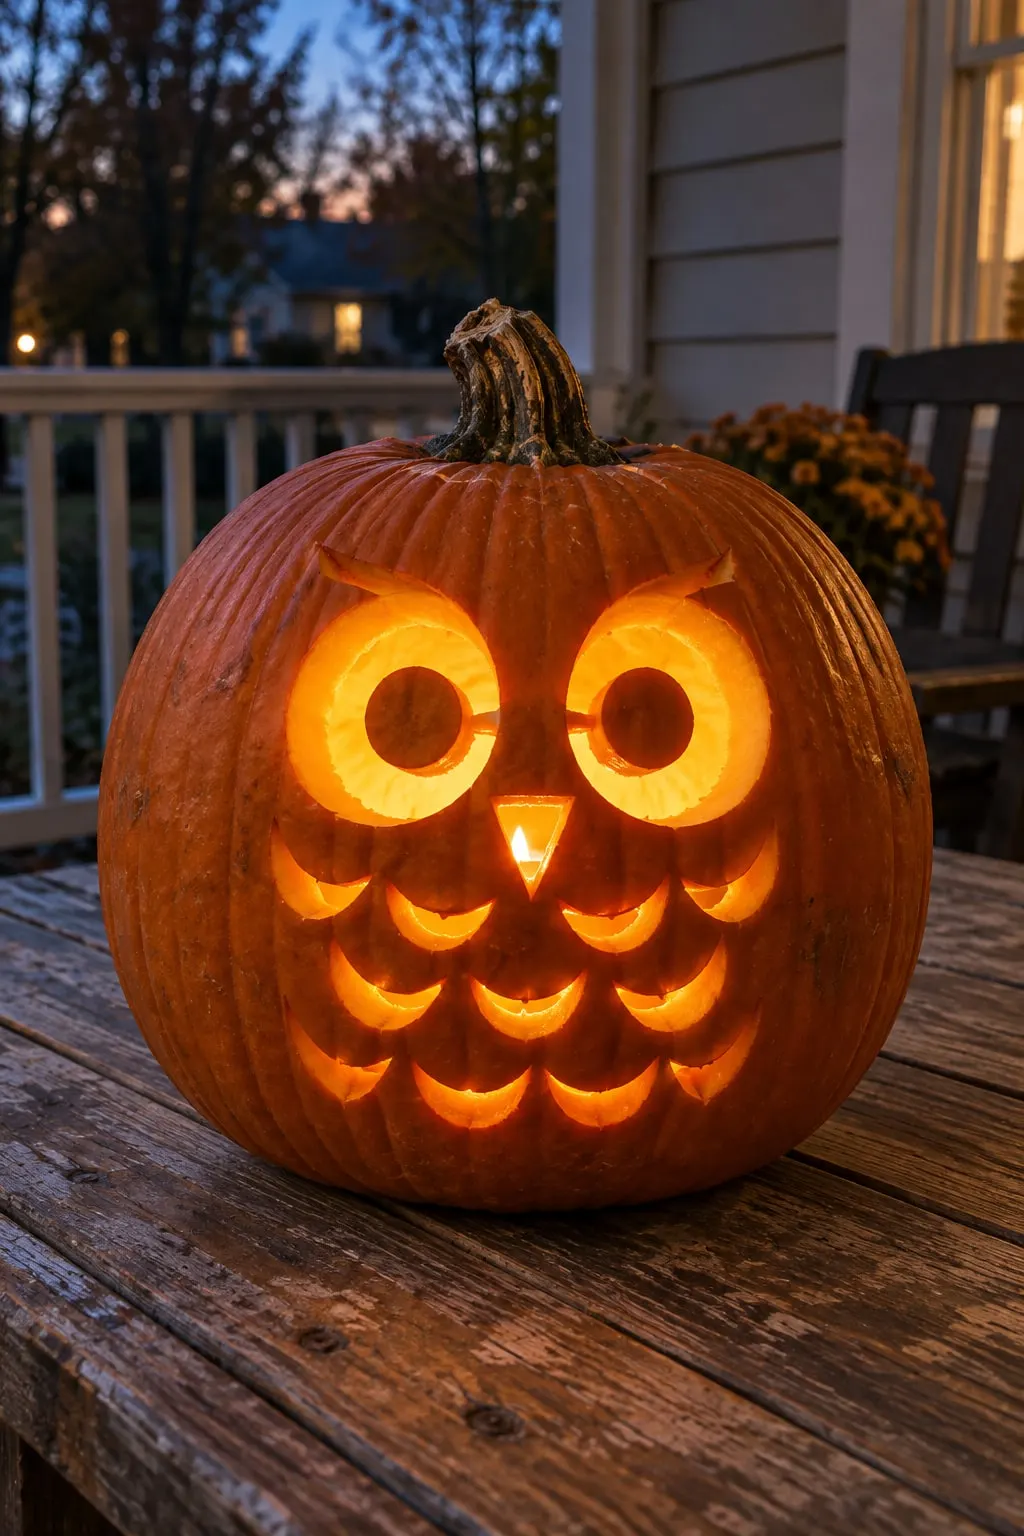
Round pumpkins make natural owl bodies. Draw two big circles for eyes, with a smaller circle inside each that you leave uncut as the pupil. Add a small triangle beak between them and rows of short crescent cuts down the chest for feathers.
Cut the 10 to 14 small feather crescents first, then the beak, then the outer eye rings, leaving a 1/2-inch bridge at the top and bottom of each ring so the pupils stay attached. Intermediate, about 75 minutes. Set it on a porch table or a railing so it looks like it is perched.
11. Corner spiderweb with a hanging spider
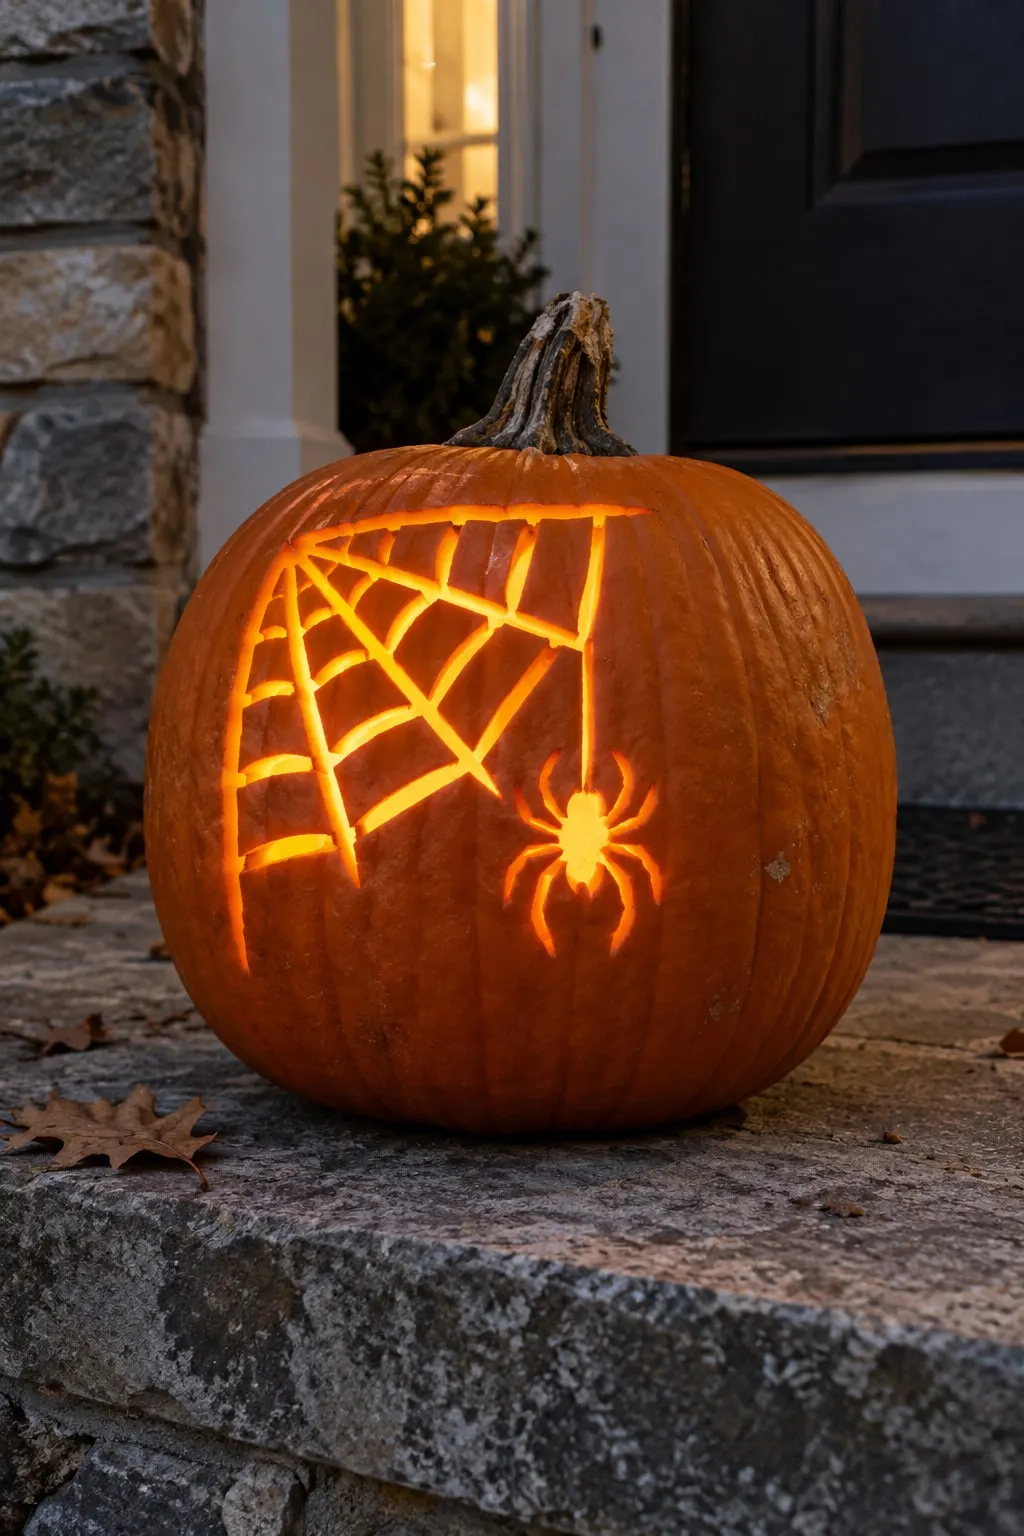
Draw a quarter web in one upper corner: five or six straight spokes from a point near the stem, crossed by three curved rings. Then draw a small round spider dangling from a single line on the opposite side.
Cut the open spaces between the threads and leave the threads themselves as uncut pumpkin. Keep each thread at least 1/2 inch wide, or the web will sag by the second night. Work from the center out. Intermediate, about an hour with a narrow blade.
12. Bat colony
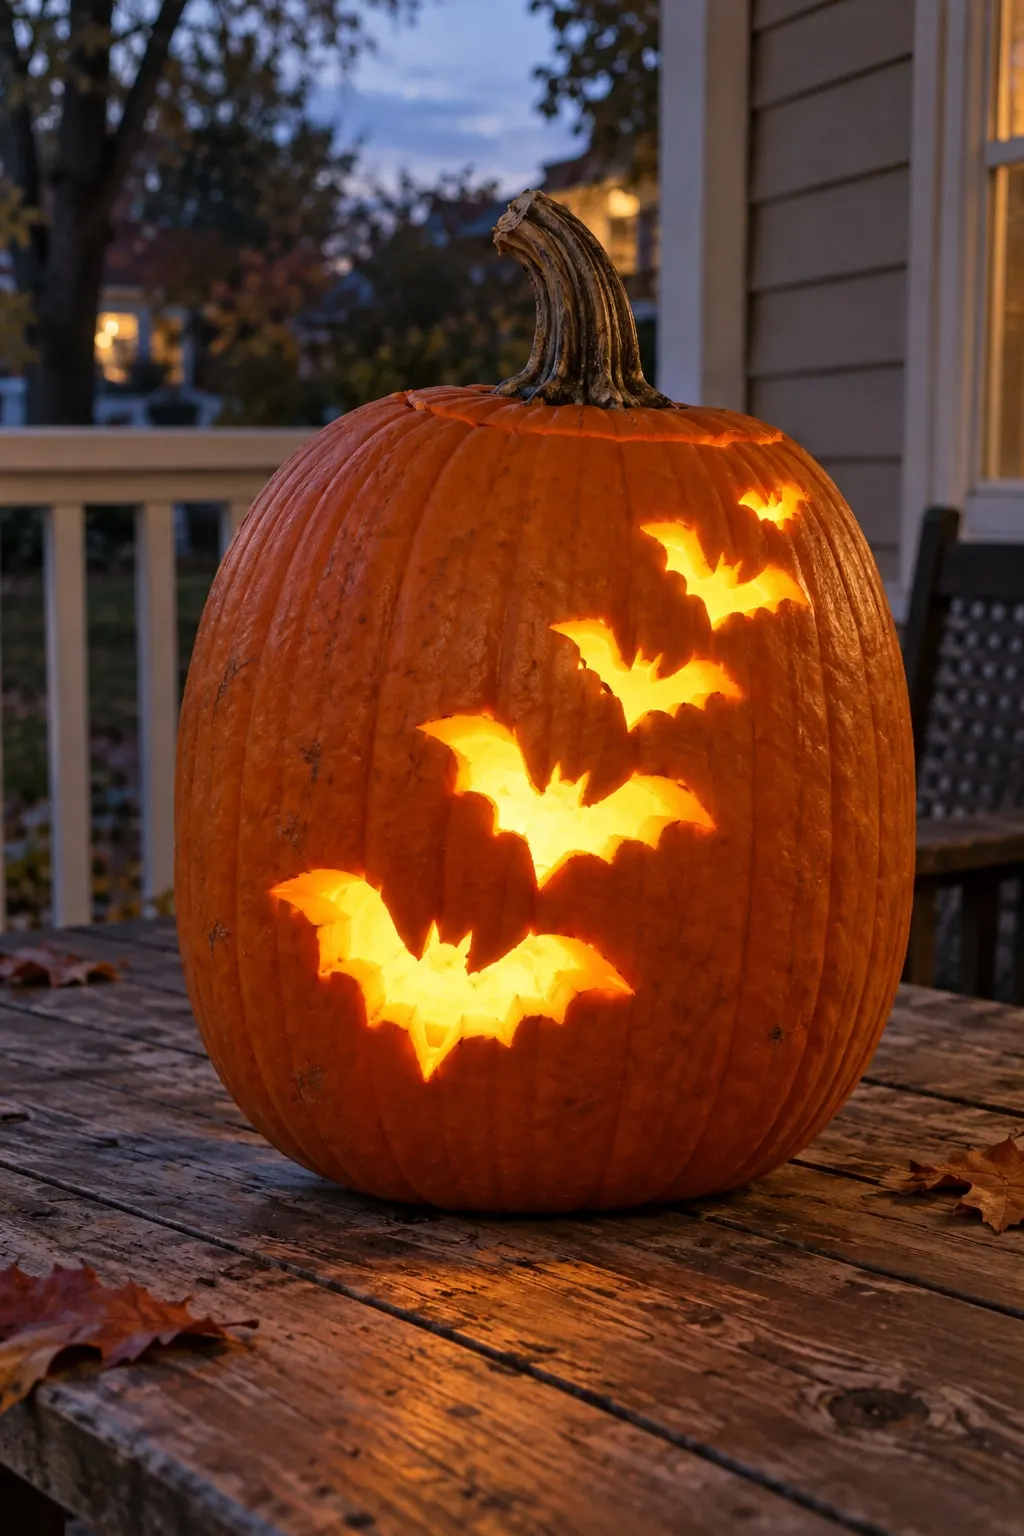
Cut four or five bats in different sizes, from 2 to 5 inches wide, flying in a diagonal line from the base to the stem. Each bat is an oval body with two scalloped wings and two tiny ear points.
Draw them all first, with about 2 inches of pumpkin between bats. Cut the smallest ones first while the pumpkin is strongest. A tall pumpkin, at least 11 inches high, gives the flight path room. Intermediate, about an hour. For a stencil, fold paper in half and cut one wing shape to get a symmetrical bat.
13. Weeping jack-o'-lantern
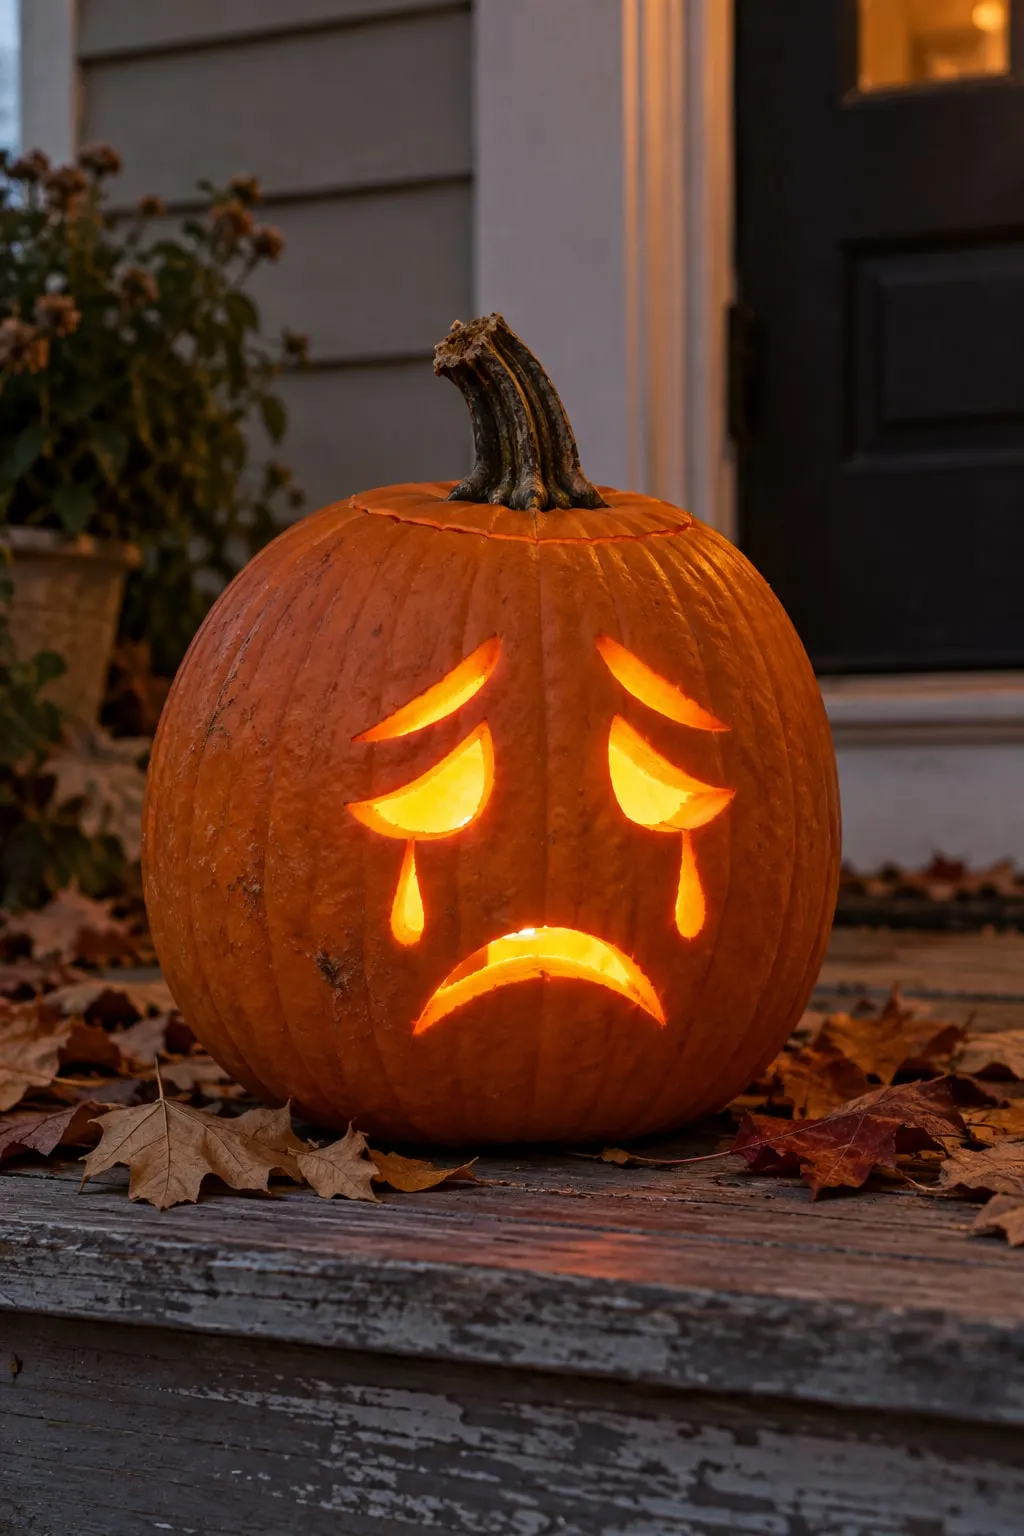
A sad pumpkin stands out on a step full of grins. Draw slanted eyes that droop toward the outside, a thin teardrop under each eye, and a small downturned mouth.
The teardrops are narrow cuts, so use a craft knife or the tip of a small saw and go slowly. Make each one about 2 to 3 inches long and no wider than 1/2 inch. Scrape the inside wall thinner around the cheeks so the tears glow brightly. Intermediate, about 50 minutes. Pair it with a happy pumpkin on the same step for a comedy-and-tragedy set.
14. Shaved leaf pattern
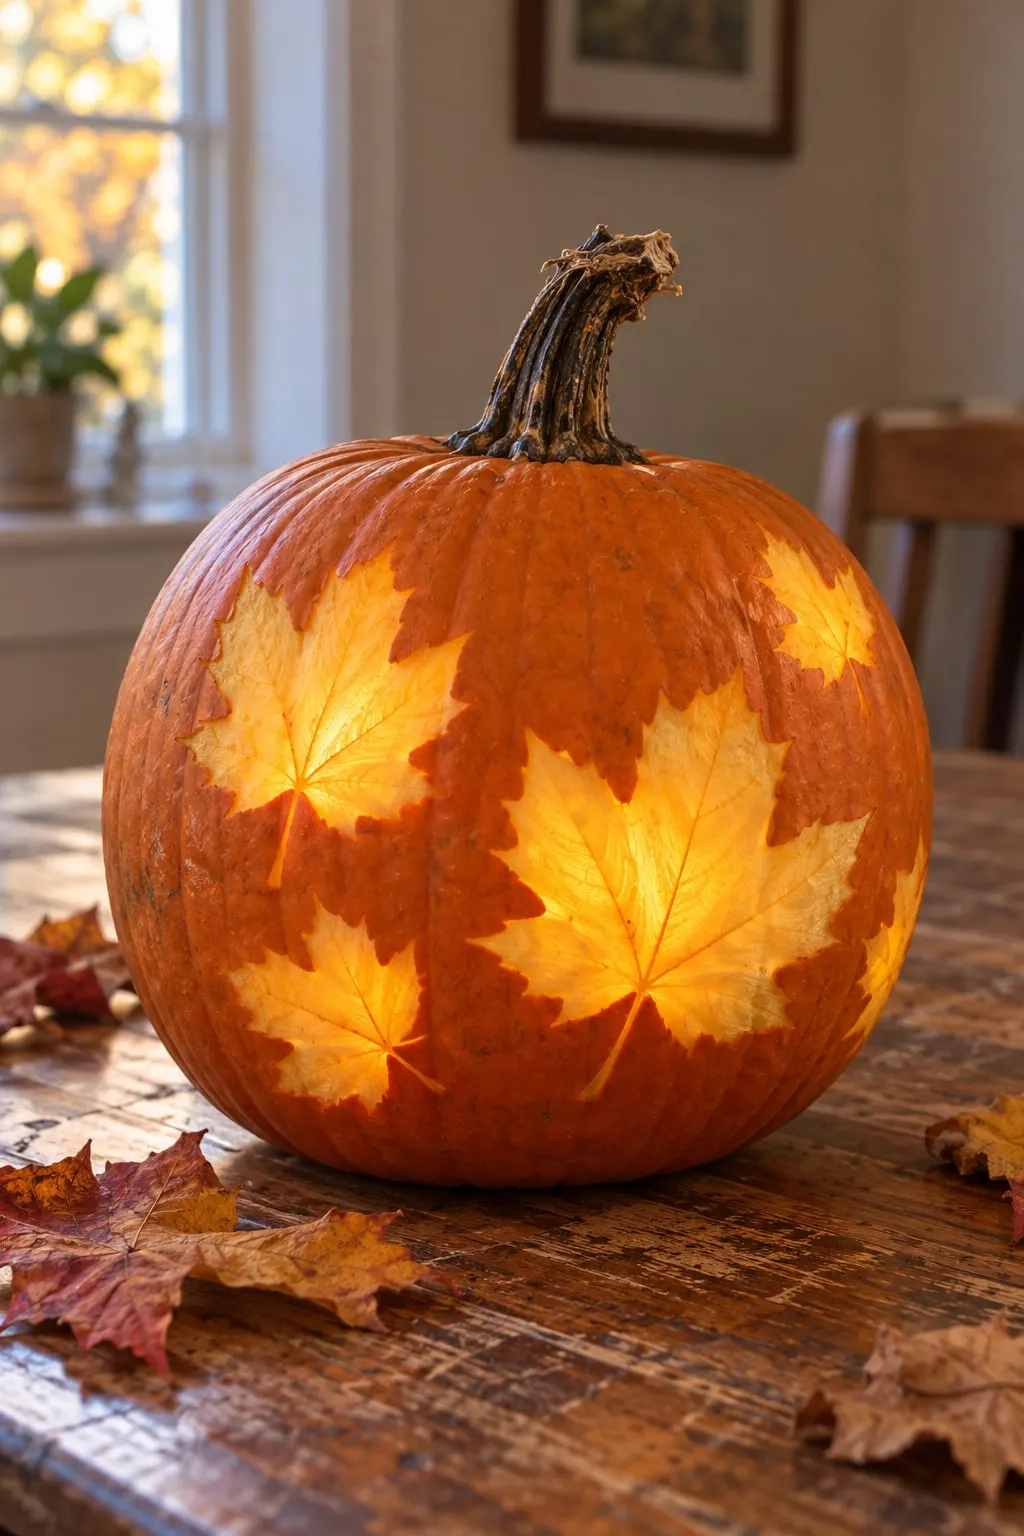
Peel away just the outer skin in leaf shapes and the thinner flesh will glow softly, with no holes at all. Trace three or four maple leaves with a pencil, score the outlines with a craft knife, and lift the skin inside each one with a loop tool.
Leave the veins unshaved so they stand out as dark lines. Scrape the inside wall to about 1/2 inch behind the leaves, since shaved designs need thinner walls to show light. Intermediate, about 90 minutes for four leaves. It works best indoors on a table, where people see it up close.
15. Haunted house in relief
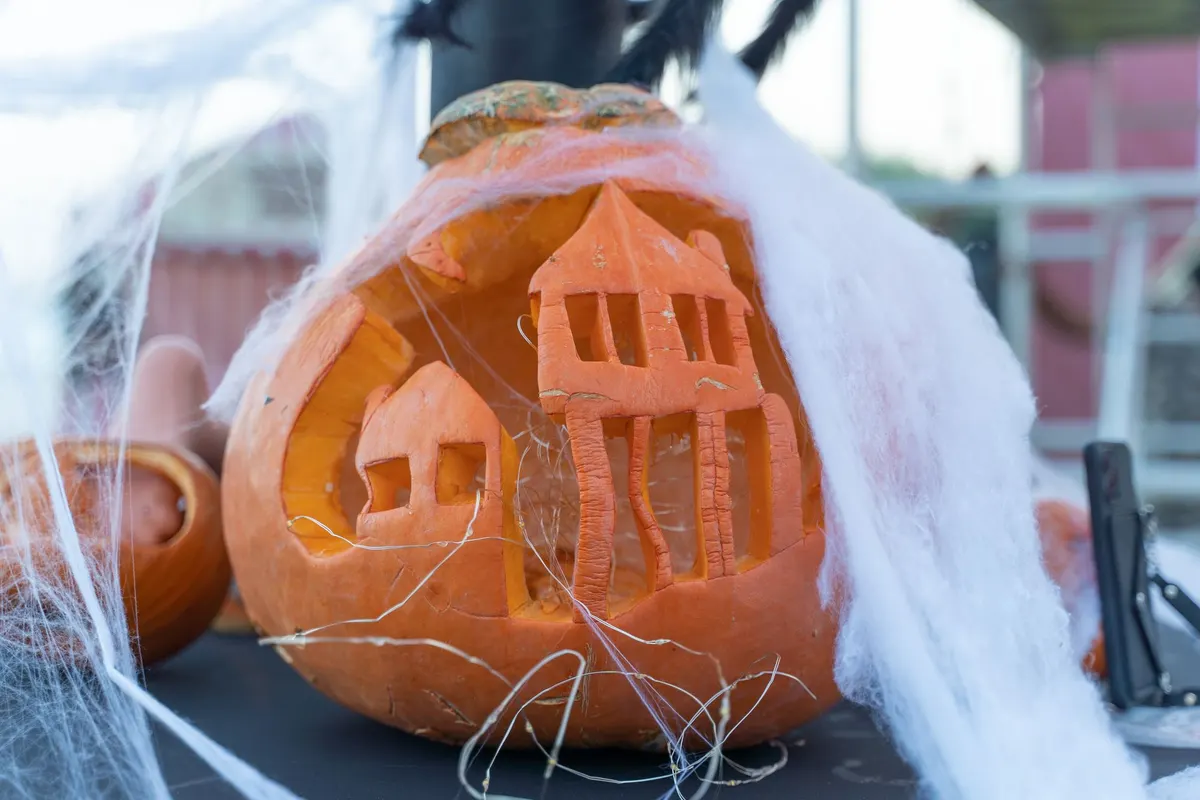
Pick a large pumpkin, about 15 inches tall, and draw a crooked house with a pointed roof, a tower and a small porch, plus a second smaller house beside it. Work in three depths: cut the windows all the way through, shave the walls down to the pale flesh, and leave the roofs as uncut skin.
Do all the shaving before cutting any windows, so the pumpkin stays strong while you press on it. Advanced, about three hours. A little stretchy cobweb over the top makes it look abandoned. Carve this the day before you plan to show it, since shaved areas dry fast.
16. Bare tree with crows
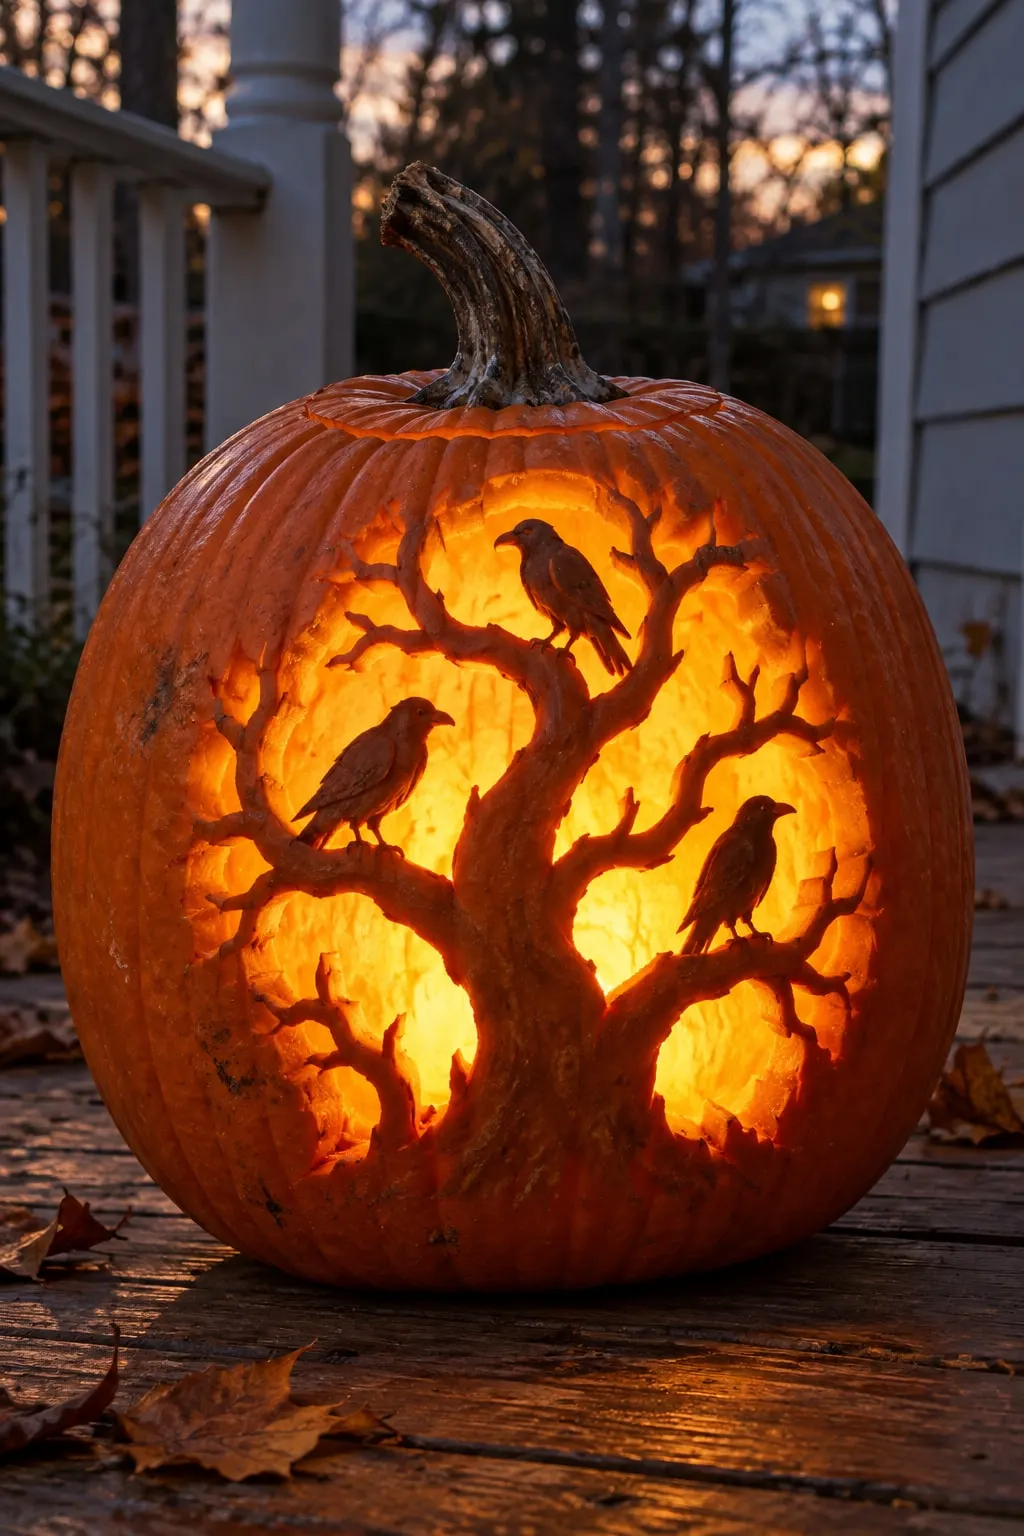
Draw a twisting trunk that starts at the base and splits into branches that get thinner toward the top, with three crows perched on the limbs. Cut away the sky between the branches and leave the tree as dark uncut skin.
The thin twigs are the hard part. Keep every branch at least 3/8 inch wide, and cut the small gaps near the tips before the larger open areas. Advanced, about two hours. Use a pumpkin at least 13 inches tall with a smooth face, and practice a single branch on a spare pumpkin first.
17. Wrought-iron gate
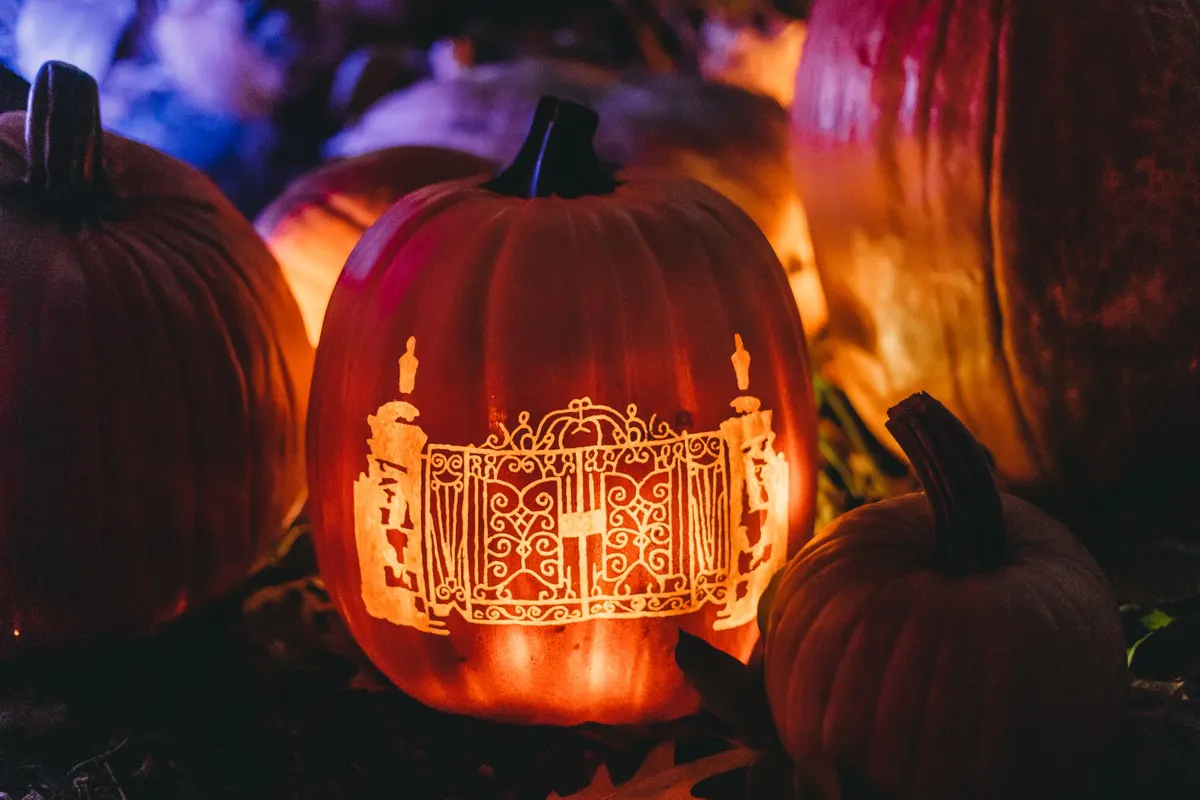
Lit from inside, this one looks like a garden gate at night. Print a gate pattern with two pillars and curly scrollwork, tape it to a tall pumpkin, and poke the lines every 1/8 inch.
Cut the tiny spaces in the scrollwork first, then the larger openings between the bars, and the outer edges last. Keep bars at least 3/8 inch wide. Mist the pumpkin with water every hour so it doesn't dry while you work. Advanced, about three hours. Light it with two battery candles to fill the whole gate with an even glow.
18. Mermaid relief sculpture
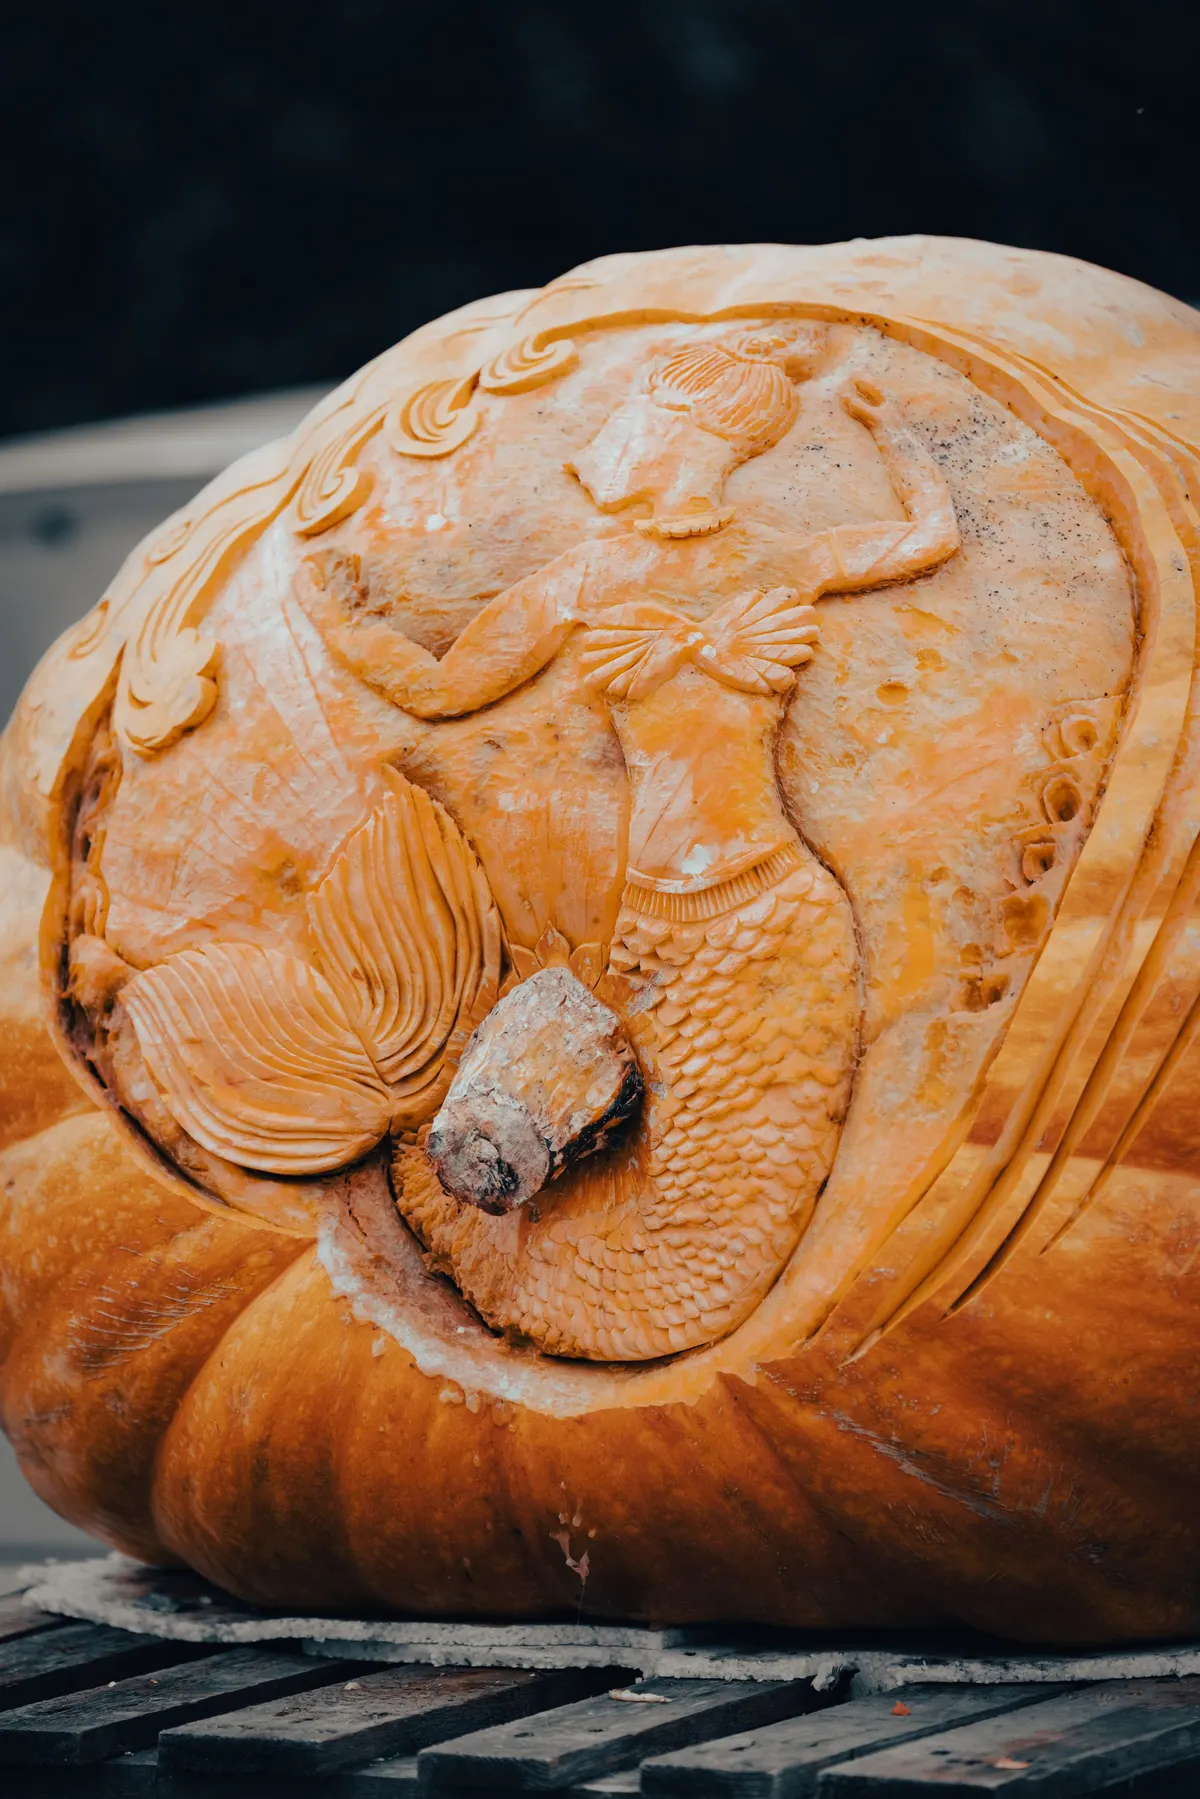
For a real challenge, try a sculpted relief on a giant pumpkin. Instead of cutting through, you carve the figure in layers: remove the skin over the whole design, then shave the flesh to different depths so parts like the tail and hair stand out.
Draw an oval frame first, then the mermaid inside, then waves around the edges. Use loop tools in two or three sizes. Advanced, about four to six hours spread over a day. A pumpkin at least 18 inches across gives you room, and misting it with water every hour slows drying while you work.
19. Painted ghost pattern
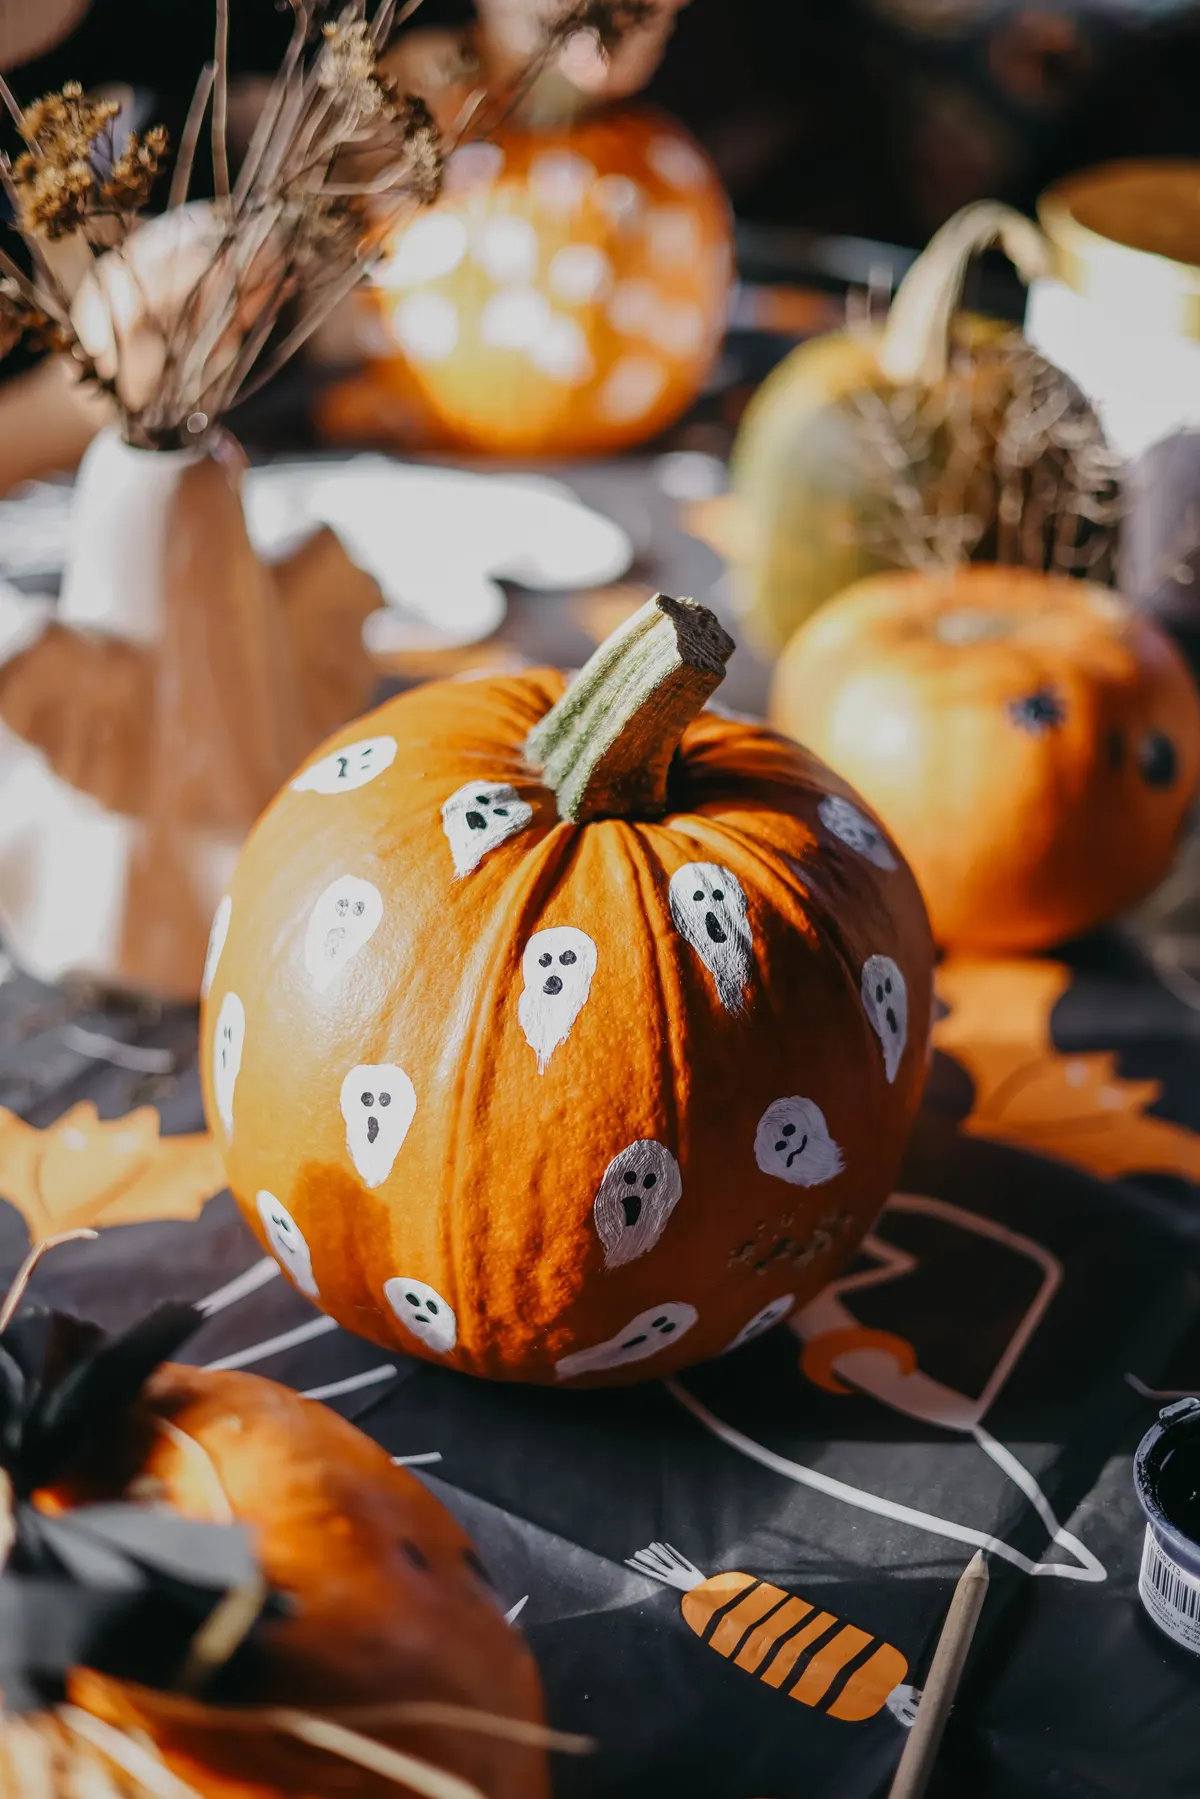
Ideas 19 to 22 need no knife and last for weeks, since the skin stays whole. Cover a table with newspaper, then let kids dab white acrylic paint onto a pumpkin in small wavy-bottomed blobs. Once dry, add two dots and a round mouth on each ghost with a black paint marker.
Wipe the pumpkin clean and dry before painting so the paint sticks. A 10-inch pumpkin fits about 20 ghosts. No-carve, about 30 minutes plus an hour of drying. Toddlers can do the blobs while older kids add the faces. Set it on a table runner or a mantel, where the white ghosts stand out against the orange.
20. Painted patchwork monster
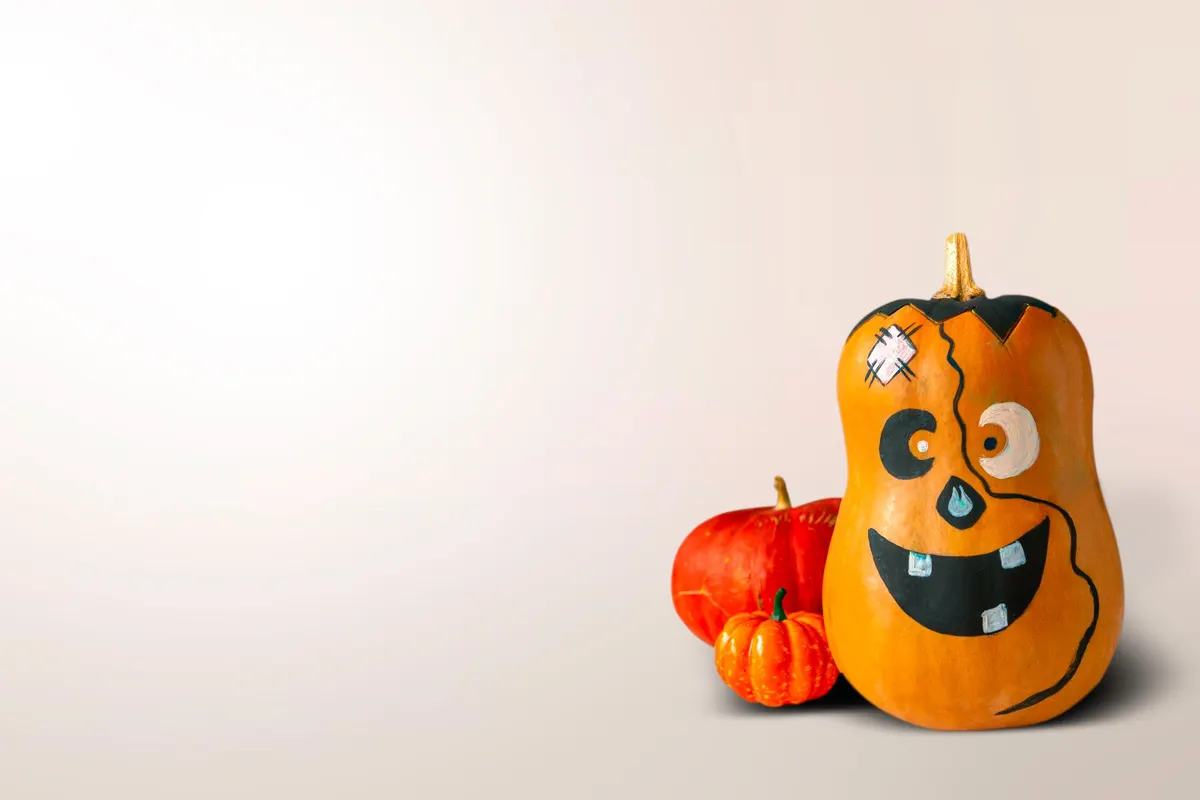
Tall, oddly shaped gourds make good monster heads. Paint on a flat-top hairline in black, two mismatched eyes, a stitched line down one cheek and a toothy grin, then add a painted bandage patch on the forehead.
Use paint markers for the stitches, which give a clean line that's easier for kids than a brush. Let each color dry for 20 minutes before painting next to it. No-carve, about 45 minutes. Display it indoors, where rain can't wash the paint off.
21. Fairy-light pumpkin pile
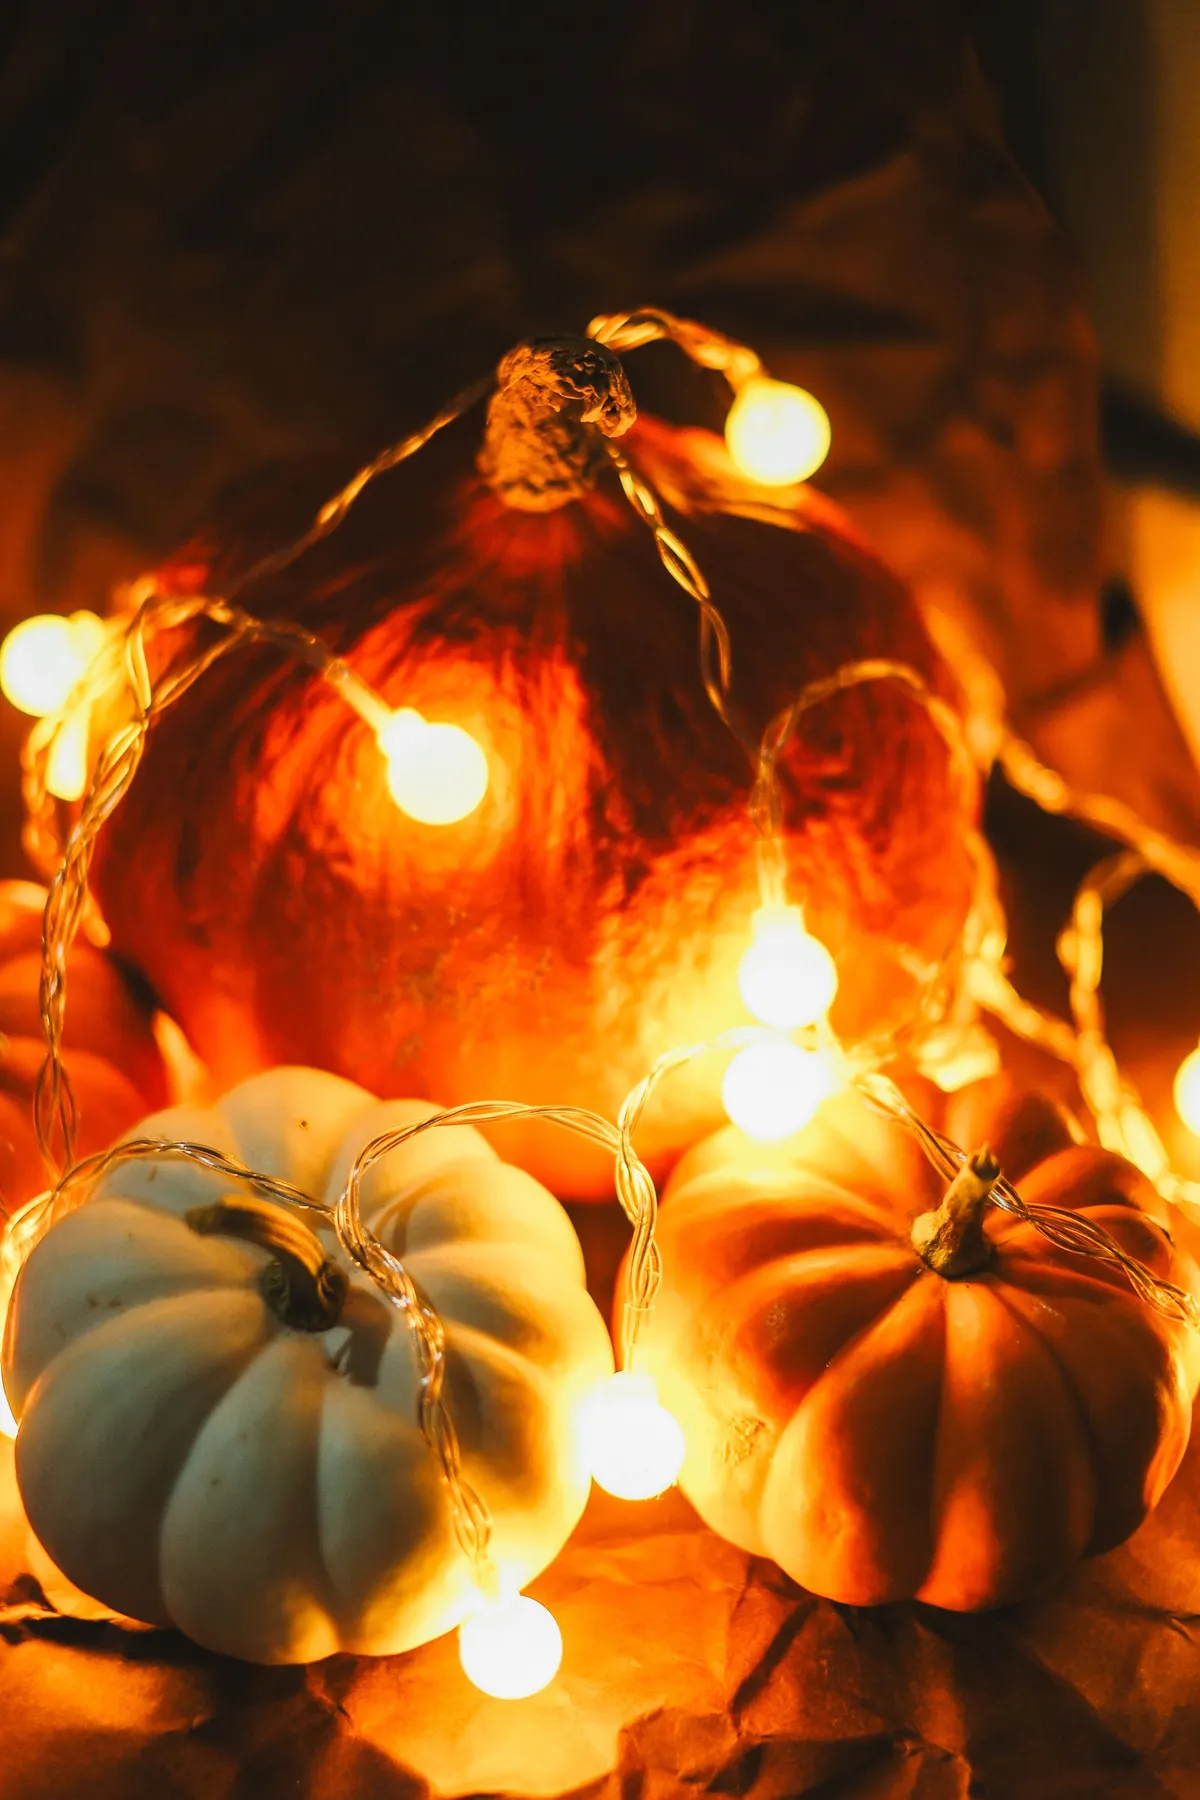
When there's no time to carve at all, wrap a string of battery fairy lights loosely around a pile of three pumpkins in different sizes and colors. Tuck the battery pack behind the back pumpkin.
A 10-foot string with about 30 warm-white bulbs covers three pumpkins. Choose a string with a timer so it turns on at dusk by itself. No-carve, about 10 minutes. Put it on a porch table or in a dark corner of the entry. An orange pumpkin next to a pale green or white one shows the light best.
22. Mummy pumpkin
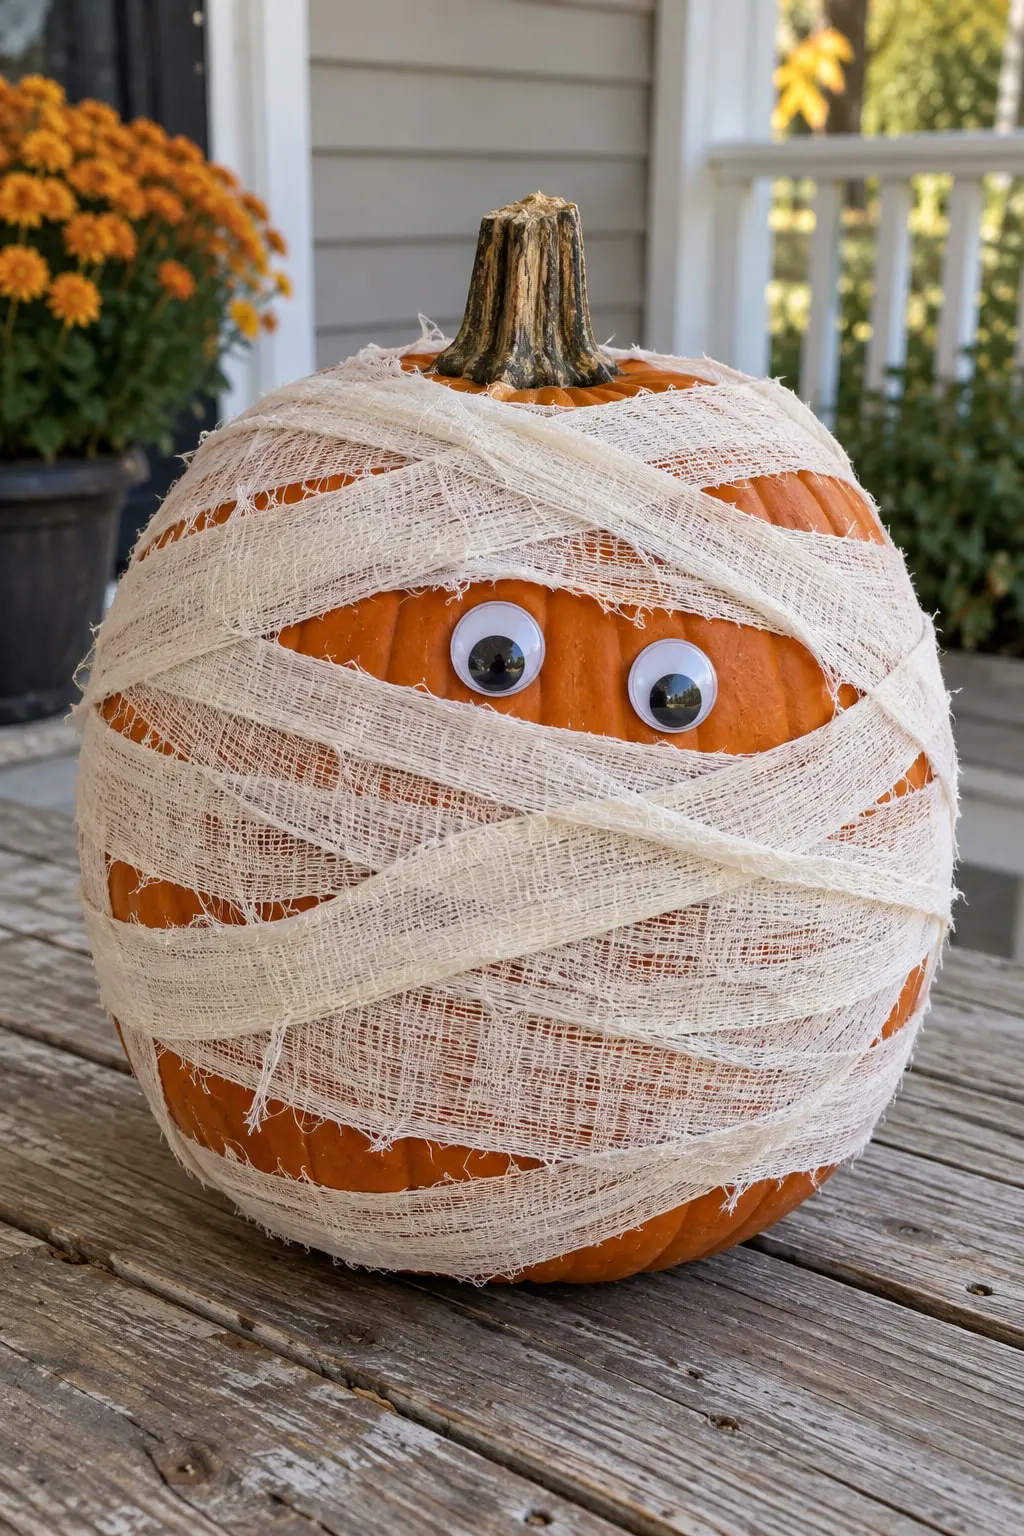
Wrap a pumpkin in overlapping strips of white gauze or torn cheesecloth, crossing them at different angles. Leave a 2-inch gap near the top and glue two googly eyes into it with tacky glue.
Tuck the loose end under the last layer, or secure it with a dab of glue. A 10-inch pumpkin needs a few rolls of 2-inch gauze. No-carve and done in about 20 minutes, which makes it a good first project for a toddler helper. Keep it away from any real flame, since loose gauze catches fire easily.
Final tips
- Practice any hard carving design on a spare pumpkin first.
- Light every pumpkin with battery candles or fairy lights.
- Pair one detailed carving with a few easy faces and painted minis so everyone gets a pumpkin. For uncarved pumpkin groups and mums, see our fall porch decor ideas and the fall decor collection.
Frequently asked questions
How early can I carve a pumpkin so it lasts until Halloween?
Carve 2 to 4 days before Halloween if nights are cool. A cut pumpkin usually starts to soften and mold within about 3 to 5 days, and less in warm, sunny spots. Any design that removes skin, such as etched, shaved or relief work, dries out fastest, so carve those the day before. Frost and direct sun both speed up rot.
How do you preserve a carved pumpkin?
Right after carving, dip the pumpkin for a few minutes in cold water with 1 tablespoon of bleach per gallon, wearing gloves, then let it dry. Each day, spritz the cut edges and inside with the same mix, and never combine bleach with vinegar or ammonia. Keep it in the shade, and bring it into a cool garage on warm days. A pumpkin that has gone soft or shriveled can sometimes perk up after a few hours in cold water.
What is a safe alternative to a real candle in a pumpkin?
Use a battery tea light, an LED puck light, or a short string of battery fairy lights. They stay cool, won't scorch the inside, and can't ignite dried pulp or nearby straw, cornstalks and paper decorations. Choose warm-white or flickering bulbs for a candle-like glow, and use two lights in a big pumpkin so the whole design shows.
What can I do with the pumpkin seeds and pulp?
Rinse the seeds to remove the strings, pat them dry, toss them with a little oil and salt, and roast them on a baking sheet at about 325°F for 20 to 30 minutes, stirring halfway, until golden. Carving pumpkin pulp is watery and stringy, so it's better for compost than for pie. Only save seeds and pulp from a freshly opened pumpkin, never one that has been sitting out.
Can I carve a fake pumpkin?
Yes. Craft foam pumpkins cut cleanly with a serrated knife or a small craft saw and can be reused for years. Some are hollow; if yours is solid, scoop out a cavity from the bottom and slip a battery light in there. Use only battery lights, since foam can melt or burn. Hard plastic and resin pumpkins tend to crack, so decorate those with paint instead.