22 Halloween Door Decoration Ideas for Houses and Apartments

Jump to an idea (22)
- Before you start
- 1. One skull on a solid-color door
- 2. Warning tape in an X
- 3. Cut-paper eyes on a black door
- 4. Mummy door with googly eyes
- 5. Ghost on the door handle
- 6. Over-the-door hook wreath with spiders
- 7. Bat and leaf decals with a lettering strip
- 8. A cute ghost sign with bunting
- 9. Floating witch hats around the door
- 10. Skeleton pets on doorstep pumpkins
- 11. Gauze web strands with a cheesecloth ghost
- 12. A giant rope spiderweb
- 13. Twin spiders on the door columns
- 14. One big spider on a double door
- 15. Cobweb draped over an iron door
- 16. A skeleton behind the gate
- 17. Cover the whole rowhouse front
- 18. Paper bats over the entry
- 19. A sheet ghost on the stoop railing
- 20. A striped garland around the frame
- 21. A black door with a maple wreath
- 22. A dark Halloween door wreath with black feathers
- Final tips
These 22 Halloween door decoration ideas cover front doors, apartment doors, and the frame and steps right around them. Some take five minutes and one hook. Others need a ladder and an afternoon. Each idea gives sizes, counts, a time estimate and a difficulty label.
The first seven work in a rented apartment, dorm or condo hallway without nails, and most need only paper, tape or cheesecloth. The middle ideas go cute or properly scary, and the last few suit a front door that should look dark and polished. For the yard and driveway, see our outdoor Halloween decorations.
Before you start
- Measure first. A standard exterior door is 36 inches wide and 80 inches tall, so a garland down both sides and across the top needs about 16 feet.
- Renters: damage-free adhesive hooks and painter's tape hold light decor. Check the weight limit on the package, test a hidden corner, and read your lease or HOA rules. Many buildings limit what can go on hallway doors.
- Never tape or tie a door shut, cover the peephole, or block the handle. In an apartment building, fire code usually keeps hallways and exits clear, so keep everything on the door itself and nothing in the walkway. Keep porch steps clear for trick-or-treaters.
- Use battery lights and battery candles. Keep gauze, paper and stretch cobweb away from bulbs, wall lamps and open flame.
- Adults handle knives, drills and hot glue.
1. One skull on a solid-color door
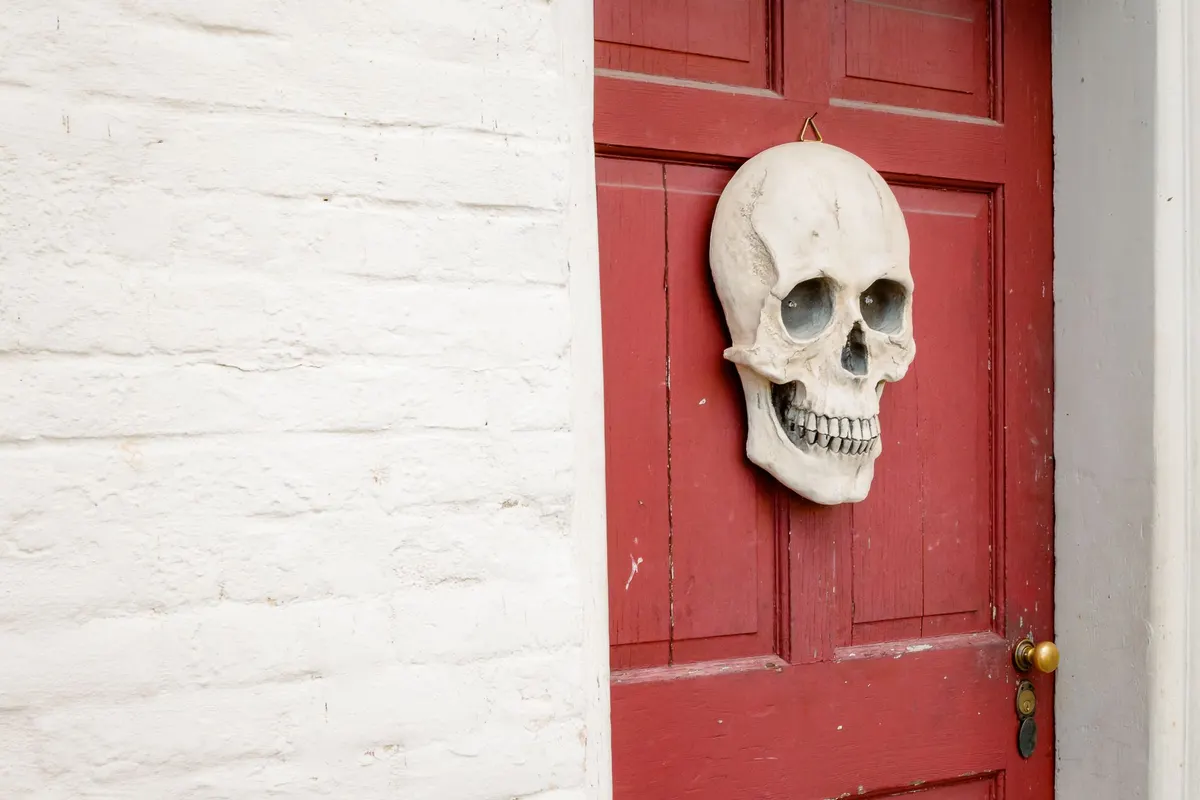
A single large skull is the easiest Halloween front door decor, and a plain red door against white-painted brick shows it off from the street. Hang one large foam or plastic skull, about 9 inches tall, from a small hook on the upper panel, a little above eye level so the peephole stays clear.
On a rental door, use an adhesive hook rated for several pounds. A skull weighs only a few ounces. Skip the wreath and the mat so the one skull gets all the attention. Easy, about 5 minutes.
2. Warning tape in an X
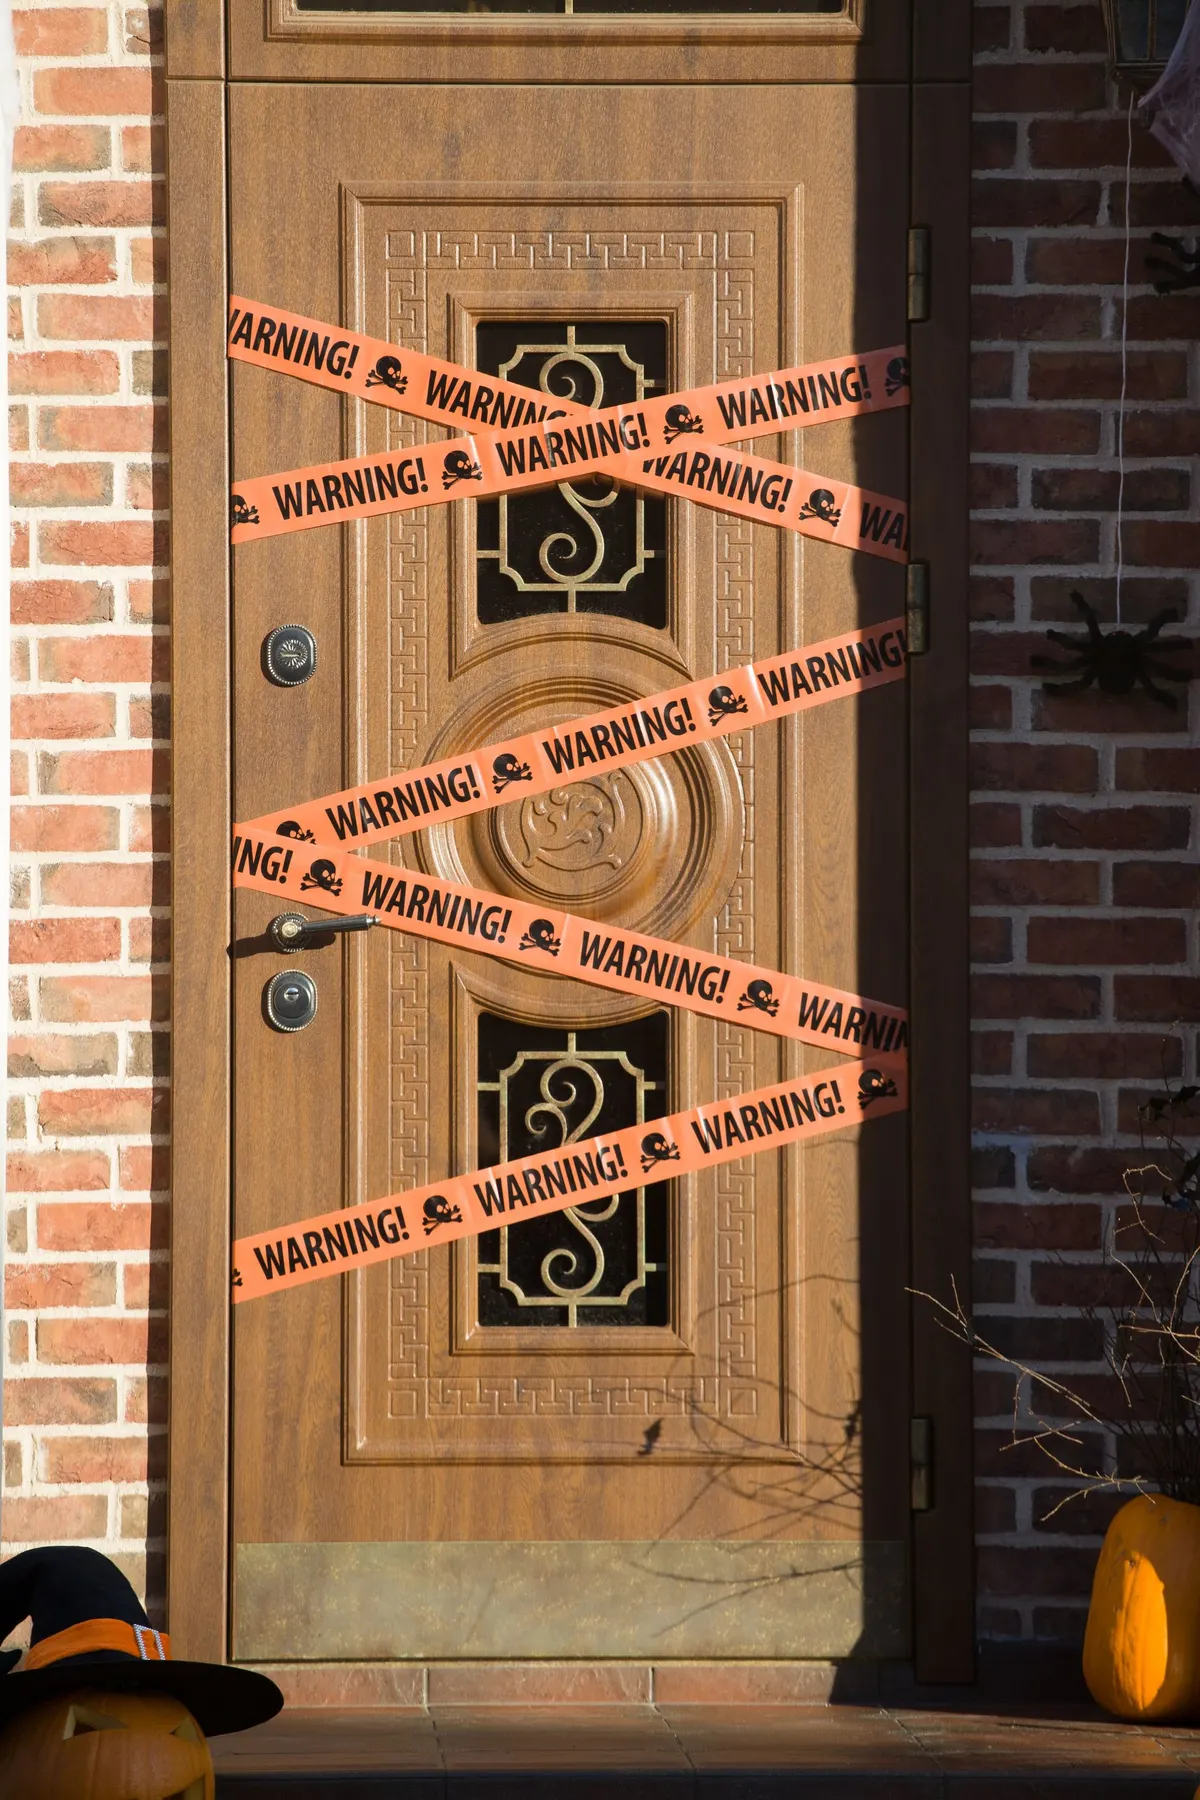
Orange Halloween warning tape printed with skulls crosses this carved wood door in about six diagonal strips, so the strips form X shapes. Cut each strip a few inches longer than the door is wide and fold the ends around the door's edges, holding them with a loop of painter's tape.
Stick the tape to the door only, never across to the frame, so the door still opens normally. Leave the handle and peephole uncovered. Add a black spider on the brick beside the door and a witch hat on a doorstep pumpkin. Easy, about 15 minutes.
3. Cut-paper eyes on a black door
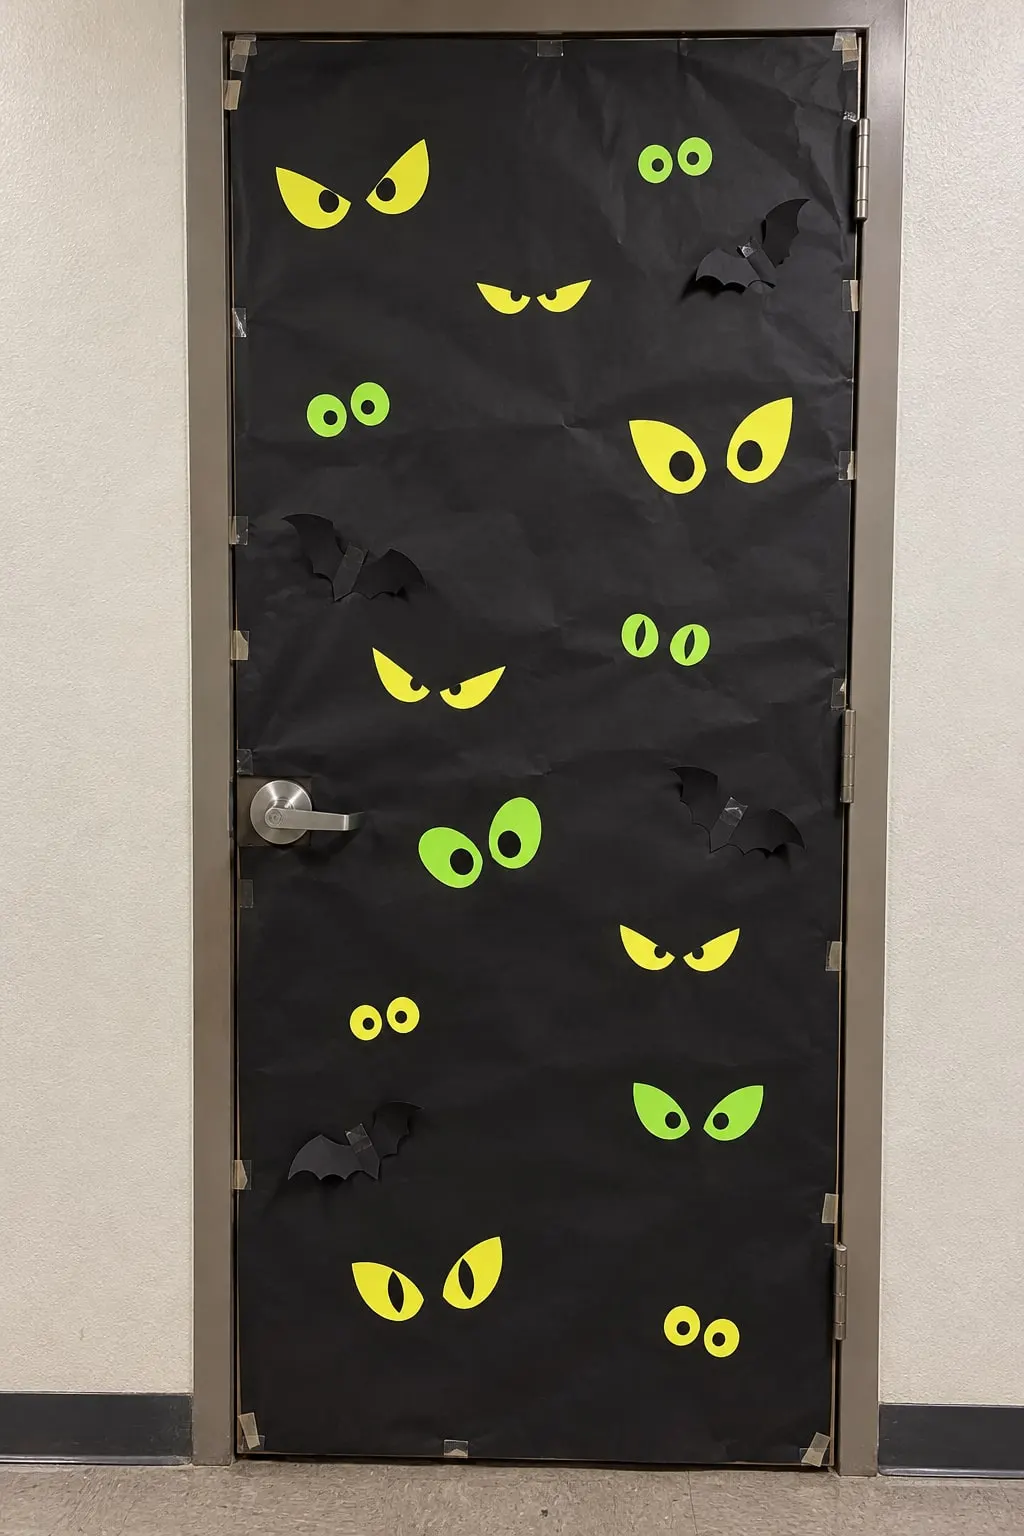
Cover a door in black craft or butcher paper, cut one 7-foot length from a 36-inch roll, and tape the edges with painter's tape. Cut a hole around the handle. Then tape on a dozen or so pairs of paper eyes in yellow and lime green, with slit pupils on some and round pupils on others, plus three or four black paper bats.
Fold each sheet in half and cut both eyes at once so the pair match. Many residence halls limit how much of a door can be covered because of fire safety, so check the rules first. Easy, about an hour, and good for a dorm or contest.
4. Mummy door with googly eyes
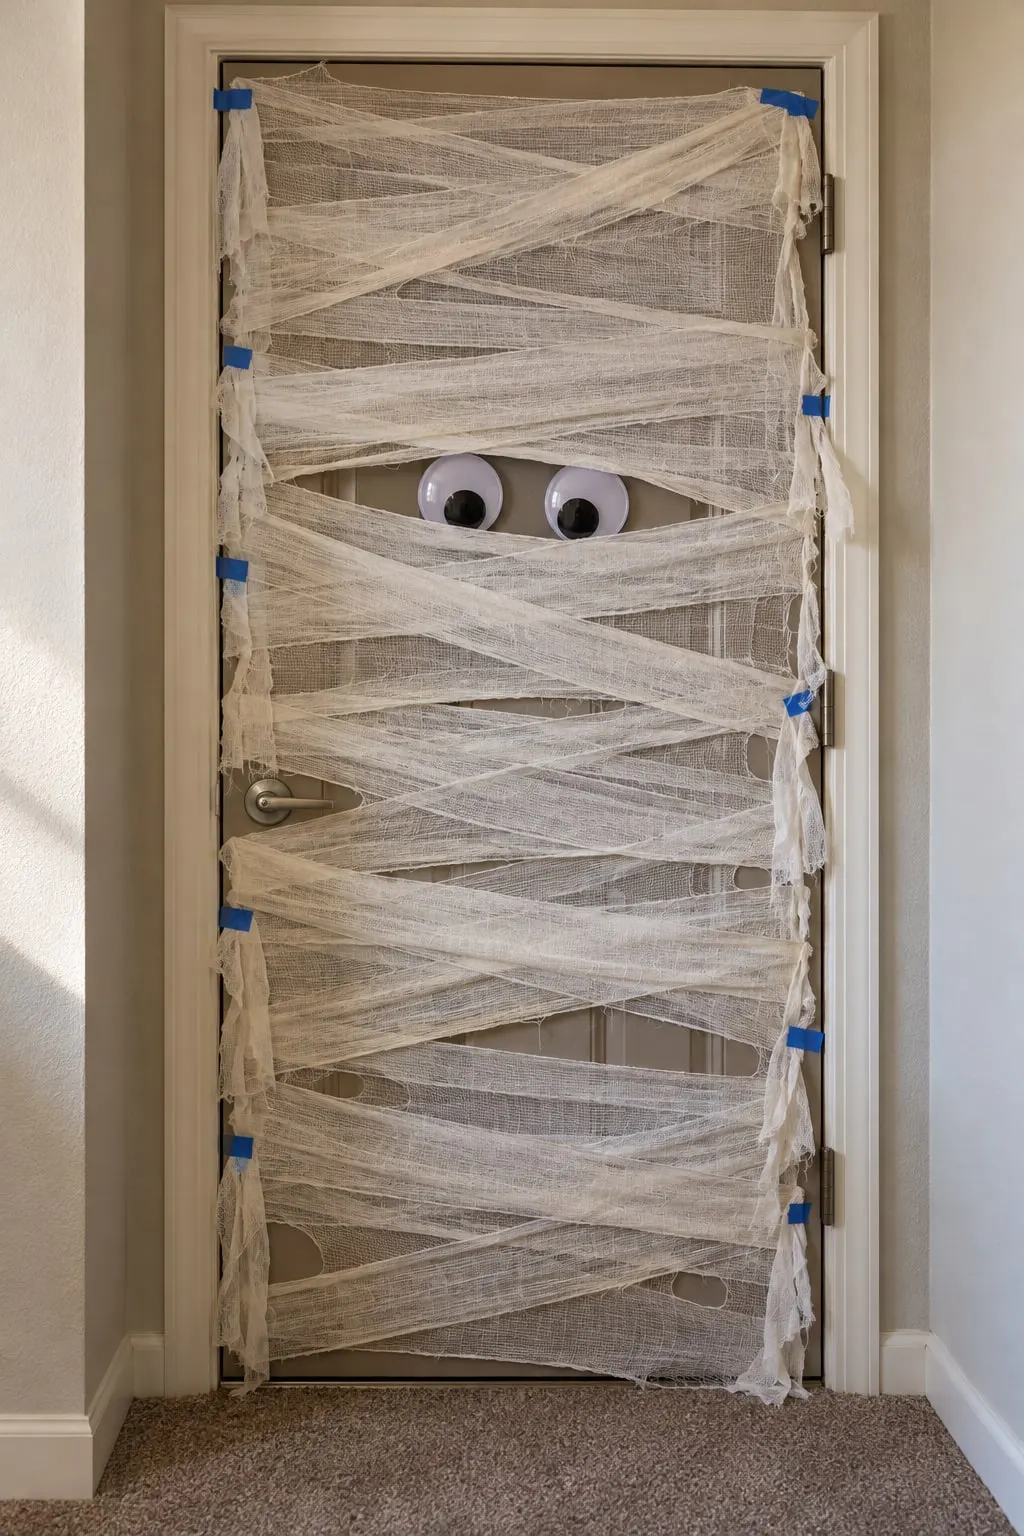
Wrap an interior door in off-white cheesecloth or gauze strips, crossing them at different angles and leaving a horizontal gap about a third of the way down. Fix two oversized googly eyes, about 4 inches wide, in the gap. Hold the strip ends with blue painter's tape on the door's edges.
Buy more cheesecloth than you think you need, because it thins as you stretch it. Leave the handle free so the door works. Gauze catches fire easily, so keep candles and hot bulbs well away. Easy, about 30 minutes.
5. Ghost on the door handle
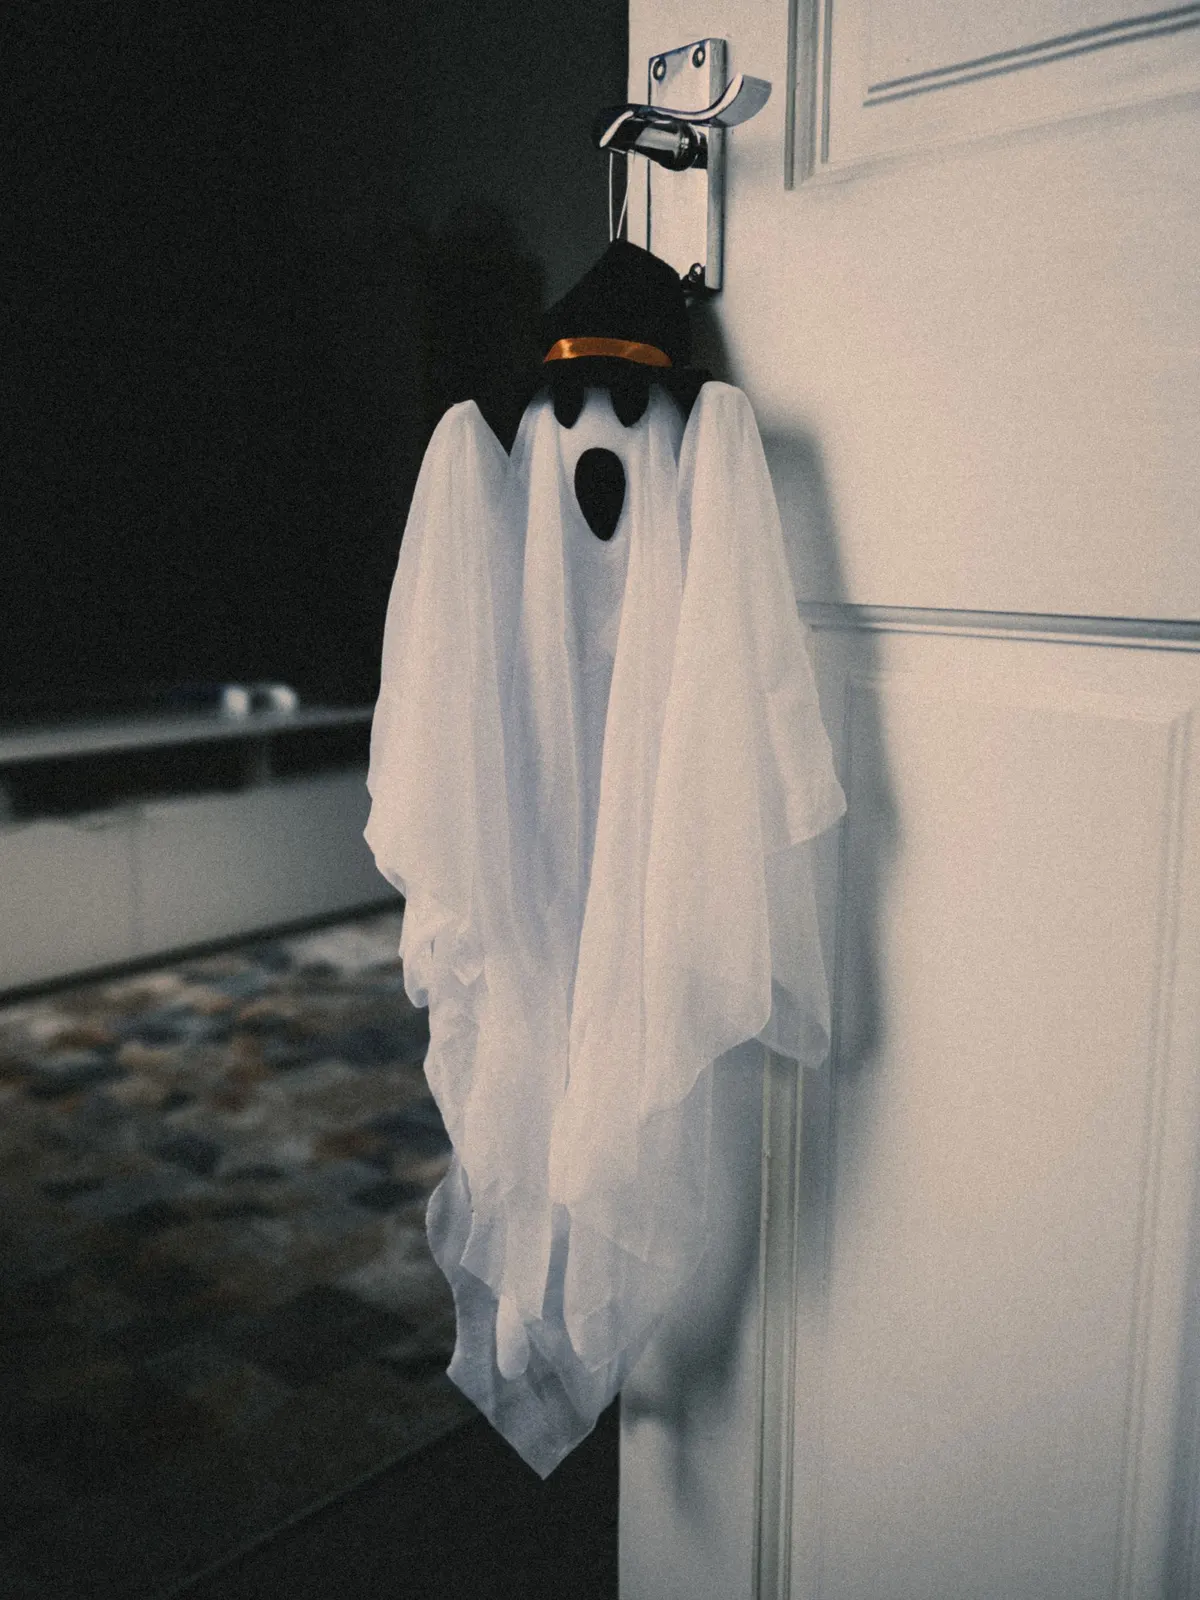
A small ghost made from sheer white fabric, with a tiny black hat and an orange ribbon band, hangs from a silver lever handle in this shot. Drape a 24 by 36 inch piece of gauze over a foam ball, tie it with string at the neck, then cut a ragged hem and draw a black oval mouth and eyes with a marker.
For an outside door, loop the string over an adhesive hook above the handle instead, so you can still reach the lever. Easy, about 20 minutes.
6. Over-the-door hook wreath with spiders
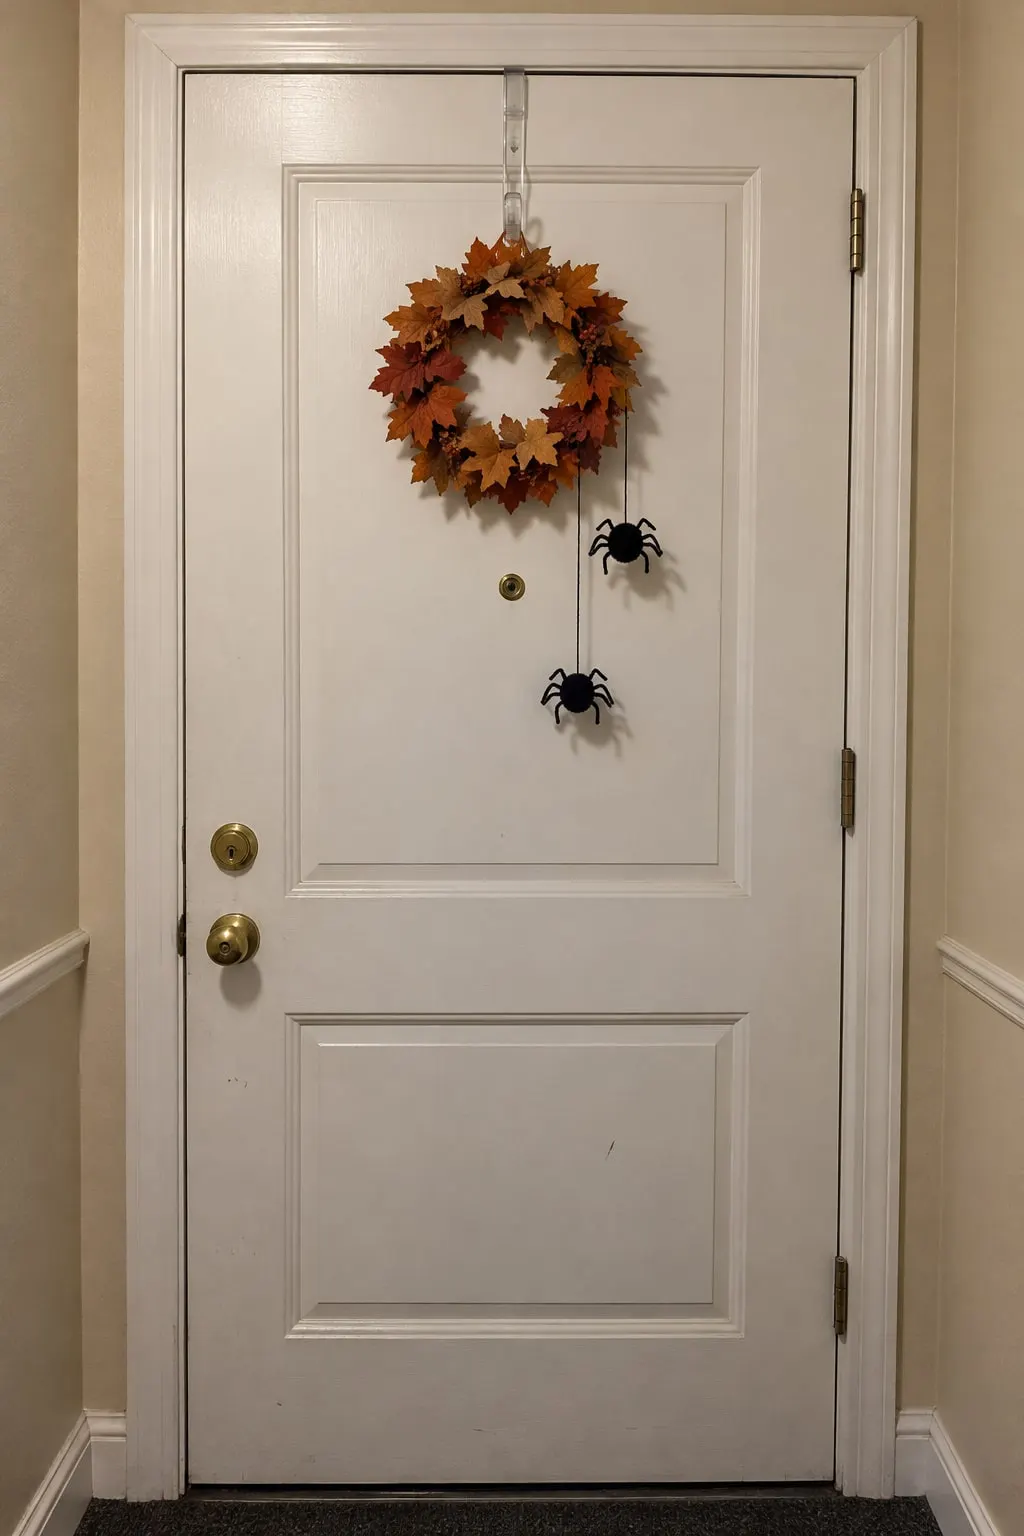
A clear over-the-door hook holds a 10 to 12 inch wreath of rust, orange and black faux leaves with no nails and no holes. Hang two black pom-pom spiders under it on black thread, one 8 inches below the wreath and one about 16 inches, so they sit at different heights.
Pick a thin, flat hook, and check that the door still latches before you walk away. If it doesn't, switch to an adhesive hook. Keep the peephole clear between the wreath and the spiders. Easy, about 10 minutes.
7. Bat and leaf decals with a lettering strip
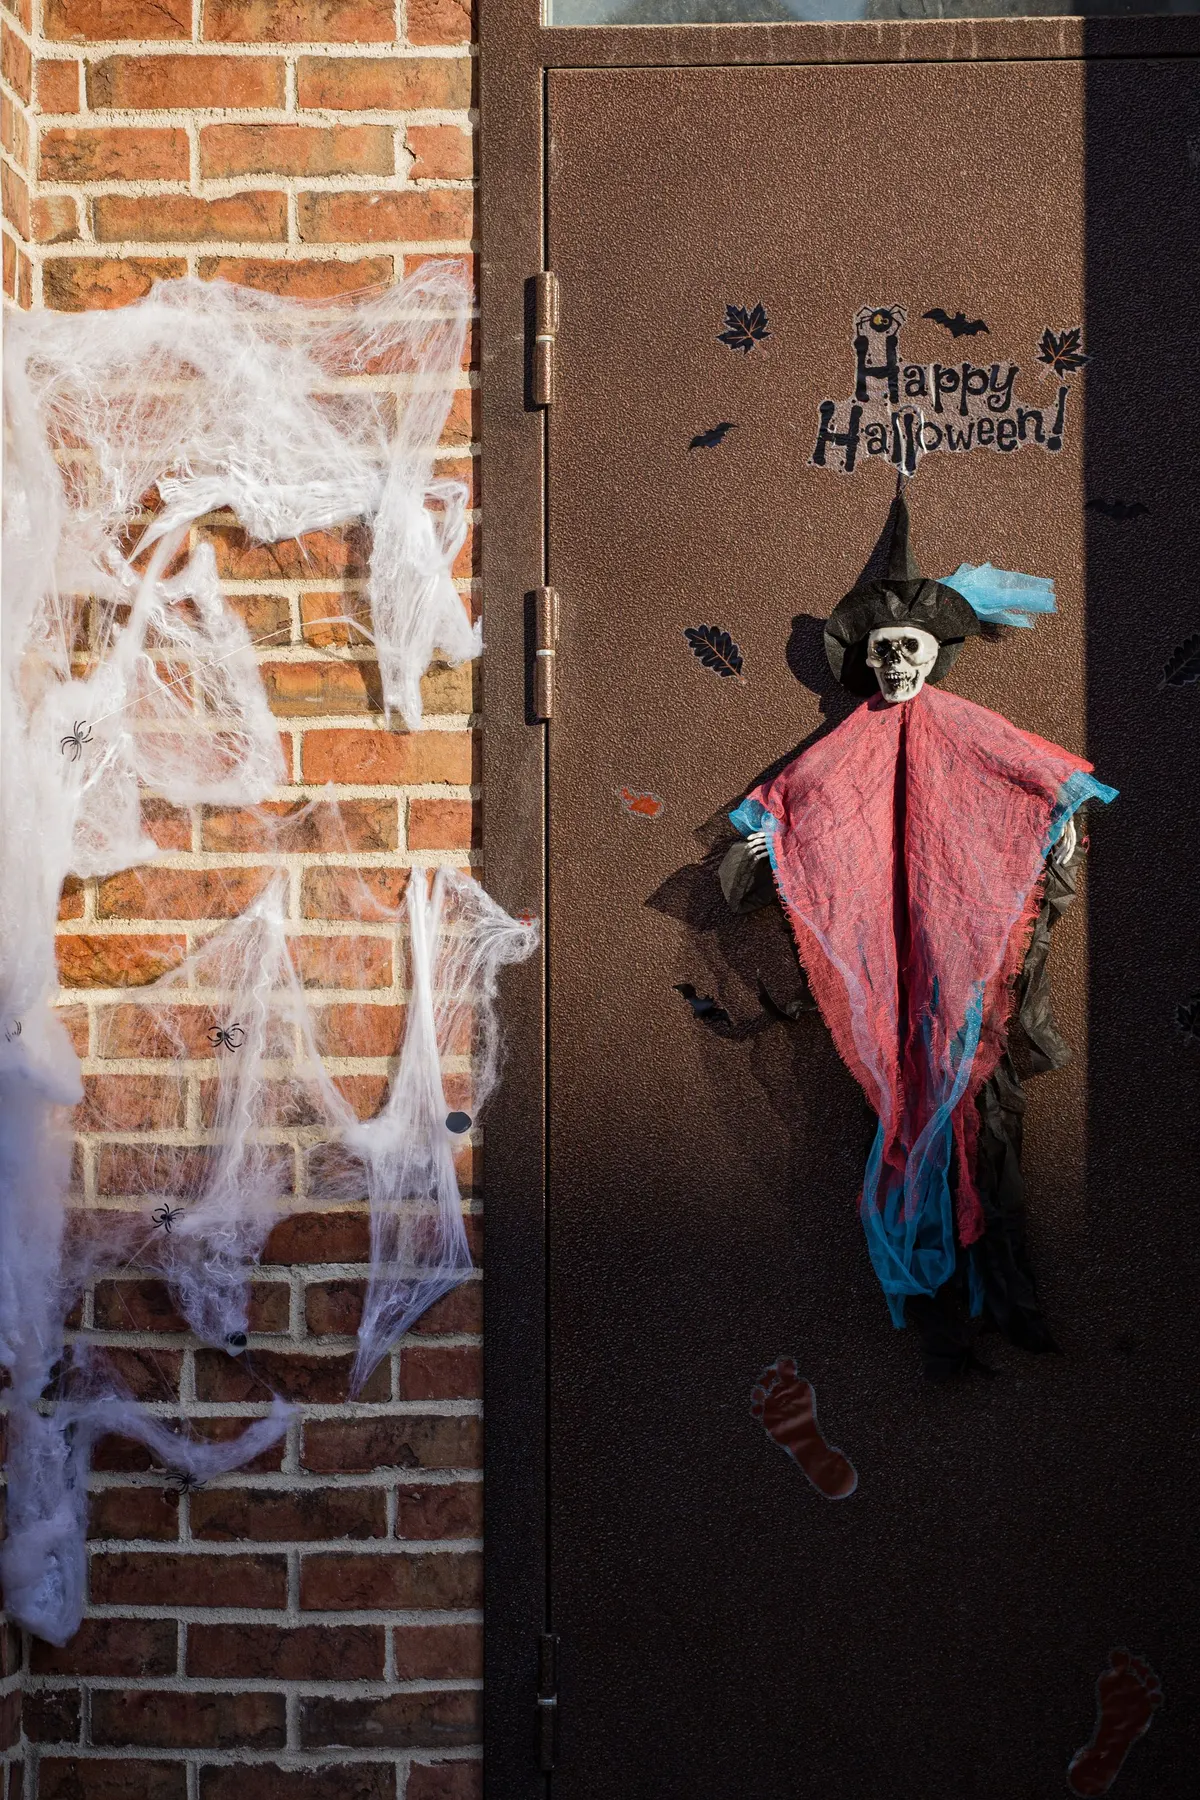
Removable vinyl decals and static clings work on metal, painted and glass doors. This dark door carries a lettering decal across the top, about eight black bat and leaf shapes, and two footprints near the bottom, with a hanging skeleton in a witch hat in the middle.
Press a test decal on a corner first. Place the bats on a diagonal in three sizes, as though they are flying up the door. Peel them off in November. Easy, about 15 minutes.
8. A cute ghost sign with bunting
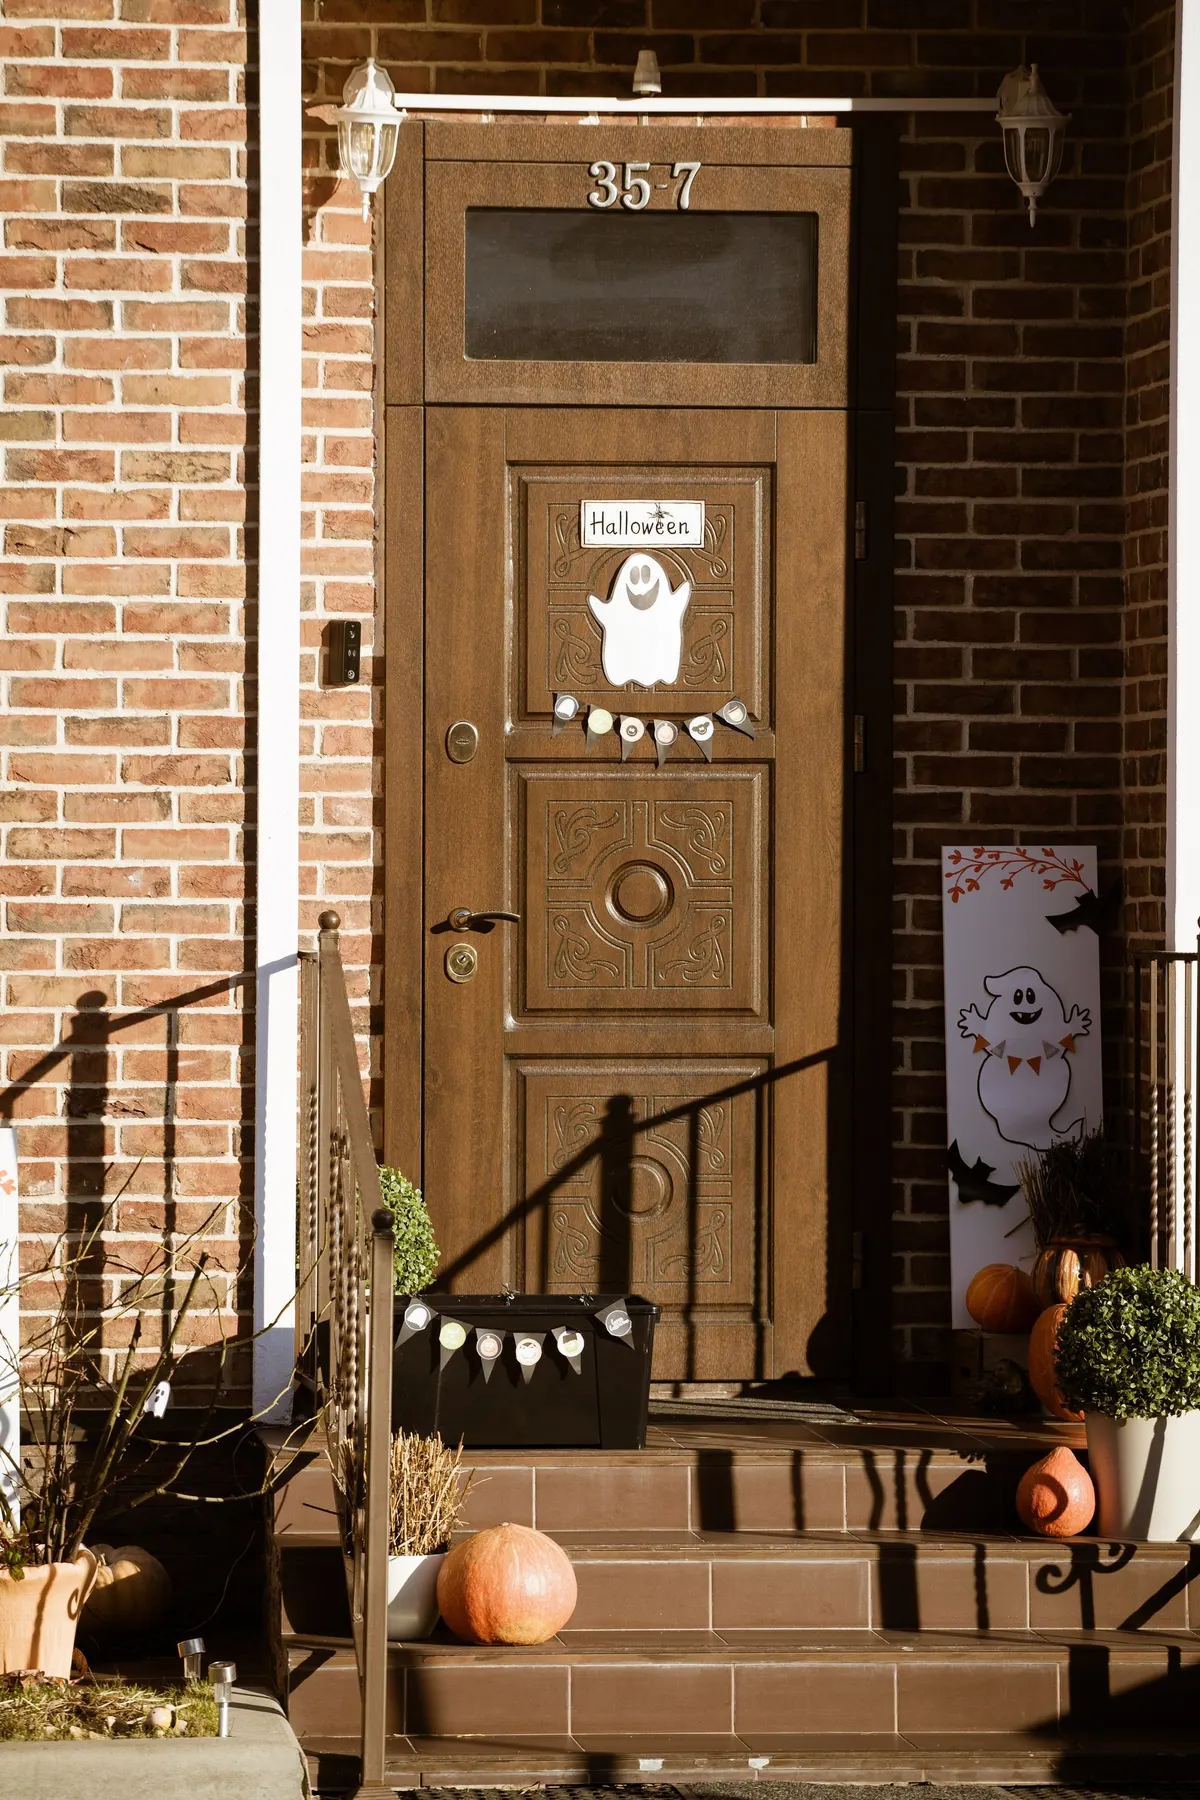
For a door kids will like, tape a smiling white ghost cutout under a "Halloween" sign on the upper panel, then hang a tiny five-flag bunting in white, gray and black below it. Cut the ghost from white poster board, about 12 inches tall, and draw the smile with a marker.
Lean a tall board with a bigger ghost outline against the wall beside the door, with a few pumpkins on the steps. Easy, about 30 minutes, and a good project for kids.
9. Floating witch hats around the door
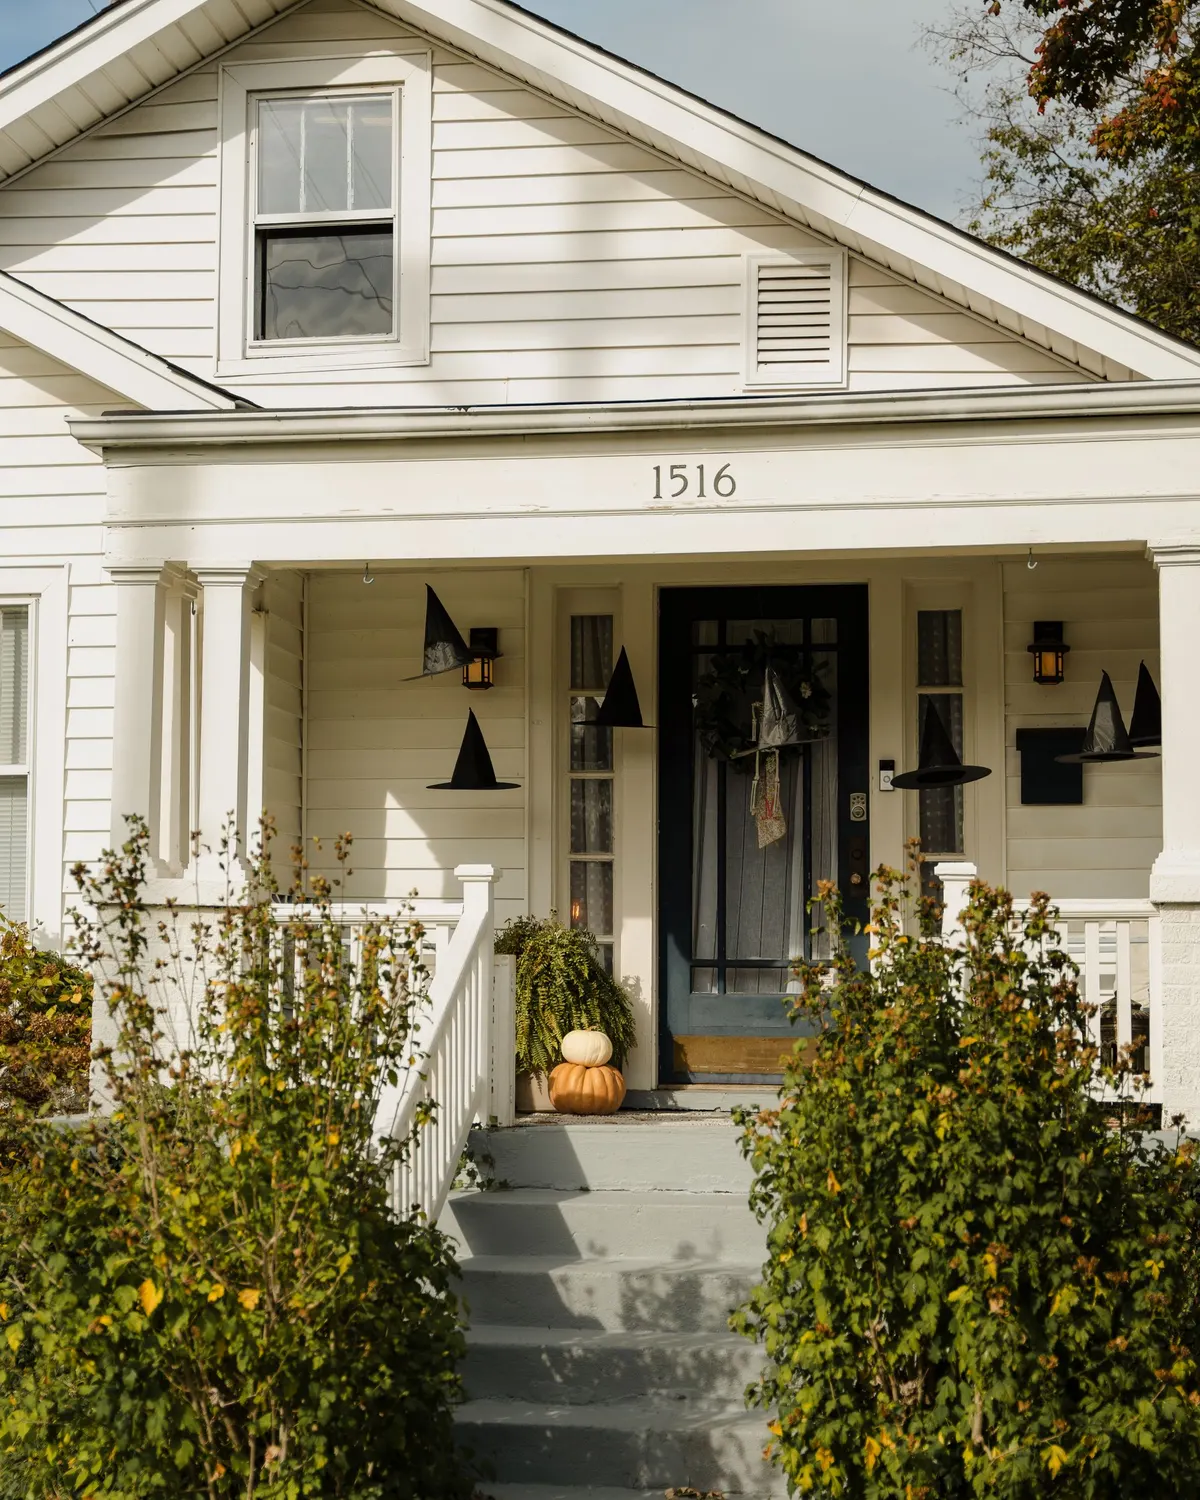
About seven black witch hats hang at different heights around this dark glass door, one tucked into the wreath, and none touches the wall. Tie each hat to a ceiling hook with clear fishing line cut to a different length, from about 2 to 6 feet, and tilt a few of them.
Hang the lowest hat above head height, around 6 and a half feet, so tall guests and kids can walk under. Use adhesive ceiling hooks if you rent. Medium, about 45 minutes.
10. Skeleton pets on doorstep pumpkins
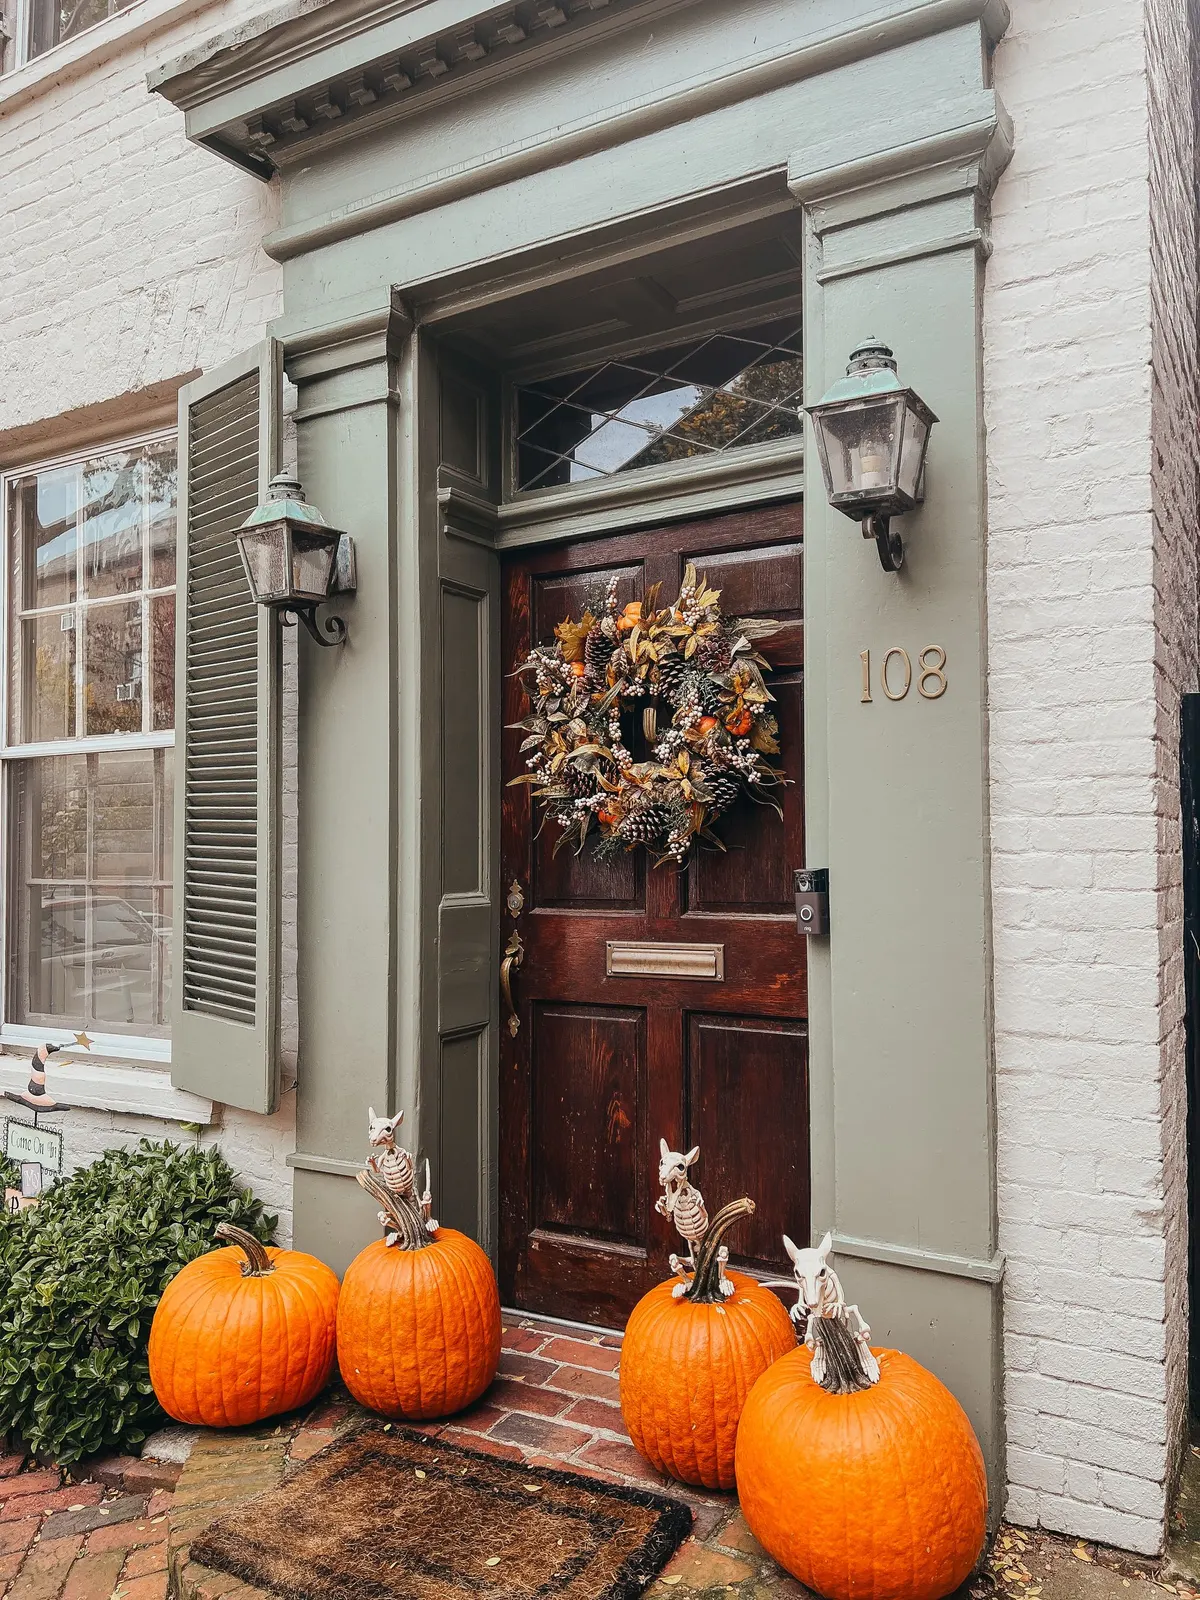
Four orange pumpkins sit on the brick step beside this dark wood door, and three of them carry small white skeleton animal figures perched on the stems. Use figures about 5 or 6 inches tall and fix each one with a dab of tacky glue.
The door itself stays quiet, with a leaf wreath in orange and gold and a pair of lanterns on the wall. Set the pumpkins to one side of the door so the path stays clear. Easy, about 15 minutes.
11. Gauze web strands with a cheesecloth ghost
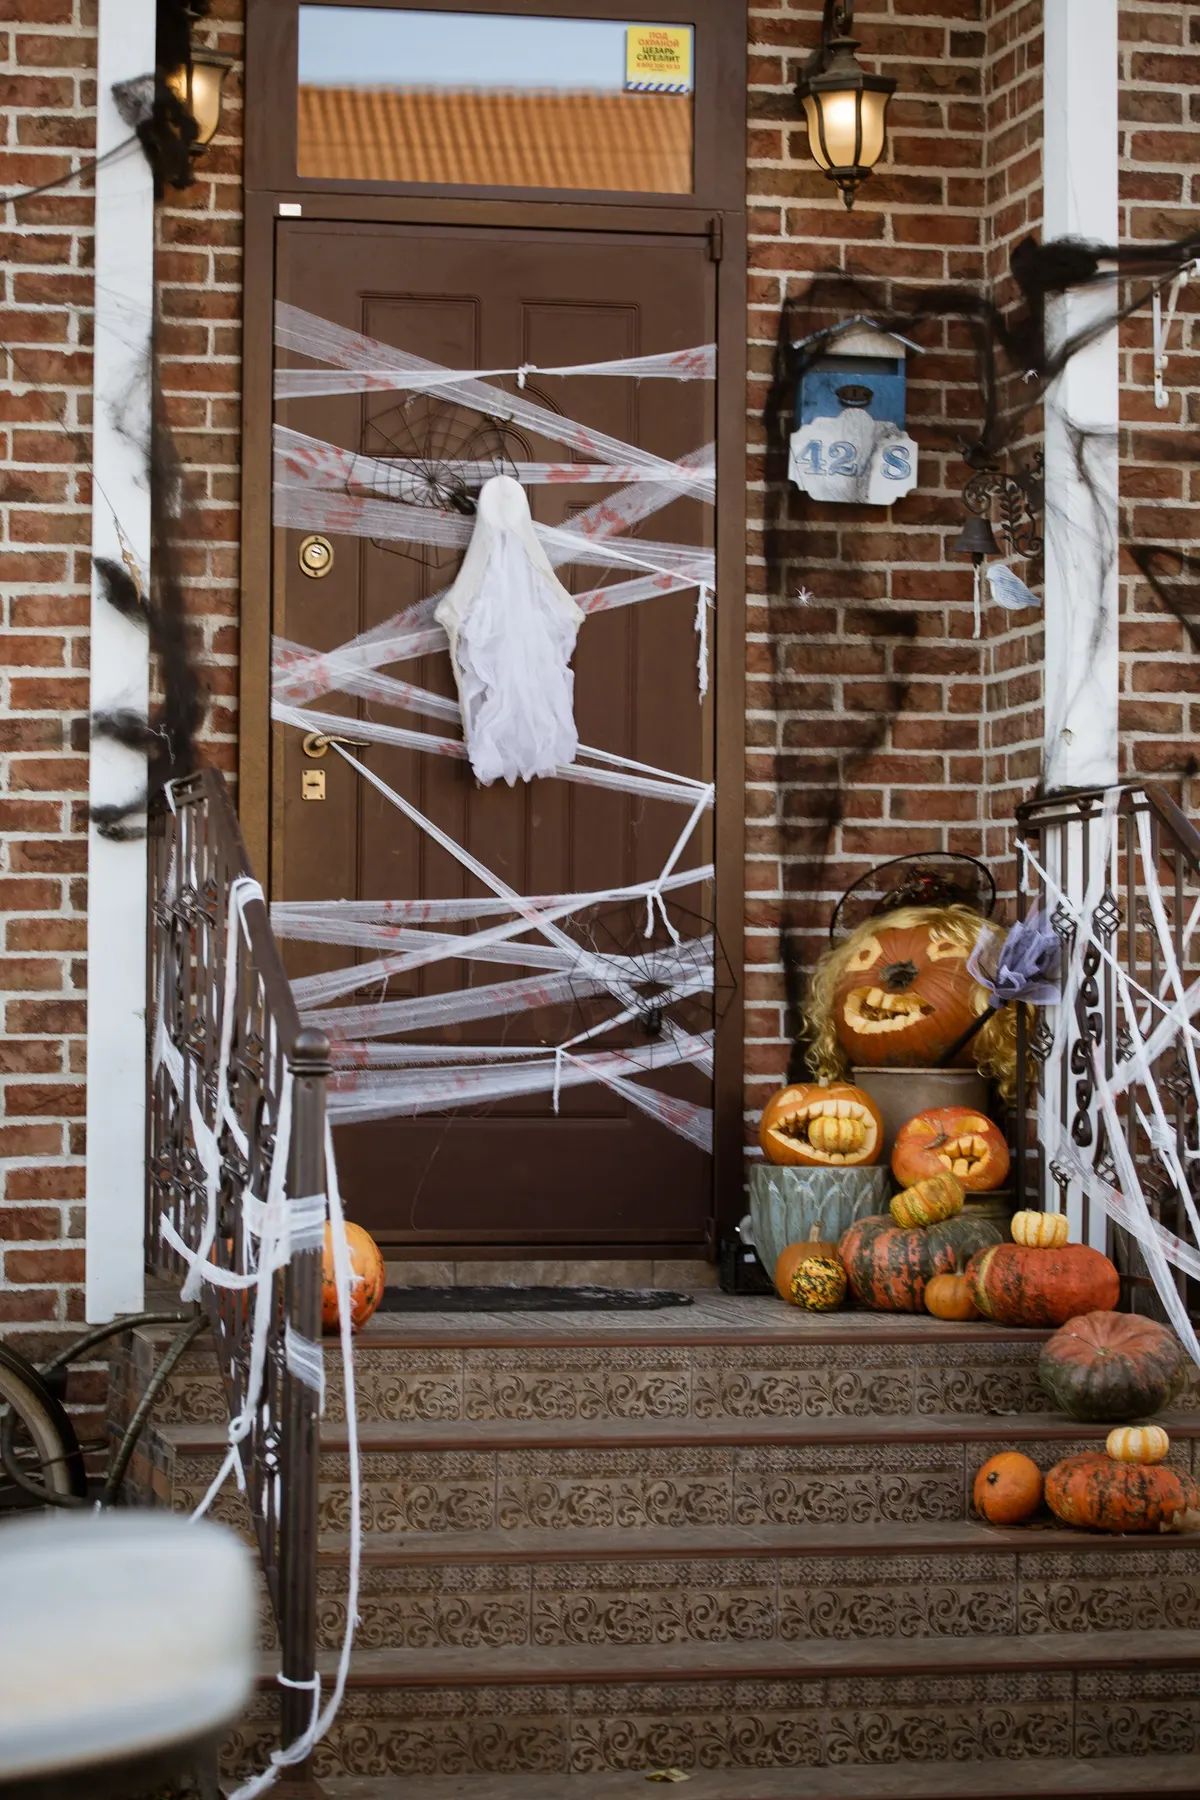
About a dozen strands of white gauze streamers crisscross this brown door, run onto the railing, and surround one faceless cheesecloth ghost hanging in the middle. Black stretch webbing on the porch rail and two black wire-style web decorations give the white strands some contrast.
Cut the strands about 10 feet long and tape the ends at the door's edges. Drape a double layer of cheesecloth over a foam ball for the ghost. Medium, about 40 minutes.
12. A giant rope spiderweb
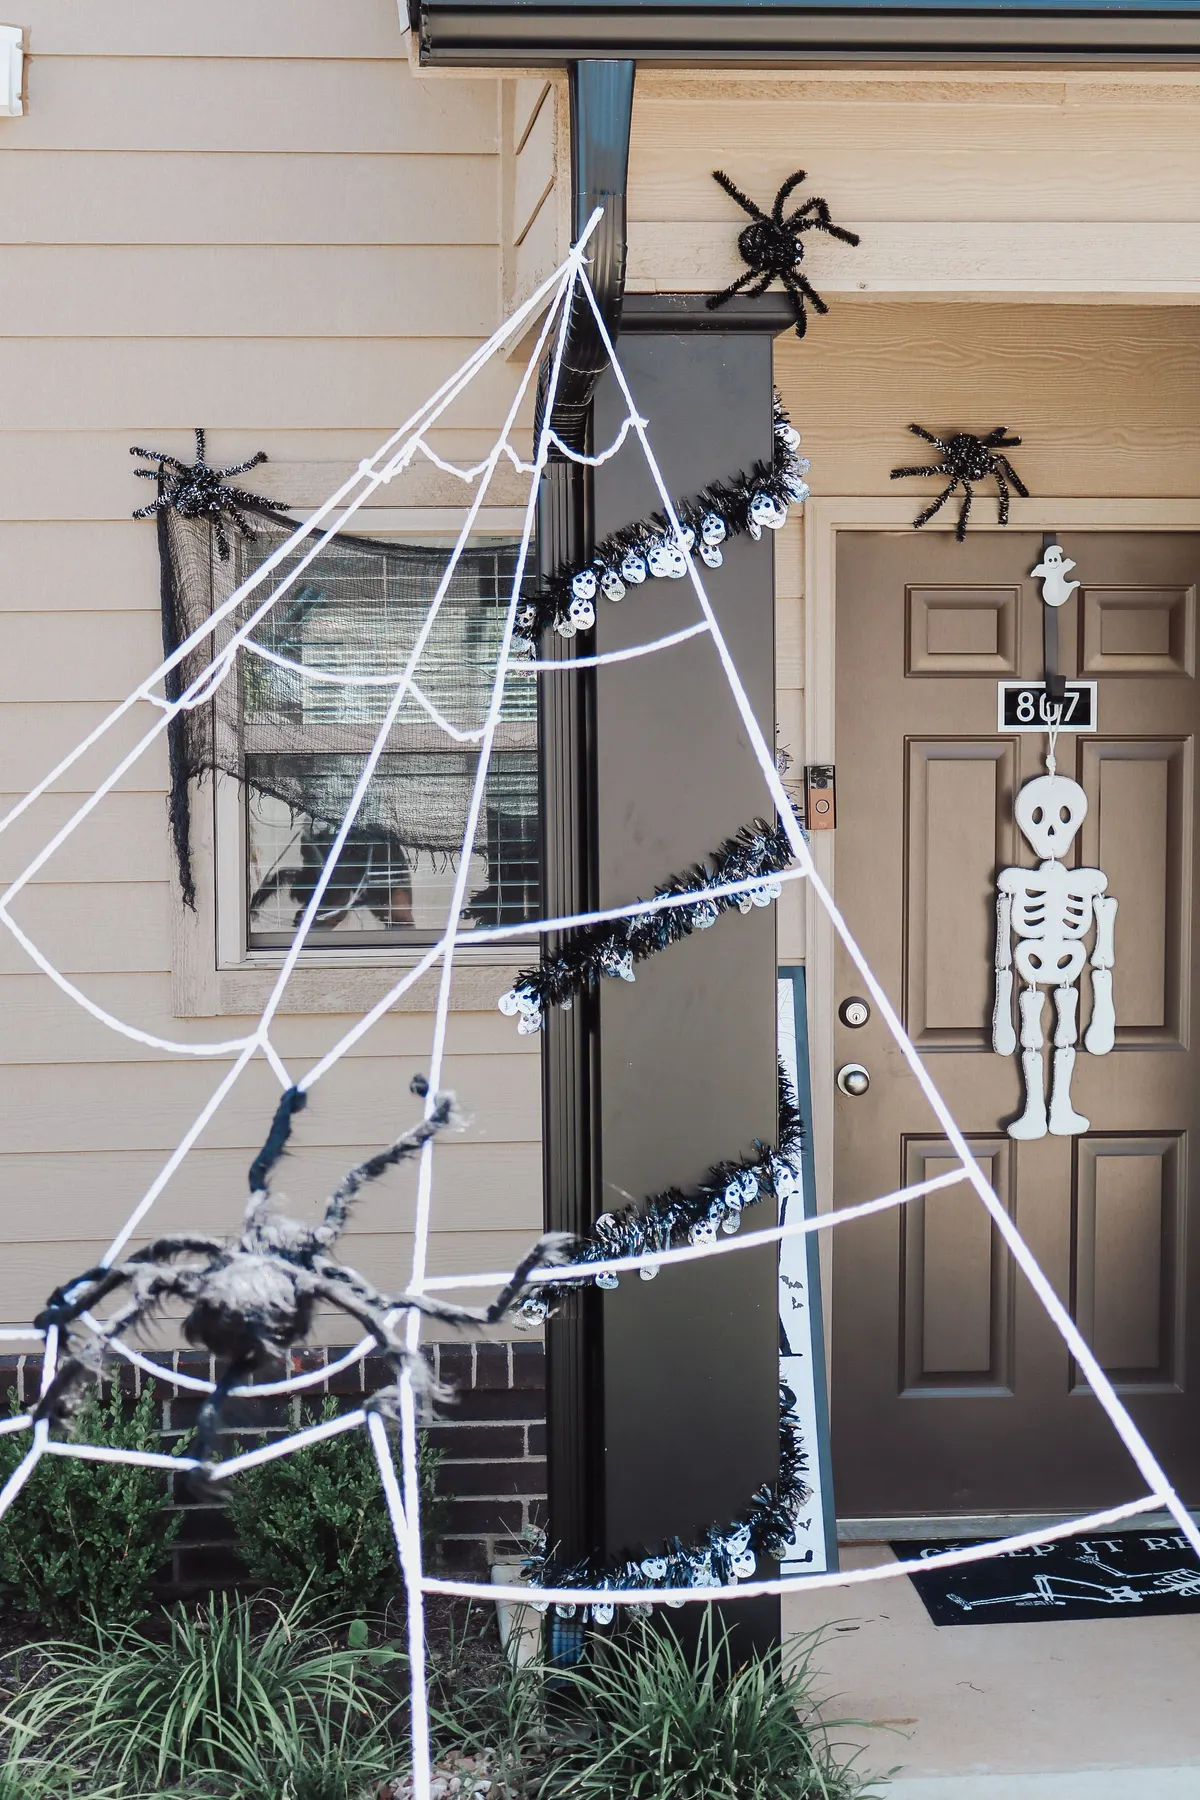
White rope forms a triangular web across this porch, from a hook at the roofline down to the ground, with cross-strands in between. A furry black spider sits low in the web, a flat skeleton hangs on the brown door, and black tinsel wraps the porch column.
Use thick white yarn or rope, tie three long lines first, then add the cross-strands with simple knots. Keep the web off the path and away from the door swing. Medium to hard, about 2 hours with a ladder and a helper.
13. Twin spiders on the door columns
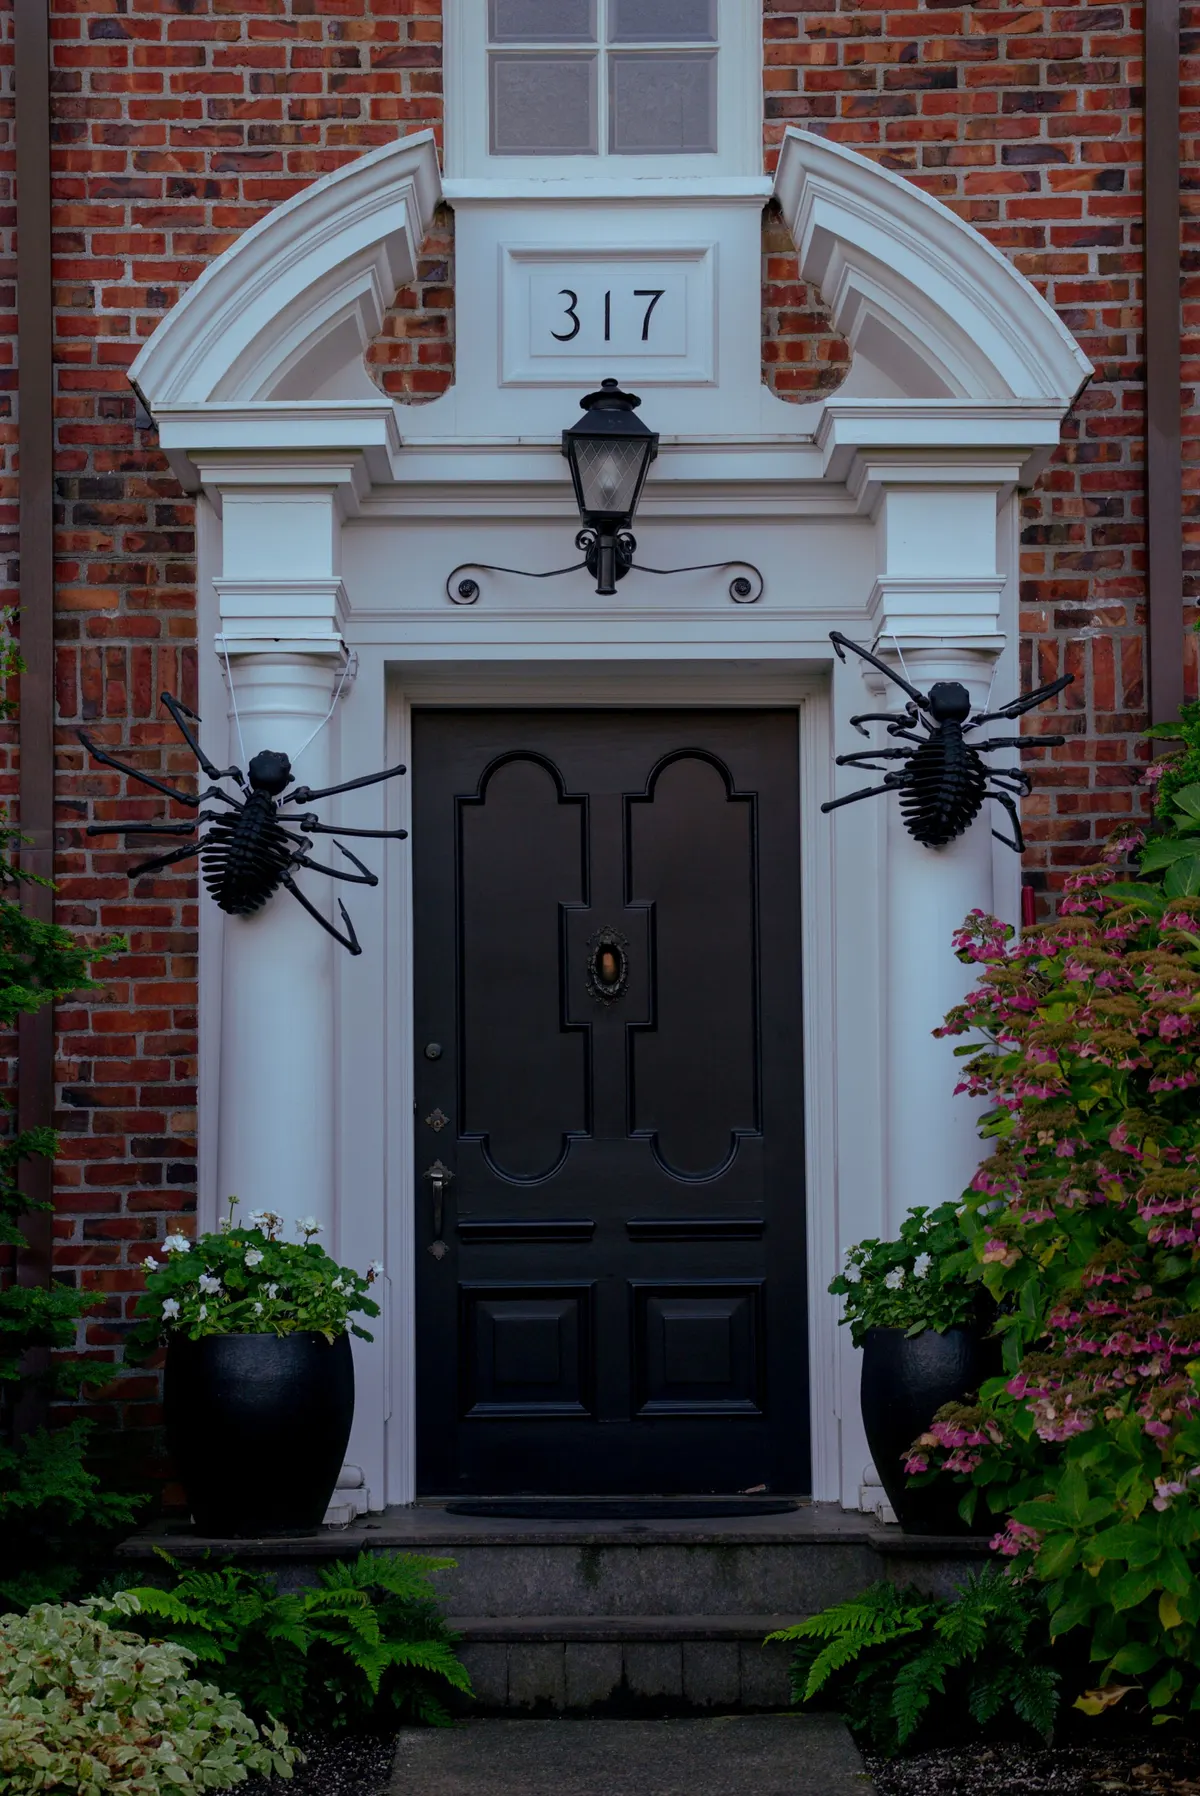
Two large black spiders, one on each white column of a classical doorway, make a symmetrical frame for a black panel door. Hang them at the same height, about level with the lantern above the door.
Tie each spider to the column with clear fishing line looped around the post rather than driving screws into trim. Two black planters with white flowers on the steps keep the look clean and a little formal. Easy, about 20 minutes.
14. One big spider on a double door
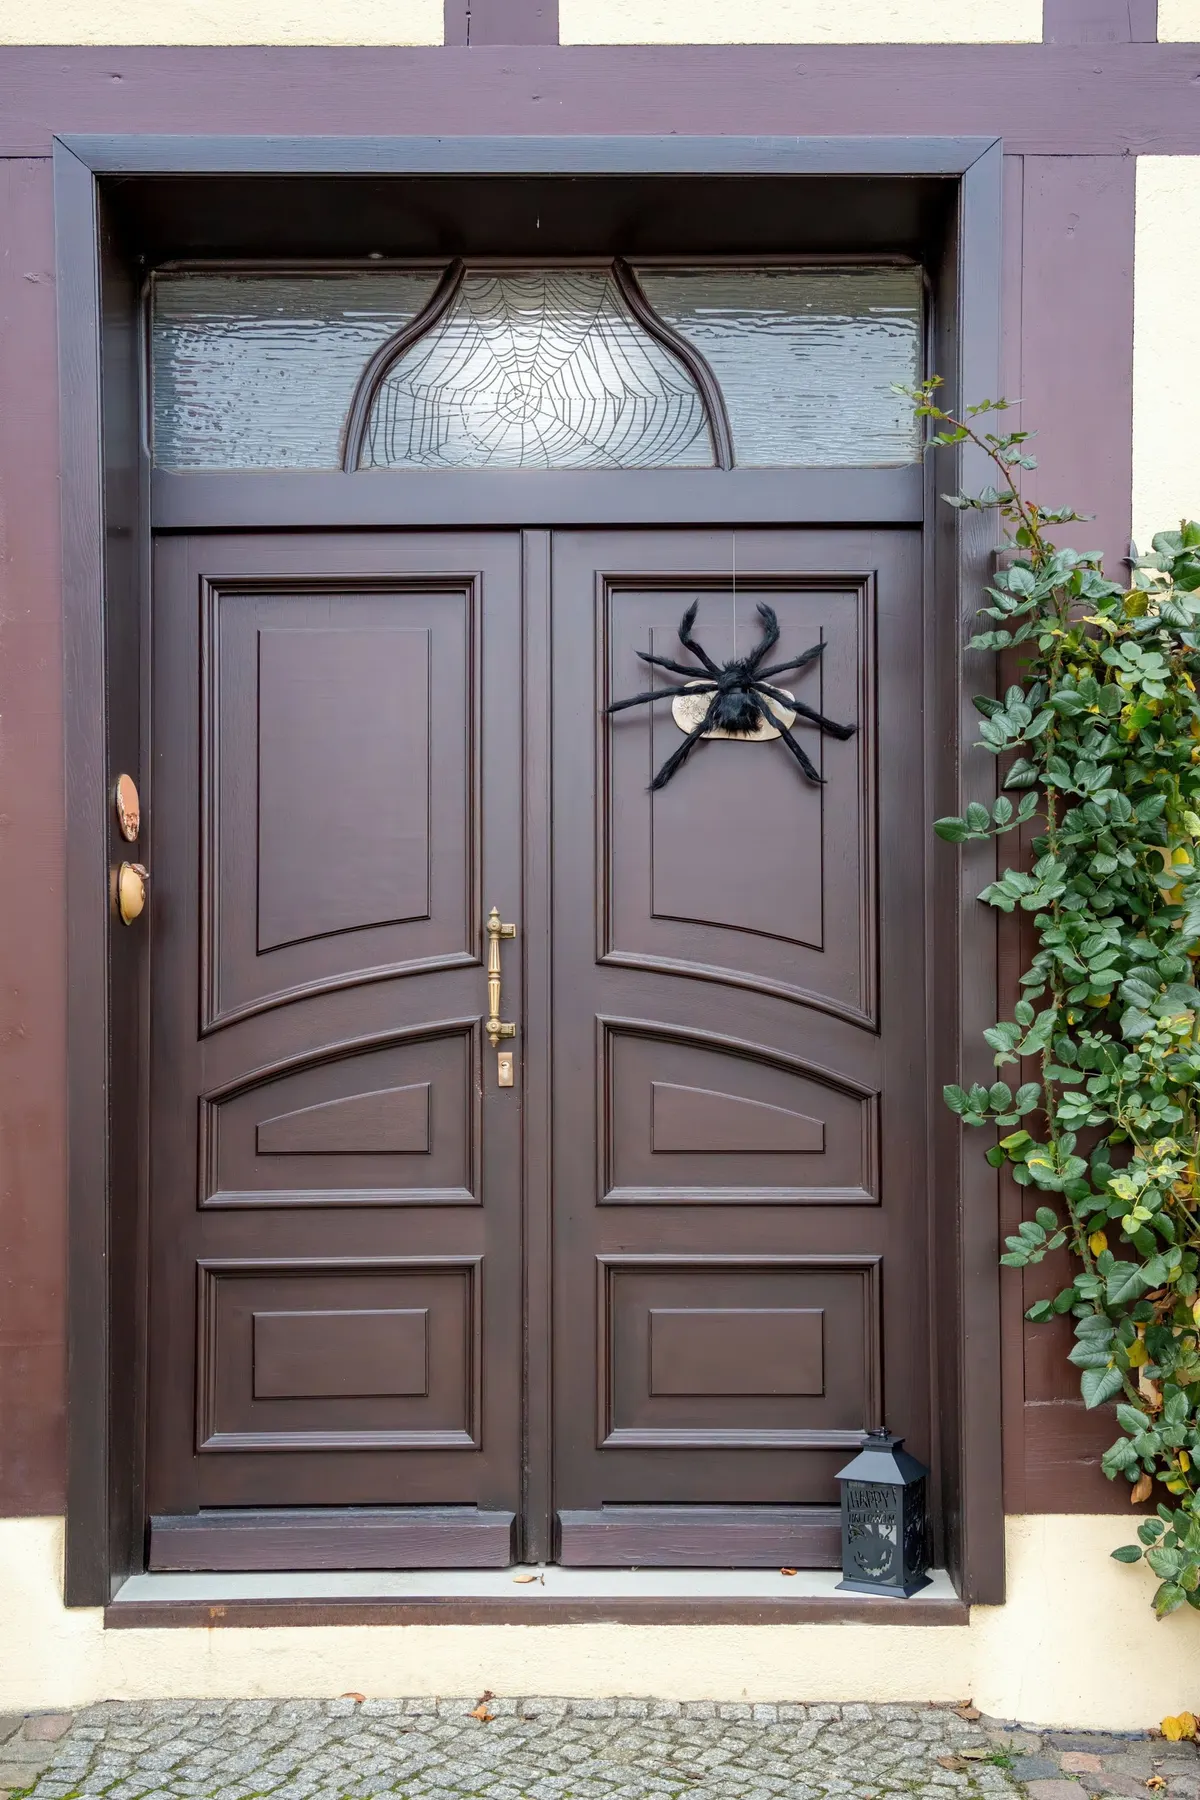
A single, dinner-plate-sized furry black spider with a pale mark on its back sits on one leaf of a dark brown double door, below a transom with a cobweb pattern in the glass. A small black cutout lantern waits on the step.
If your door has no webbed glass, tape or hang a few strands of stretch cobweb in the top corners. Hang the spider from a hook on a short length of thread so it dangles slightly. Easy, about 10 minutes.
15. Cobweb draped over an iron door
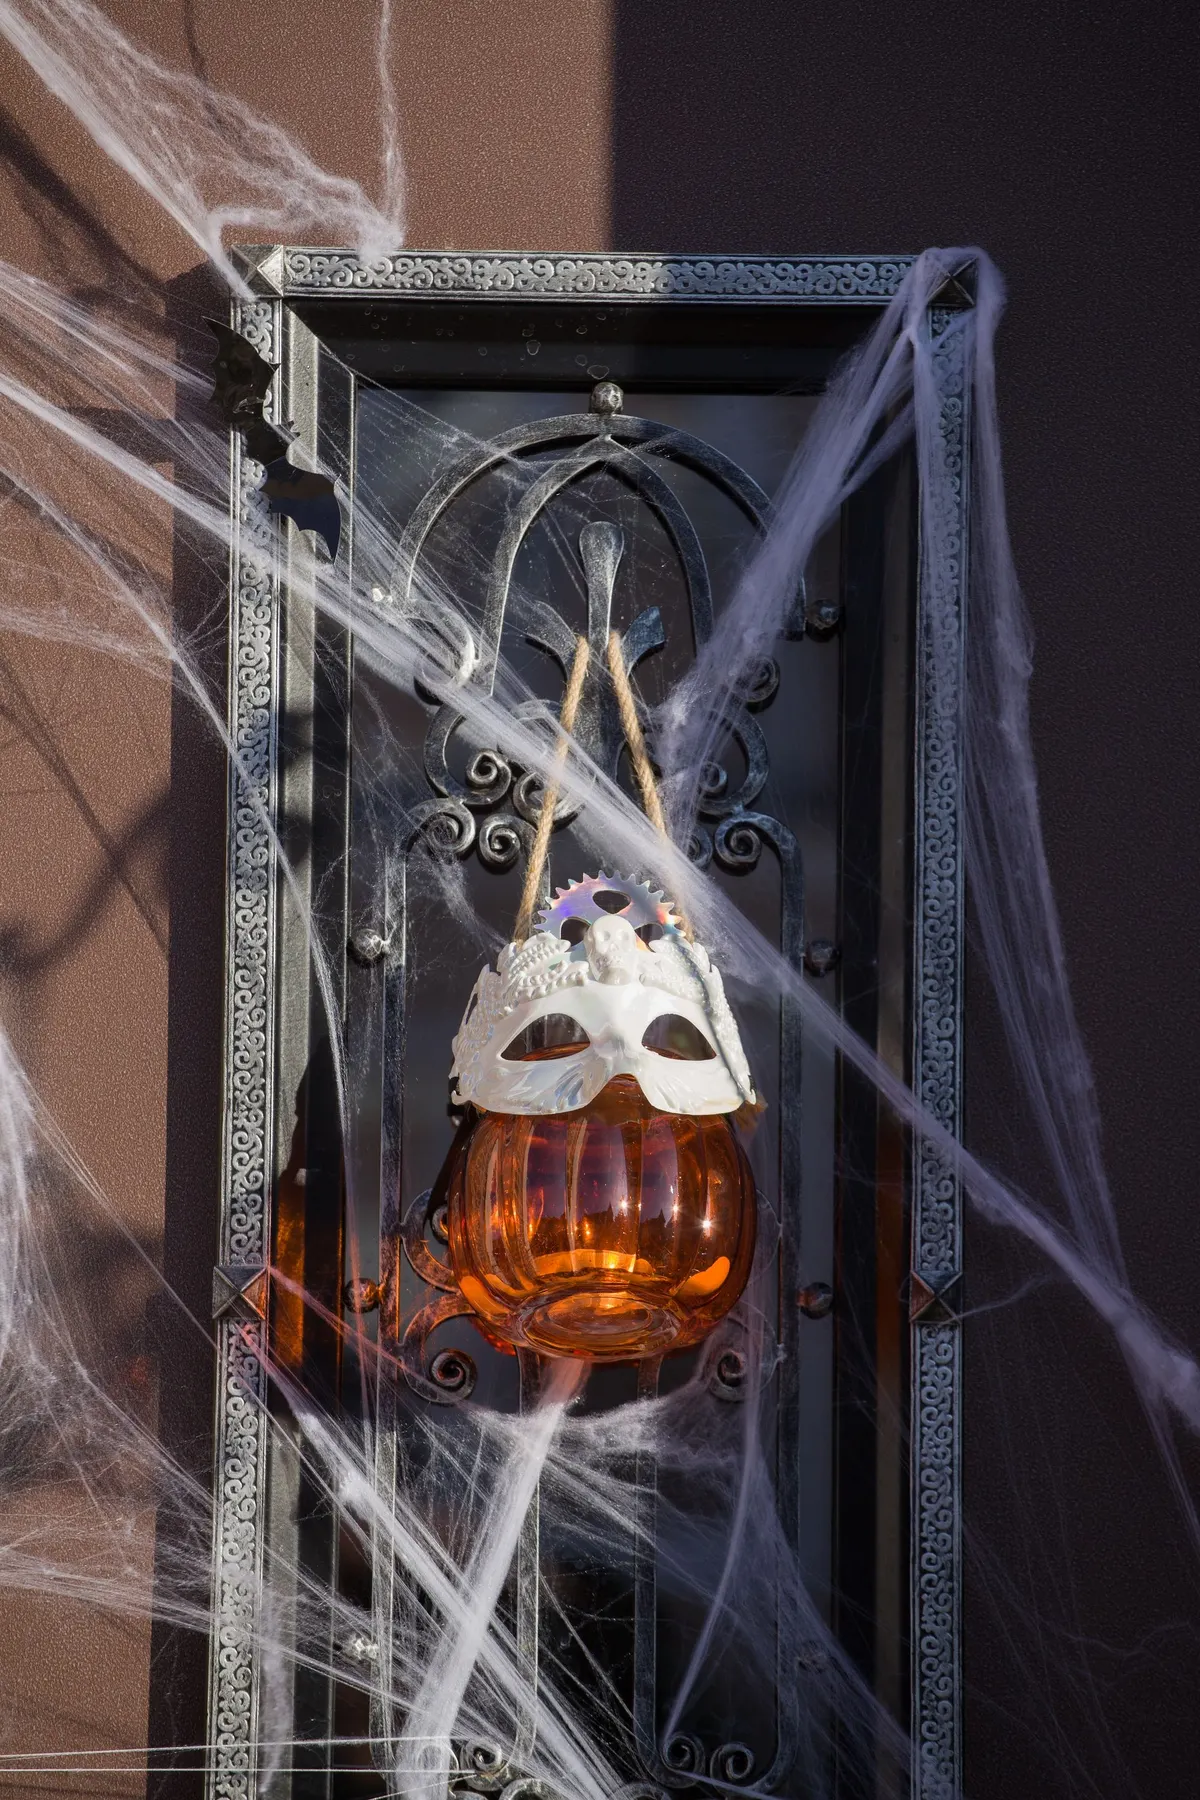
This black wrought-iron door has pale stretch cobweb pulled across it in thick wisps. A pumpkin-shaped amber glass lantern with a white masquerade-style mask on top hangs from two lengths of tan jute.
Pull the cobweb thin until it is sheer. Use a battery tea light inside the lantern, and keep the web clear of wall lamps and anything hot. If you glue the mask to the lantern, have an adult handle the hot glue. Medium, about 30 minutes.
16. A skeleton behind the gate
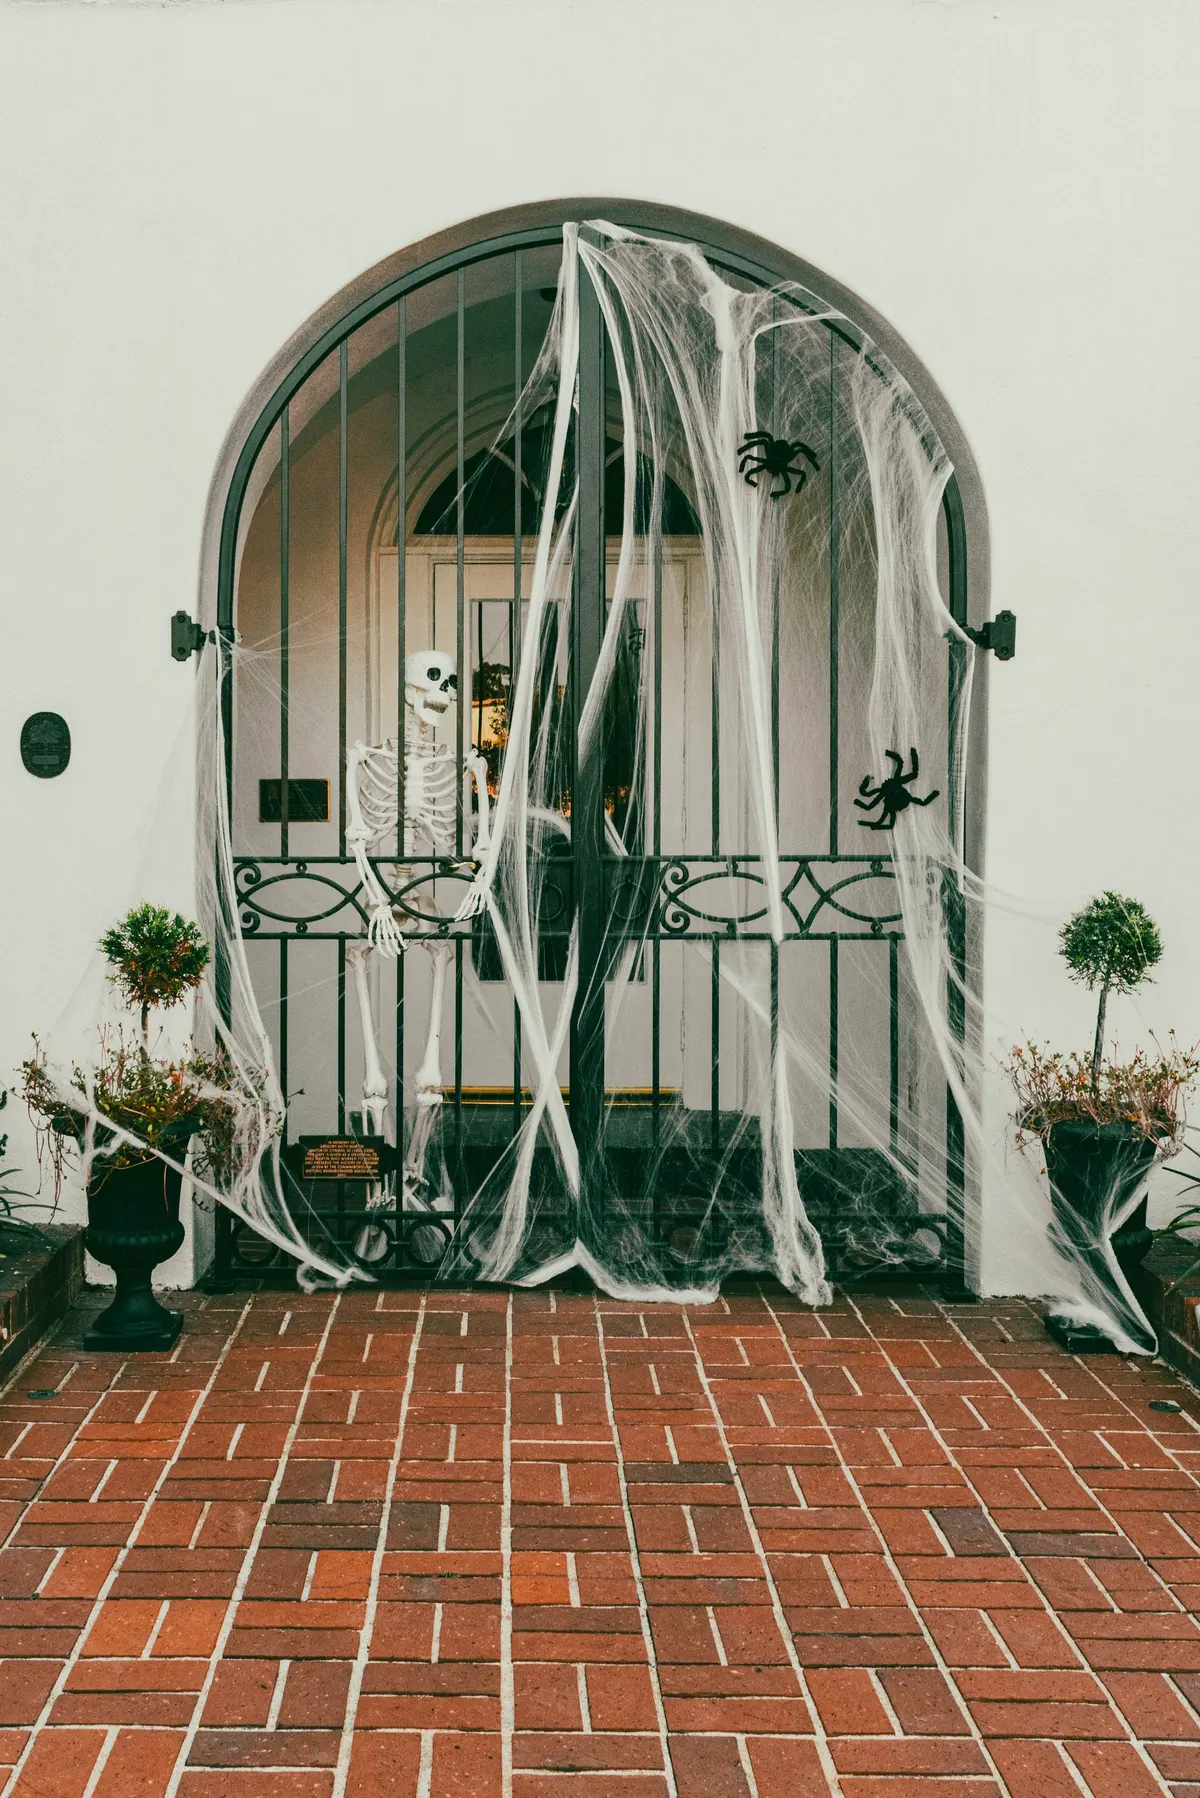
A near life-size white plastic skeleton leans inside an arched black iron gate, one arm bent toward the middle of the gate as if it is trying to get out. Two black spiders sit in sheer white cobweb across the bars, and two urns with trimmed topiary stand on a brick path.
Of all the scary Halloween door decorations here, this one reads best from the street, and it works on a security door or a storm door too. Fix the skeleton with zip ties at the back. Medium, about 45 minutes.
17. Cover the whole rowhouse front
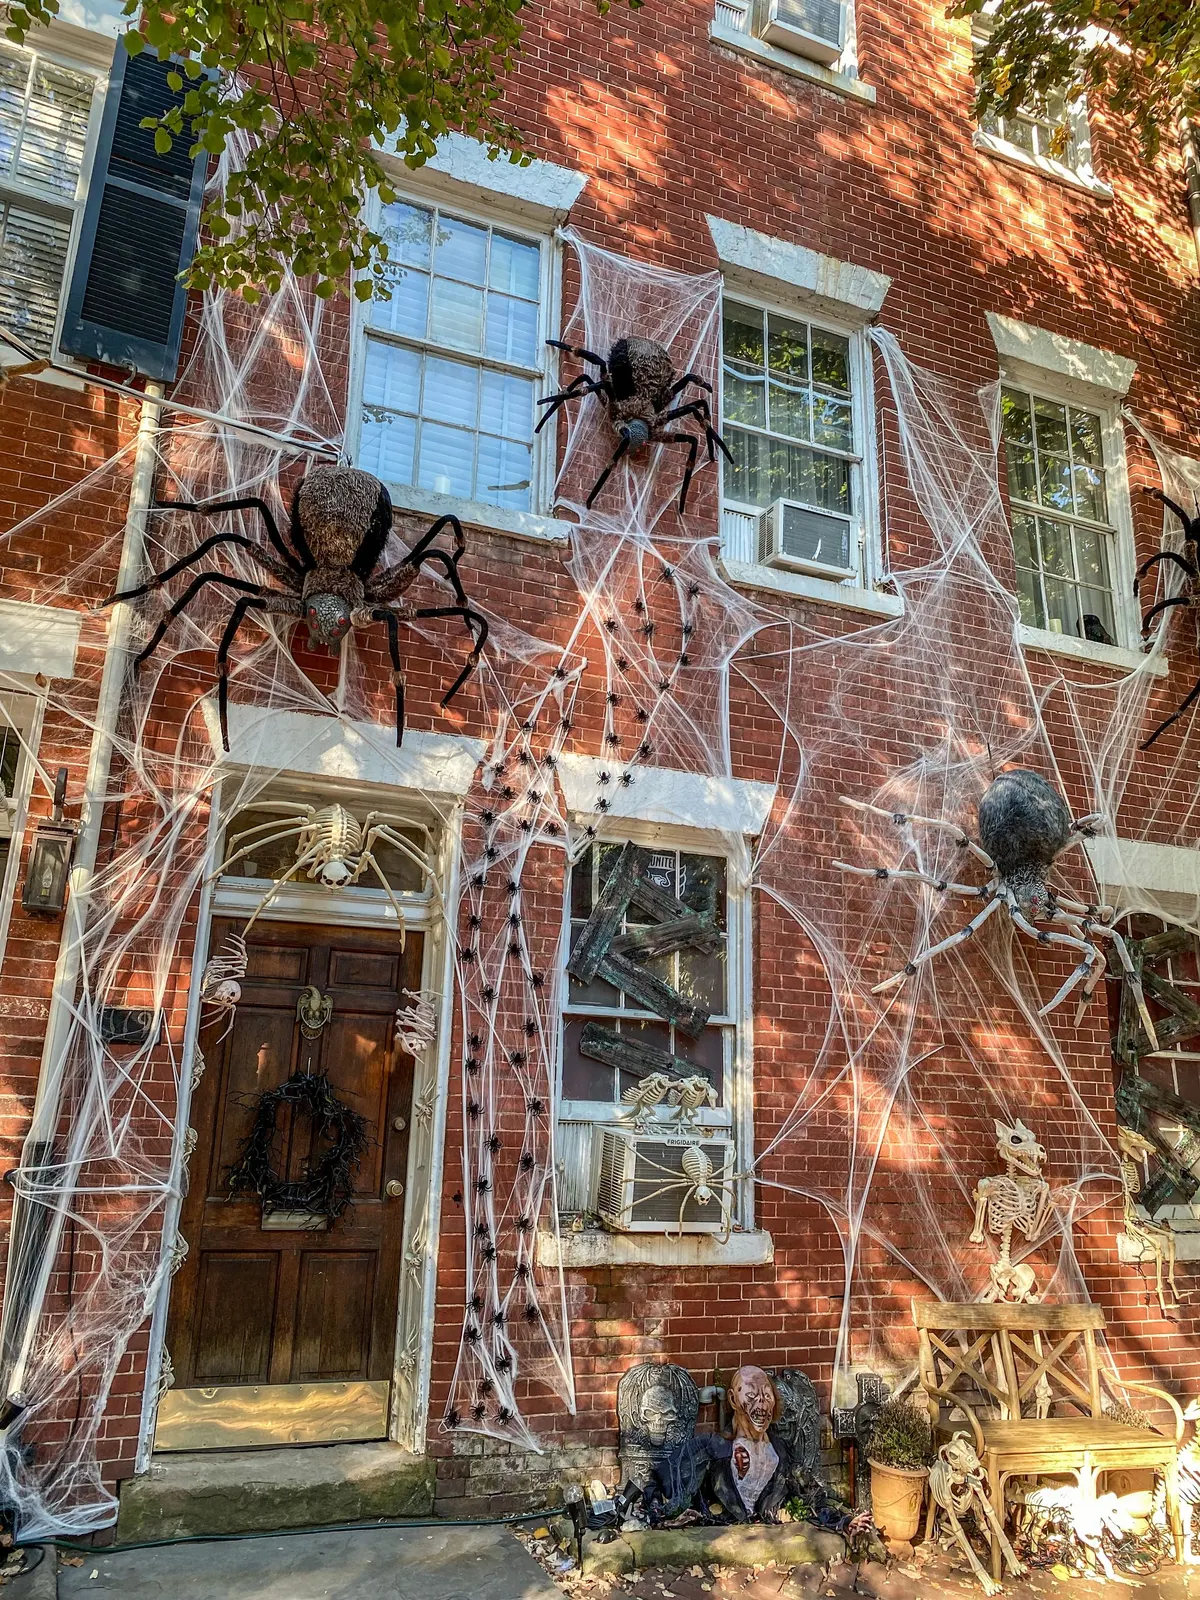
On a brick rowhouse or a townhouse stoop, the door can be the center of a bigger scene. Here, white stretch webbing covers the wall from the roofline to the door, four large spiders sit in it, and a white skeleton hangs above the dark door, which also has a twig wreath.
Pull the webbing apart until it is thin and uneven, and loop it around railings, lamps and window frames instead of driving in tacks. Space the large spiders about 3 feet apart and add dozens of small ones along the strands. Keep the path to the door at least 3 feet wide. Hard, about 2 to 3 hours with a ladder.
18. Paper bats over the entry
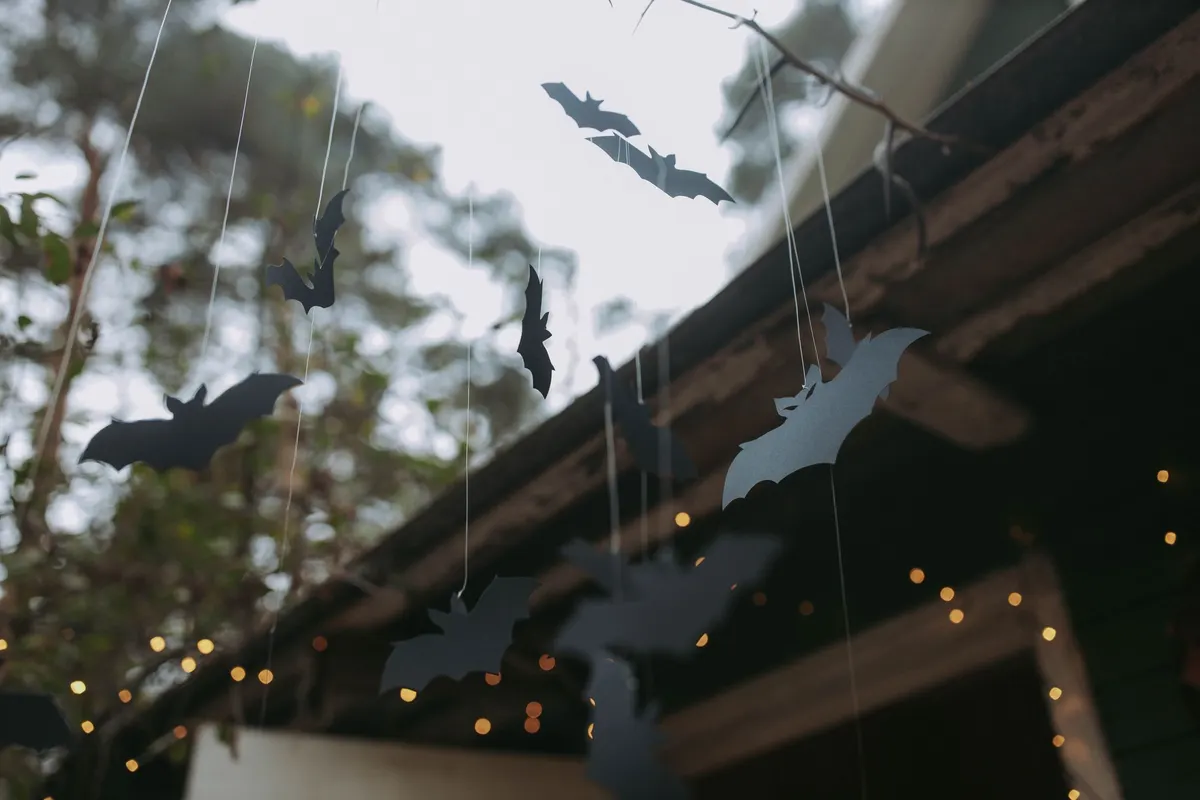
Black paper bats in different sizes hang from thin, clear threads under this old porch roof, with warm string lights glowing behind them. Cut 12 to 20 bats from black cardstock in three sizes, about 3, 5 and 7 inches wide.
Hang them at lengths from 6 to 24 inches so the bats overlap in a loose cluster above the door. Use battery fairy lights, since paper and heat don't mix, and take the bats down if rain is coming. Easy, about 45 minutes.
19. A sheet ghost on the stoop railing
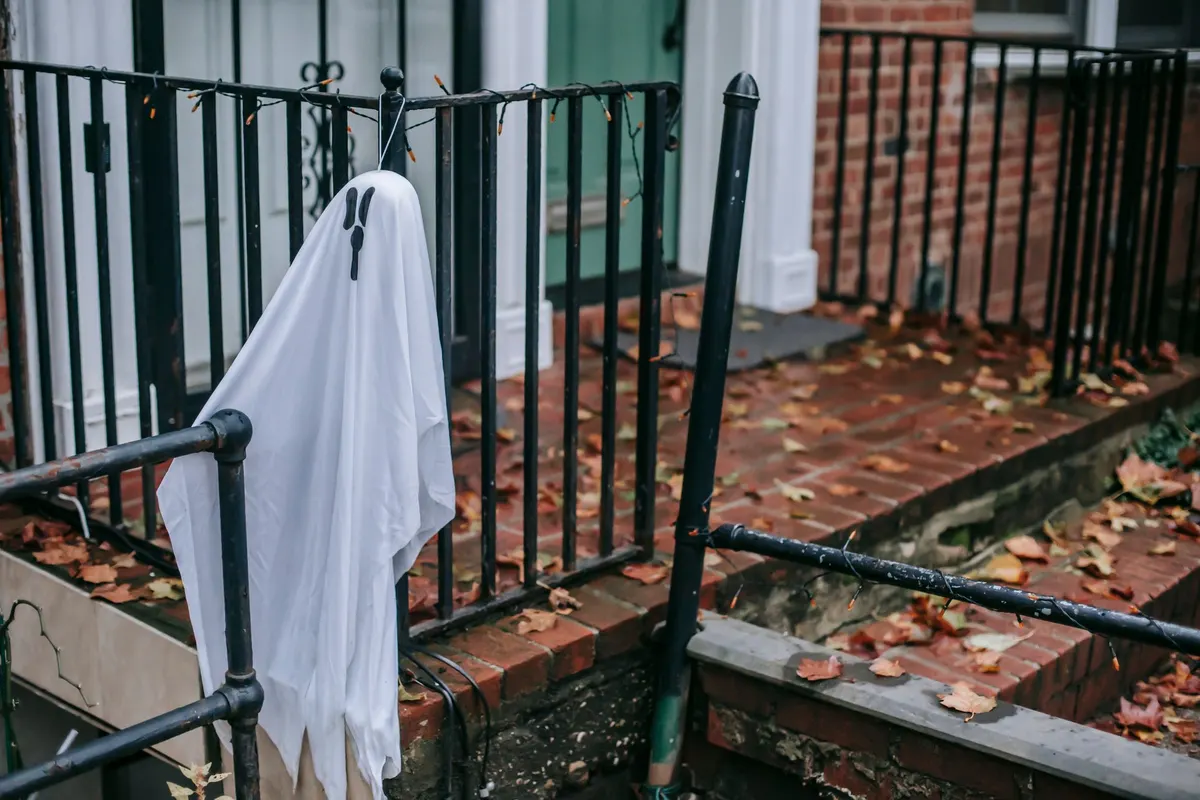
One handmade white ghost with long black teardrop eyes hangs on a black iron stoop railing, with a thin line of orange mini lights above it and fallen leaves on the brick steps. A green door waits behind.
Stuff a pillowcase with plastic bags, tie it off, and drape a white sheet over it. Cut the eyes from black felt or paper. Zip-tie battery orange lights along the railing. Leave the leaves where they fall. Easy, about 30 minutes.
20. A striped garland around the frame
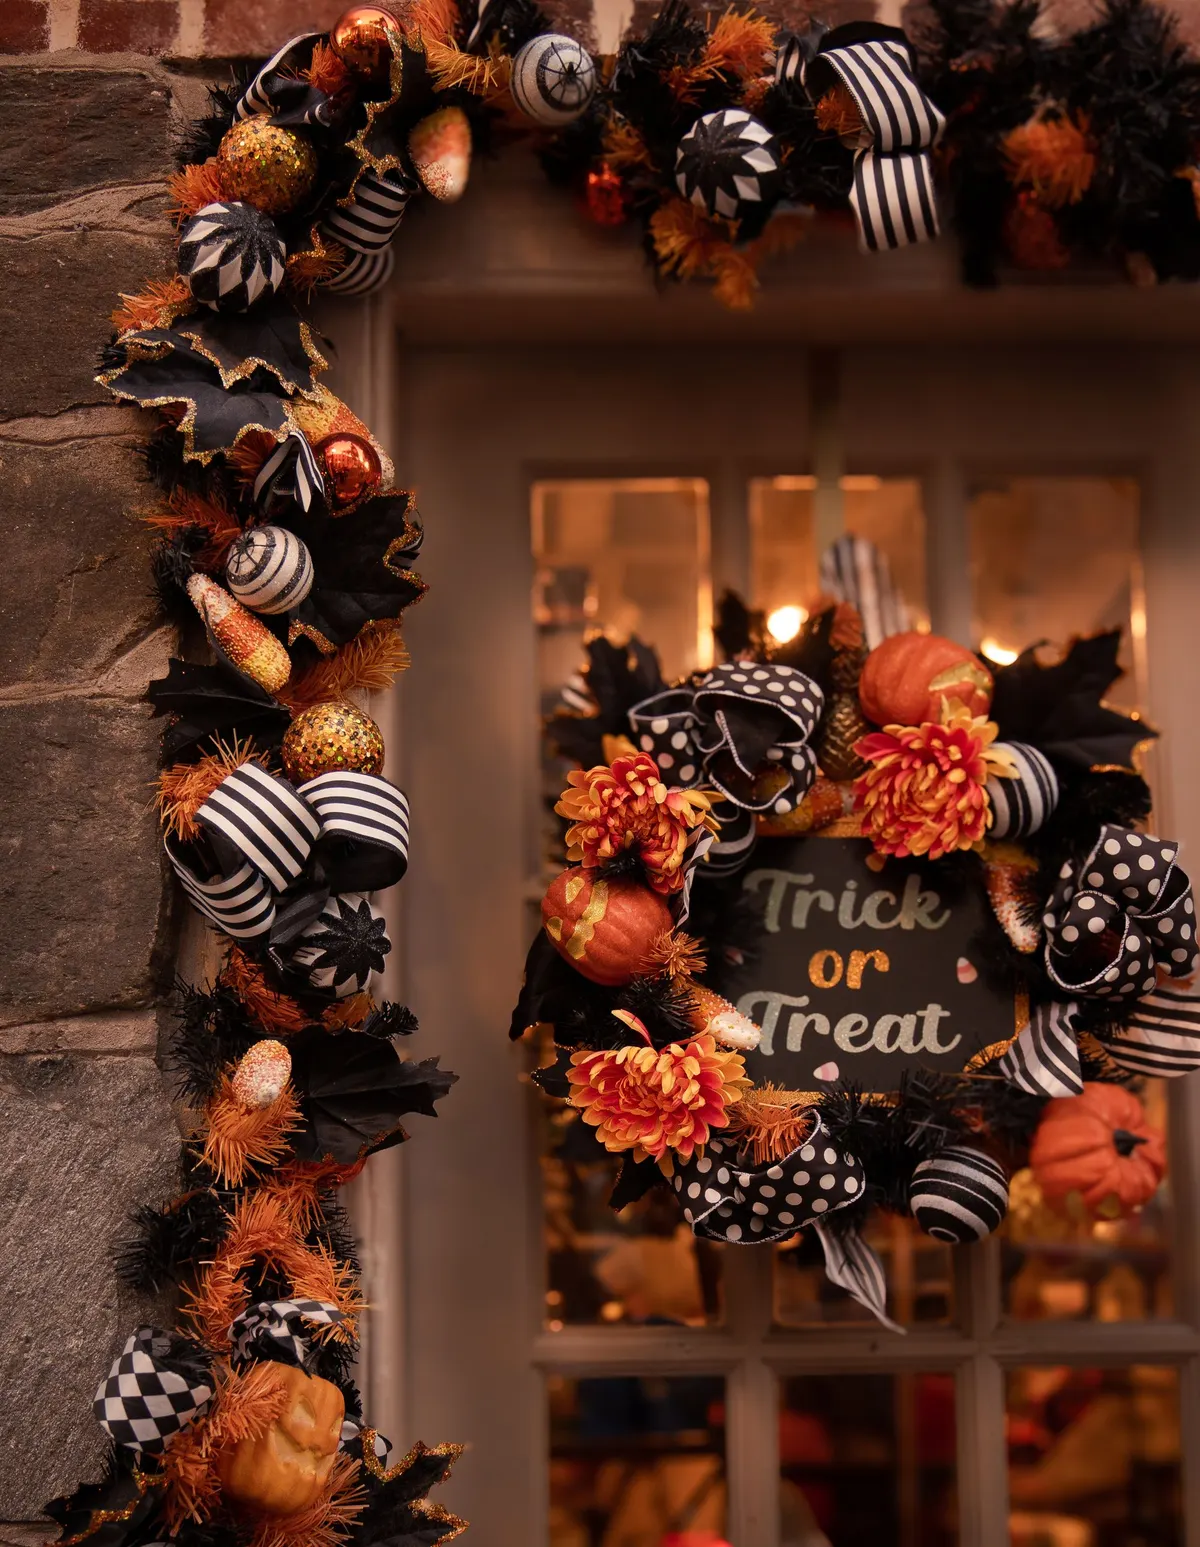
A garland of black and orange spiky stems, black glitter maple leaves, striped bows and candy corn ornaments runs down the left side and across the top of this glass-paned door. A matching wreath with a small black plaque hangs on the door.
A standard door takes about 16 feet, so join two 9-foot garlands and trim one. Attach it to the trim, not the door itself, with clear adhesive hooks at the corners, so the door still swings. Medium, about 45 minutes.
21. A black door with a maple wreath
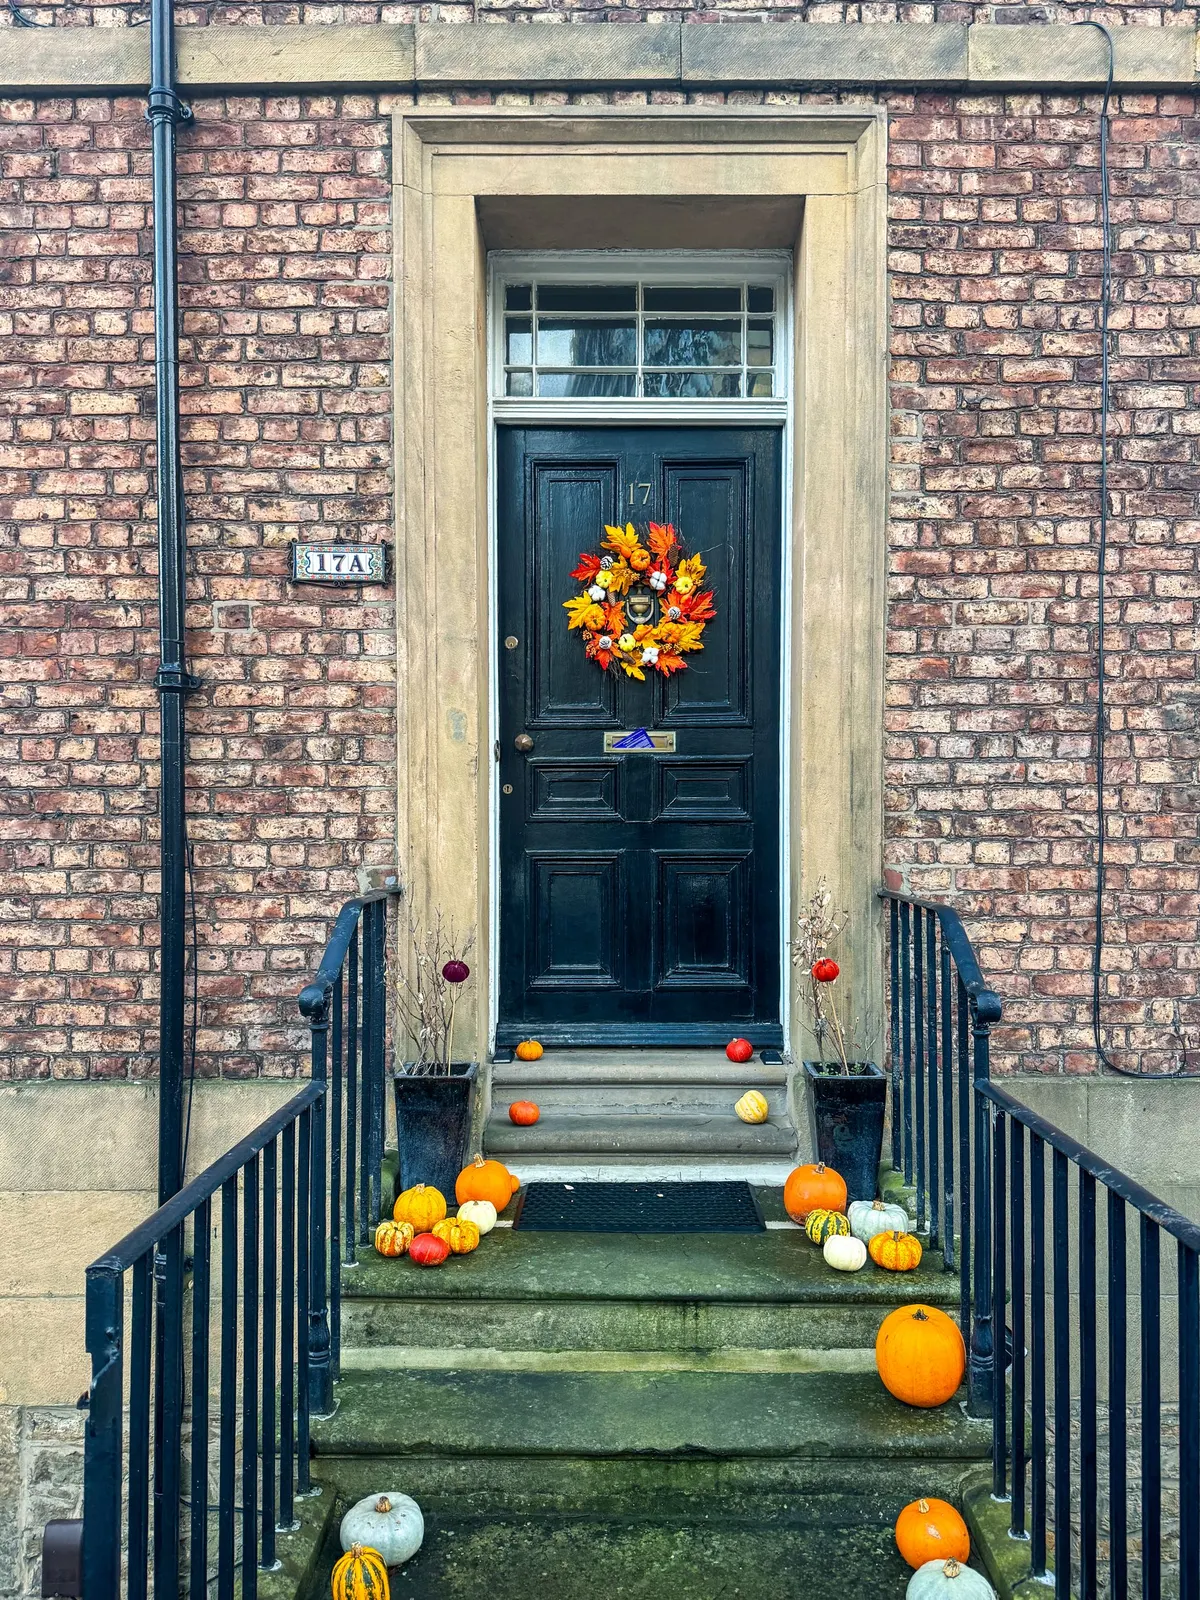
For an elegant look, keep the palette to black, orange and a touch of red. A glossy black Georgian door carries one wreath of maple-style leaves in orange, red and yellow with small pumpkins, and two black planters flank it with bare twigs and a single red bauble each.
Cluster pumpkins in mixed colors on the stone steps, and keep the walkway clear. For more arrangements like this one, see our fall porch decor ideas. Easy, about 30 minutes.
22. A dark Halloween door wreath with black feathers
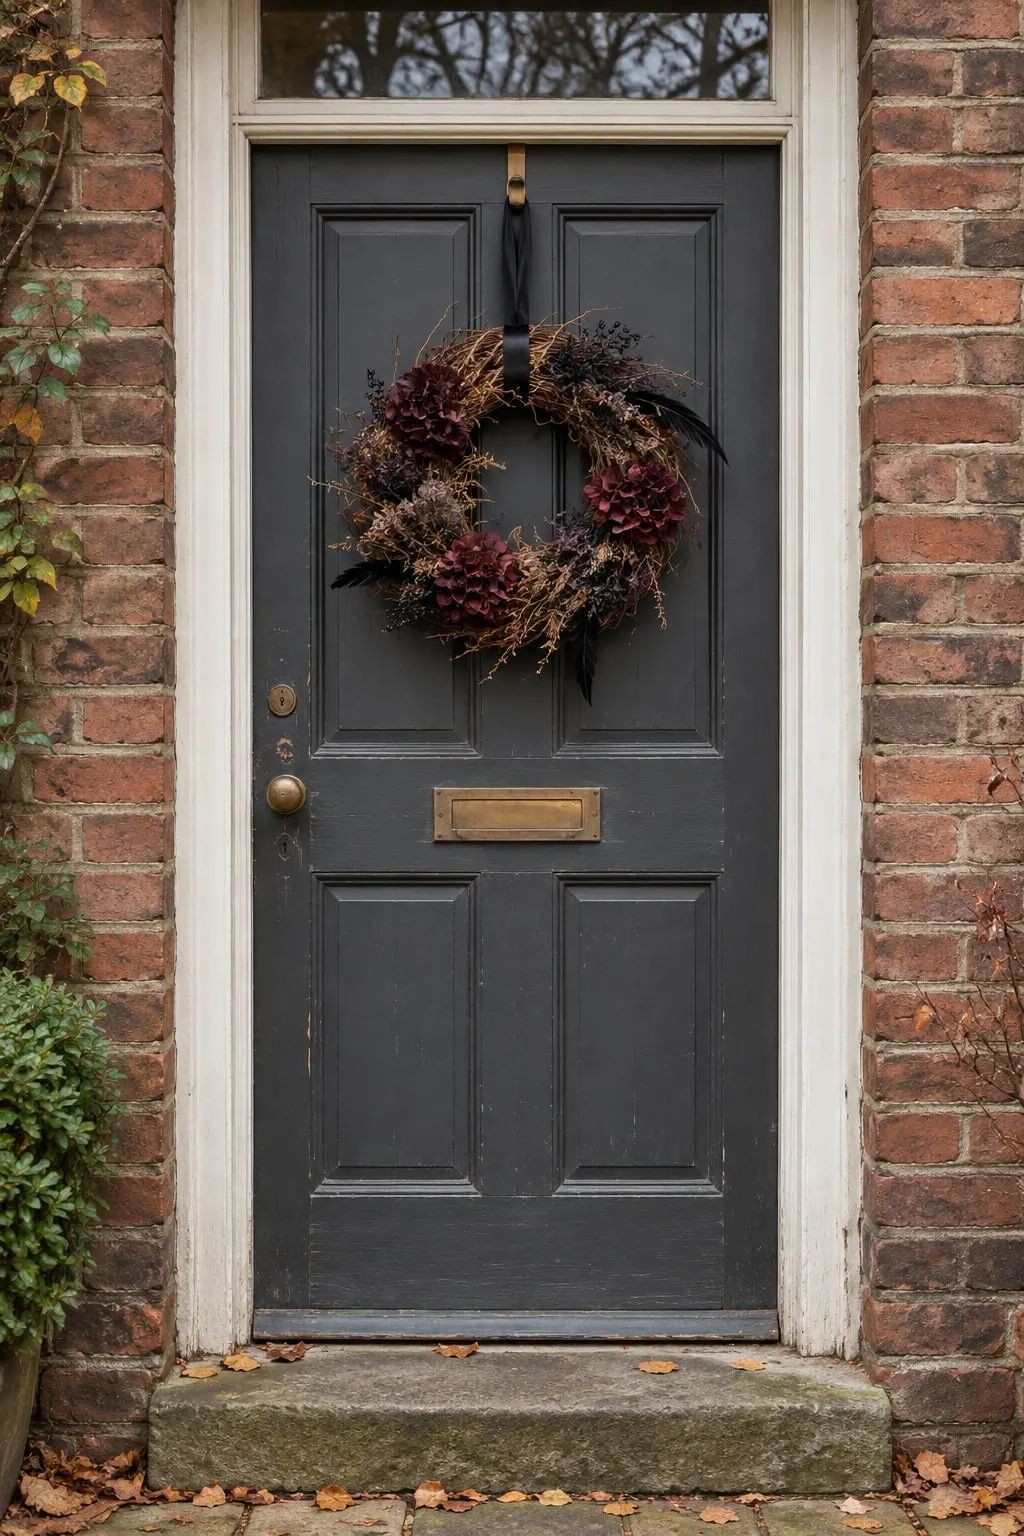
Build a Halloween door wreath on a 16 to 18 inch grapevine base. Glue three dried hydrangea heads in burgundy around it off-center, add a few black craft feathers and black berry sprigs, and leave one side sparse.
Hang it from a brass hook on a wide black ribbon so the loop is part of the look. The charcoal door and brass handle here keep the whole entry moody. Medium, about an hour.
Final tips
- Pick one idea and repeat its colors rather than mixing five themes on one door.
- Hang anything that dangles above head height, or press it flat against the door, so guests don't bump it.
- Take stretch cobweb, paper and gauze down soon after Halloween. Rain ruins them, and loose cobweb can trap birds and insects.
- Pair a door idea with a carved pumpkin from our carved pumpkin ideas, or visit porch and door ideas for more entry looks.
Frequently asked questions
How can I decorate an apartment door for Halloween without nails?
Use removable adhesive hooks rated for the weight, a clear over-the-door hook for a wreath, painter's tape for paper and gauze, and static-cling or removable vinyl decals on smooth doors. A steel door also takes magnetic hooks. Hang light pieces only, test one hook in a corner first, and read your lease or building rules, since some buildings limit what goes on shared hallway doors.
Do adhesive hooks damage a painted door?
Removable hooks are made to come off cleanly from smooth, fully cured paint, but they can pull off paint that is fresh, flaking or textured. Press each hook firmly for the time on the package, stay under its weight limit, and wait before hanging anything on a recently painted door. To remove one, pull the tab straight down along the door, slowly, instead of peeling it outward.
How do I make a Halloween door look scary instead of cute?
Go dark and keep it simple. A black or deep brown door, thin stretch cobweb, and one oversized spider or skeleton look scarier than a crowd of small props. Add a warm orange battery light or a flickering lantern at night, and let some of the door stay bare. Avoid bright pastels, smiling faces and glitter if you want it to feel creepy.
When should I put up Halloween door decorations?
Many people decorate in early to mid October, but weather matters more than the date. Wreaths, skulls and plastic spiders can go up early. Paper, gauze, cheesecloth and stretch cobweb are better added in the last week, since rain and wind wreck them quickly. Take them all down within a few days after Halloween, before they get soggy or tangled.
Can I decorate a shared hallway or fire door for Halloween?
Often not much. Many apartment buildings, dorms and offices limit paper, fabric and cobweb on corridor doors and walls because they burn easily, and some ban them completely. Never cover a peephole, block a door from opening, or use anything that hides an exit sign. Ask your property manager or resident adviser what is allowed before you buy supplies.
You might also like
 Halloween
22 Carved Pumpkin Ideas, From Easy Faces to Showstoppers
 Halloween
22 No-Carve Pumpkin Ideas: Paint, Fabric, Tape and Stacks
 Halloween
21 Outdoor Halloween Decoration Ideas for Yards, Trees and Paths
 Christmas
17 Christmas Door Decorating Contest Ideas (Office & School)
 World holidays
20 Diwali Decoration Ideas for Your Home
 Fall
Fall22 Fall Porch Decor Ideas for Real Porches and Real Budgets