21 Outdoor Halloween Decoration Ideas for Yards, Trees and Paths

Jump to an idea (21)
- Before you start
- 1. Ring of ghosts around a big tree
- 2. Cheesecloth ghosts hanging from branches
- 3. Hanging jar lanterns
- 4. Orange lights spiraling up a trunk
- 5. Bats flying on fishing line
- 6. Paper bag luminaries along the walk
- 7. Stake lights edging the path
- 8. Milk jug ghosts in a garden bed
- 9. A mini graveyard on the lawn
- 10. Coffin sign on the fence
- 11. Tombstone tied to a gate
- 12. Cornstalks and webs on a fence
- 13. Spiders and black webbing on siding
- 14. One giant skeleton and a crowd of small ones
- 15. Skeleton on the lawn with a purple spotlight
- 16. Balcony skeletons watching the street
- 17. Inflatables for a small fenced yard
- 18. Scarecrow with a pumpkin head
- 19. Witch legs sticking out of a pot
- 20. Hay bale seating for a backyard party
- 21. A purple window glow
- Final tips
These 21 outdoor Halloween decoration ideas cover the whole yard: trees, walkways, fences, siding, steps and the windows people see from the street. Most are DIY, many use things you already own, and each one gives a time, a size or a count so you can copy it.
You will find DIY outdoor Halloween decorations to build, from lit paths to ghosts and graveyards, plus versions for small yards, balconies and townhouses and notes on wind, rain and trick-or-treater safety. For the front door itself, see our Halloween door decoration ideas. Porch steps and mums are in our fall porch decor ideas.
Before you start
Walk the yard in daylight and mark the path trick-or-treaters will take. Keep it at least 3 feet wide and free of cords, hoses and low props, and put a light at every step edge.
Outdoor lights need extension cords marked for outdoor use, plugged into a GFCI outlet, with plugs kept off wet grass. A timer turns everything on at dusk. LED strands run cooler than old bulbs.
Use battery lights, never open flames, near straw, cornstalks, paper and cobweb. Stake or weigh down anything that can tip, and bring in paper and fabric when rain is forecast. An adult handles hot glue guns, craft knives, jigsaws and ladders. Pets chew cords and tug webbing, so keep both out of reach. Check HOA or lease rules before you attach anything.
1. Ring of ghosts around a big tree
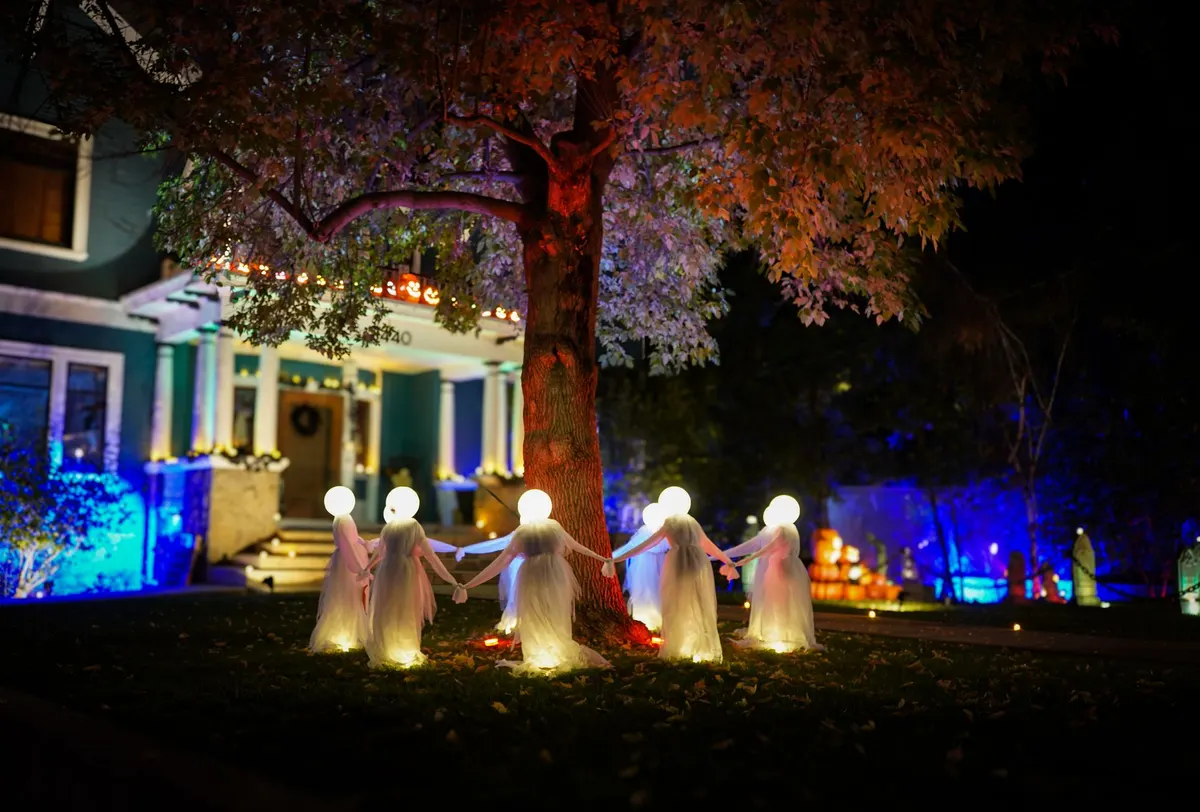
A circle of ghosts holding hands around a trunk gives the whole yard one focal point. Build each ghost on a 4-foot stake: top it with a foam ball, drape white cheesecloth over it, and tuck a battery light inside the head. Join neighboring sleeves with a strip of cloth.
Set five to seven ghosts about 2 feet apart, then wash the trunk with one spotlight from the ground. Orange light on the bark and white light in the heads, as shown here, gives the strongest glow. For wind, push each stake at least 10 inches into the soil. Medium, about 2 hours.
2. Cheesecloth ghosts hanging from branches
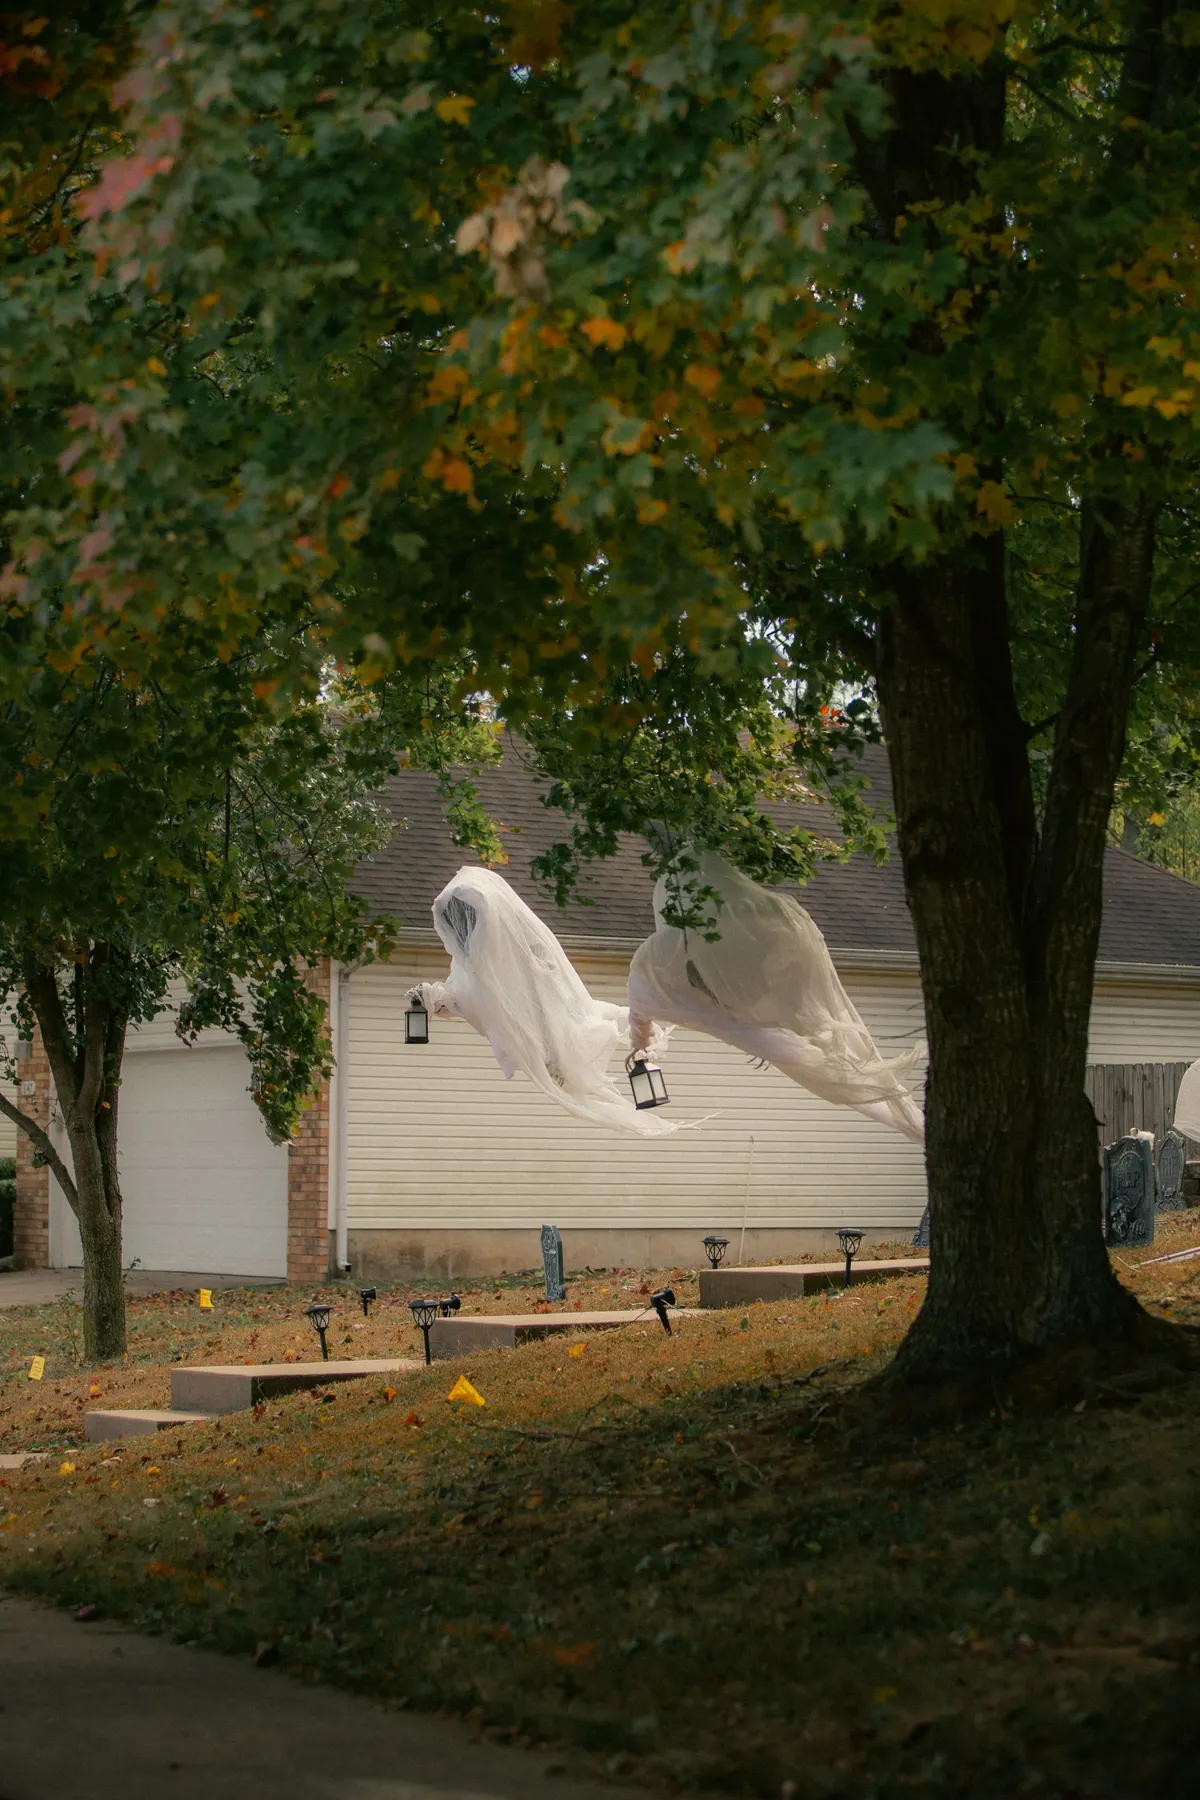
Two or three hanging ghosts at different heights look like they are floating in the leaves. Soak cheesecloth in liquid fabric stiffener, drape it over an inflated balloon, and let it dry overnight. Pop the balloon, draw eyes and a mouth with a black marker, and hang each ghost on fishing line.
Keep the lowest hem above 6 feet near a path so no one walks into it. A small battery lantern hung under one ghost adds a second level of light. Stiffener is not waterproof, so take the ghosts down before rain. Easy, one evening plus drying.
3. Hanging jar lanterns
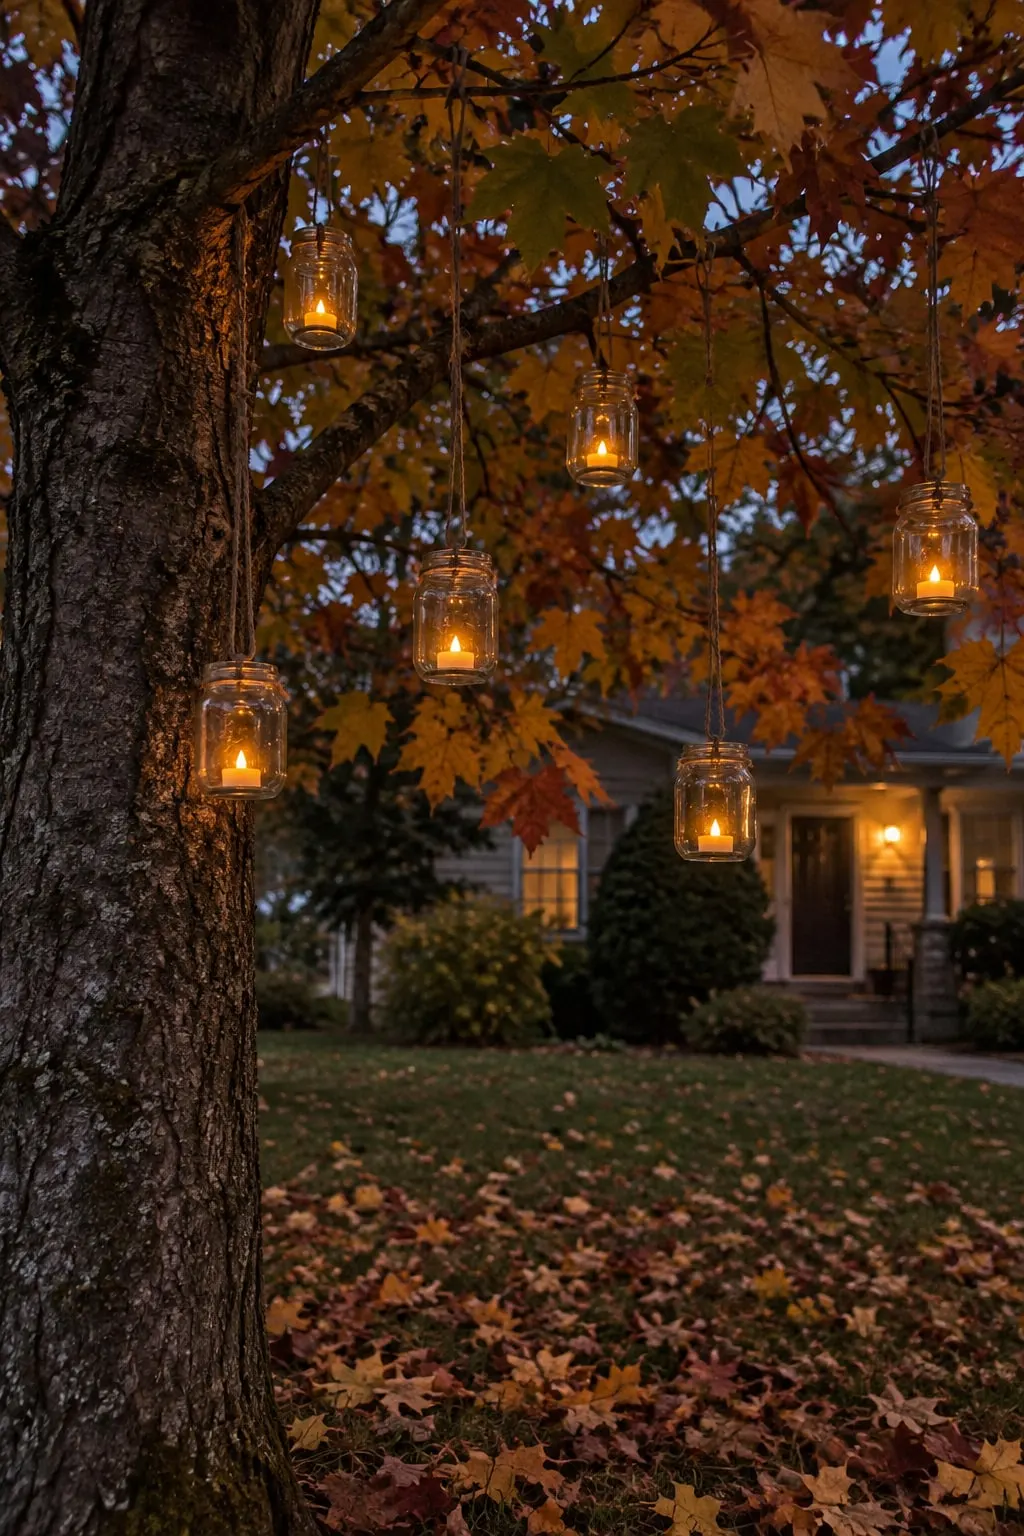
Six jars hung at staggered heights turn a front-yard tree into a glowing canopy. Wrap twine twice around each jar neck, secure it with a twist of thin wire, and drop in a battery tea light. Hang them 6 to 12 inches apart from the same thick branch, with the longest drop about 5 feet.
Use warm, flickering battery lights only. Glass breaks, so hang jars where kids and pets can't swing at them, and take them down before a windy night. Plastic jars from the recycling bin are a safer swap near kids. Easy, about 30 minutes.
4. Orange lights spiraling up a trunk
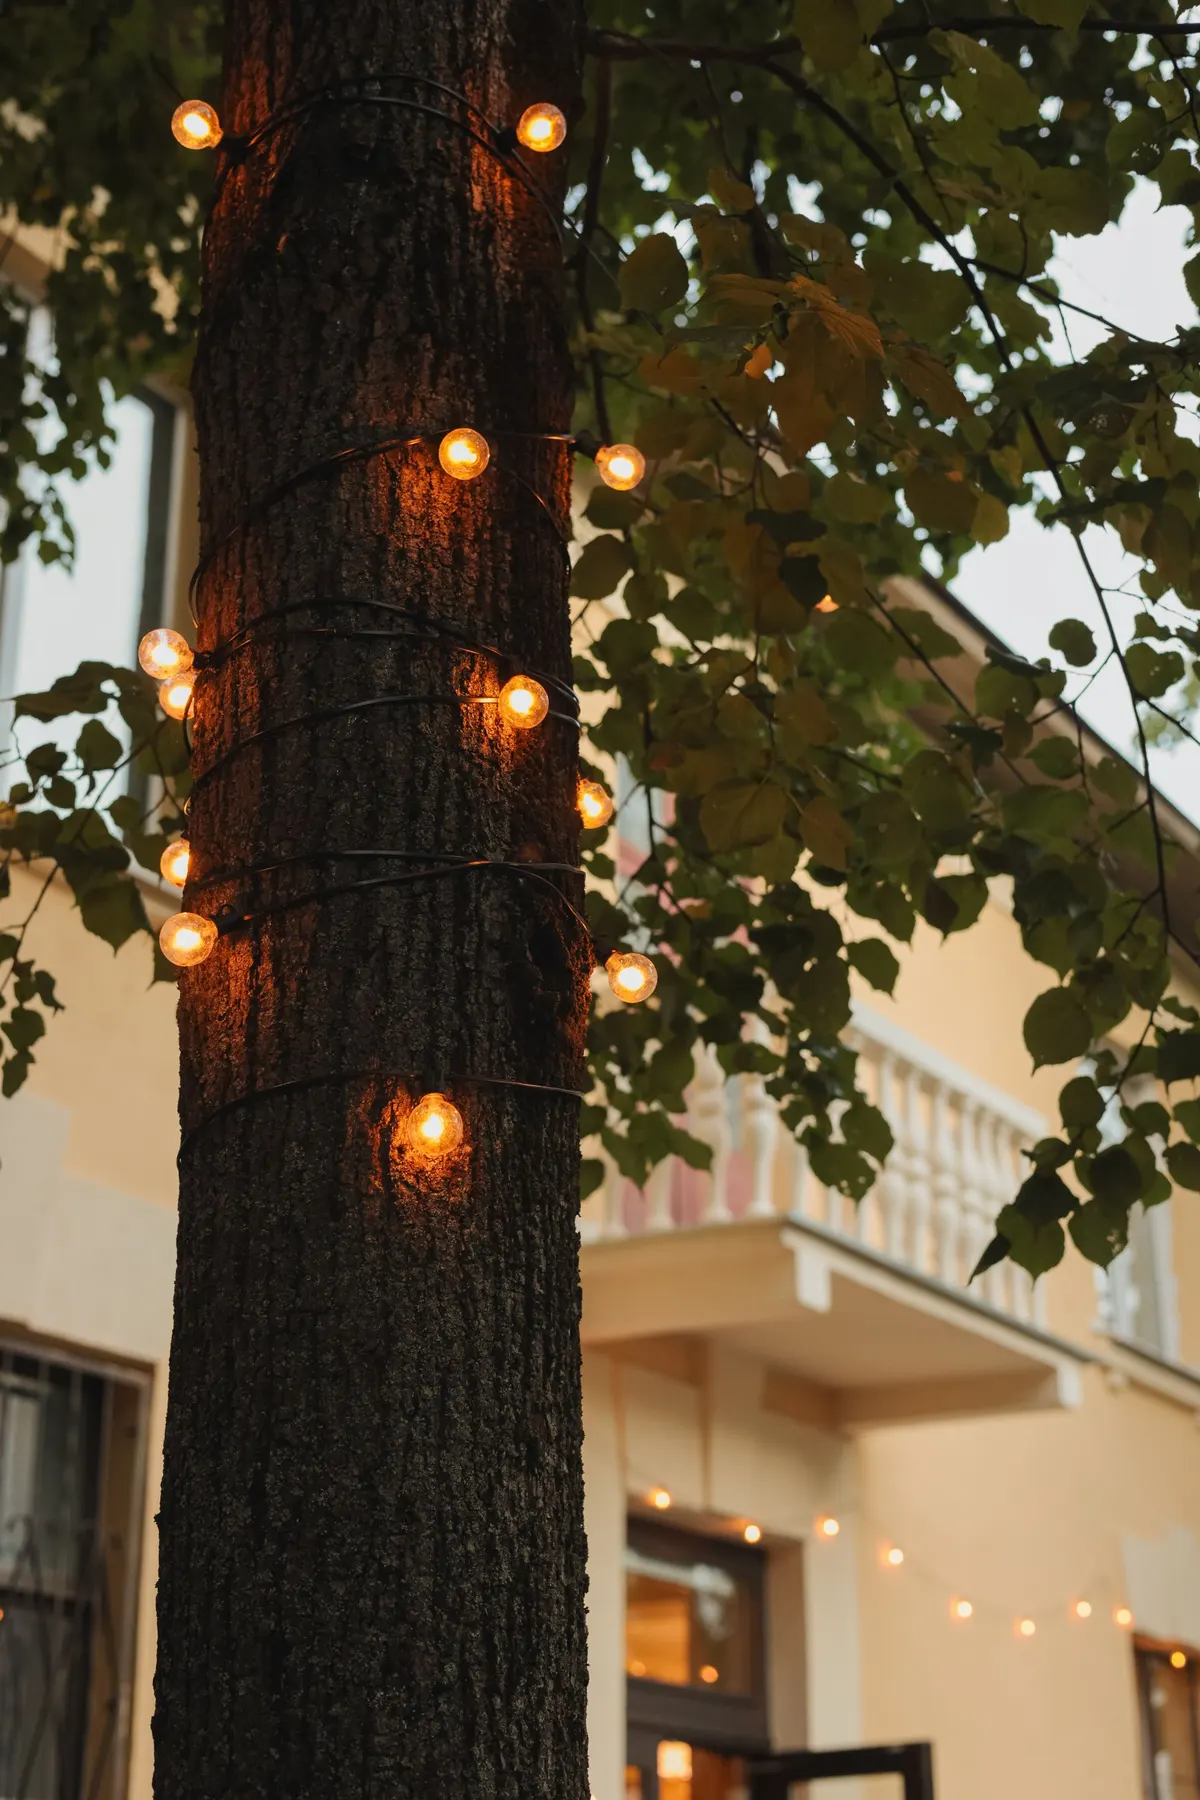
A trunk wrapped in orange globe lights is easy to spot from the street. Start at the bottom, wind the strand upward in a loose spiral with wraps about 6 inches apart, and keep the plug end near an outlet. Dark wire blends into dark bark, so only the bulbs show.
Choose an outdoor-rated LED strand, wrap loosely so the bark can grow, and never staple through the cord. Add a timer set to dusk. Spiral wraps use much more strand than the trunk's height, so measure the wraps before you buy. Easy, 30 minutes.
5. Bats flying on fishing line
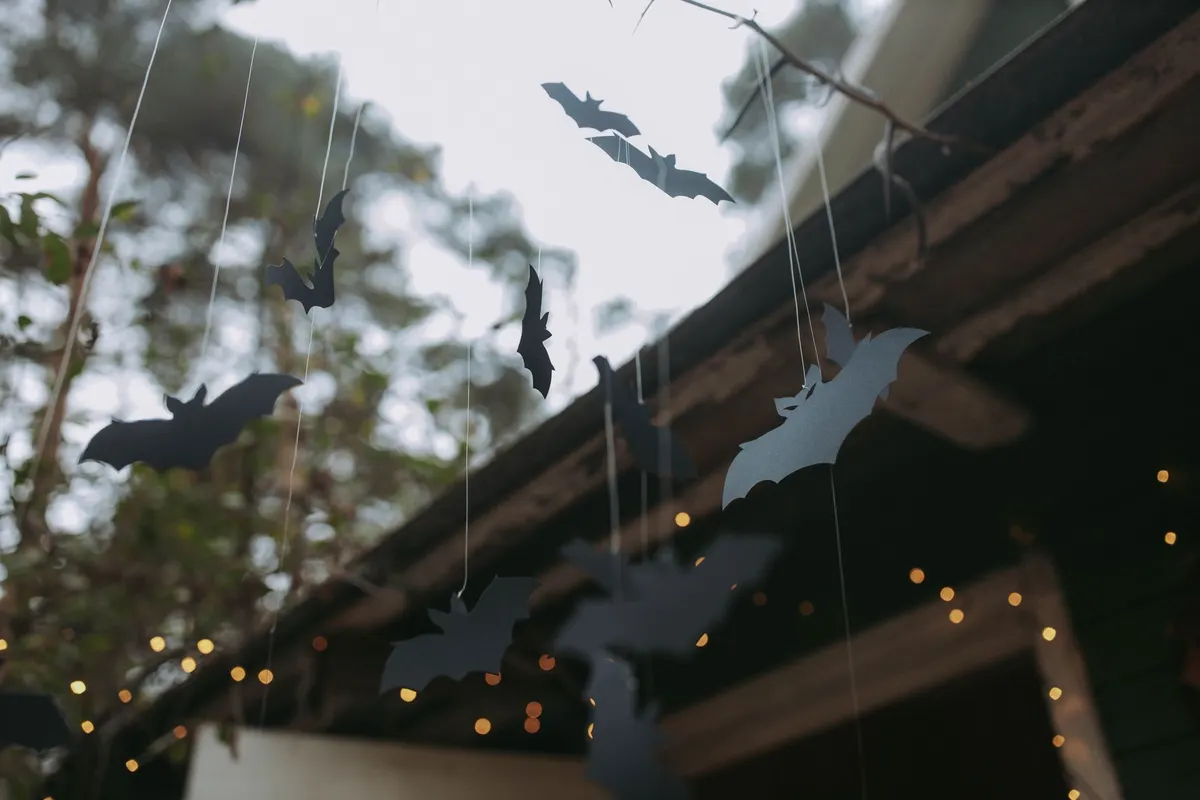
A dozen bats in three sizes read as a swarm when they hang at uneven lengths. Cut wingspans of 6, 9 and 12 inches from black craft foam or corrugated plastic, which survive dew where paper turns to mush. Tie each to clear fishing line and hang them 4 to 24 inches below a branch or roof edge.
Tuck a strand of tiny warm lights along the fascia or branch behind them, so the bats show as silhouettes. This is a good townhouse option, since a porch roof is enough. Easy, about 45 minutes.
6. Paper bag luminaries along the walk
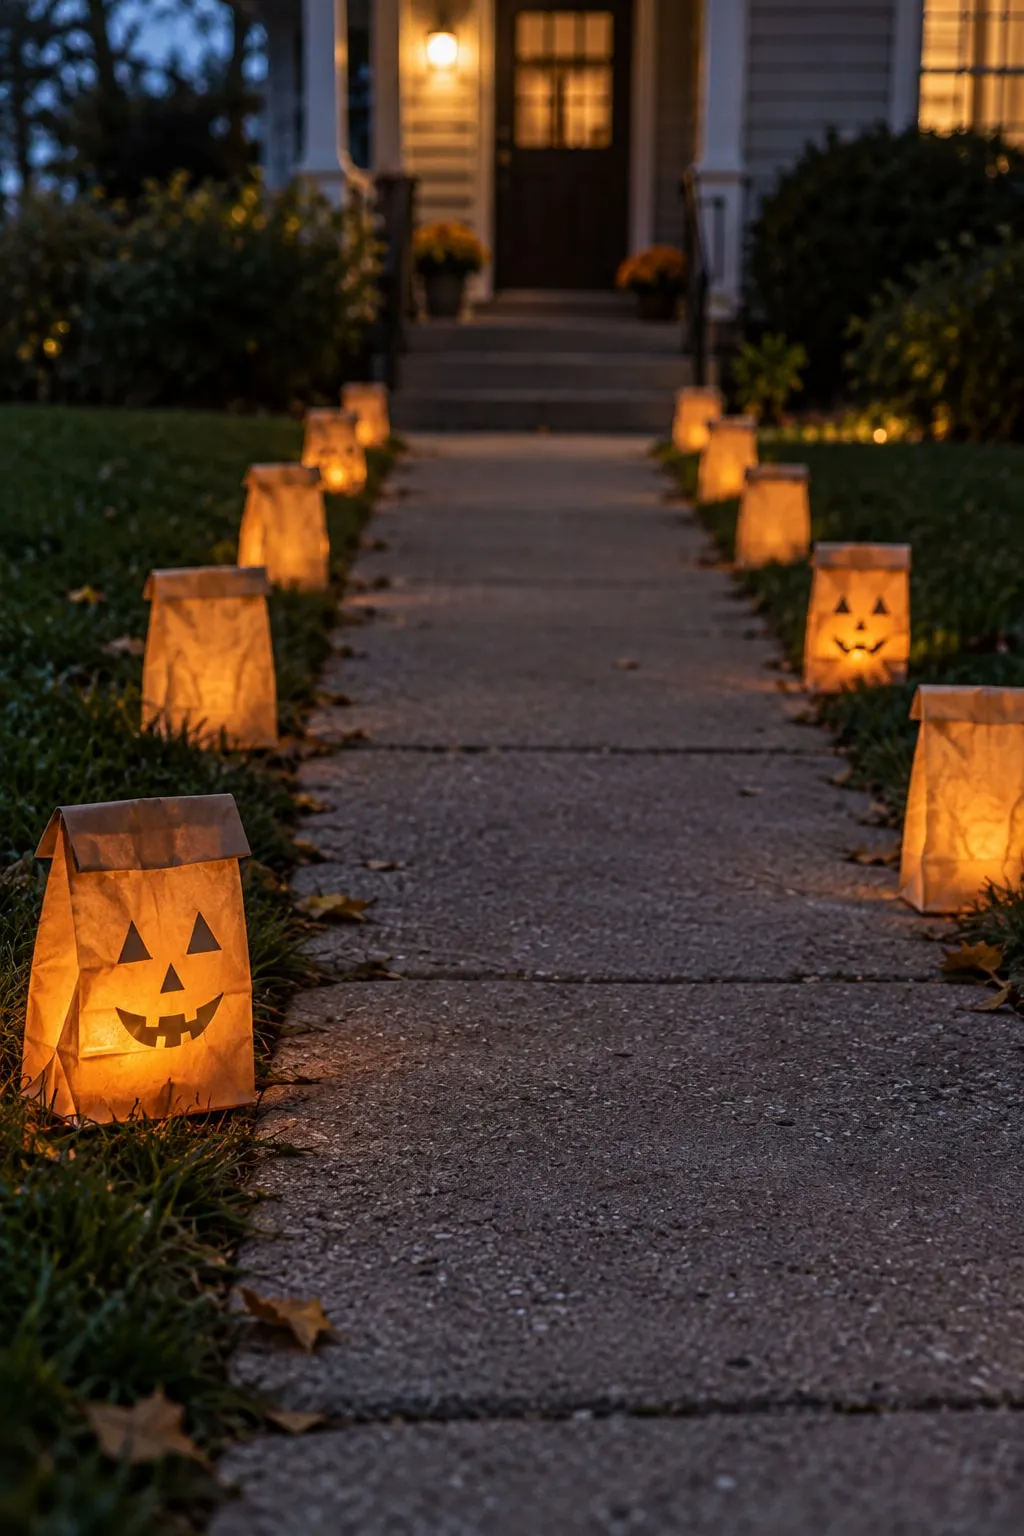
Five brown paper lunch bags on each side line about 12 feet of walkway when spaced 3 feet apart. Pour 2 inches of sand into each bag, fold the top over once, and set a battery tea light on the sand. An adult can cut triangle eyes and a jagged mouth into a few bags for jack-o'-lantern faces.
The sand holds them down in a breeze. Use these on dry nights only, because wet paper collapses, and skip real candles. Ten bags cost very little, which makes this a strong budget way to light a path. Easy, 20 minutes.
7. Stake lights edging the path
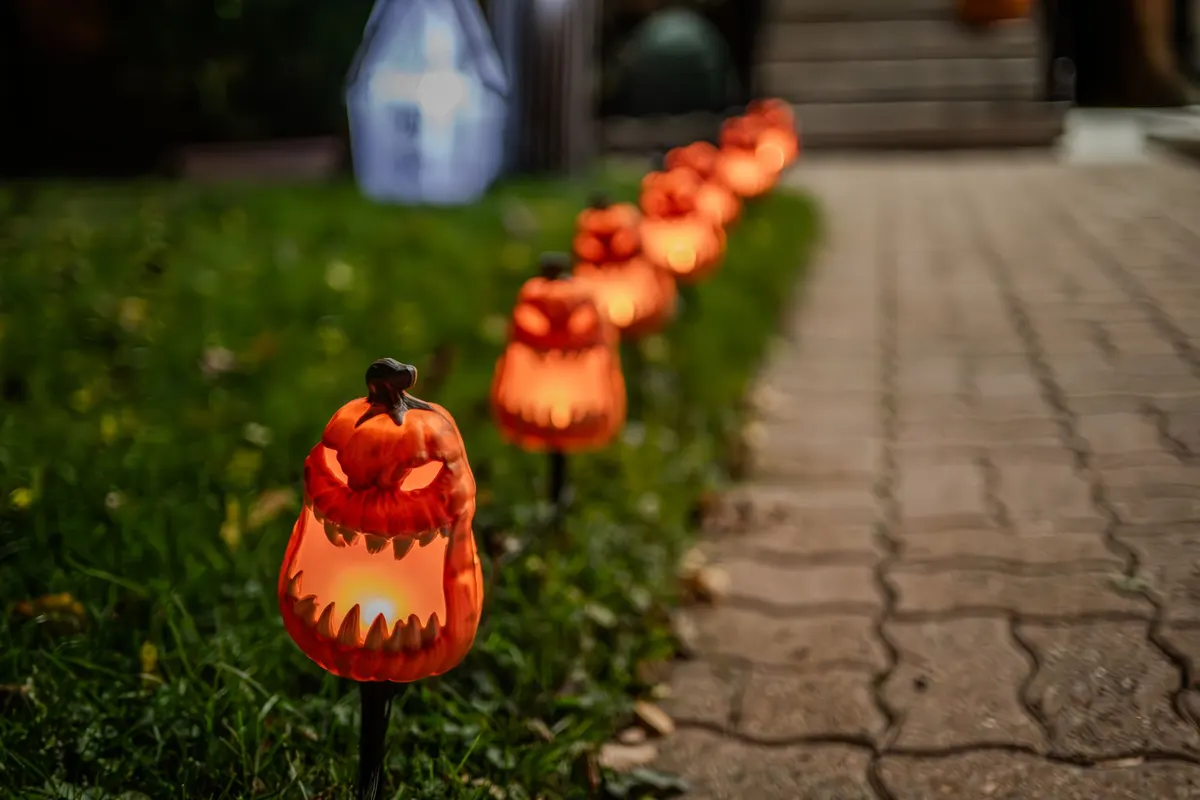
About eight pumpkin-shaped stake lights with glowing mouths, set 2 feet apart in the grass along a paved path, mark where to walk without a single cord. Push each stake in at the lawn edge, not on the paving, so shoes and the mower miss it.
Solar stakes need a full day of sun to run at night, and battery ones need fresh cells. Test them the day before Halloween. These work for a short city walk or a long driveway alike, since you only add more stakes. Easy, 10 minutes.
8. Milk jug ghosts in a garden bed
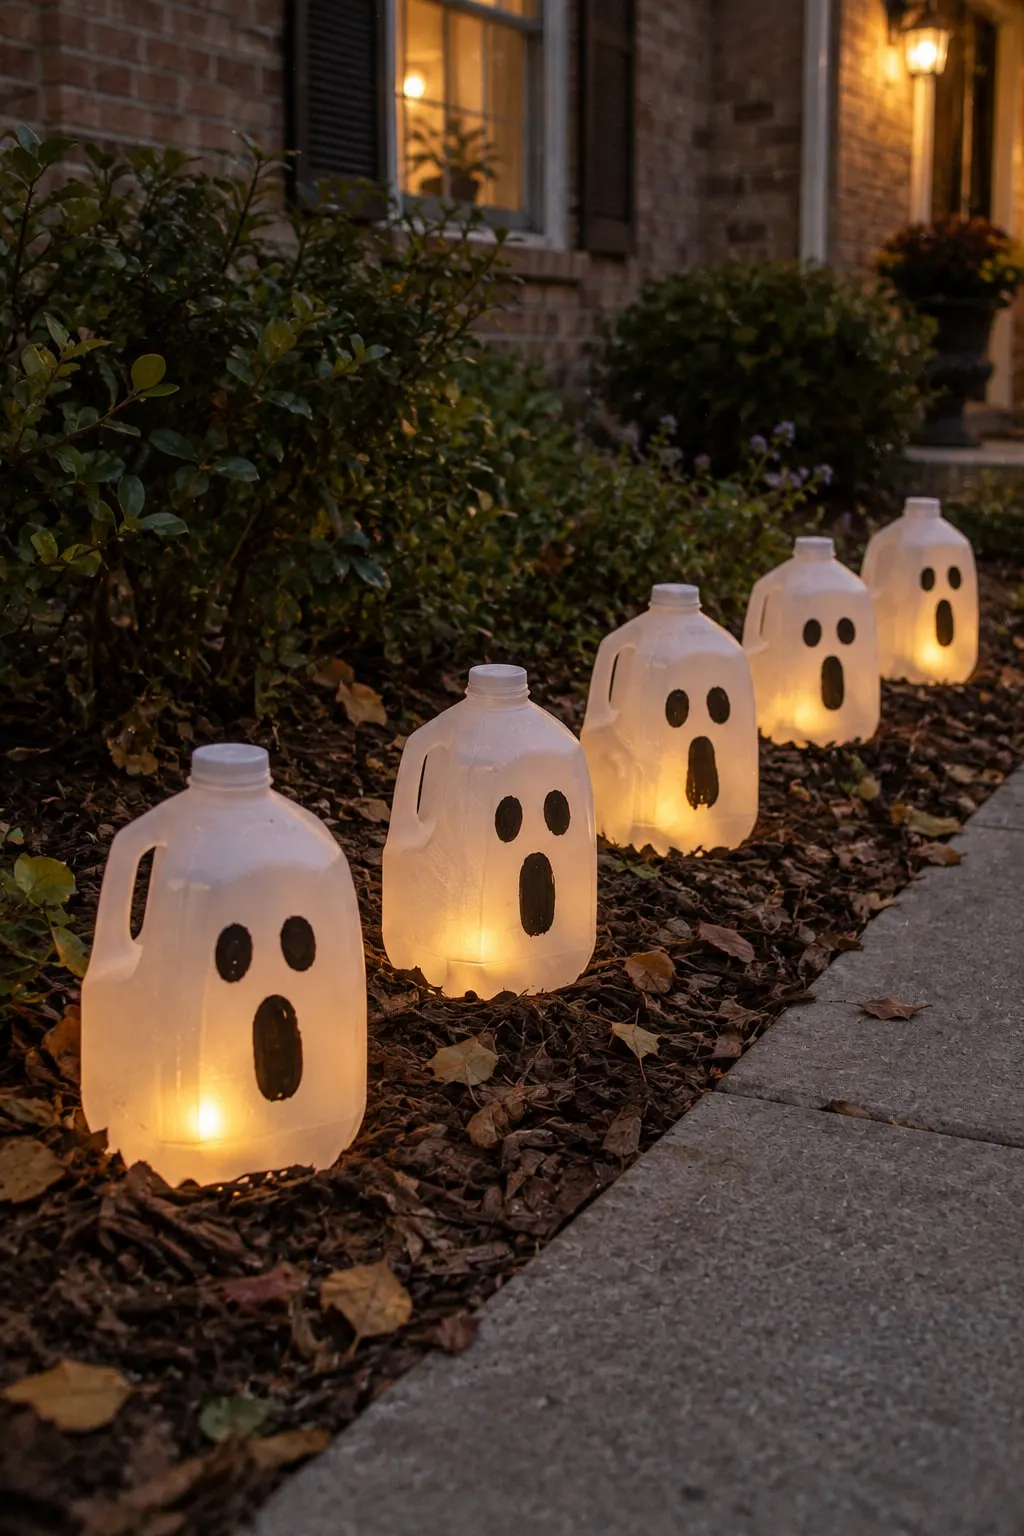
A row of five glowing jugs costs almost nothing. Rinse empty gallon milk jugs, peel off the labels, and draw oval eyes and a long open mouth with a black permanent marker. Put a cup of sand in the base, then a battery light inside, and screw the cap on.
Set them 18 inches apart along a bed or walkway with the faces pointed at the sidewalk. The sand and the closed cap keep them upright in wind, and the plastic doesn't mind a damp night. Easy, about 15 minutes each.
9. A mini graveyard on the lawn
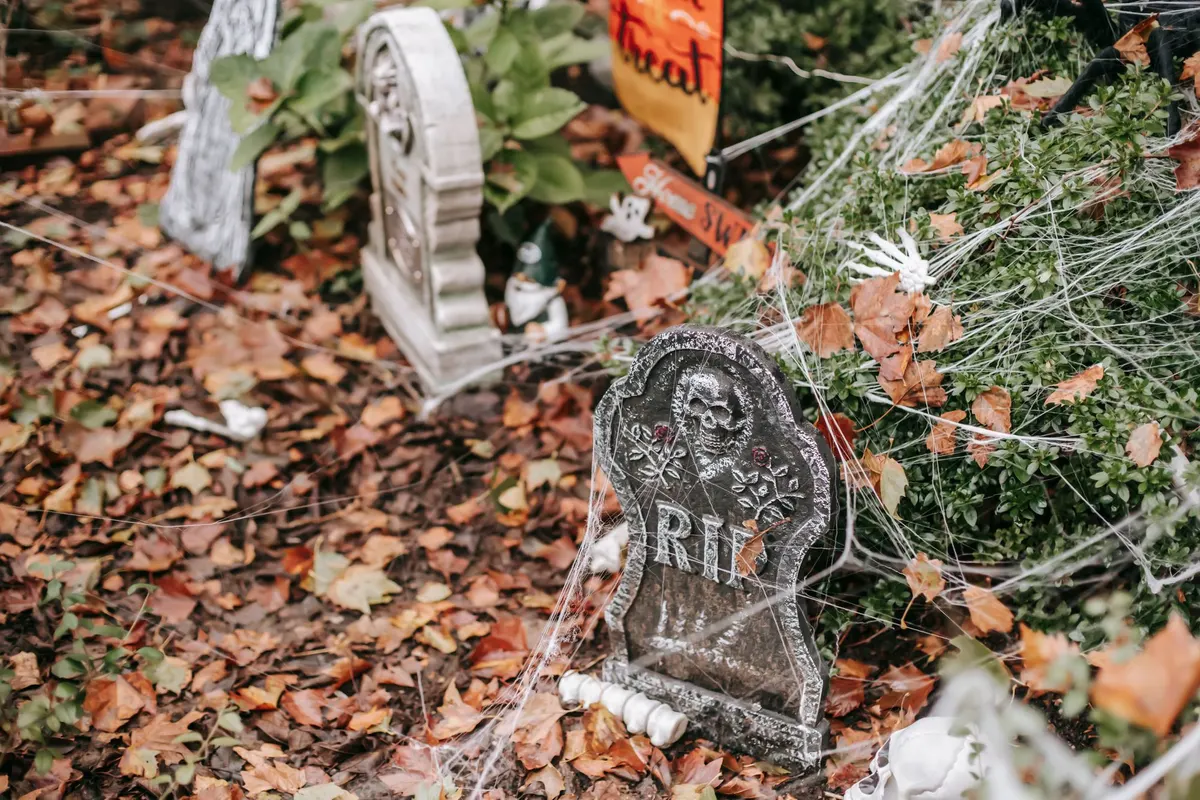
Three gray headstones are enough. Set one tall stone behind two shorter ones, 10 to 24 inches high, and stagger them instead of lining them up. Add fallen leaves, a few skeleton hands and a thin pull of cobweb over the tops.
To make stones, cut rigid foam insulation board with a serrated knife, paint it gray with acrylic (spray paint can melt foam), then dab on black and green. Push two 12-inch stakes through the back of each. Medium, 2 hours plus drying.
10. Coffin sign on the fence
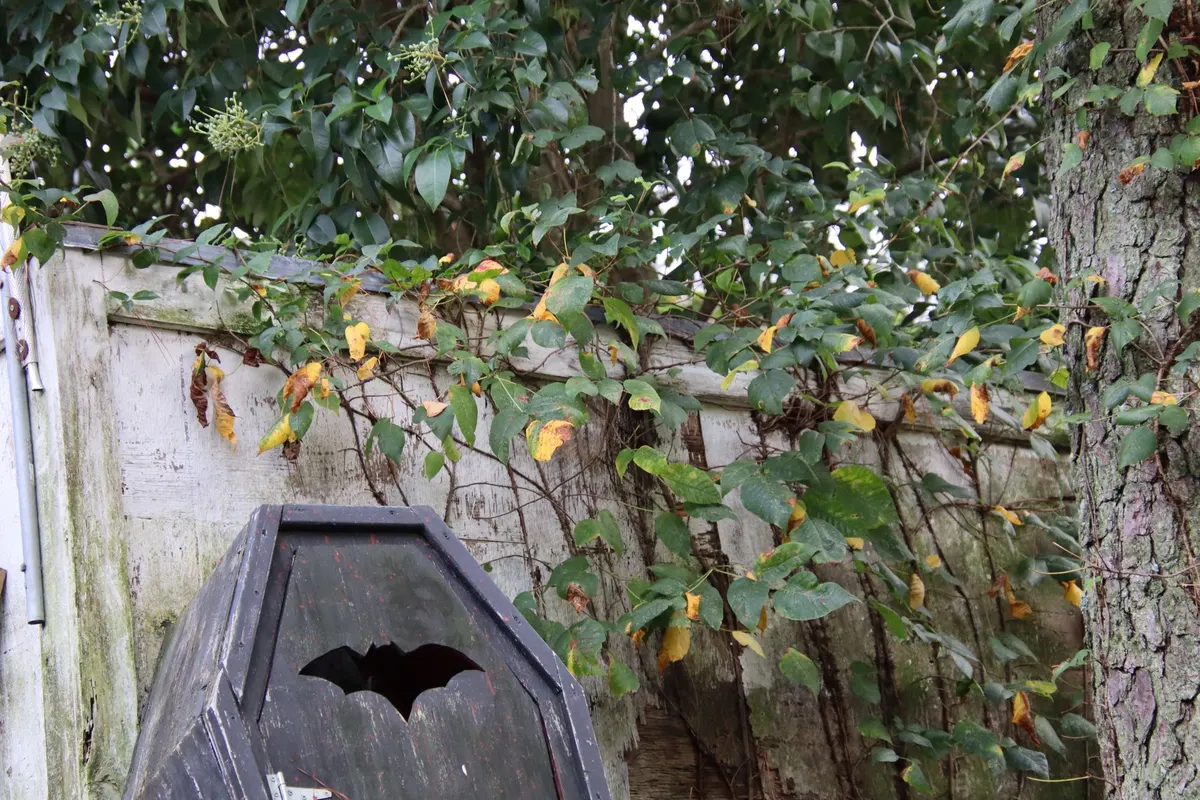
A coffin-shaped sign leaning on a fence looks scarier than its size. Draw a coffin about 30 inches tall and 14 inches wide at the shoulders on plywood or corrugated plastic, and have an adult cut it with a jigsaw. Paint it charcoal and add a bat silhouette in black.
Prop it with two stakes behind it, or screw it to a fence post. Sand the edges to prevent splinters. Corrugated plastic is lighter and handles rain better than thin plywood. Medium, 2 hours plus paint drying.
11. Tombstone tied to a gate
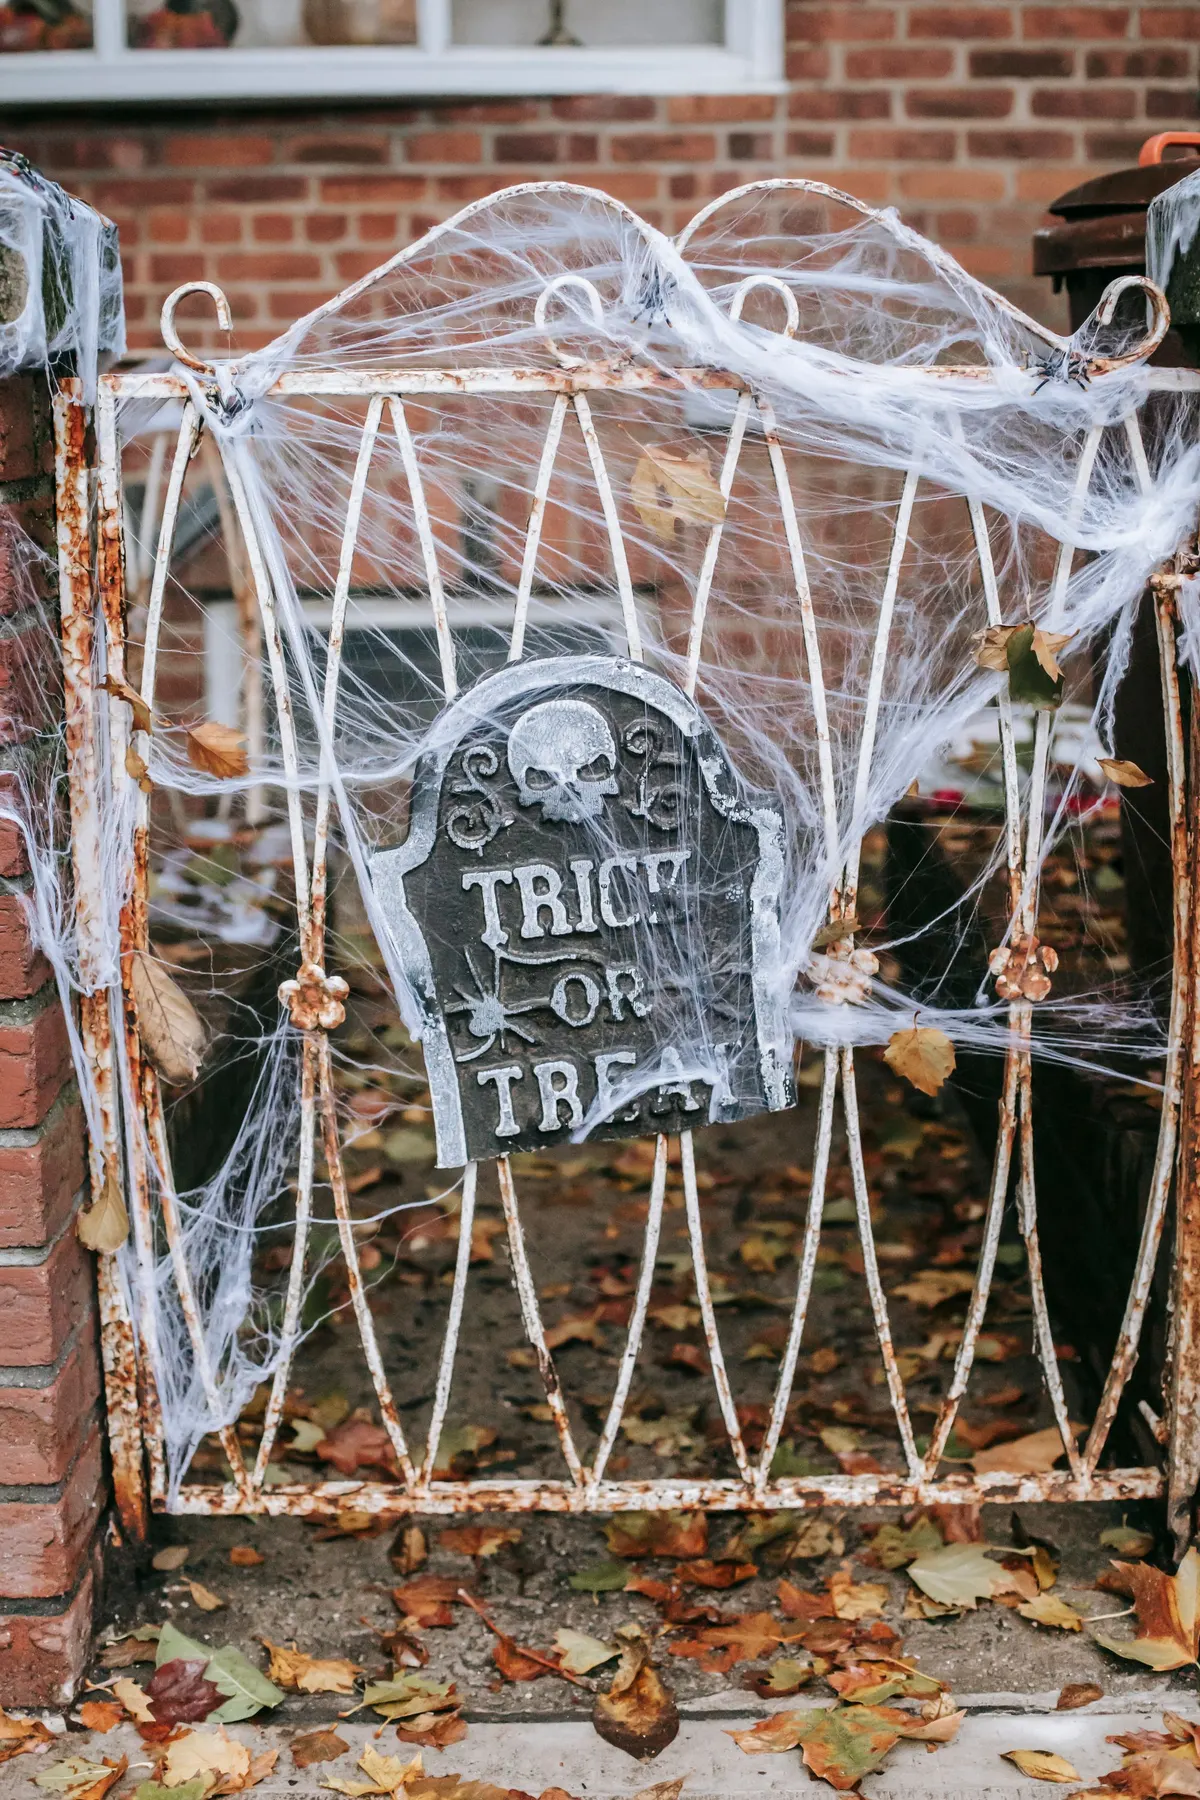
A small foam tombstone with a skull can hang on a gate with zip ties, so it needs no lawn and no stakes. That suits townhouse stoops and apartment gates. Cut it about 12 by 18 inches, paint it gray, and write a message such as "Trick or Treat" in black.
Wrap thin cobweb around the gate bars and add a few leaves. Zip ties come off in seconds afterward, with no drilling. Seal paint with a clear coat if rain is likely. Easy, 30 minutes.
12. Cornstalks and webs on a fence
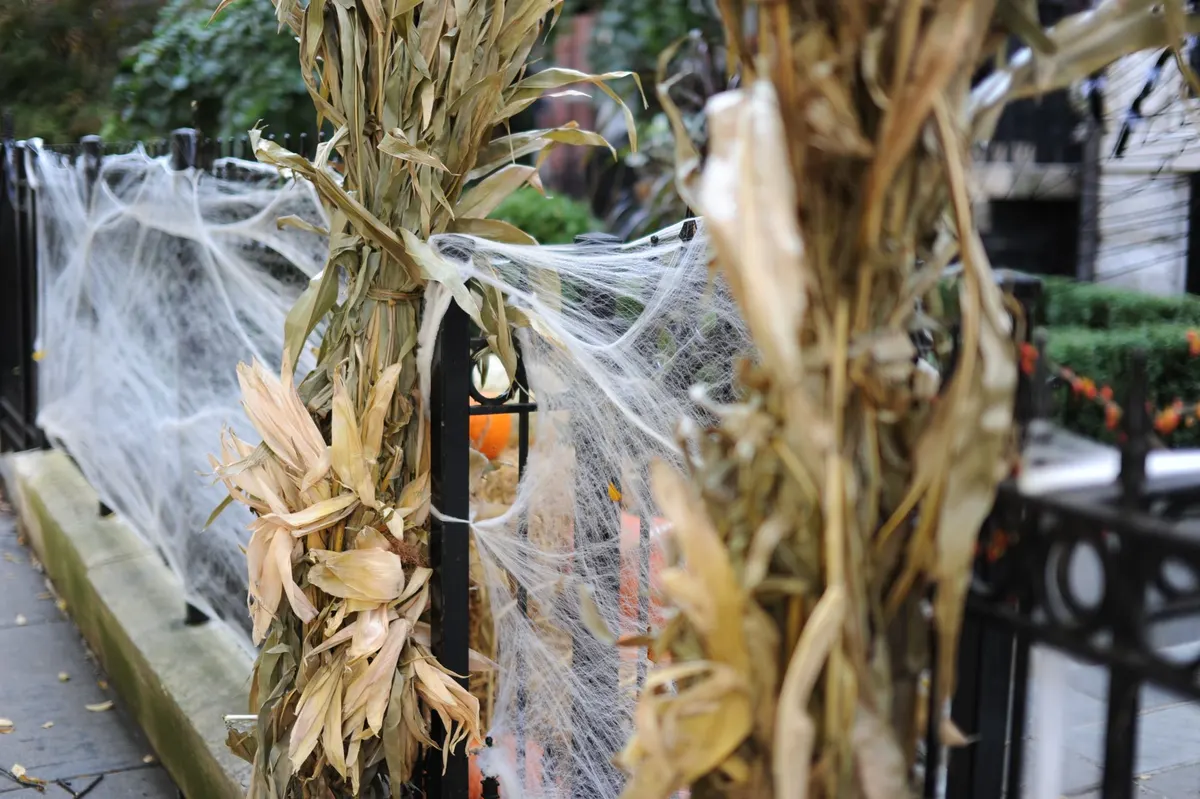
Two bundles of dried cornstalks tied to a black metal fence set a harvest scene before any Halloween prop is added. Tie each bundle of five to seven stalks with twine at the middle and top, then zip-tie it to the fence posts.
Stretch white cobweb between the bundles, pulled thin so it looks airy. Dry stalks burn fast, so use battery lights only near them. Afterward the stalks can go to the compost. Easy, 20 minutes.
13. Spiders and black webbing on siding
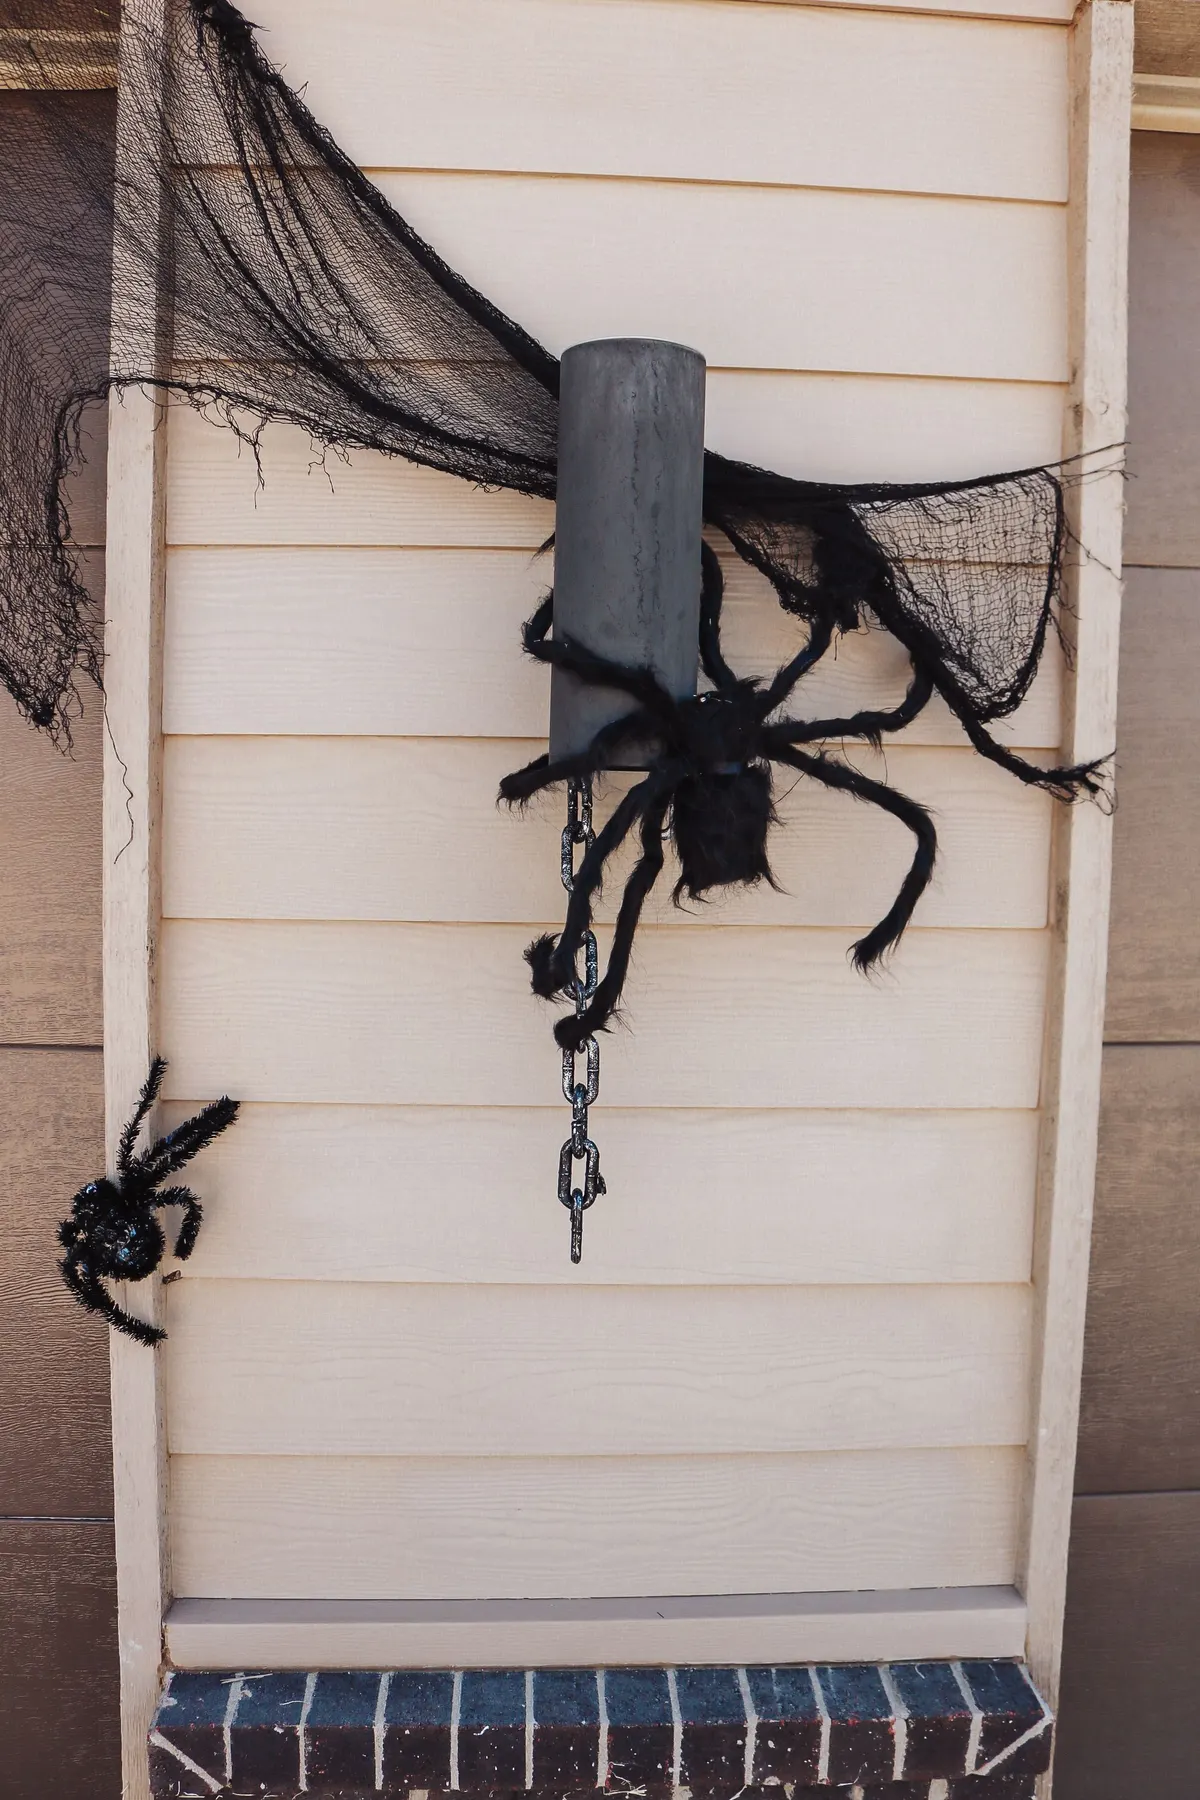
Black webbing on pale siding stands out from the street. Stretch it across a high corner, then place two large spiders in the web. Anchor the corners with removable outdoor hooks or zip ties around a rail, not nails.
Keep it away from bulbs and wall lights. Webbing can trap birds and small animals, so pull it thin and take it down right after Halloween. A matching row of spiders along the porch rail extends the idea for about the same effort. Easy, 30 minutes.
14. One giant skeleton and a crowd of small ones
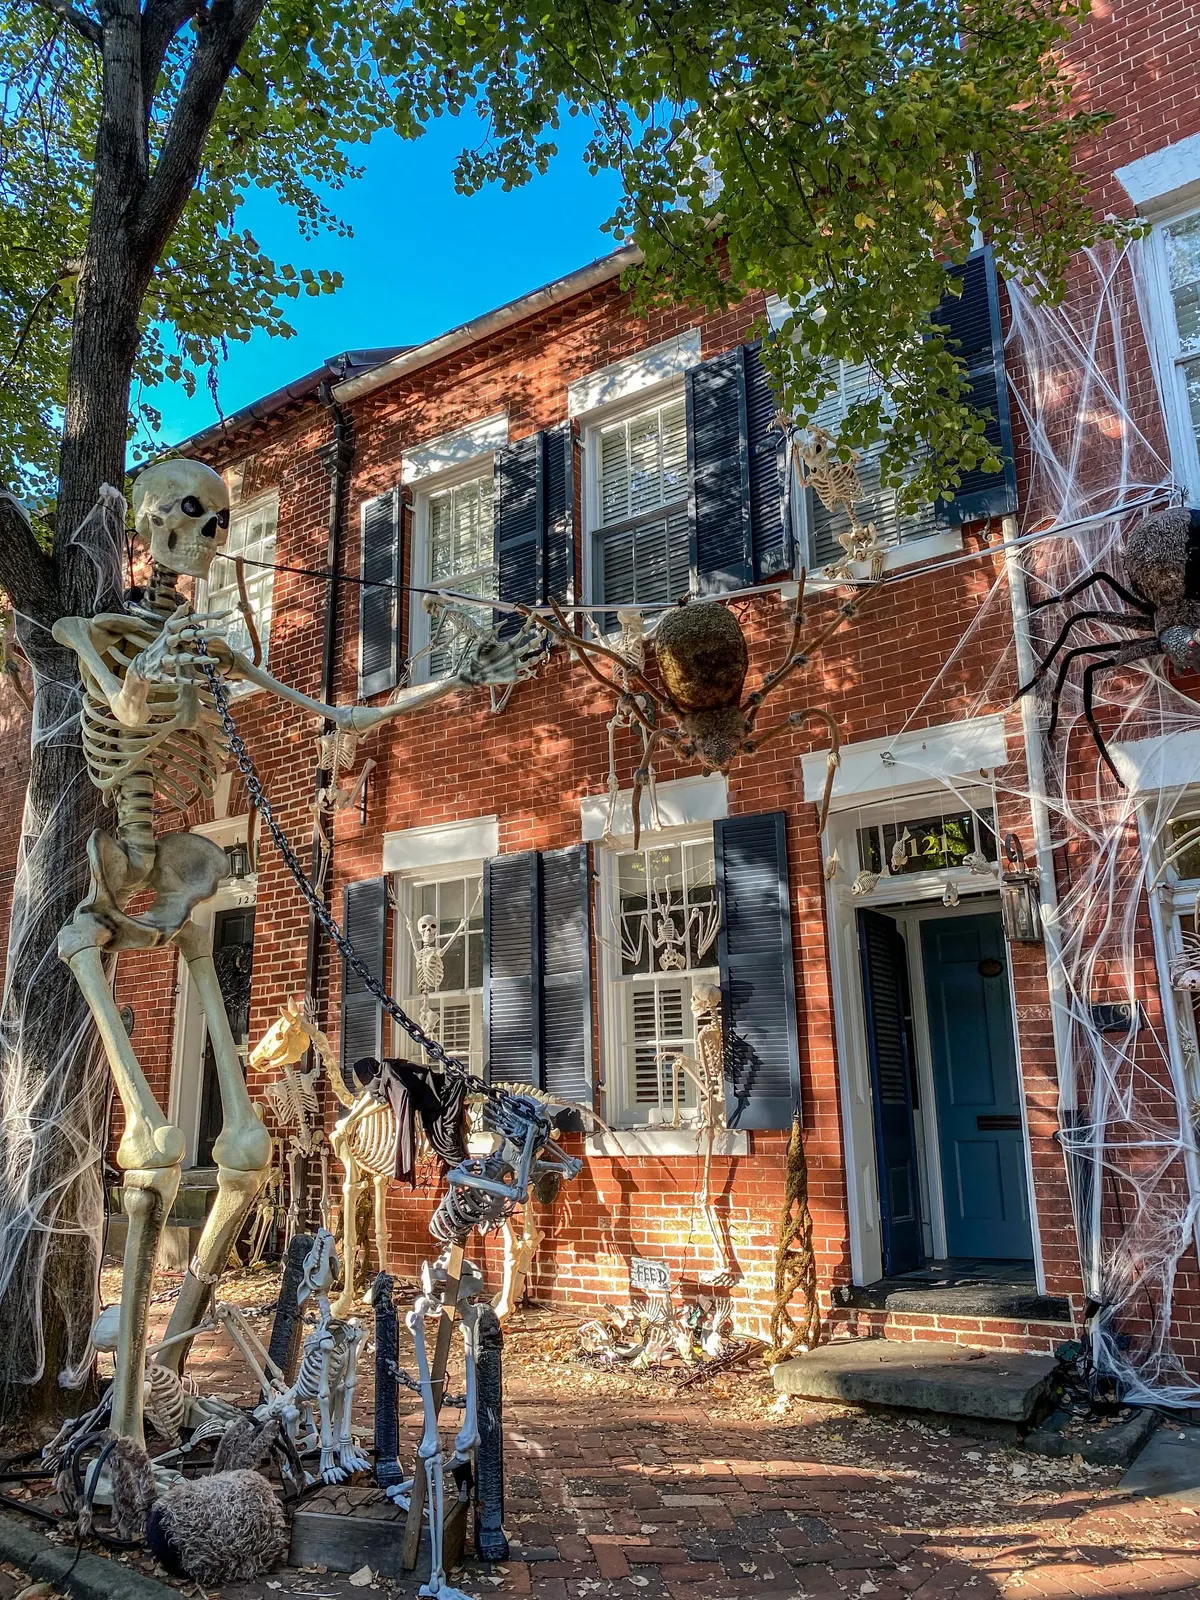
For haunted house ideas on a budget, a crowd works better than one expensive prop. Seat an oversized skeleton against the house, then group ten or more small skeletons in the front bed at different heights. Add a few large spiders and cobweb across the porch and brick.
Tall figures need two ground stakes and a guy line each. A second adult should steady any ladder. Zip-tie smaller skeletons to the railing so they don't blow into the road. Hard, a weekend build.
15. Skeleton on the lawn with a purple spotlight
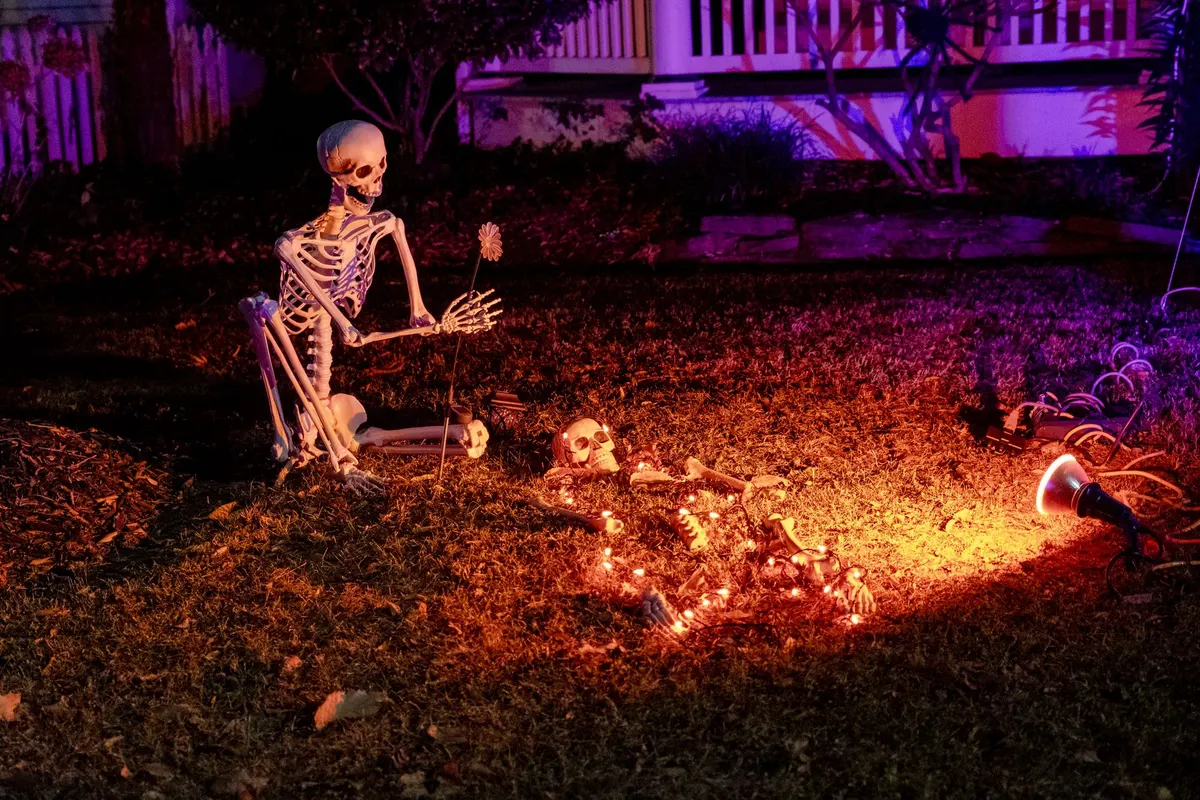
One skeleton on the lawn is enough if the lighting is right. Scatter a skull and a few bones around it, wrap orange string lights around the porch rail, and aim one purple spotlight from the side.
Set the spotlight about 6 feet away and tilt it up at the skeleton, so the beam never shines at people on the walkway. Tie the skeleton to a stake and keep the plug off wet grass. This is a good one-prop yard for a small lot. Easy, 30 minutes.
16. Balcony skeletons watching the street

Two skeletons posed on a balcony look like neighbors watching the street. Zip-tie each one at the waist and shoulders to a post or rail, pose them side by side, and face them toward the sidewalk.
This is a renter option, since nothing needs drilling. Check that the rail is solid before you load it, and remove anything that could fall on a passer-by. If the balcony is shaded, add a battery spotlight clipped to the rail, aimed at them. Easy, 20 minutes.
17. Inflatables for a small fenced yard
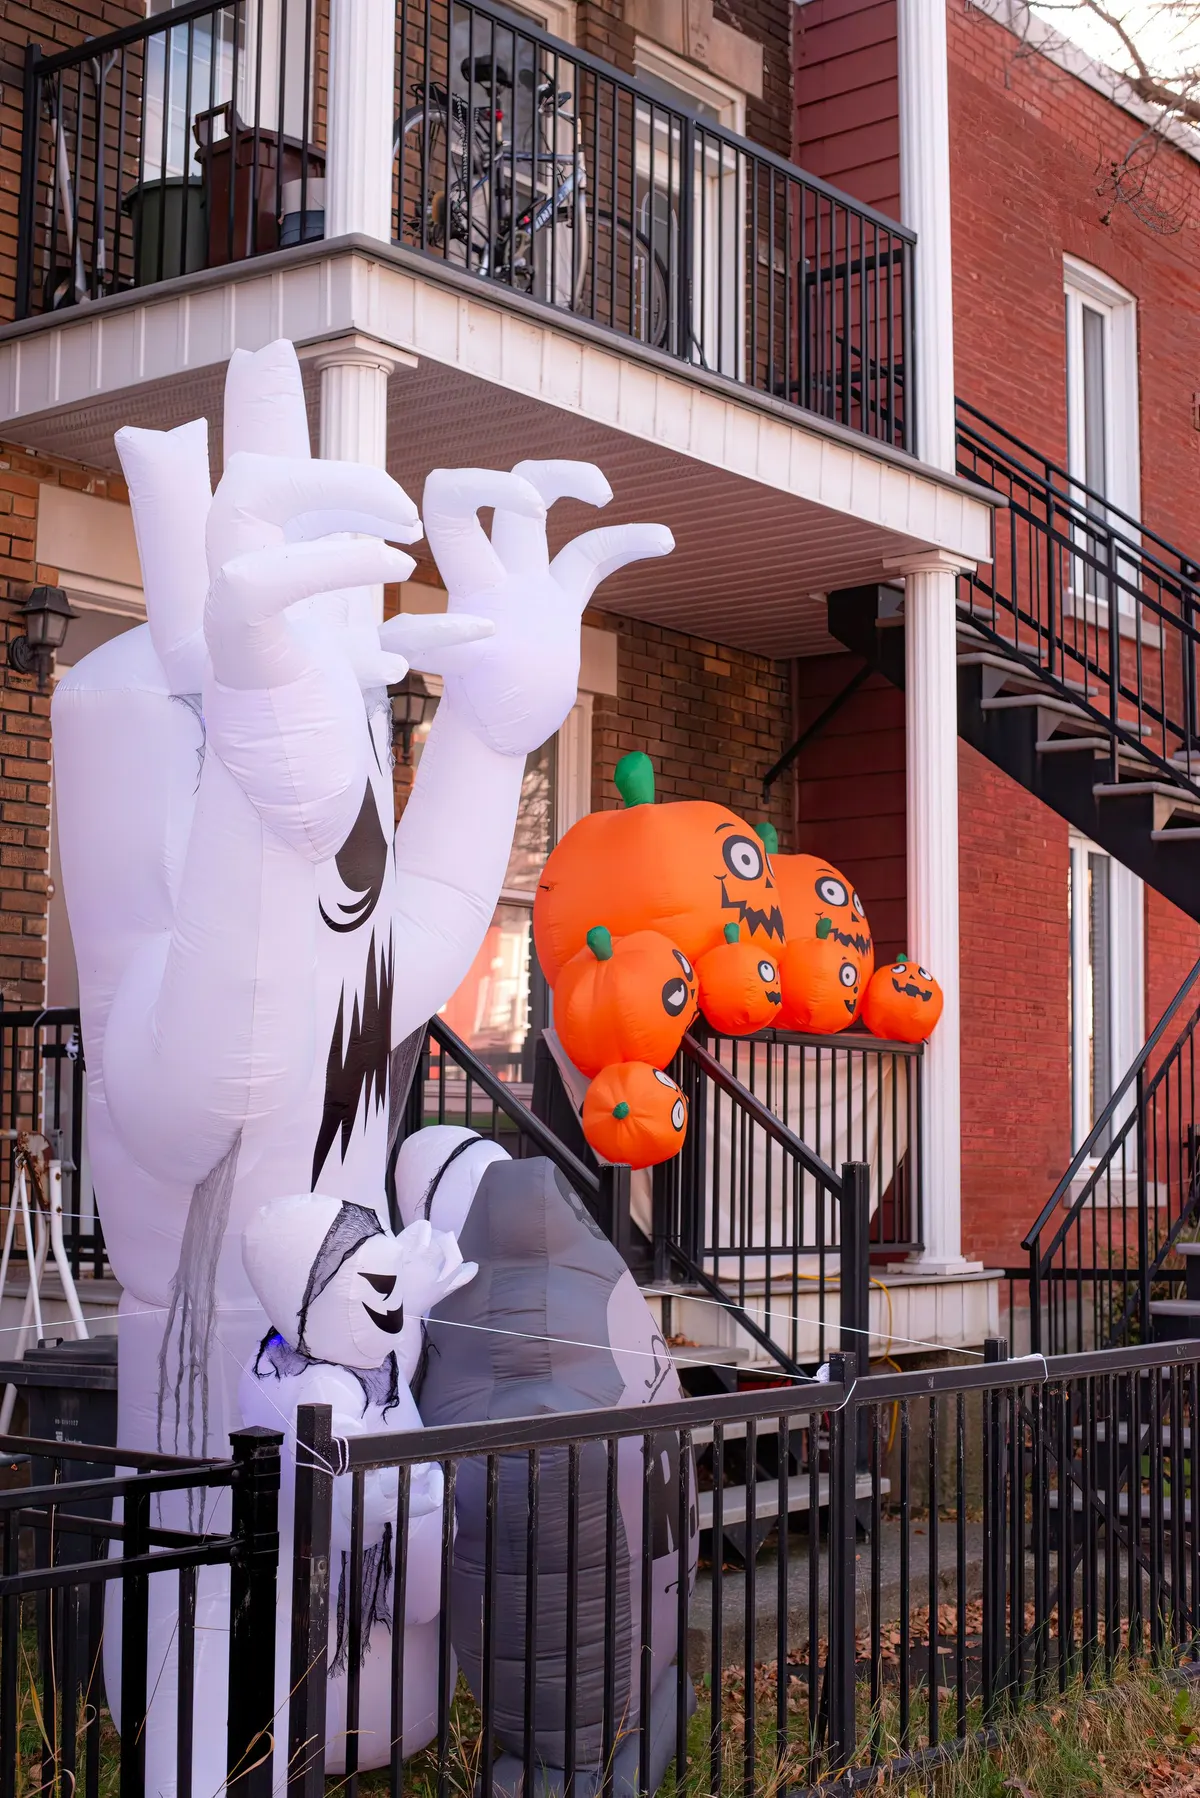
A tall inflatable tree, a small ghost, a pumpkin cluster and a gravestone fill a small front yard fast. Use every tether and stake, and run the outdoor-rated cord along the fence base, away from the walkway.
Put them on a timer so they inflate only after dusk, and unplug them in strong wind, because they act like sails. Leave 3 feet between the display and the path so kids can pass. Easy, 15 minutes plus a few minutes to deflate and dry before storing.
18. Scarecrow with a pumpkin head
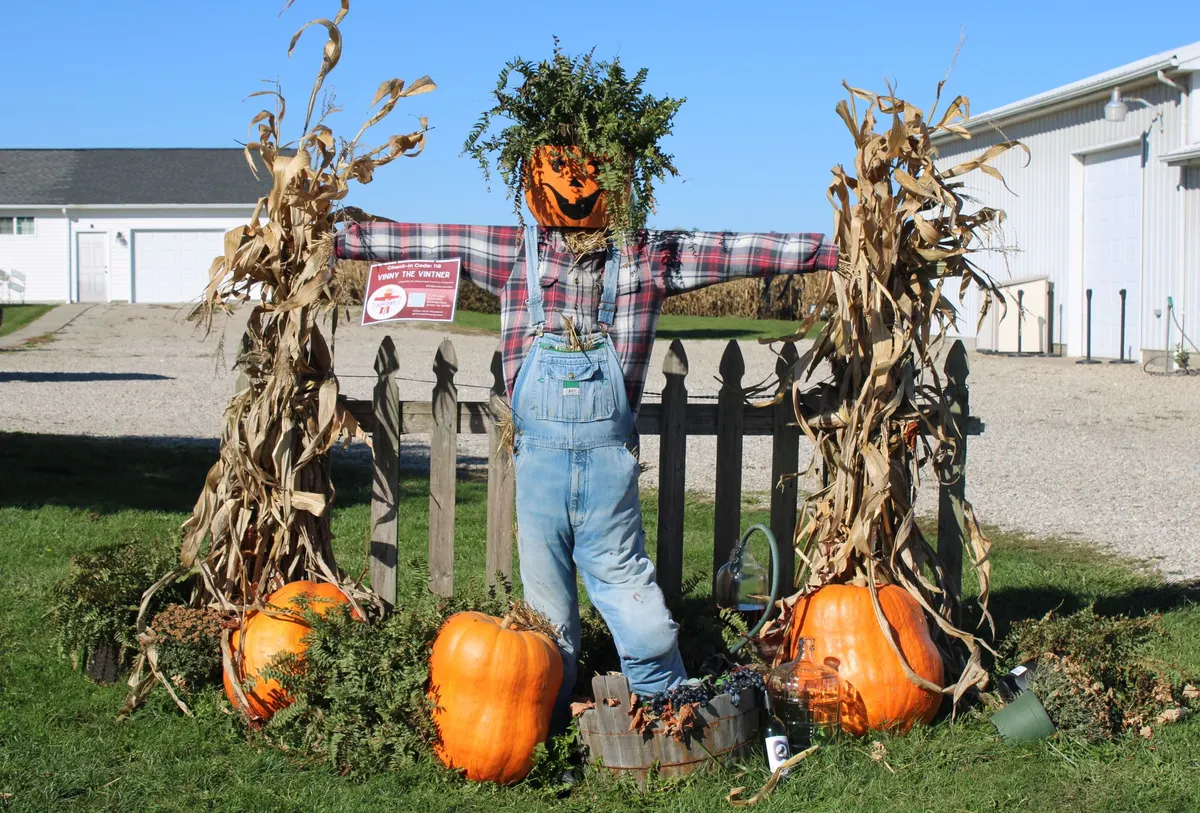
An old plaid shirt and overalls become a yard scarecrow. Stuff them with straw, leaves or newspaper and tie the cuffs shut. Drive a 5-foot stake 1 foot into the ground, slide the body over it, and top it with a pumpkin.
A real pumpkin head softens in a week or two, so use a faux pumpkin for a longer run. Surround it with cornstalk bundles and a few pumpkins, as shown here. Newspaper stuffing sags in rain, so choose straw or plastic bags. Easy, about an hour.
19. Witch legs sticking out of a pot
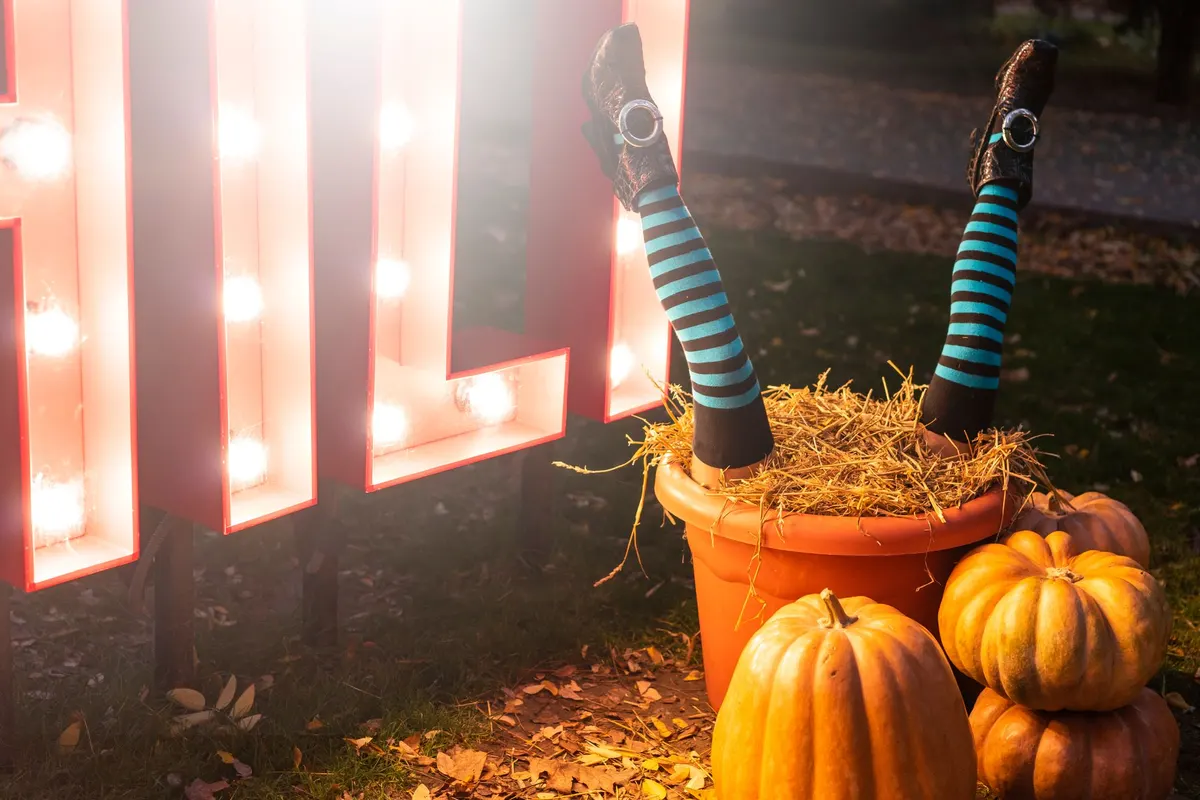
A pair of striped witch legs poking out of a pot of straw is a cheap prop that gets a laugh. Stuff striped tights with two pool noodles or plastic bags, slip buckled shoes on the ends, and stand the legs in a large pot.
Weigh the pot down with bricks, then cover them with straw. Add a few pumpkins around it. Keep the whole thing away from fire pits and candles. Easy, about 40 minutes.
20. Hay bale seating for a backyard party
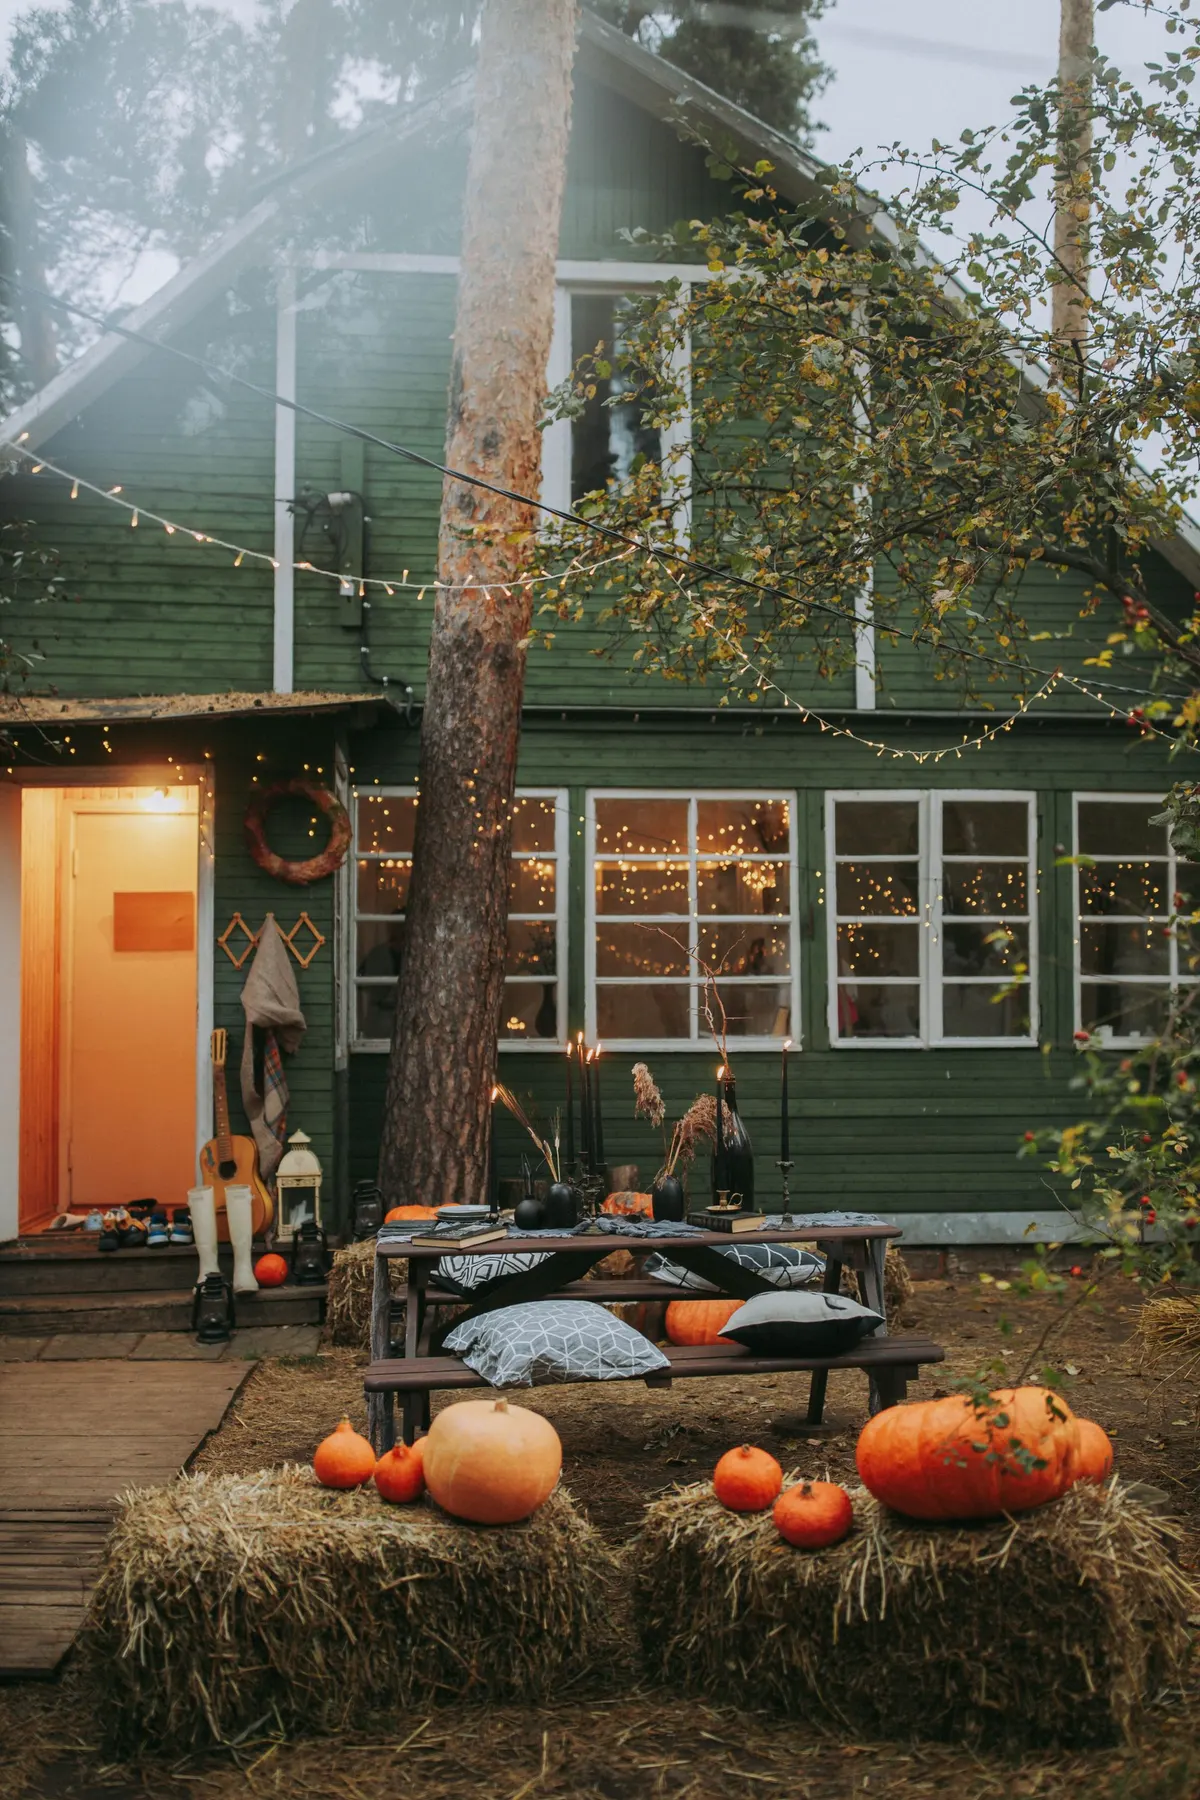
Hay bales make a bench for a backyard gathering. A standard small bale is about 14 by 18 inches across and 36 inches long, so two end to end seat a few people. Add cushions, a picnic table, a few pumpkins and a strand of string lights.
Keep hay and dried stalks 10 feet or more away from fire pits, grills and heaters, and use battery lights only. Wet hay molds, so cover it with a tarp if rain is forecast. Medium, about an hour.
21. A purple window glow
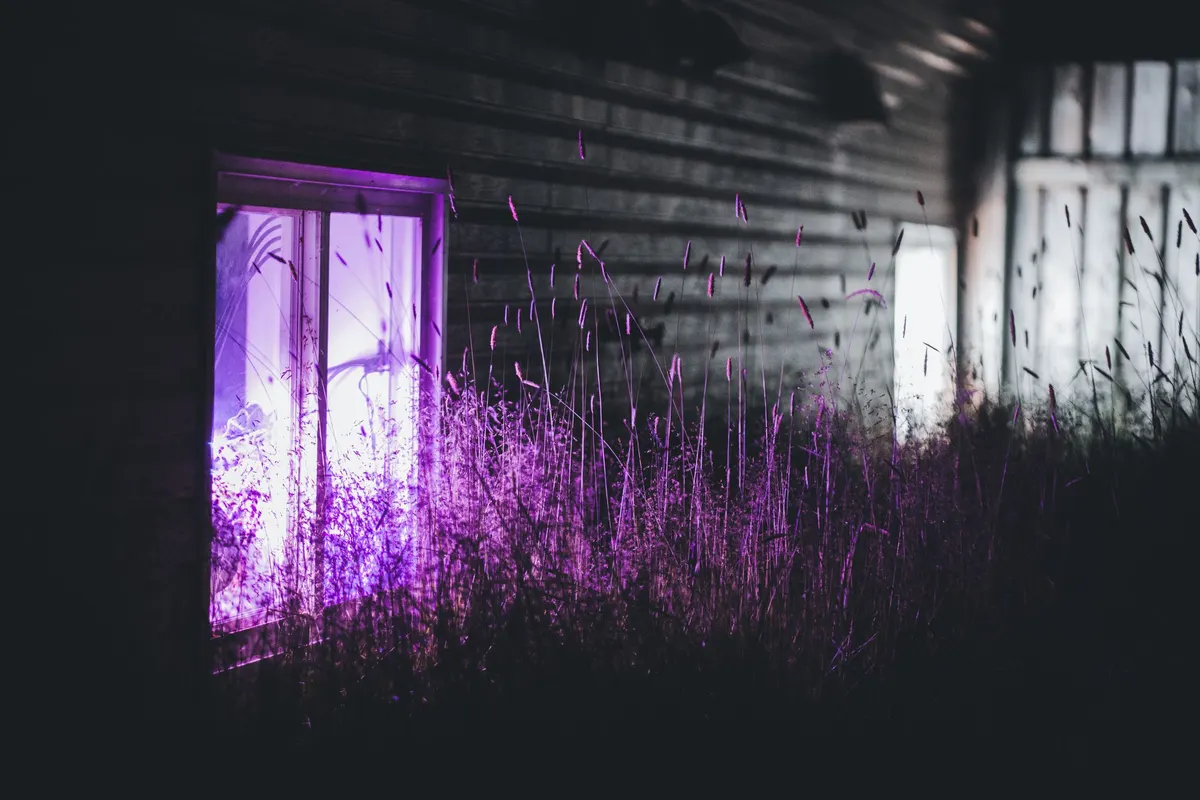
A single violet window on a dark wall makes the house look haunted from the street. Put a purple LED bulb in a lamp near the window, switch off the other lights in that room, and add a purple uplight in the grass out front.
Nothing attaches to the outside, so this suits renters. Use LED bulbs only, because colored paper or fabric over a hot bulb can scorch. It also works on a townhouse window right on the sidewalk. Easy, 15 minutes.
Final tips
- Light the path and steps first, then add the spooky effects.
- Keep cords off the walkway, and use outdoor-rated cords on a GFCI outlet.
- Anchor everything with stakes, zip ties or weights, and bring in paper and fabric before rain.
- Use battery lights, not flames, near straw, cornstalks and webbing.
- Take decorations down within a few days after Halloween so wind doesn't scatter them. More ideas are in our Halloween hub, outdoor ideas and carved pumpkin ideas.
Frequently asked questions
How do you keep outdoor Halloween decorations from blowing away?
Anchor every light prop at two points. Push stakes through the legs of foam tombstones, tie tall pieces to a fence or railing with zip ties, and weigh inflatables with all of their tether stakes or sandbags. Put sand or gravel in the bottom of jugs and bags. Hang bats and ghosts on fishing line from sturdy branches, not twigs. If a storm with strong gusts is forecast, bring in anything that can fly.
Can Halloween decorations stay outside in the rain?
Plastic, foam, painted wood and corrugated plastic usually handle rain. Paper bags, cardstock, cheesecloth and cotton webbing go limp, so use them only on dry nights or bring them in. Lights need to be marked for outdoor use, and the plug and cord joints should sit up off wet ground, ideally under a cover or in a weatherproof box. Dry everything before storing it, or foam and fabric will mildew.
Is it safe to run extension cords for outdoor Halloween lights?
Use cords labeled for outdoor use and plug them into a GFCI-protected outlet. Check the strand packaging for how many sets can be linked, and don't plug a cord into itself beyond that. Keep plugs off wet grass, never run cords across a walkway where people step, and don't staple through the cord. Unplug when you leave for the night if you aren't on a timer, and use LED strands, which run cooler than old incandescent ones.
How should I light a yard for trick-or-treaters?
Light the walking path and the steps first, then add spooky effects. Kids watch their feet and their candy bags, so put a light at every step edge and where the path turns. Keep the walkway at least 3 feet wide and clear of cords, hoses and low props. Skip strobes and fog near stairs. Shine spotlights at a prop from the side, not into the path, so no one gets glare.
How can I decorate outside without a yard or without drilling?
Use the railing, steps, windows and the wall at eye level. Zip ties hold skeletons and bats to balcony rails, adhesive hooks rated for outdoor use hold light weights on smooth siding, and a pair of potted props with battery lights makes a doorstep display. Check your lease or HOA rules first, and take everything down within a few days after Halloween so wind doesn't scatter it.
You might also like
 Halloween
22 Carved Pumpkin Ideas, From Easy Faces to Showstoppers
 Halloween
22 Halloween Door Decoration Ideas for Houses and Apartments
 Halloween
22 No-Carve Pumpkin Ideas: Paint, Fabric, Tape and Stacks
 Fall
Fall22 Fall Porch Decor Ideas for Real Porches and Real Budgets
 Christmas
17 Christmas Door Decorating Contest Ideas (Office & School)
 World holidays
20 Diwali Decoration Ideas for Your Home