22 No-Carve Pumpkin Ideas: Paint, Fabric, Tape and Stacks

Jump to an idea (22)
- Before you start
- 1. Painted cartoon faces
- 2. Marker-drawn jack-o'-lantern
- 3. Black and cream tape stripes
- 4. Glitter face with a paper crown
- 5. Monster in a witch hat
- 6. Pumpkin covered in eyes
- 7. Black and white skull pumpkins
- 8. Pastel trio with glitter dots
- 9. Metallic spray-painted pumpkin
- 10. Hand-painted stripes
- 11. Ombre painted centerpiece
- 12. Chalkboard pumpkin with doodles
- 13. Napkin decoupage
- 14. Dried flower crown
- 15. Twine-wrapped pumpkins
- 16. Knit pumpkins
- 17. Velvet pumpkin
- 18. Fabric pumpkins with felt faces
- 19. Stacked heirloom pumpkins
- 20. Pumpkin stack in an urn
- 21. Dark heirloom grouping
- 22. Ceramic jack-o'-lantern vase
- Final tips
These 22 no-carve pumpkin ideas skip the knife and the slimy scoop. You get painted faces, tape and marker designs for kids, fabric pumpkins you can bring out every year, and stacked arrangements that need nothing but the pumpkins themselves.
Each idea lists supplies, a time estimate and the detail that makes it work. Uncut pumpkins last weeks longer than carved ones, so start in early October. For the knife version, see our carved pumpkin ideas.
Before you start
Pick firm pumpkins with intact stems, and never carry them by the stem. Wash each one with mild soapy water, dry it, then wipe the skin with rubbing alcohol and let it dry so paint and glue grip.
Use acrylic craft paint in two thin coats. A white base coat makes pastels and bright colors read true on orange skin. Spray paint and clear sealer go on outdoors only. Adults handle the low-temperature glue gun. Skip pins and tacks on real pumpkins, because every hole lets in moisture and mold. Keep googly eyes, beads and other small parts away from children under 3.
1. Painted cartoon faces
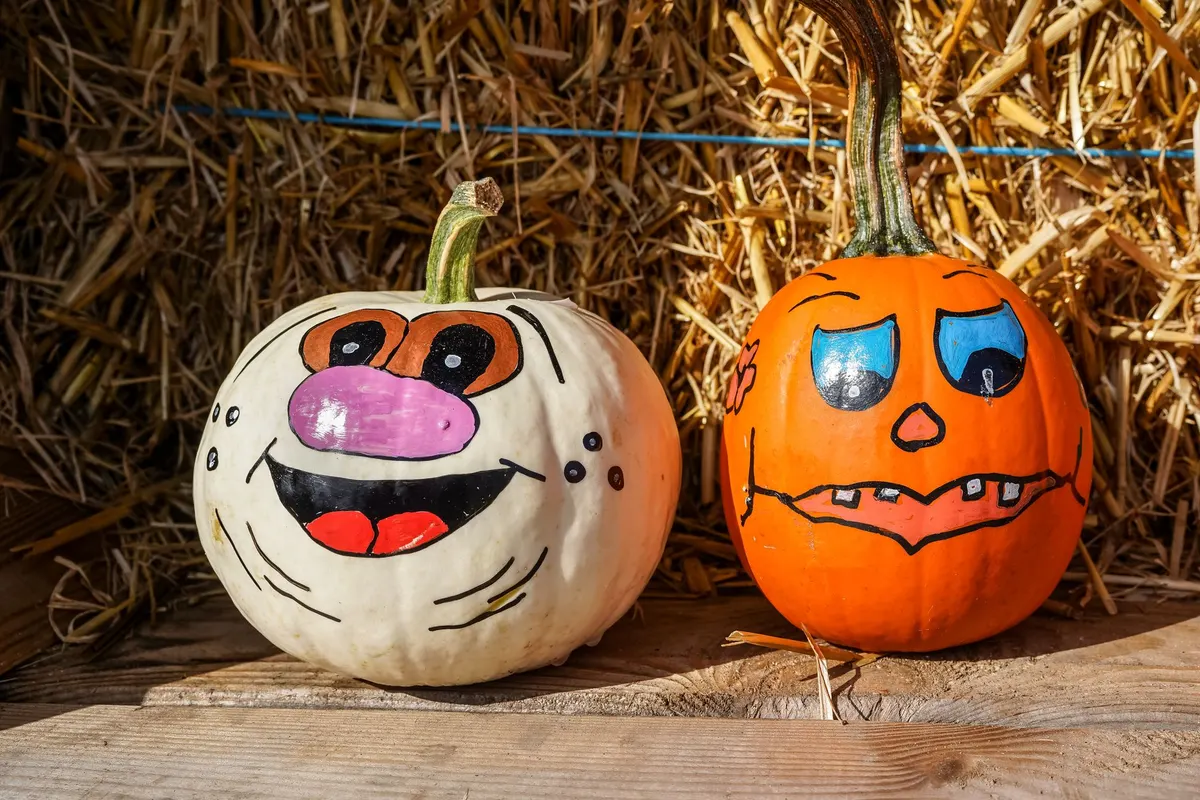
Painted faces show up from the sidewalk and last as long as the pumpkin. One white pumpkin and one orange one look better side by side than a matching pair. Base-coat the white one if its skin is patchy, then pencil the face lightly before painting.
Paint the whites of the eyes first, let them dry for 10 minutes, then add pupils, a nose (big and pink on one, small on the other) and a wide mouth with a few crooked teeth. Outline everything in black with a fine brush last. Give the two pumpkins different moods, one cheerful and one worried. Beginner, about 45 minutes for the pair.
2. Marker-drawn jack-o'-lantern
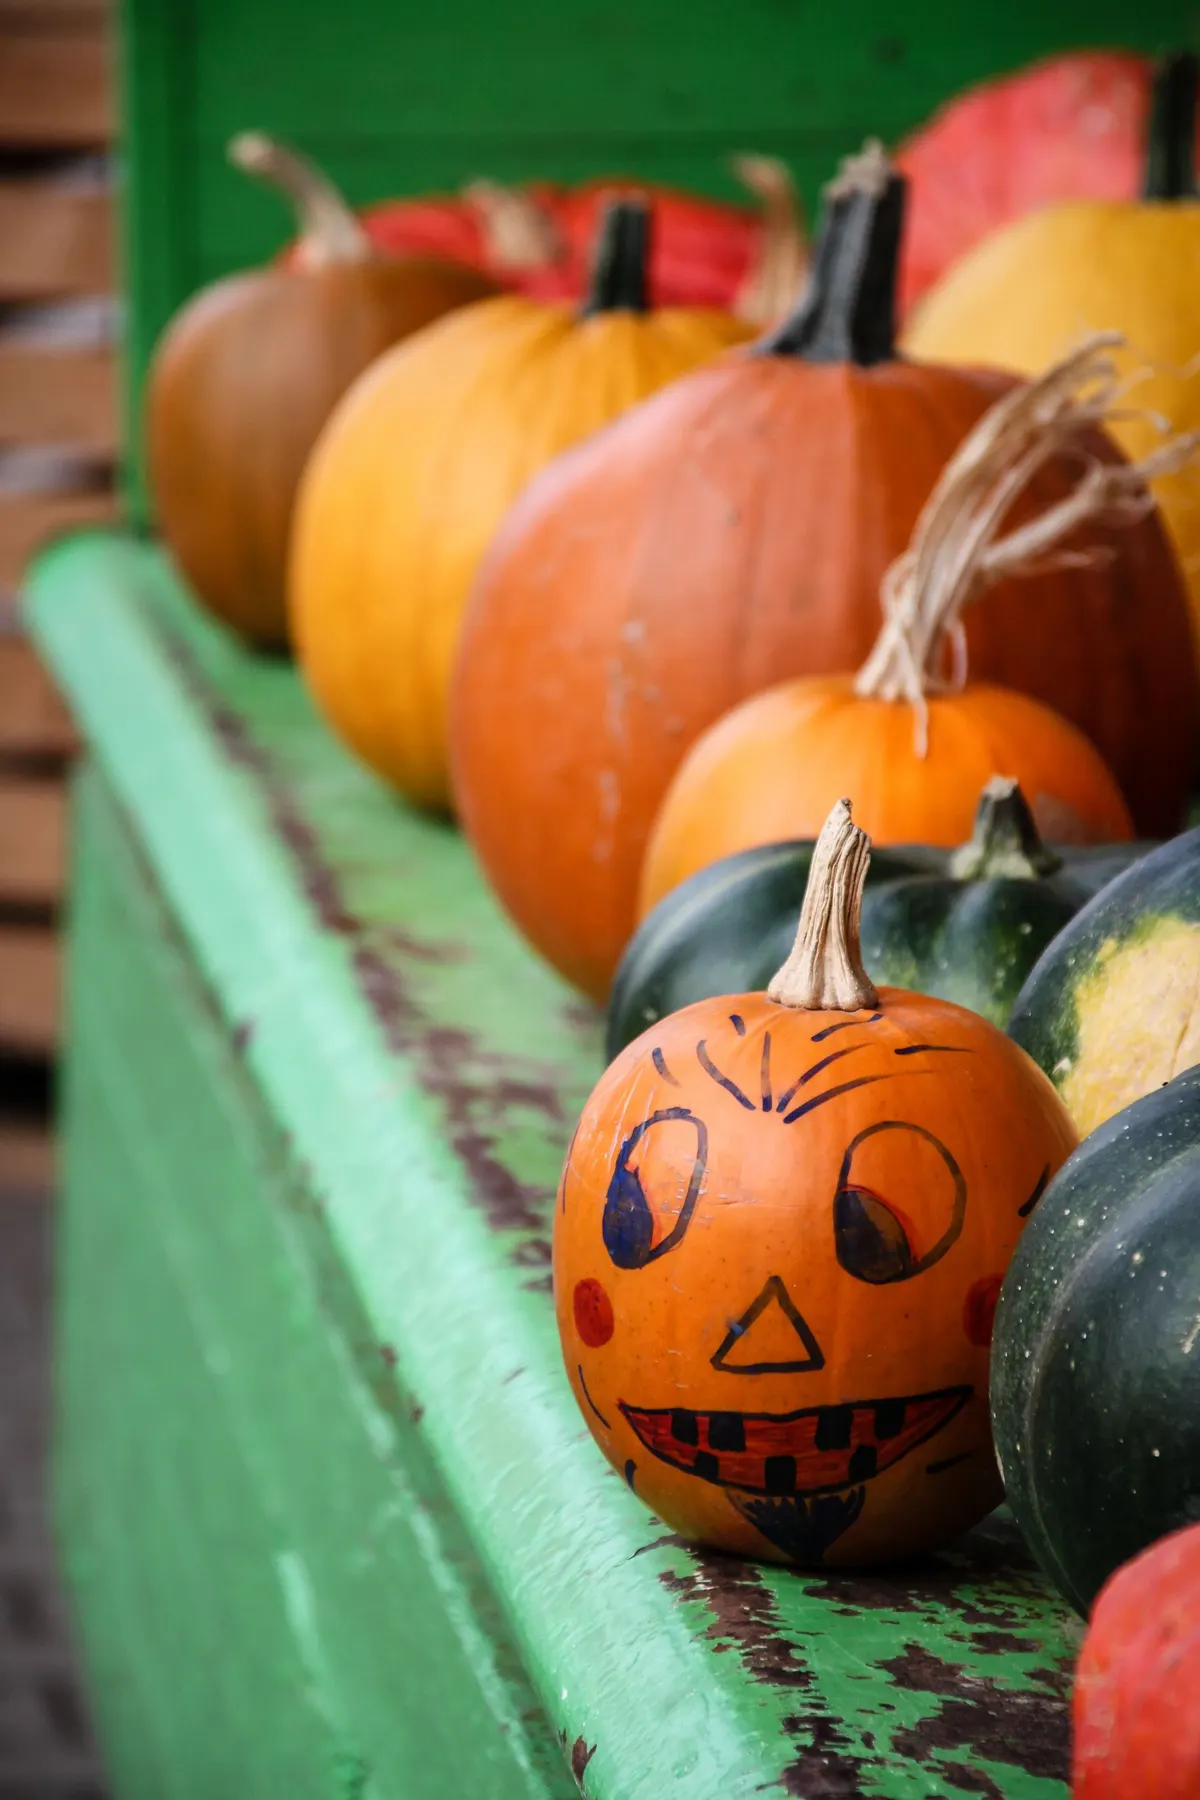
This is the fastest idea here. Draw a classic face straight onto the skin with a black paint marker: round eyes, a triangle nose and a wide crescent grin. Color the mouth red, crosshatch dark lines over it, and dab red cheeks with a fingertip of acrylic paint.
Paint markers give bolder, more opaque lines on waxy skin than most ordinary markers. Kids can draw the face in pencil or washable marker, and an adult can trace it with the paint marker. Set it among plain pumpkins and squash so the face stands out. Beginner, about 15 minutes.
3. Black and cream tape stripes
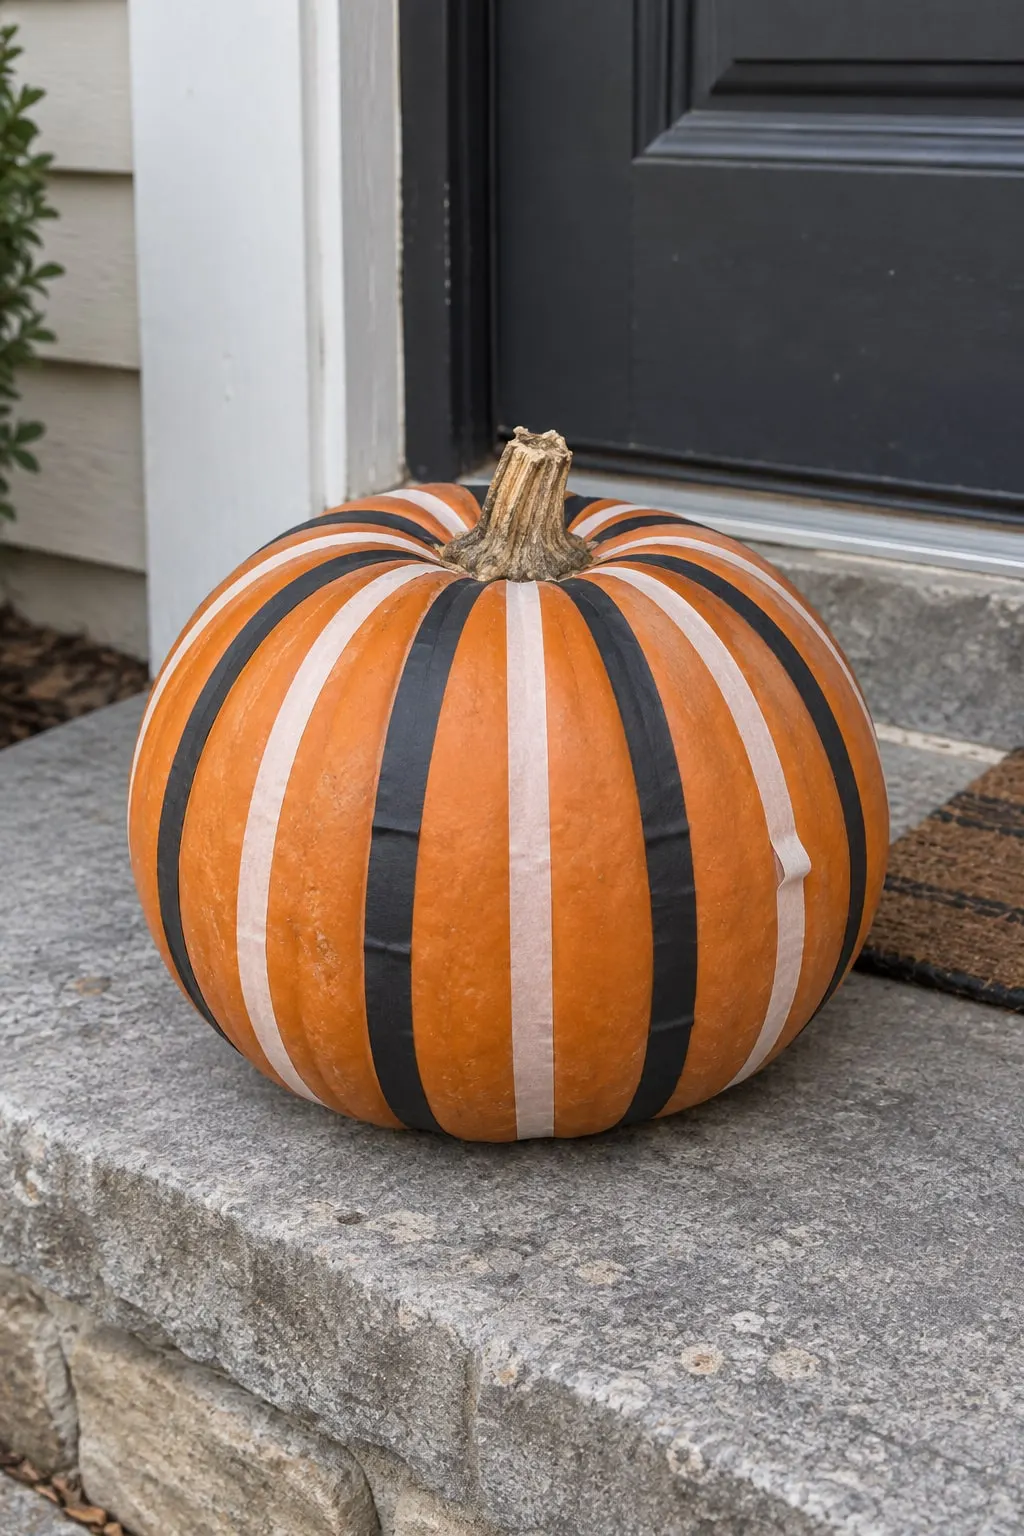
Tape is the no-mess option. Run strips of black and cream vinyl or washi tape down the ribs from the stem to the base, alternating the colors, on clean, dry skin.
Start each strip at the stem and smooth it downward with your thumb so it follows the curve. Trim ends that bunch at the stem. A 10-inch pumpkin takes about 16 strips. Press every edge with a fingernail so dew doesn't lift the corners, and peel the tape off in November to reuse the pumpkin for Thanksgiving. Beginner, about 20 minutes.
4. Glitter face with a paper crown
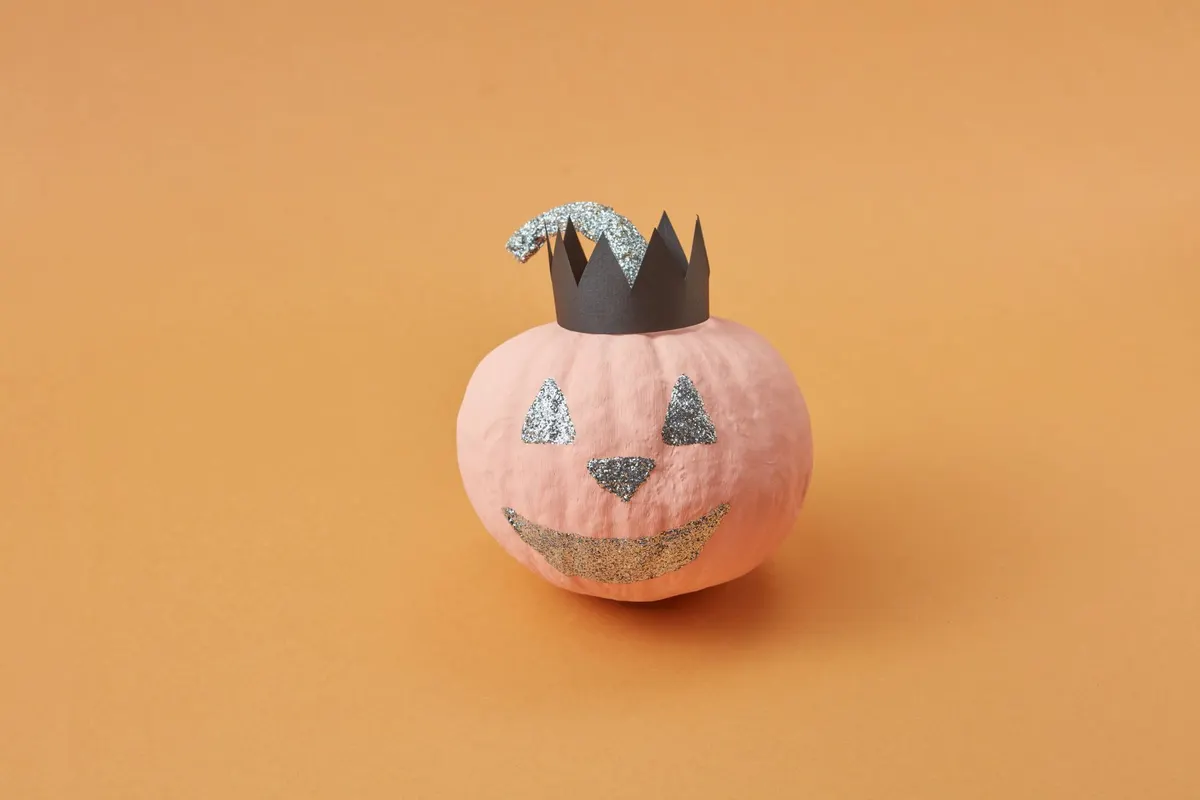
A small pink pumpkin gets a silver glitter face and a black paper crown. Paint the pumpkin pale pink in two coats over a white base coat. Brush craft glue onto triangle eyes, a triangle nose and a crescent grin, then pour fine silver glitter over the glue and tap off the extra onto a sheet of paper.
Glue glitter to the stem the same way. Cut a 2-inch strip of black cardstock with points along one edge, wrap it around the stem and glue the ends. Spray clear sealer over the glitter outdoors to cut shedding. Beginner, about 40 minutes plus drying.
5. Monster in a witch hat
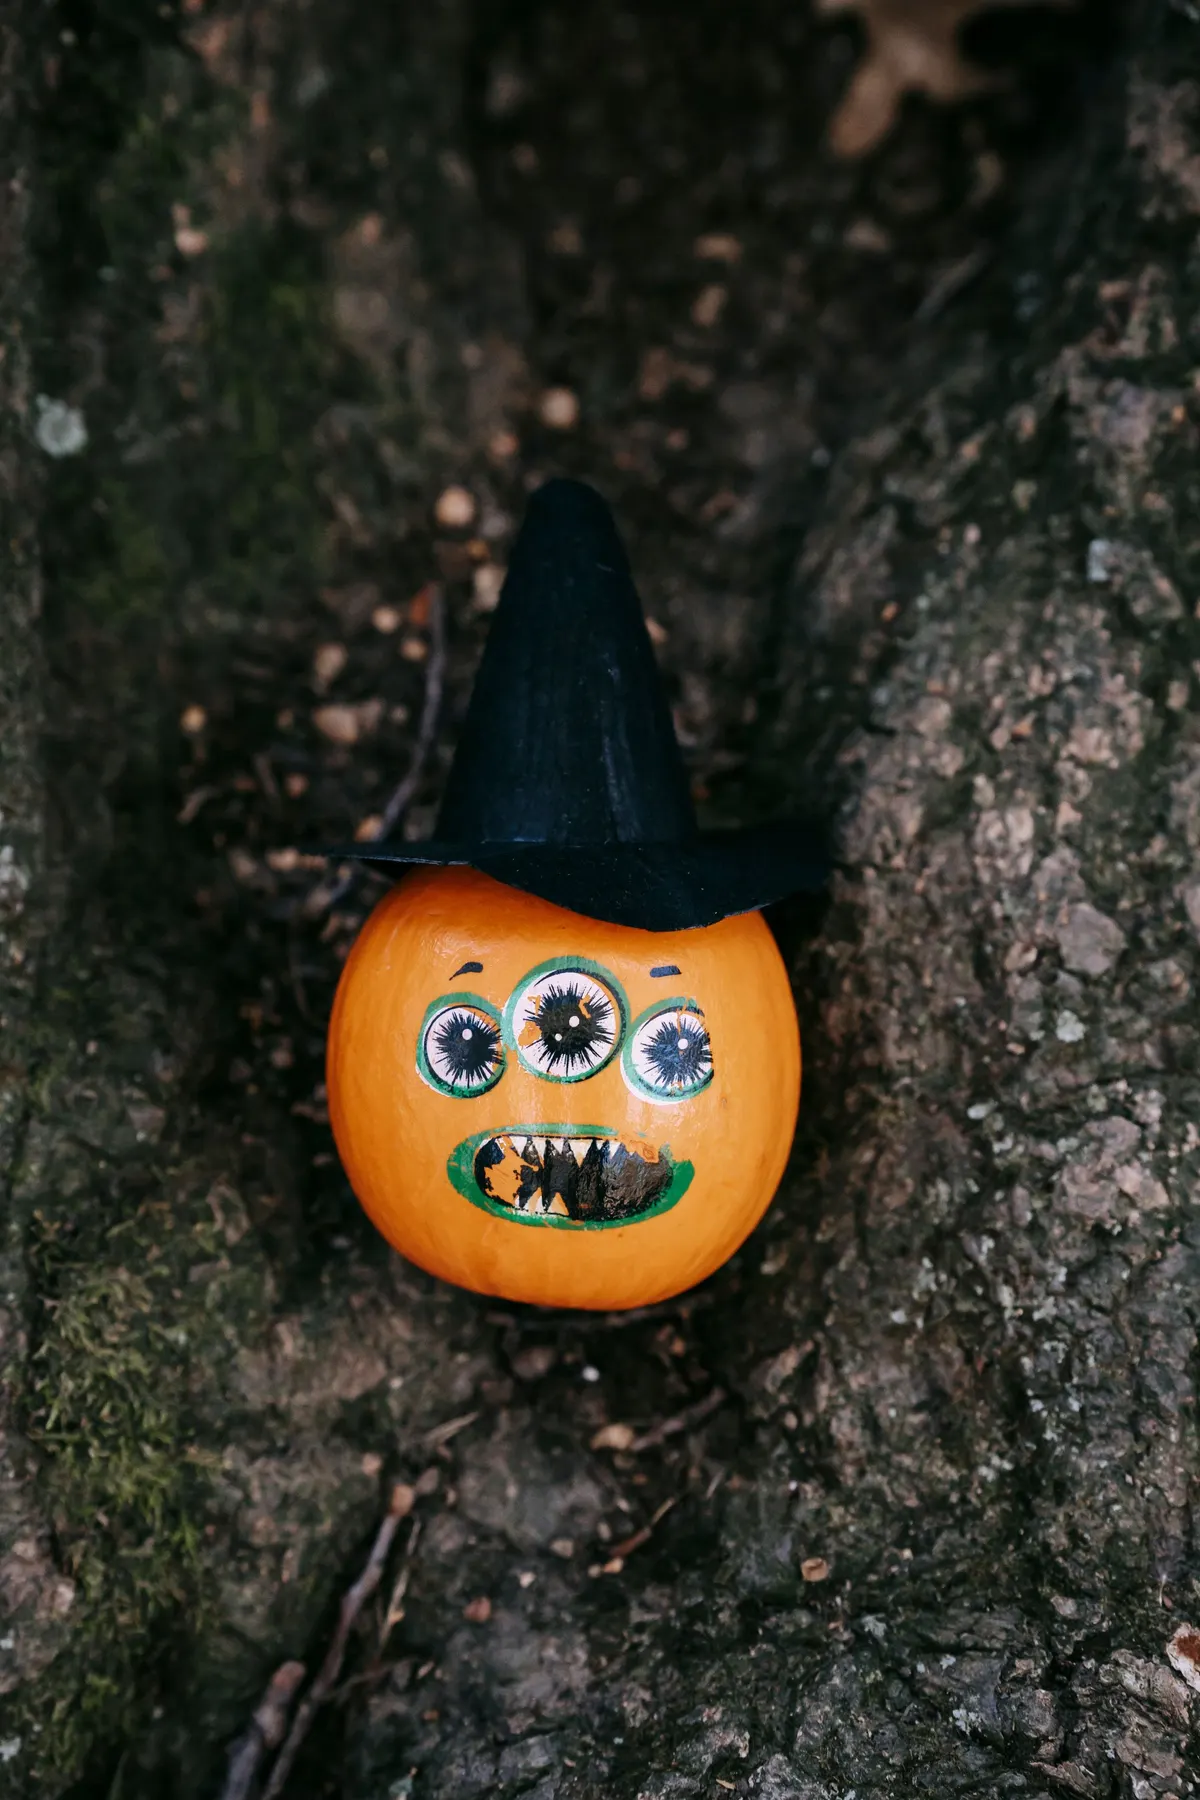
A small orange pumpkin turns into a monster with big round eyes and a hat. Paint three white circles about 1 inch across in a row, add gray-blue irises and black pupils, then paint a wide mouth with a green outline, a black inside and white zigzag teeth.
Set a black felt witch hat over the stem, or roll one from black cardstock into a cone with a circle brim and glue it at the back. A hat about as tall as the pumpkin looks right. Kids can paint the teeth while an adult does the eyes. Beginner, about 45 minutes.
6. Pumpkin covered in eyes
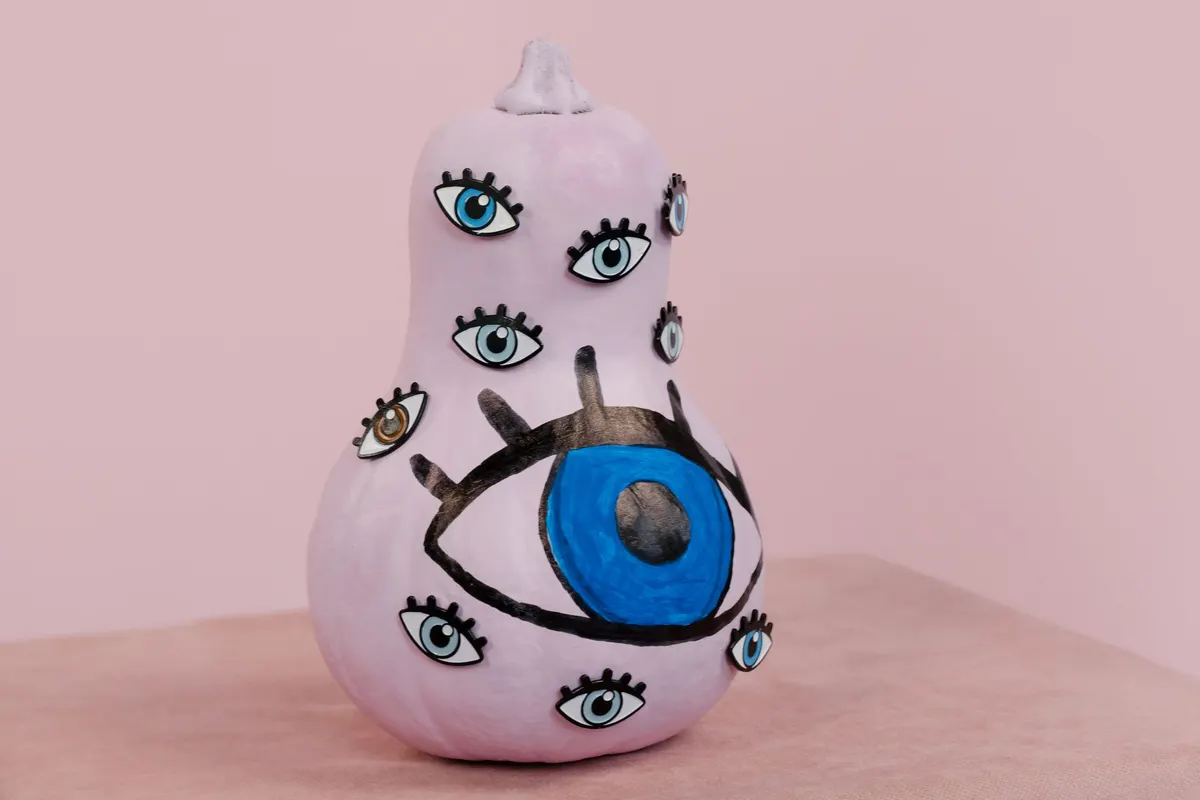
Use a butternut squash, a long gourd or a tall pumpkin for this one. Paint the whole thing soft lilac over a white base coat, stem included. Draw 9 to 12 almond eye shapes in pencil, scattered at different angles, then fill each with white, a blue or amber iris and a black pupil.
Add one much bigger eye on the wide lower part. Outline every eye in black and flick on three or four short lashes with a fine brush. Mixing eye sizes makes it look watchful instead of busy. Intermediate, about 1 hour.
7. Black and white skull pumpkins
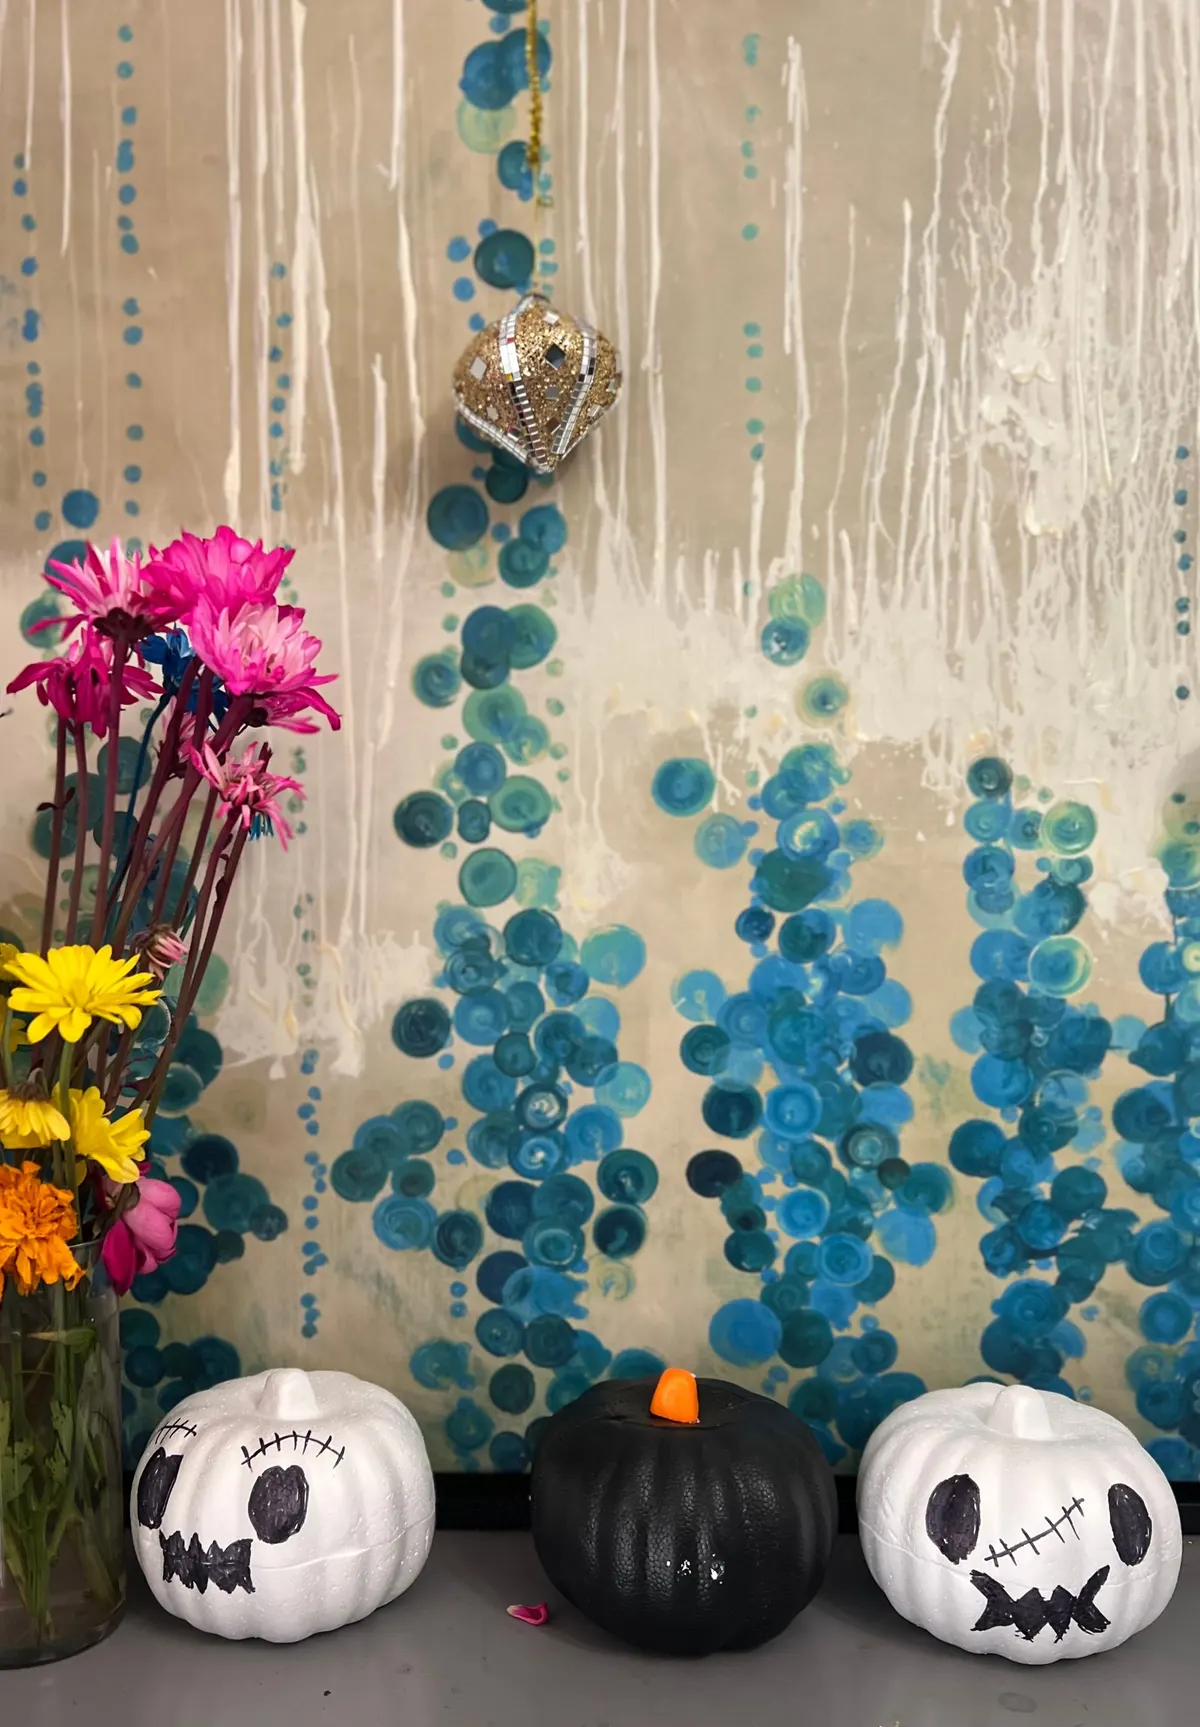
Three small pumpkins in black and white look sharper as a set than three orange ones. Paint two white and one solid black. Give both white pumpkins skull faces with hollow black eye sockets and a stitched mouth, one with a wider zigzag grin.
Leave the black pumpkin plain, so it rests the eye between the two skulls. Line them up on a mantel or shelf about 3 inches apart, and add a vase of bright flowers for color. Beginner, about 1 hour for three.
8. Pastel trio with glitter dots
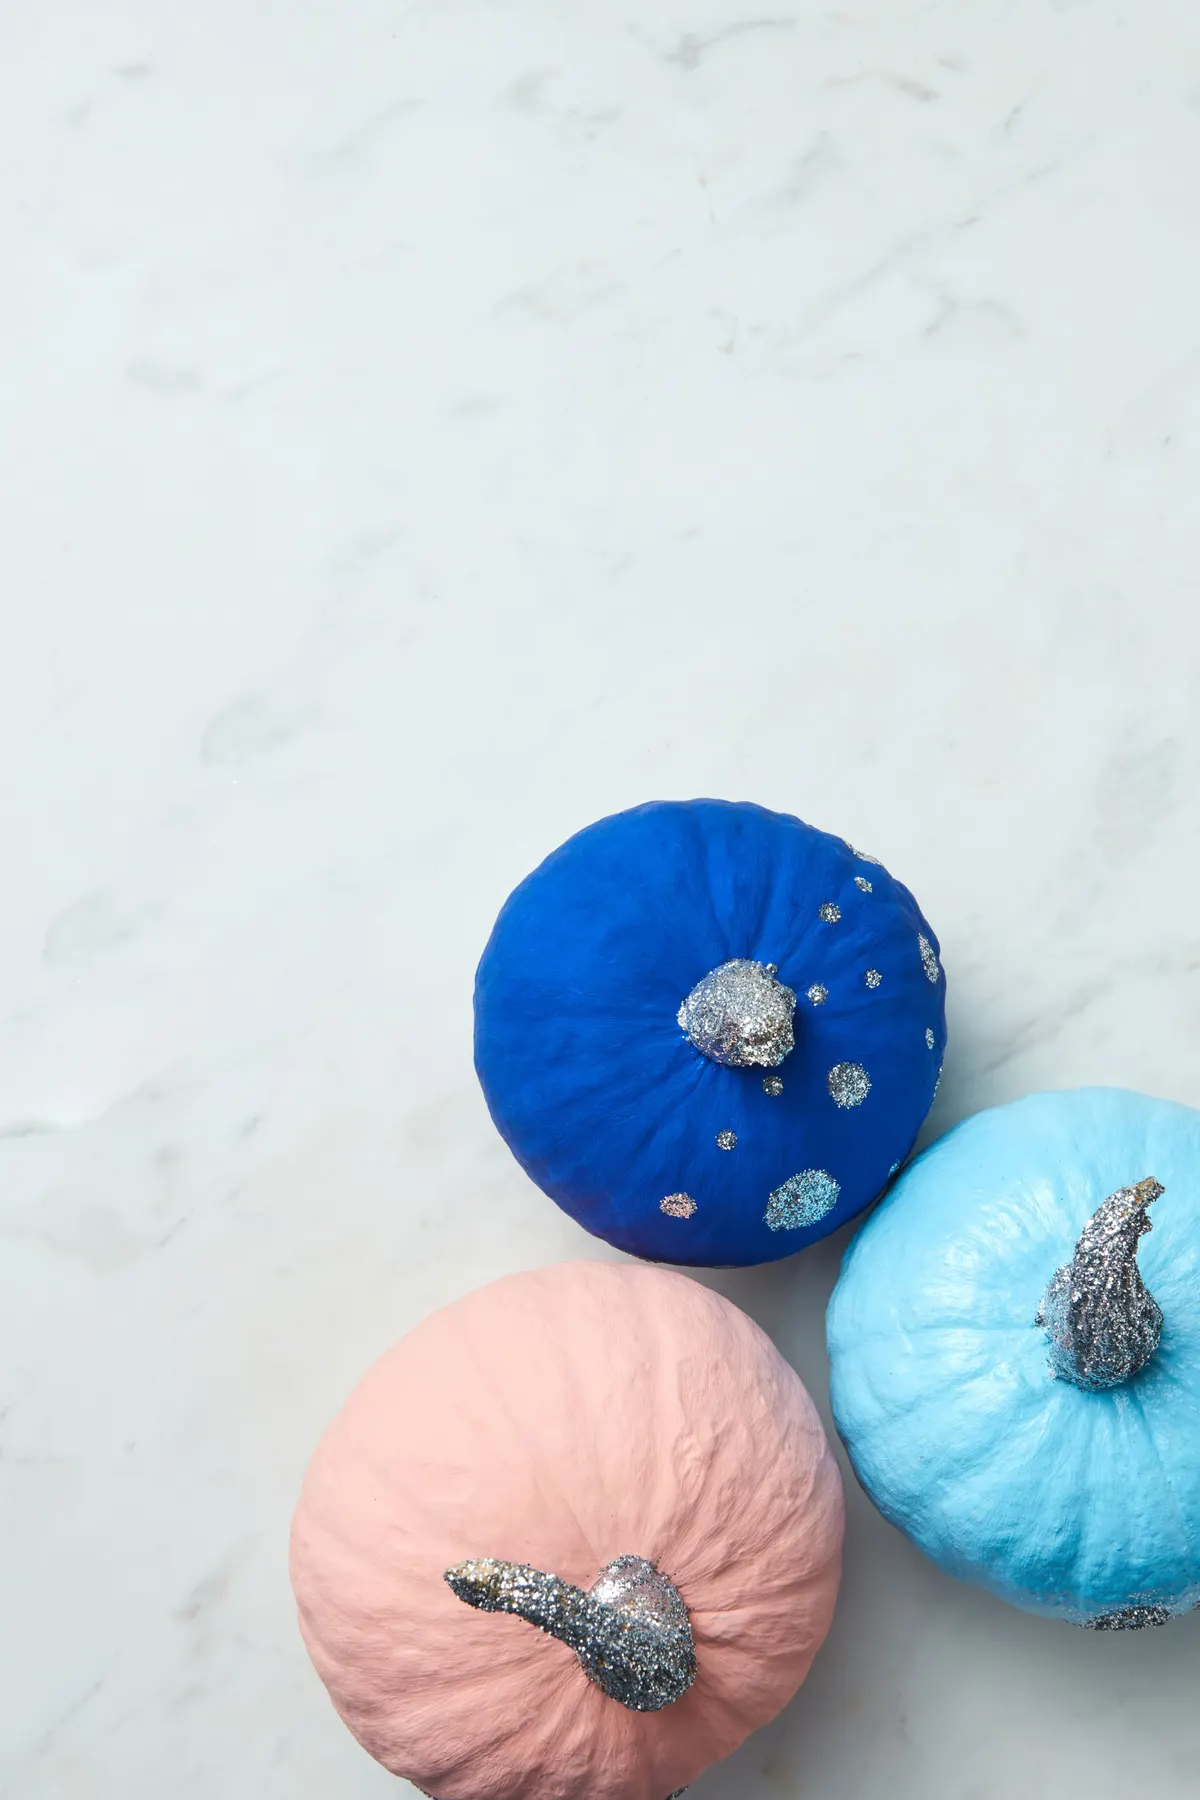
Pastels fit a room that isn't decorated for Halloween. Paint three mini pumpkins royal blue, pale pink and sky blue. Use a white base coat under the pink and sky blue so the orange doesn't turn them muddy.
On the royal blue pumpkin, dab on silver glitter dots with the round end of a paintbrush handle dipped in glitter glue. Cover all three stems in silver glitter. Cluster them on a marble board or a light tray. Kids can do the dots, and an adult can do the base coats. Beginner, about 1 hour plus drying.
9. Metallic spray-painted pumpkin
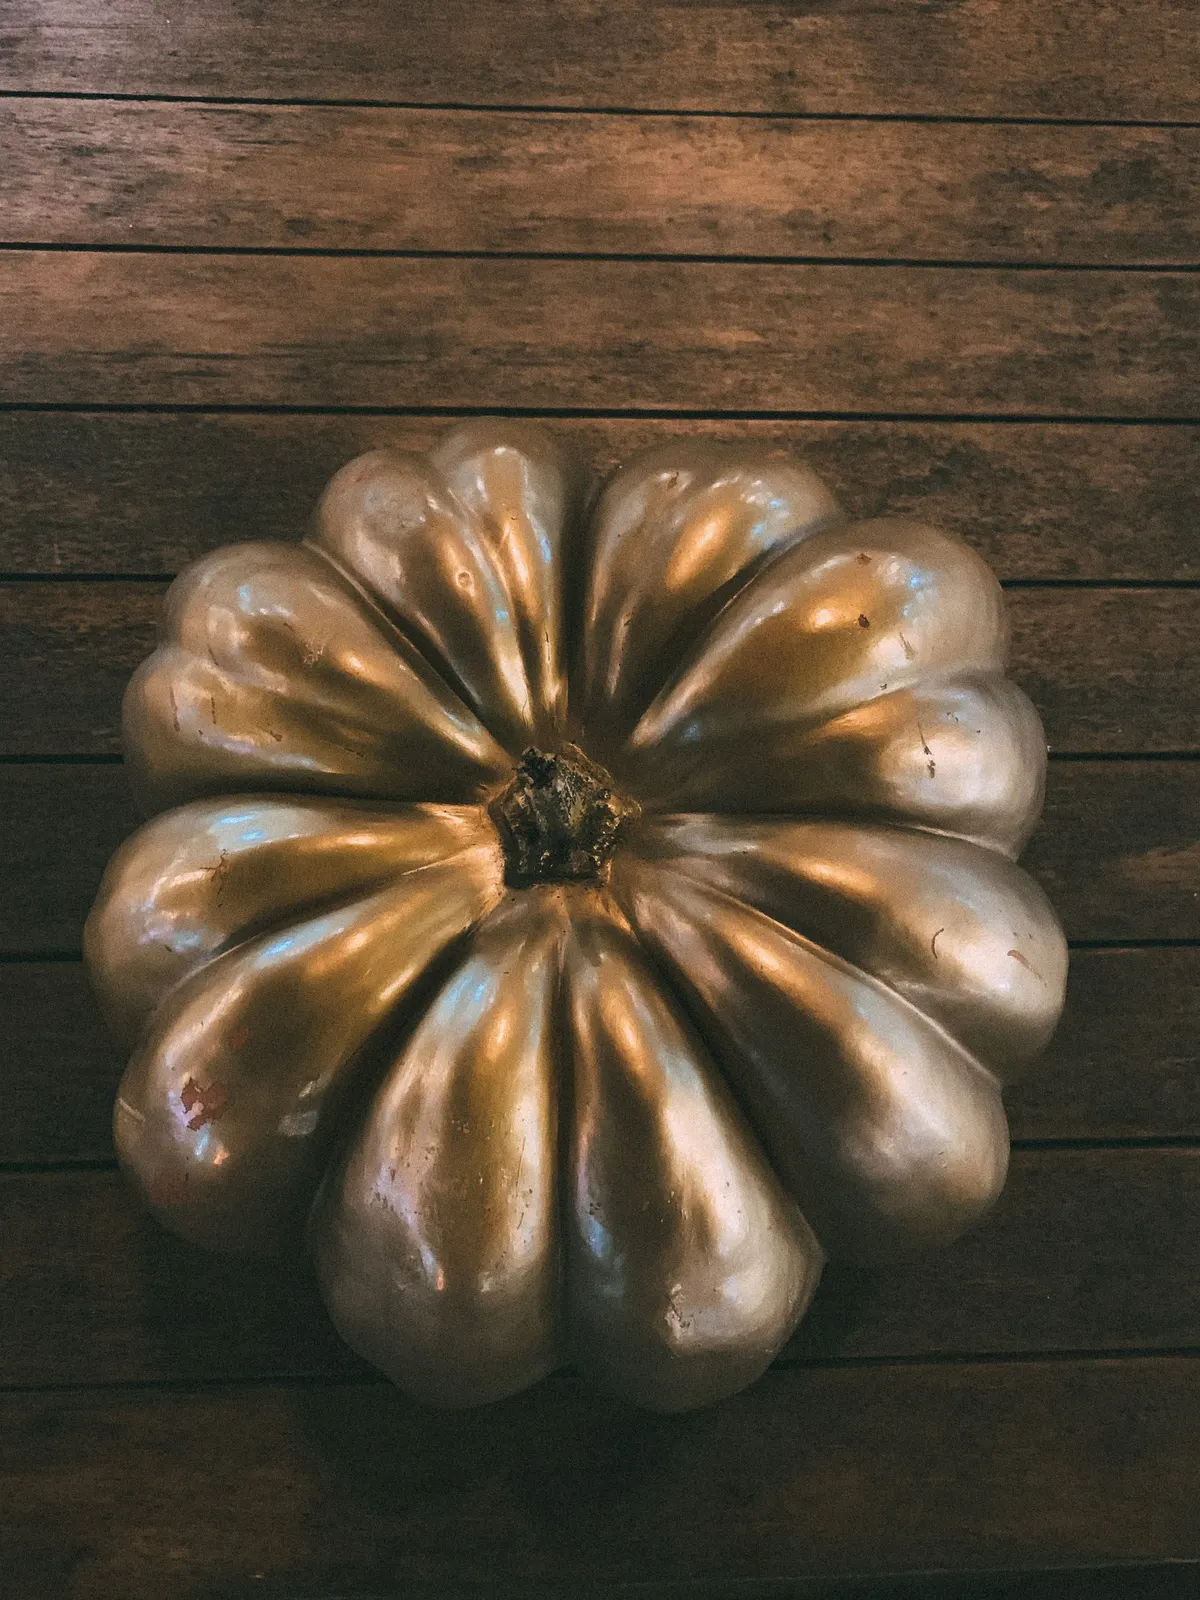
Metallic spray paint makes a flat, ribbed Cinderella-type pumpkin look like a bronze sculpture. Work outdoors on a drop cloth, and spray from about 10 inches away in light passes, turning the pumpkin as you go.
Let it dry for an hour, then flip it and spray the bottom edge. Small orange chips just look aged. Leave the stem natural brown or mask it with painter's tape. Group it with plain dark pumpkins, or set it alone on a wooden board for a fall table that works into November. Beginner, about 20 minutes plus drying.
10. Hand-painted stripes
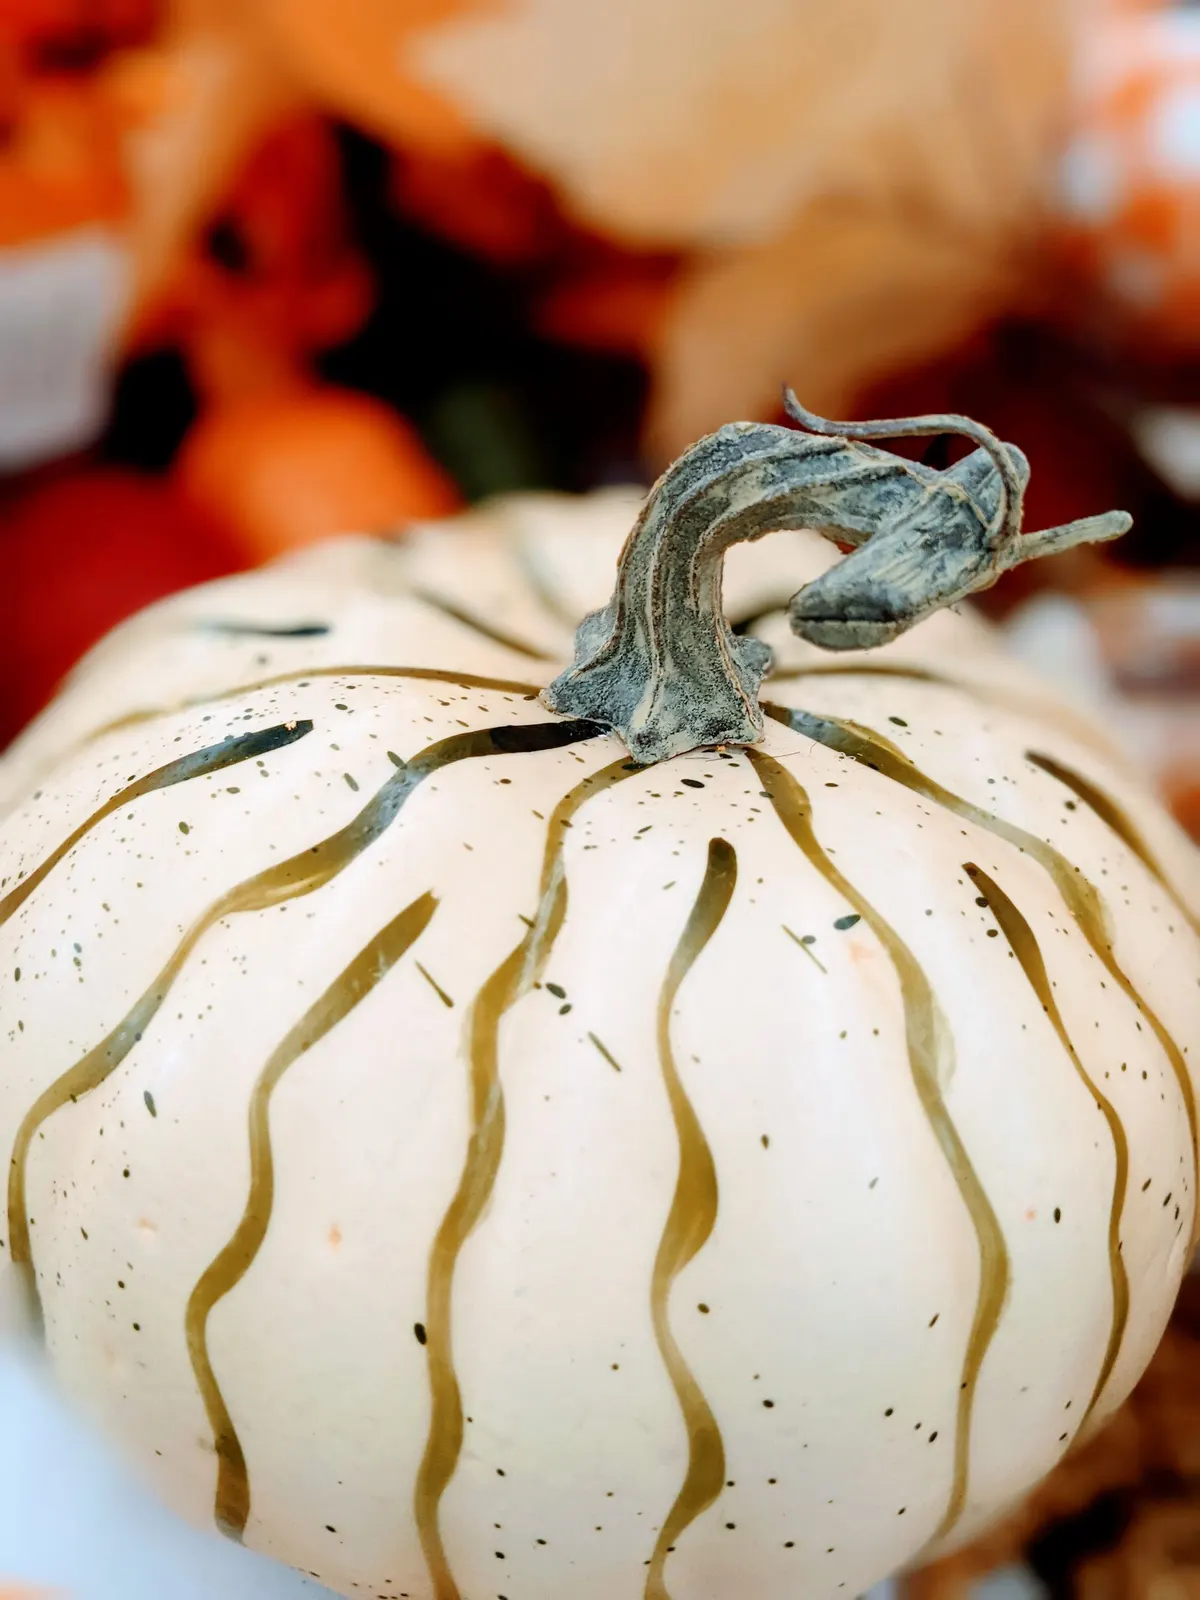
A smooth white pumpkin takes freehand stripes well. Load a small flat brush with olive-gold acrylic and paint loose, wavy stripes from just below the stem toward the base, spacing them about an inch apart. Keep the lines a little uneven, since they look hand-painted that way.
When they are dry, load an old toothbrush with thinned brown paint and run your thumb across the bristles to flick fine speckles over the pumpkin. Test the flick on paper first. The look suits a fall table more than a spooky porch. Intermediate, about 45 minutes.
11. Ombre painted centerpiece
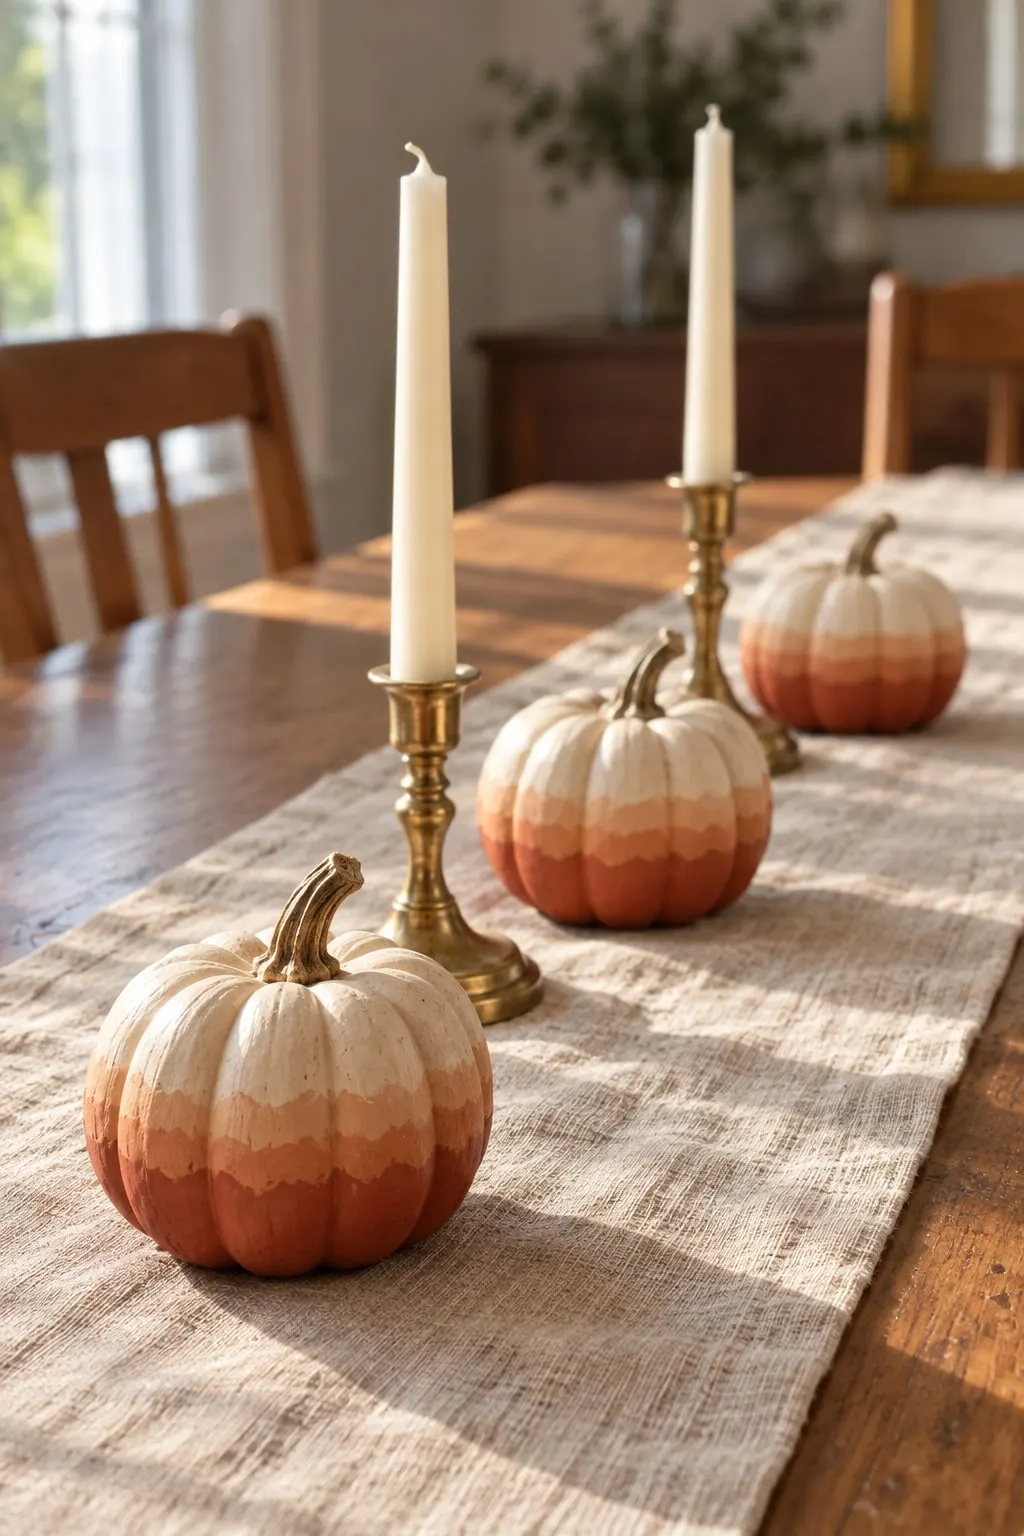
Three small pumpkins painted in stepped cream-to-rust bands make a centerpiece that lasts until Thanksgiving. Mix three shades in a paper cup: rust, rust mixed half and half with cream, and cream.
Over a white base coat, paint the top half cream. Then paint wavy bands below it, each darker than the last, ending in rust at the base. Let each band dry so the edges stay crisp. Alternate the pumpkins with taper candles in brass holders down a linen runner. Never leave lit candles unattended, or use flameless tapers. Intermediate, about 1 hour. More ideas are in our Thanksgiving table decor guide.
12. Chalkboard pumpkin with doodles
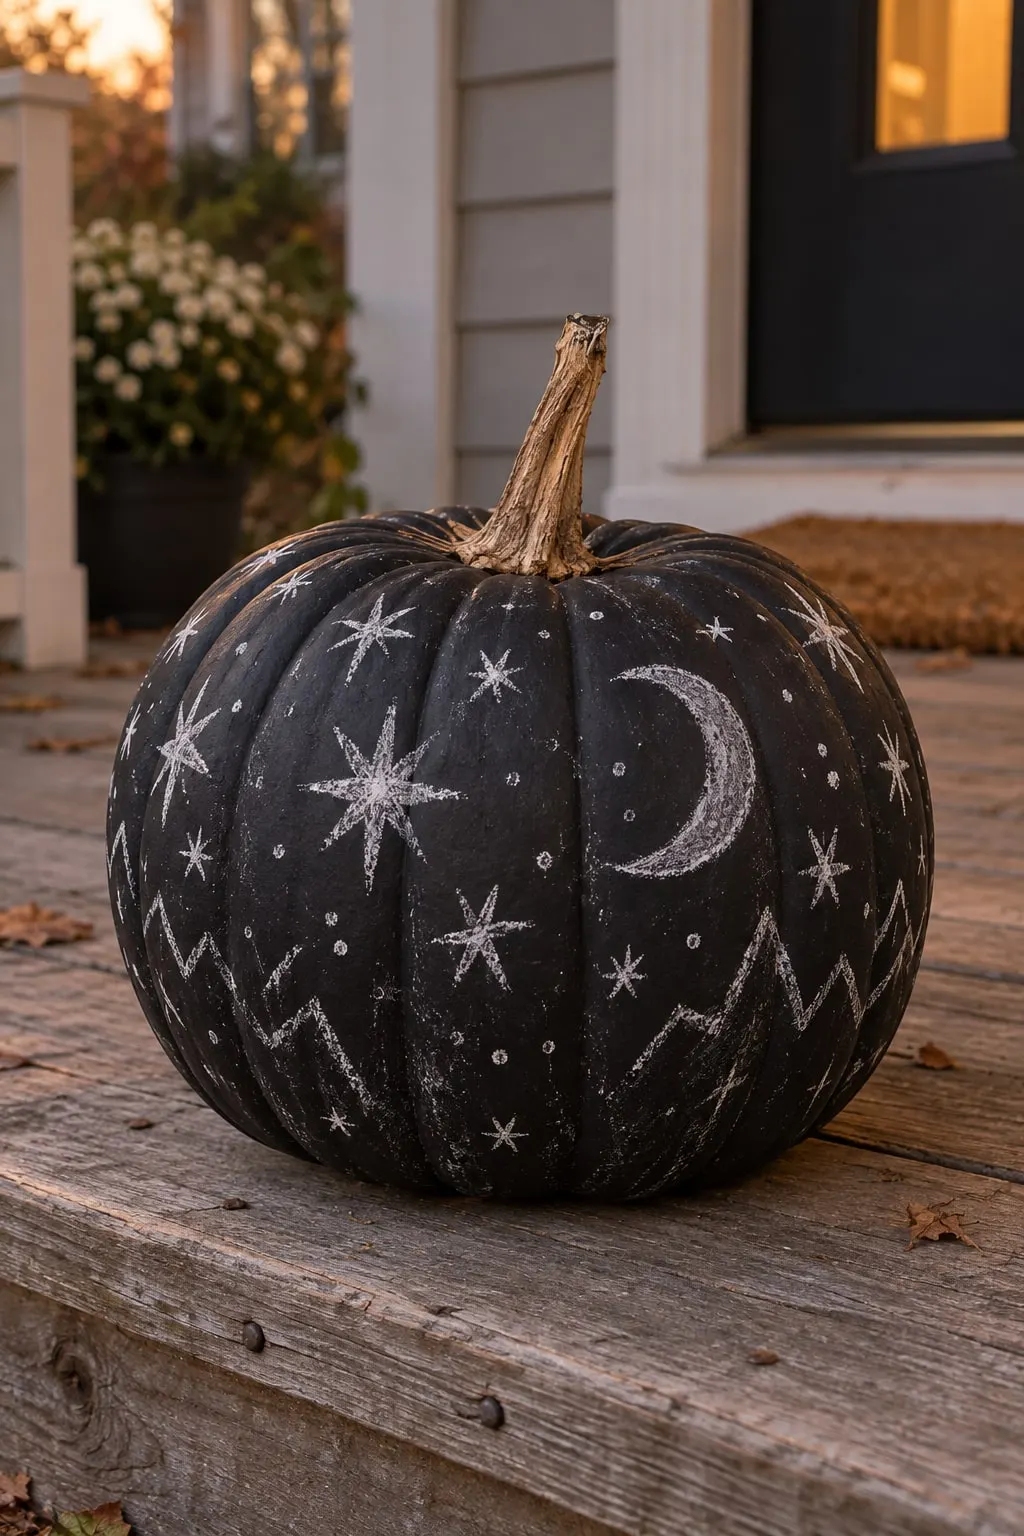
Chalkboard paint turns a pumpkin into something you can redraw all season. Brush on two coats of black chalkboard paint, let it cure overnight, then rub the side of a piece of white chalk over the whole surface and wipe it off. This primes the surface so later drawings erase cleanly.
Draw stars, a crescent moon, dots and zigzags, or let kids draw whatever they want. Wipe it clean and start over each weekend. A chalk marker gives bolder lines but is harder to erase, so test it on the bottom first. Beginner, about 30 minutes plus overnight curing.
13. Napkin decoupage
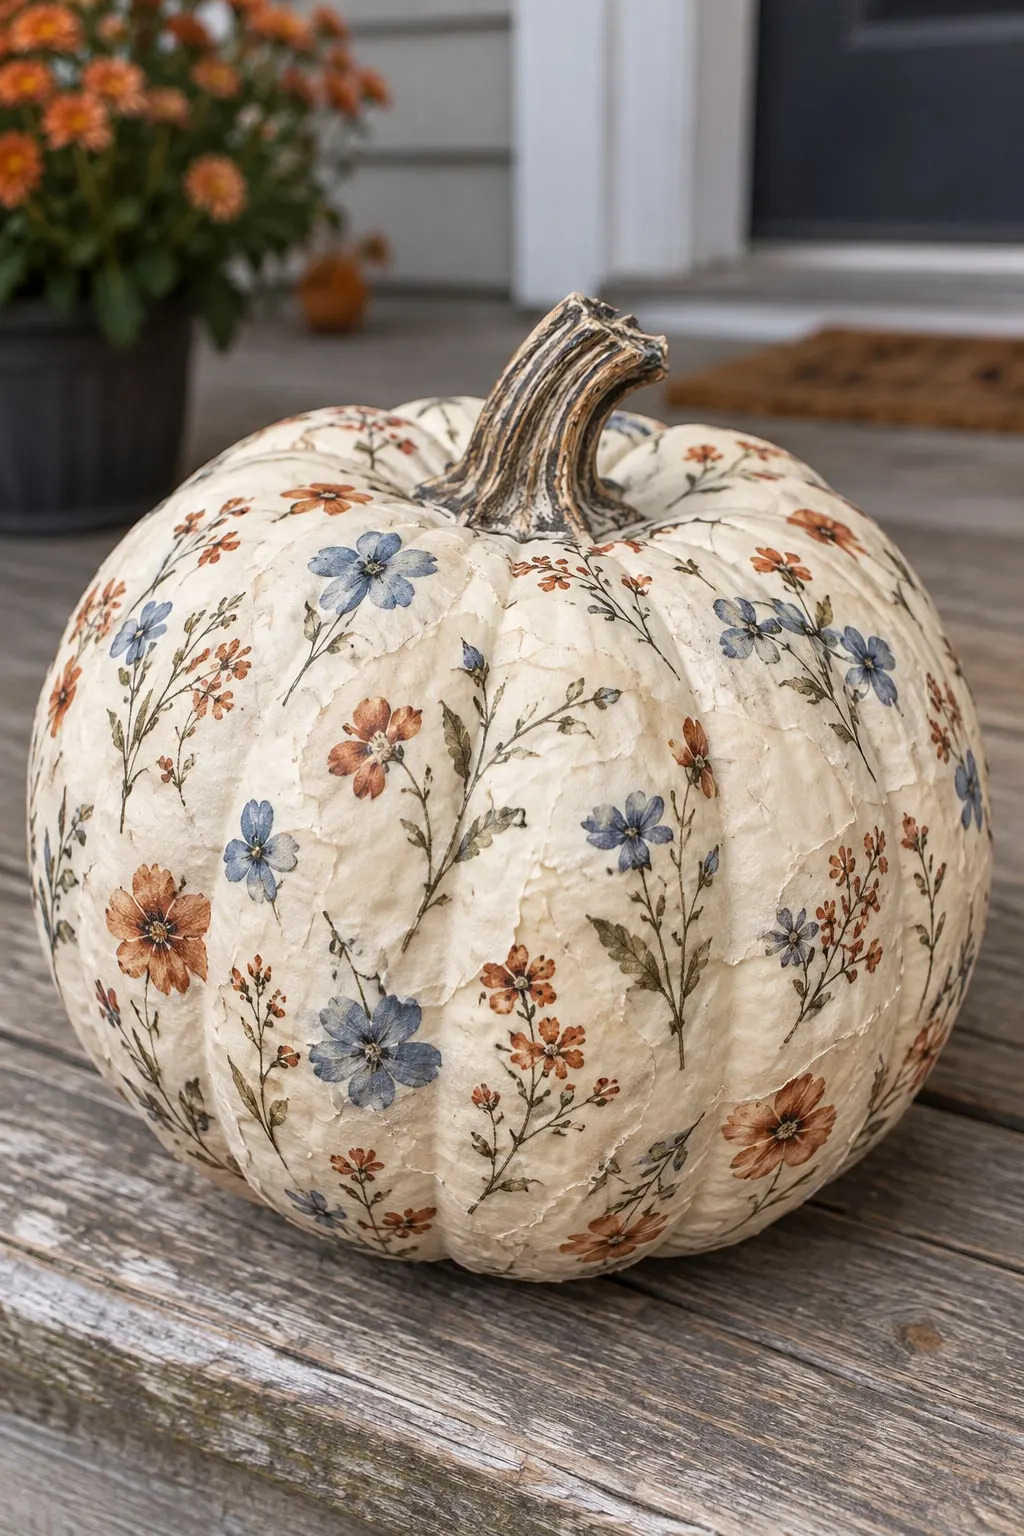
Patterned paper napkins and decoupage glue give a white pumpkin an all-over floral print. Peel the napkins apart and keep only the printed top layer. Tear it into palm-sized pieces, since torn edges hide better than cut ones.
Brush a thin layer of decoupage glue onto a small area, lay a piece on top and brush more glue over it, working from the center out to push out wrinkles. Overlap the pieces until the pumpkin is covered, then add two top coats. On a porch, use an outdoor-formula decoupage glue. Intermediate, about 1.5 hours.
14. Dried flower crown
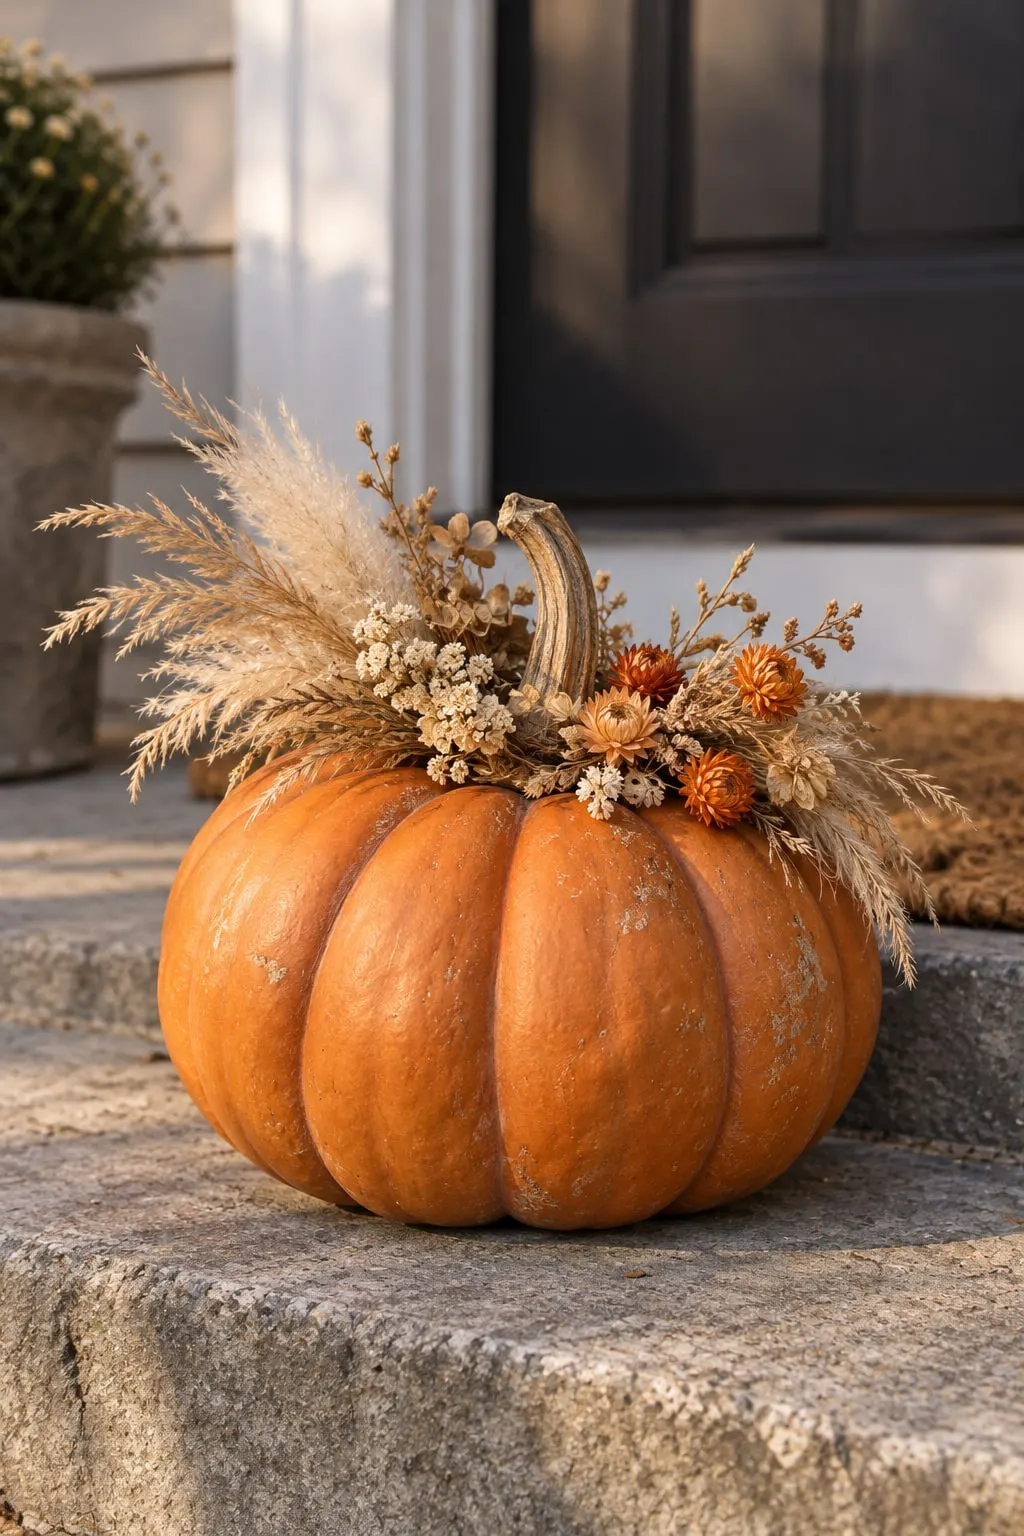
A crown of dried flowers around the stem makes a plain pumpkin look styled. Pick three textures: one or two fluffy pampas plumes, a few stems of dried grass or statice, and small blooms like strawflowers for color.
Cut each stem to 3 to 5 inches. Start with the pampas at the back, then fill in with grasses and finish with the blooms, gluing each piece close to the stem with a low-temperature glue gun. Let a few pieces lean outward. The flowers are already dry, so the crown holds its look for weeks, but keep it away from candles and open flames. Beginner, about 30 minutes.
15. Twine-wrapped pumpkins
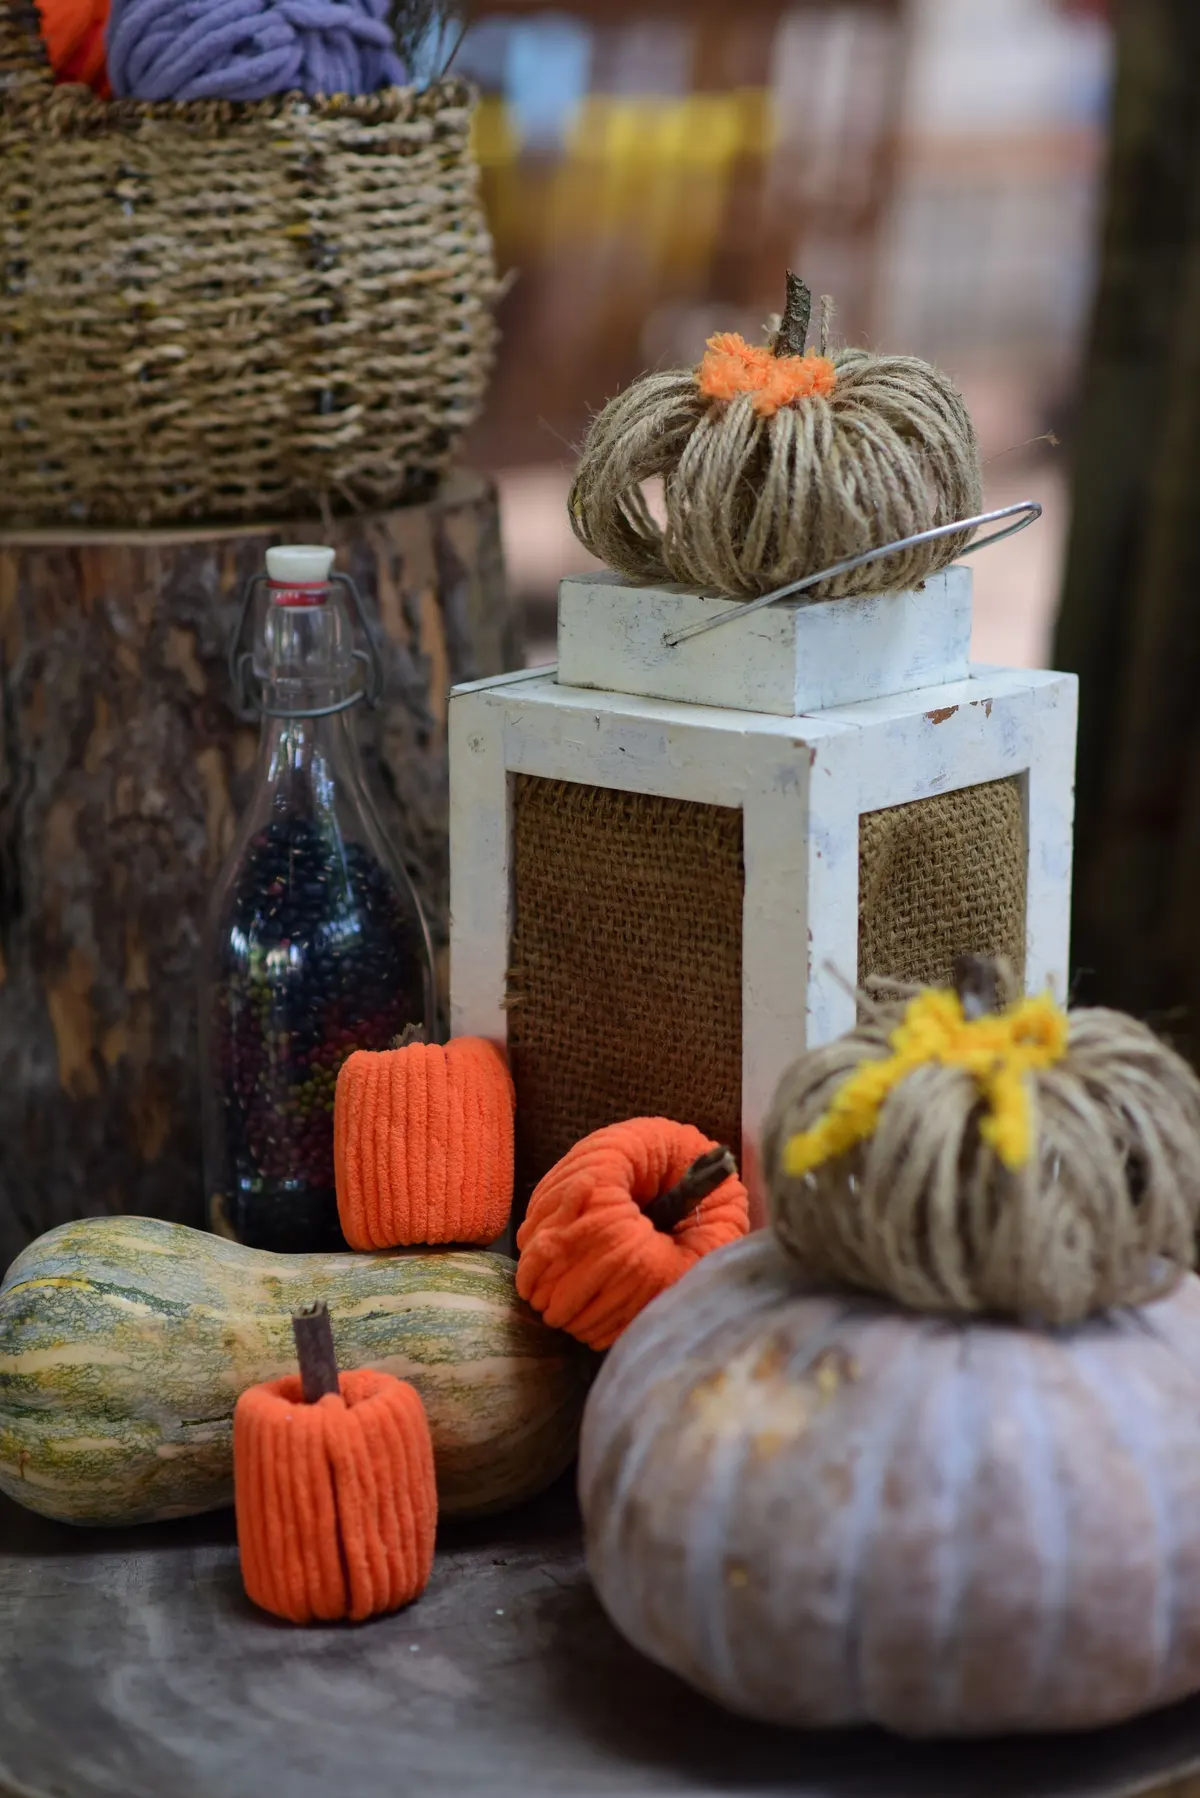
Jute twine turns a foam craft pumpkin or a small real one into a rustic piece. Glue the end of the twine at the stem, then loop it down to the base and back up, following the ribs. Glue each turn and keep the loops close.
Finish with a fluffy tuft of yarn at the stem. A 6-inch pumpkin uses about 50 yards of twine, so buy a full spool. Set one twine pumpkin on a plain one and another on top of a lantern, then add knit pumpkins for a porch or entry vignette. Beginner, about 1 hour.
16. Knit pumpkins
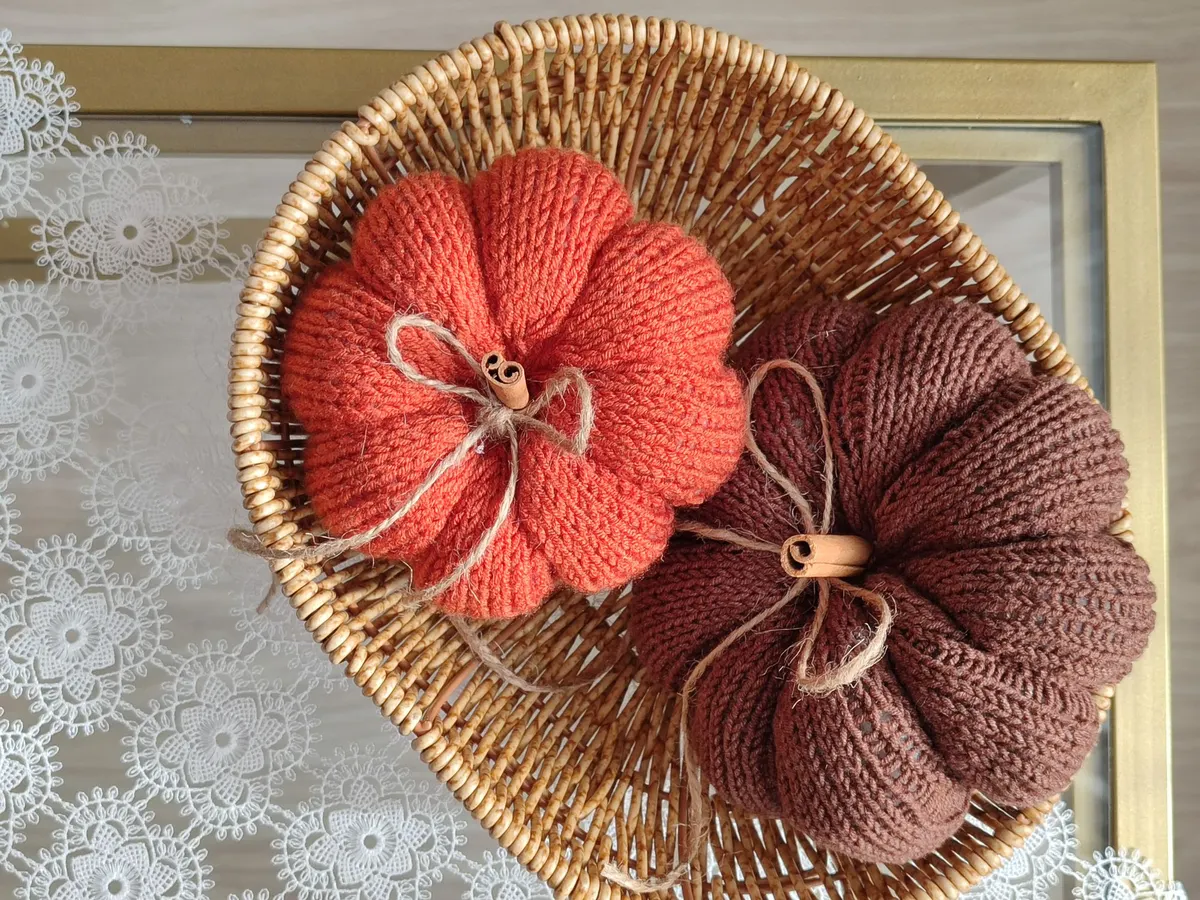
Knit pumpkins come out every fall, and you never have to toss them. Knit or crochet a rectangle about 10 by 6 inches, sew the short ends together into a tube, and gather one end shut with a running stitch.
Stuff it with polyester fiberfill, gather the top, and wrap the yarn tail from top to bottom five or six times to make the sections. Push a cinnamon stick or a short wooden dowel into the center for a stem and tie on a jute bow. An old sweater sleeve works the same way if you don't knit. Intermediate, about 2 hours each.
17. Velvet pumpkin
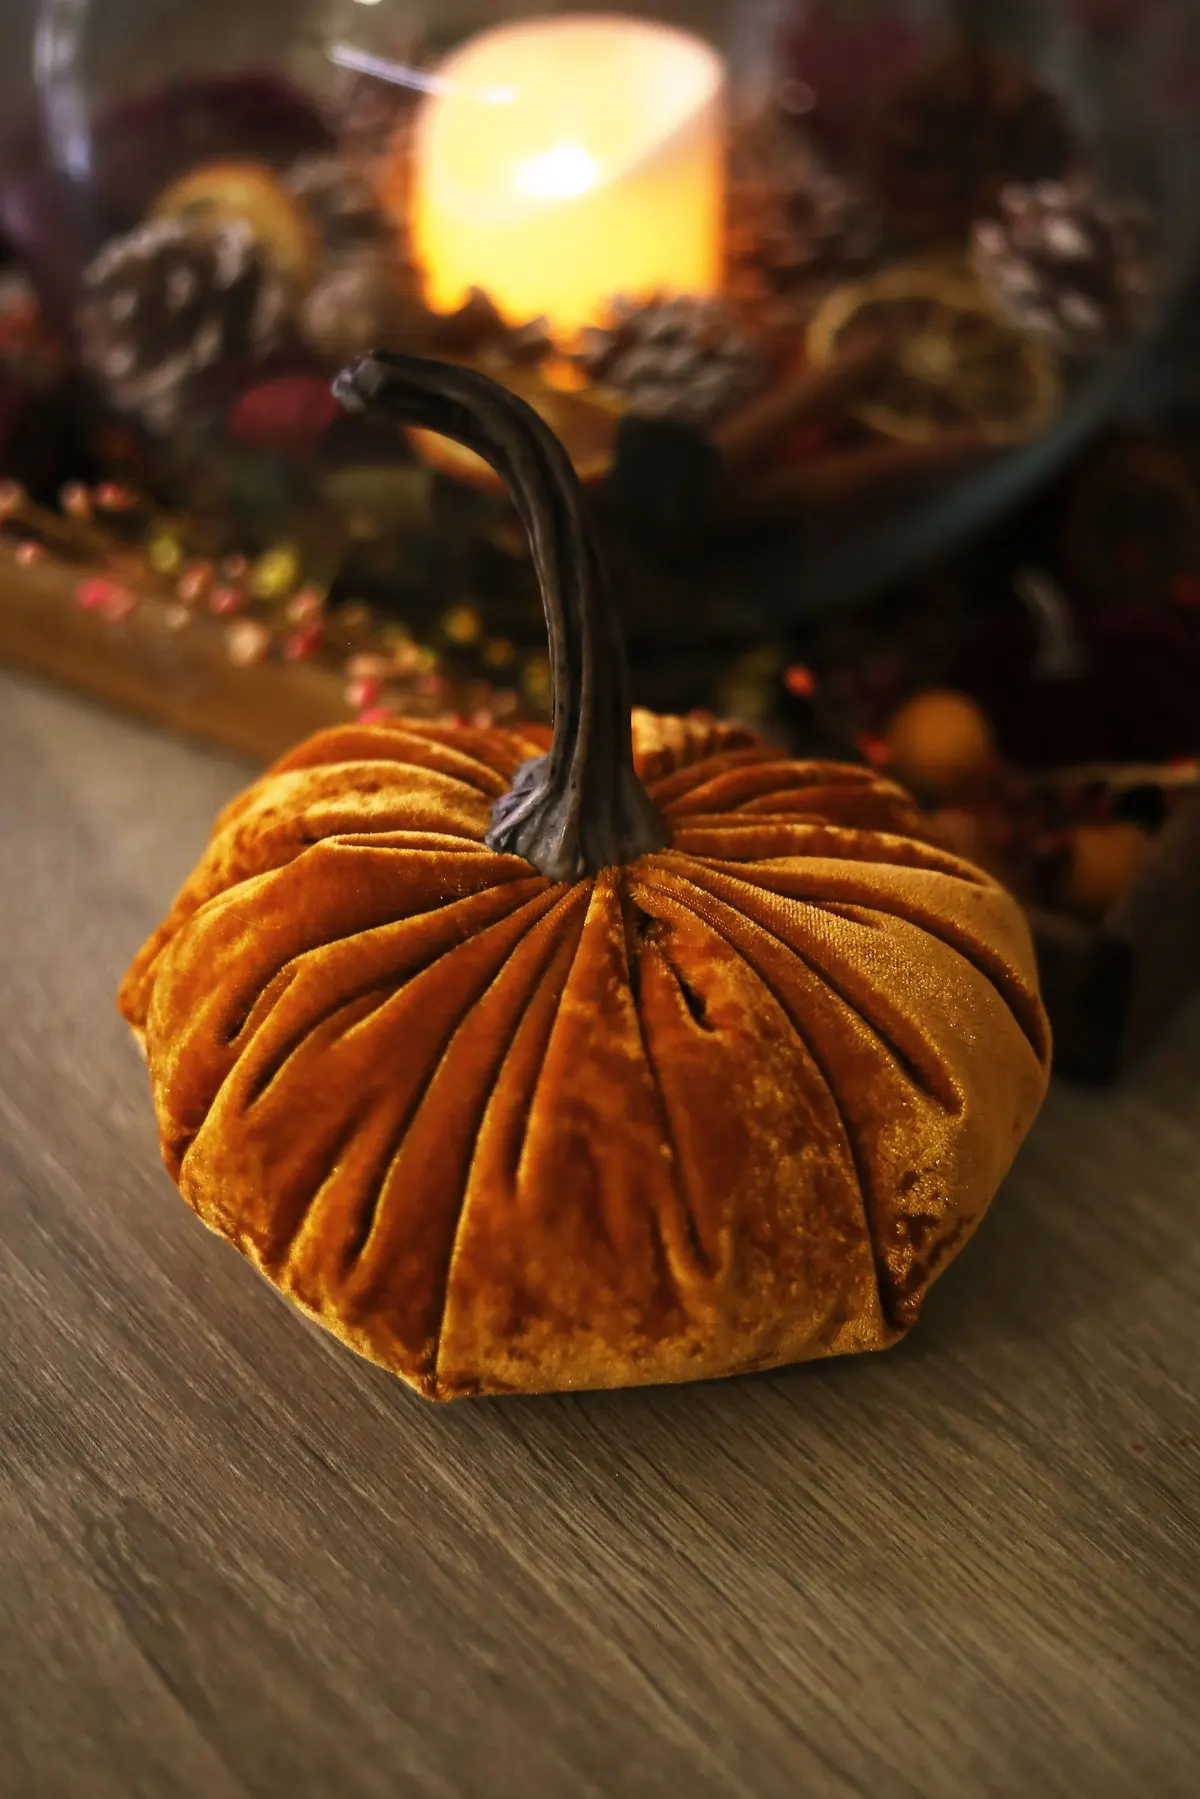
Velvet pumpkins look expensive but take about 30 minutes. Cut a circle of crushed velvet about 18 inches across. Sew a running stitch around the edge, 1/2 inch in, with strong thread.
Pull the thread to gather the circle into a pouch, fill it with fiberfill, and add a handful of dry rice or beans at the bottom so it sits flat. Pull tight, knot it, then glue a real dried pumpkin stem into the opening with a low-temperature glue gun. Save stems from last year's pumpkins for this. Burnt orange, rust and gold look best together. Beginner, about 30 minutes.
18. Fabric pumpkins with felt faces
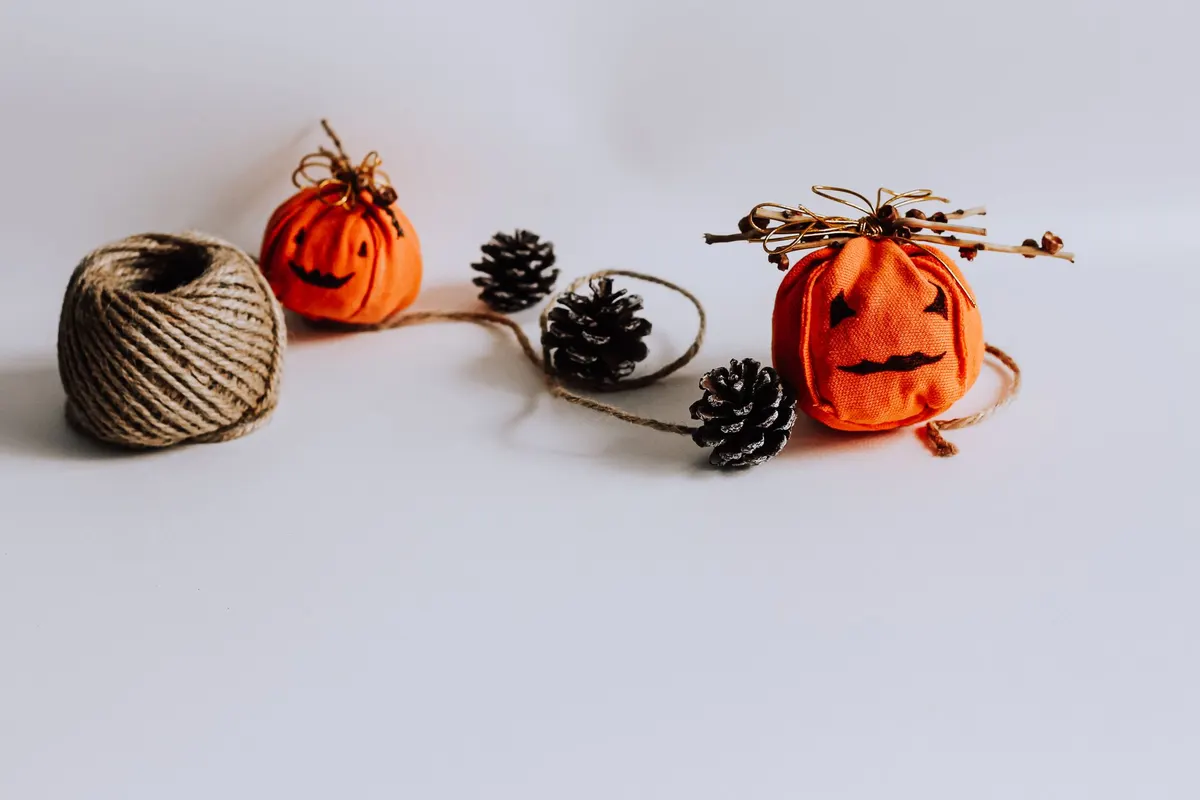
Small fabric pumpkins with felt faces suit a kid's room or a low shelf, though the twig and felt pieces are not for children under 3. Make them like the velvet pumpkin, using orange cotton or flannel and a circle about 10 inches across.
Cut two triangle eyes, a nose and a jagged grin from black felt and glue them on with fabric glue. Glue in a short twig for a stem and wrap a bit of twine around its base. Older kids can cut the felt with blunt scissors. Make three or four and set them in a basket with pine cones and a ball of twine. Beginner, about 45 minutes each.
19. Stacked heirloom pumpkins
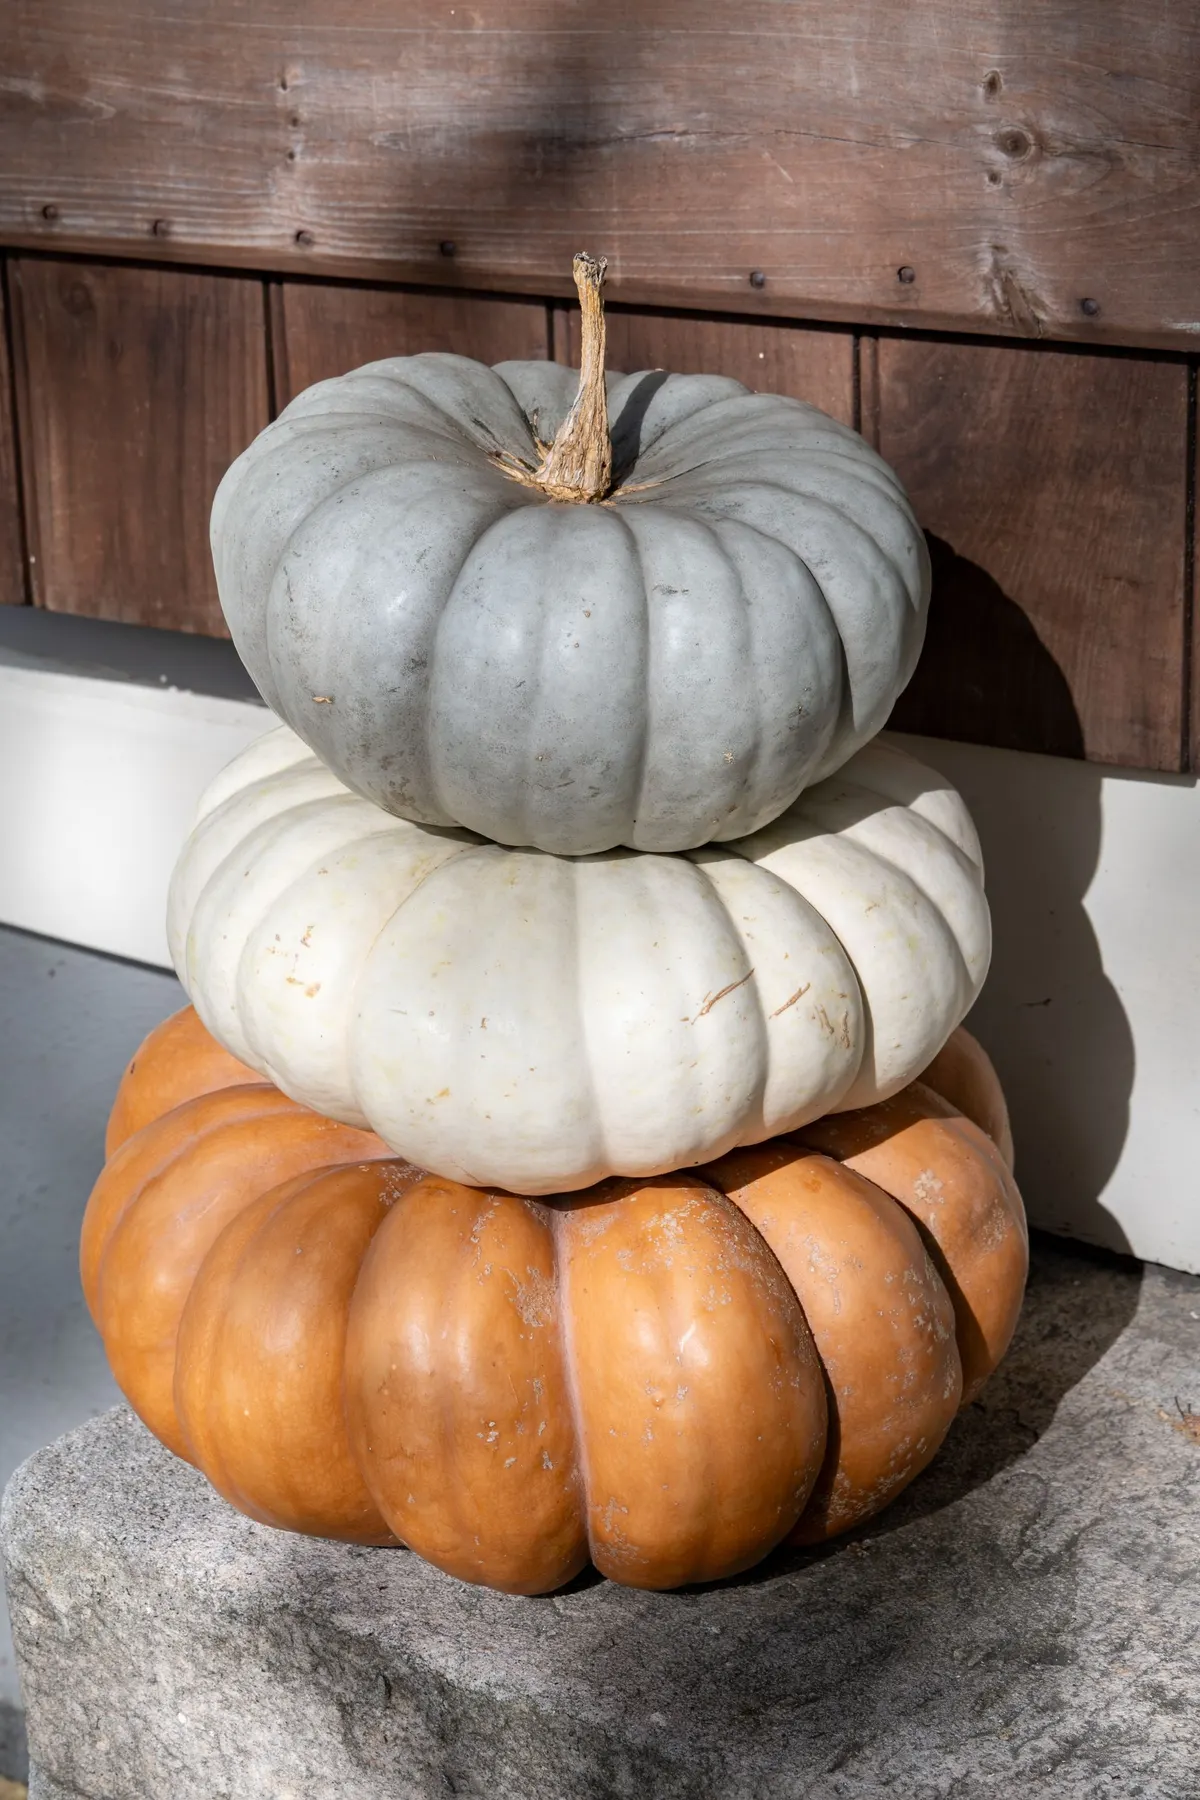
Three heirloom pumpkins stacked from largest to smallest make a porch display with no tools. Use a flat, wide pumpkin on the bottom, a medium white one in the middle and a small blue-gray one on top.
Set each pumpkin on the one below and rock it until it settles. If a stem keeps it from sitting level, swap in a different pumpkin or glue on a small cork shim. Set the stack beside the door on a stone block or a step, away from foot traffic. More ideas are in our fall porch decor guide. Beginner, about 10 minutes.
20. Pumpkin stack in an urn
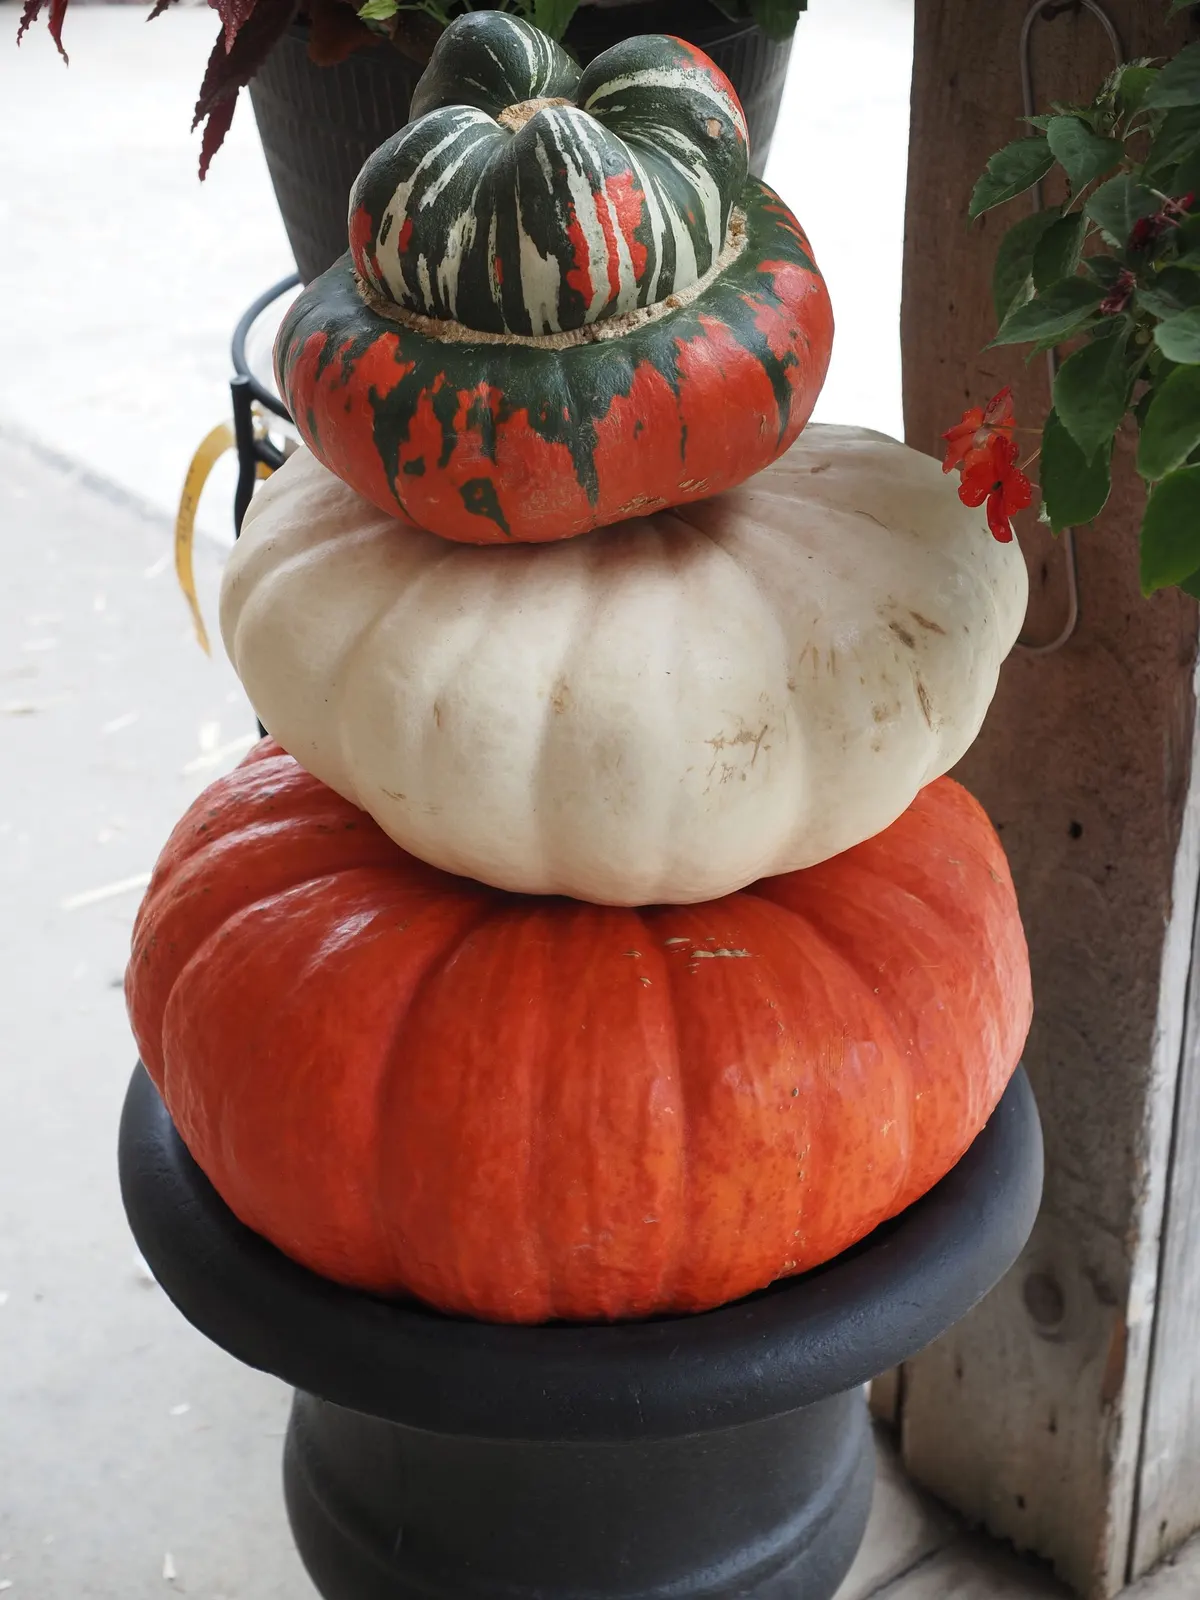
An urn planter raises a pumpkin stack to doorway height. Pick a black or stone urn about as wide as your largest pumpkin. Pack the bowl with a bag of gravel or a block of foam to just below the rim so the bottom pumpkin sits level.
Stack a ribbed orange-red pumpkin, then a cream one, and finish with a striped turban squash on top. Use one urn on each side of the door, or one for a narrow entry. In November, swap the top squash for greenery so the stack carries into winter. Beginner, about 15 minutes.
21. Dark heirloom grouping
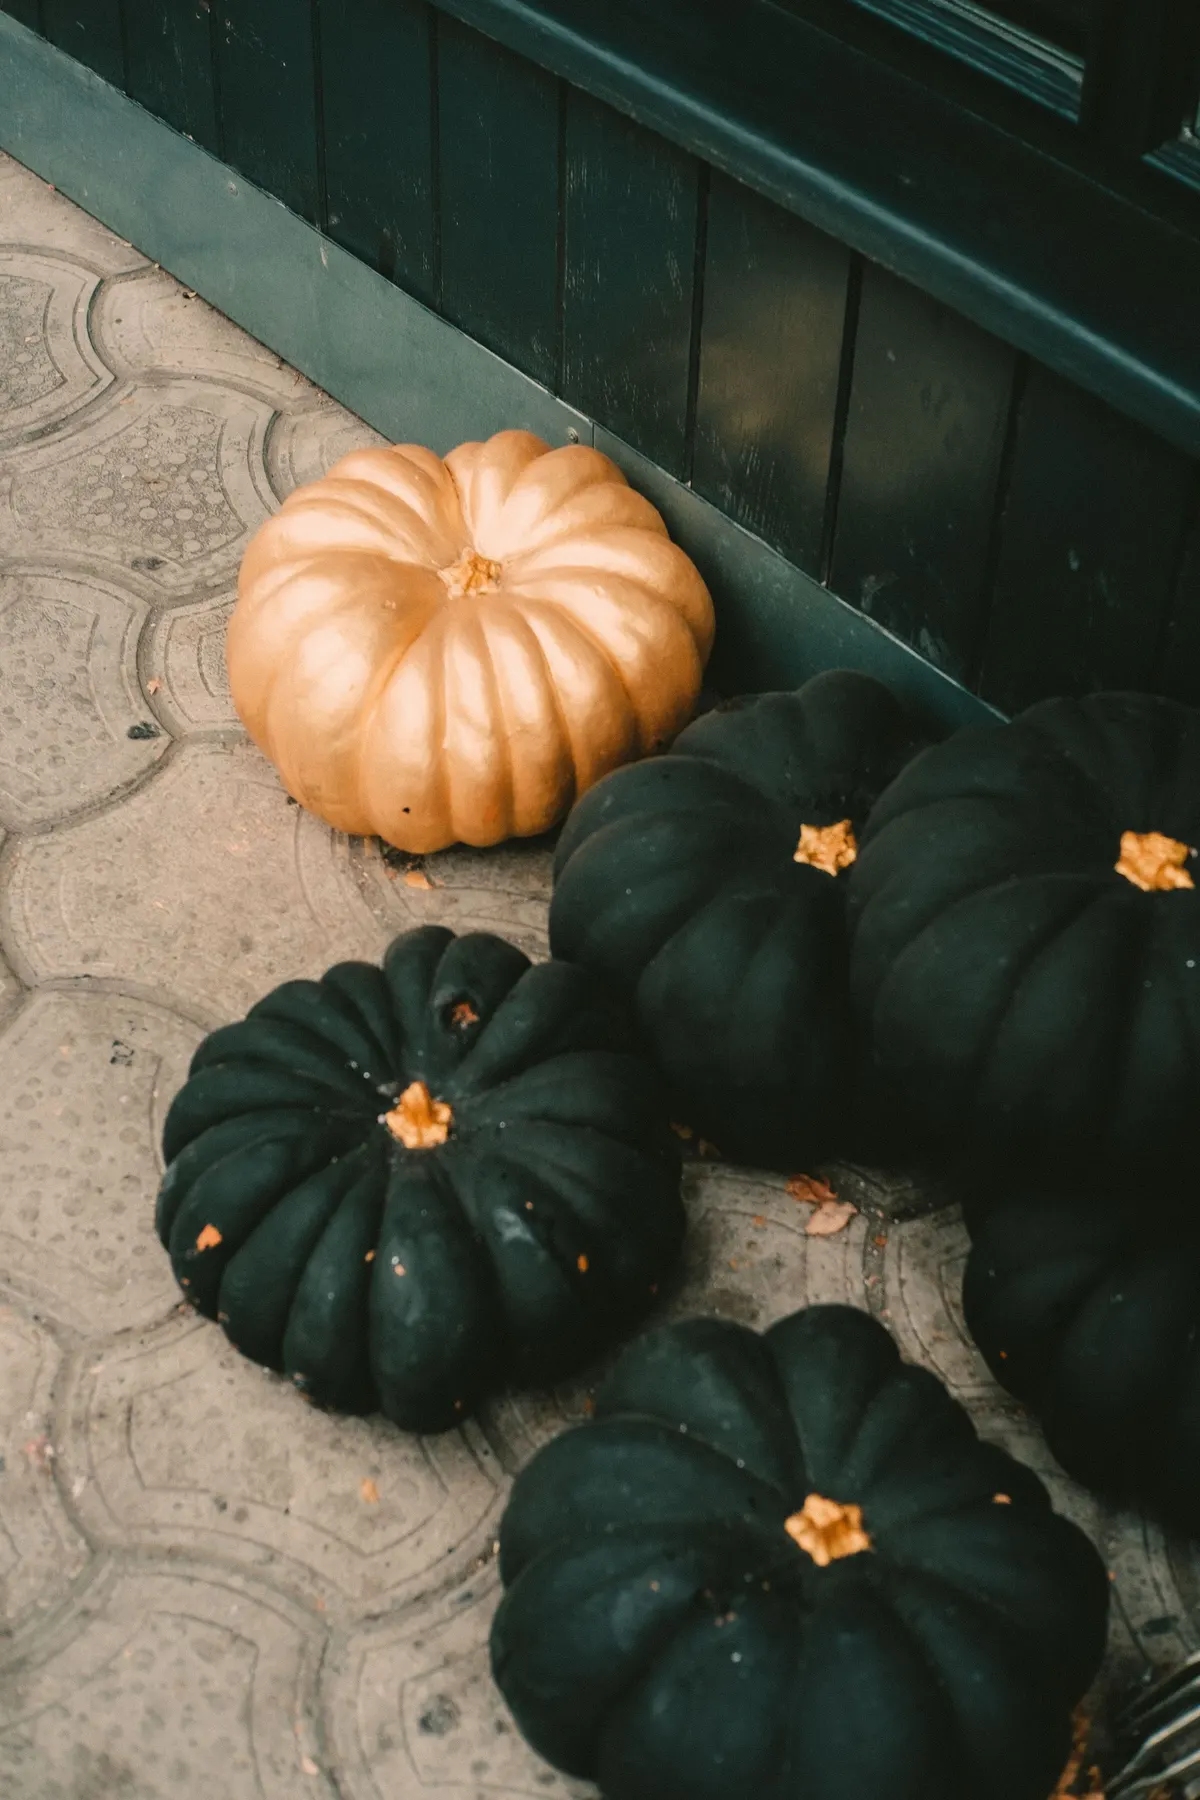
A group of very dark green pumpkins looks moody with no paint at all. Look for near-black varieties at a farm stand or grocery store, and buy five or six in mixed sizes.
Cluster them on a step or along a walkway, then add one pale tan or gold pumpkin slightly off-center as a contrast. Odd numbers look more natural than even ones. The dark skins pair well with a black or deep green front door. This look also works into Thanksgiving with no changes. Beginner, about 10 minutes.
22. Ceramic jack-o'-lantern vase
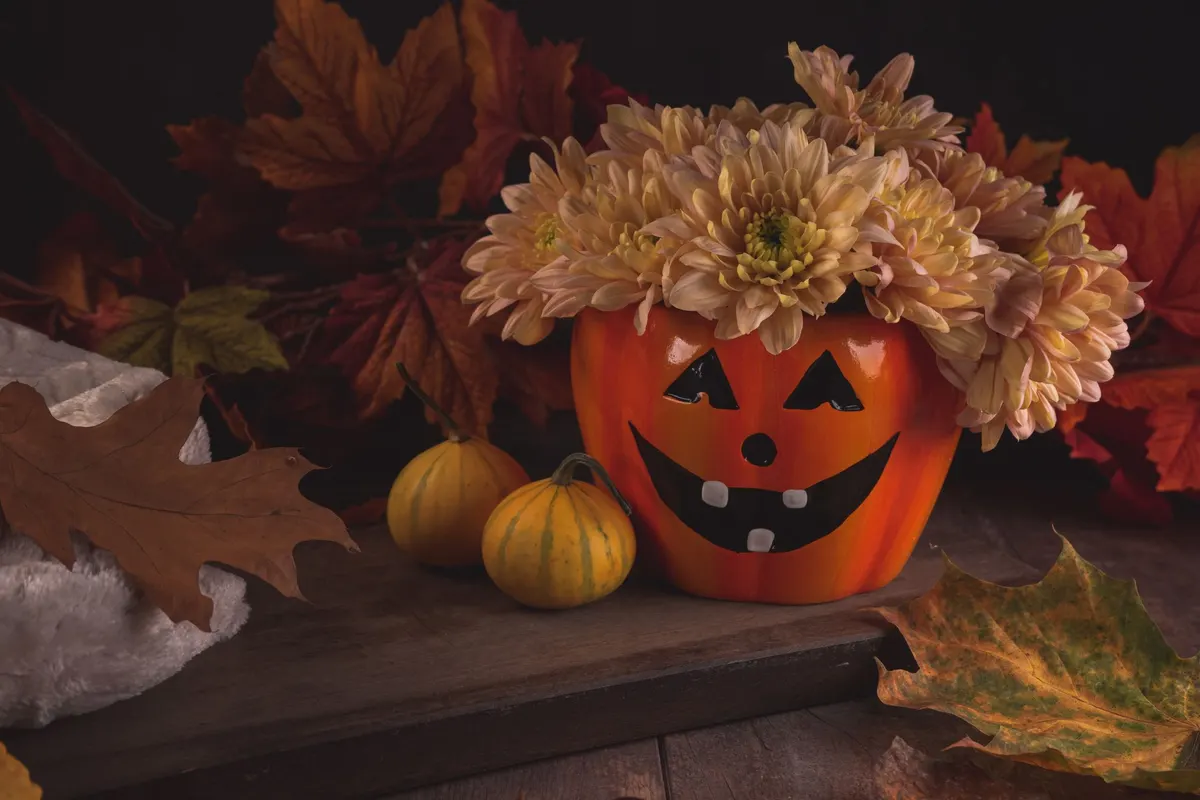
A ceramic jack-o'-lantern pot holds flowers instead of a candle. Fill it with a small potted mum, or with cut mums in a jar of water set inside. Peach and cream mums soften the grin, while orange or dark red play it up.
Add two or three striped mini pumpkins and a few dried maple leaves around the base. Water a potted mum every few days, and pour off any water that collects in the bottom. Keep mums out of reach of pets, since they are toxic to cats and dogs. A hardy garden mum can move to the garden afterward. Beginner, about 15 minutes.
Final tips
- Wash, dry and wipe every pumpkin with rubbing alcohol before painting or gluing.
- Set real pumpkins on a saucer or trivet, not damp concrete, and check the base every few days.
- For more porch and table ideas, browse the Halloween hub and our porch and door ideas.
Frequently asked questions
How long does an uncarved pumpkin last?
A firm, uncut pumpkin with its stem attached can last two to three months somewhere cool, dry and shaded. On a porch, expect several weeks, less in hot sun, rain or frost. Paint does not stop rot, so check the base every few days for soft spots. Setting the pumpkin on a saucer or cork trivet instead of damp concrete helps it last longer.
What kind of paint works on real pumpkins?
Acrylic craft paint is the easiest choice. Wash the pumpkin, let it dry completely, and apply two thin coats, letting each dry before the next. Pastels and white show better over a white base coat. Spray paint works for metallic finishes, applied outdoors in light coats. A clear acrylic sealer helps paint survive damp porch nights.
How do you get decorations to stick to a pumpkin?
Start with clean, dry skin: wipe it with rubbing alcohol on a paper towel and let it evaporate. A low-temperature glue gun holds felt, ribbon, dried flowers and paper crowns. Double-sided tape works for light paper pieces. Avoid pins and tacks on real pumpkins, because every hole lets moisture and mold in.
What are good no-carve pumpkin ideas for toddlers?
Washable paint dabbed on with sponges and chunky washable markers on a white pumpkin both work for toddlers, with an adult watching. Skip stickers, googly eyes, beads, glitter and other small parts for children under 3, since they are choking hazards, and keep the glue gun with an adult. Small pie pumpkins are easier for little hands to steady.
Can you compost a painted pumpkin?
Unpainted pumpkins compost well. Advice on painted ones varies: Delaware's environmental agency says to put them in the trash, while some extension services allow composting once all decorations come off. Spray paint, sealer, chalkboard paint, decoupage and glitter, which is usually plastic, belong in the trash. Never leave painted or glittered pumpkins out for wildlife to eat.
You might also like
 Halloween
22 Carved Pumpkin Ideas, From Easy Faces to Showstoppers
 Halloween
22 Halloween Door Decoration Ideas for Houses and Apartments
 Halloween
21 Outdoor Halloween Decoration Ideas for Yards, Trees and Paths
 World holidays
20 Diwali Decoration Ideas for Your Home
 Christmas
17 Christmas Door Decorating Contest Ideas (Office & School)
 Fall
Fall22 Fall Porch Decor Ideas for Real Porches and Real Budgets