22 Easy DIY Halloween Decorations to Make This Weekend

Jump to an idea (22)
- Before you start
- 1. Draped fabric ghosts for a tabletop
- 2. Cheesecloth ghosts on garden stakes
- 3. Hanging handkerchief ghost
- 4. Paper ghosts on straws
- 5. Needle-felted wool ghost
- 6. Ghost light string
- 7. Toilet paper tube bats
- 8. Paper bat wall
- 9. Monster silhouettes on a window
- 10. Cobweb and spiders on a window
- 11. Yarn spiderweb in a hoop
- 12. Felt spiderwebs for a table
- 13. Skull in a feather nest
- 14. Potion jars
- 15. Tissue paper jar ghosts
- 16. Cardboard tombstones for the mantel
- 17. Spray-painted plastic pumpkins
- 18. Pumpkin lantern lights
- 19. Thrifted frames with paper silhouettes
- 20. Dressed-up witch hat
- 21. Paper pennant banner
- 22. Candlelit staircase corner
- Final tips
These 22 easy DIY Halloween decorations use paper, cheesecloth, cardboard, jars and Dollar Tree finds. Most take under an hour with scissors, glue and paint. Ghosts come first, then bats and webs, then jars, frames, a banner, a mantel and a staircase.
Each idea lists sizes, counts and timing, plus a cheaper or renter-friendly version where it helps. For knife-free pumpkins, see our no-carve pumpkin ideas.
Before you start
Use battery tea lights, LED strands and flameless candles near anything made of paper, fabric, cobweb, feathers or moss. Adults handle the hot glue gun, craft knife, spray paint and felting needle. Keep googly eyes, pompoms, plastic spiders, ping-pong balls and battery tea lights away from children under 3, since swallowed button batteries are an emergency.
In a rental, hang things with painter's tape, removable hooks or mounting putty, and test each on a hidden patch of paint first. Bring paper and cheesecloth in on wet nights.
1. Draped fabric ghosts for a tabletop
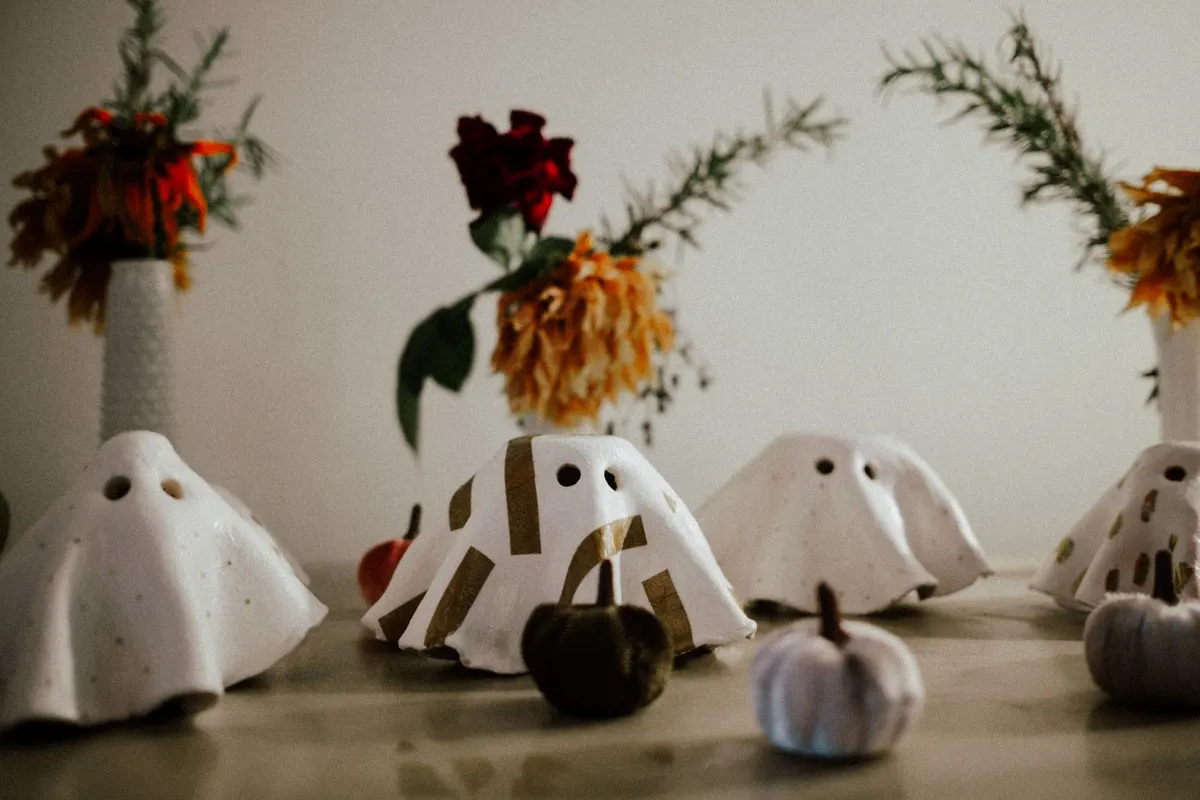
Small stiffened ghosts make a quiet, grown-up centerpiece. Cut 12-inch squares of cheesecloth or old cotton sheet, soak them in fabric stiffener, and drape each over a foam ball set on top of a bottle. Pinch the hem into ripples and let them dry for a full day.
Cut two round eye holes with small scissors while the cloth is still slightly damp. Decorate one ghost with stripes of gold washi tape and dot another with gold paint. Group four or five with velvet pumpkins and a few bud vases of dried flowers. Beginner, about 30 minutes plus drying.
2. Cheesecloth ghosts on garden stakes
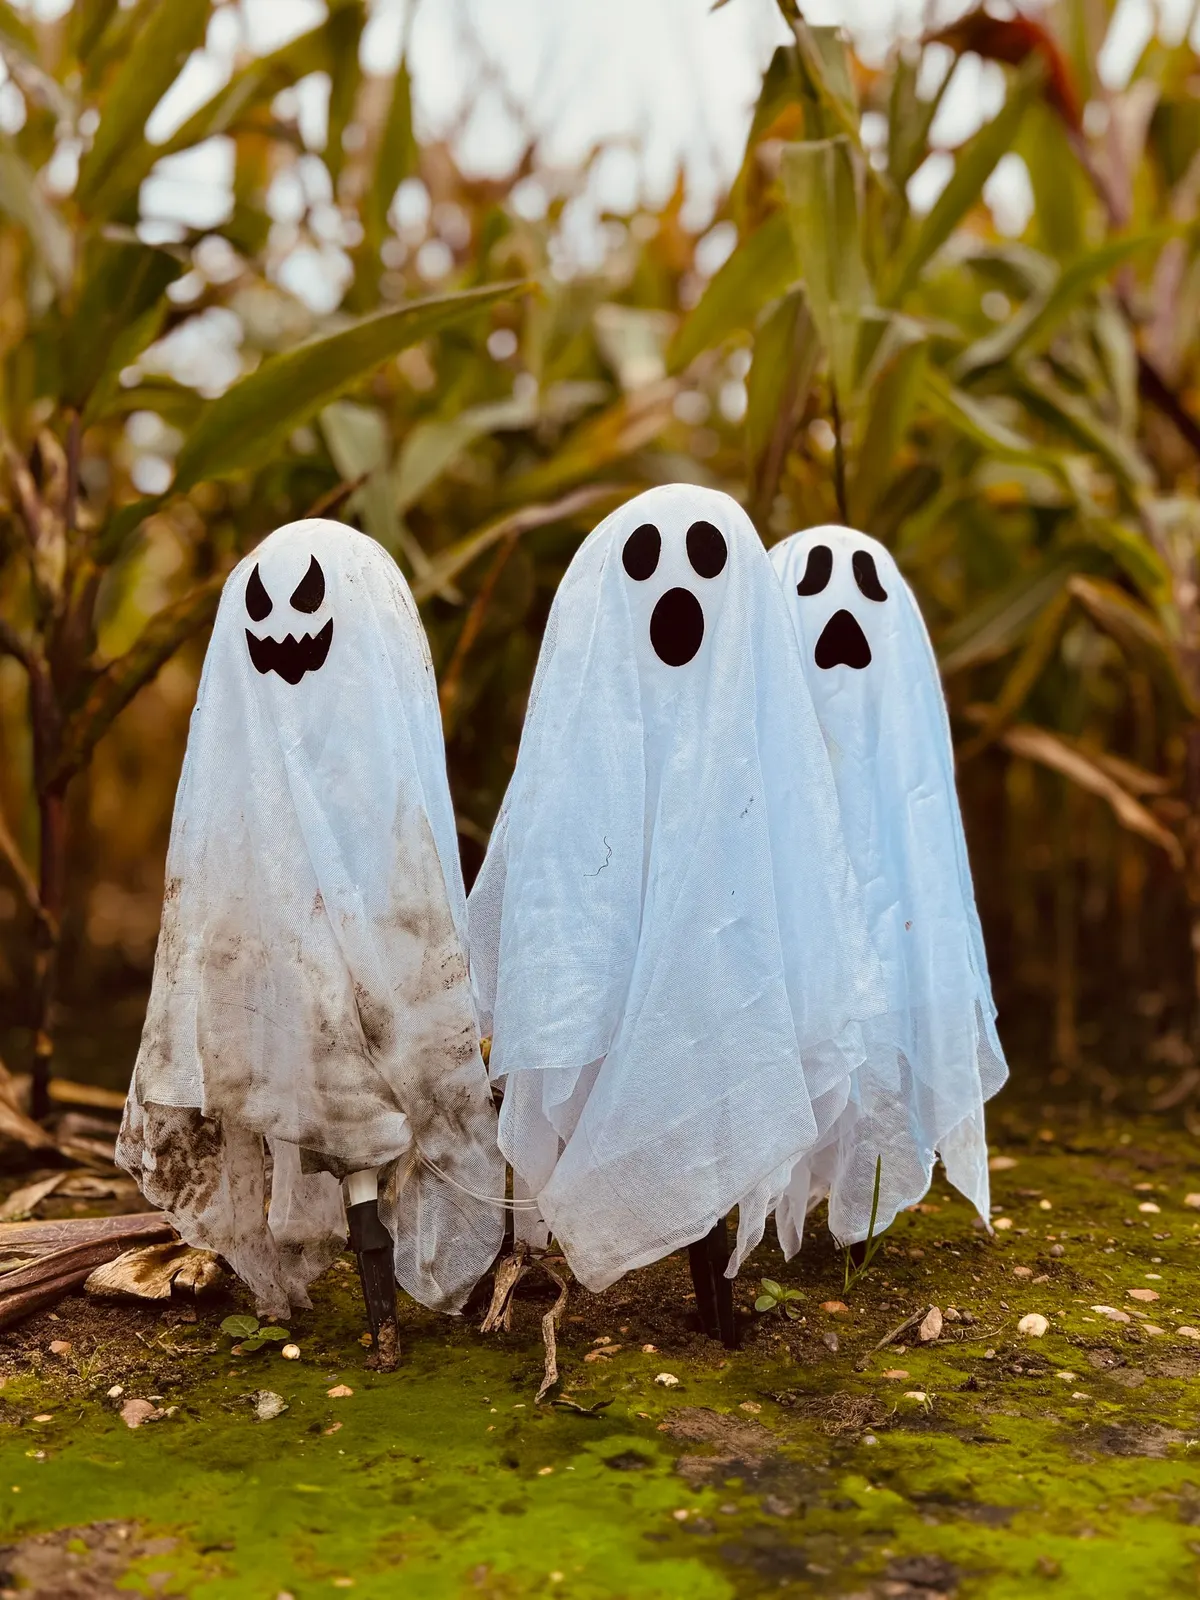
Three staked ghosts look like they are walking out of the garden. Push a 3-foot wooden stake into the soil, top it with a foam ball or a wad of newspaper taped into a head, and drape a 1-yard length of cheesecloth over it.
Cut faces from black felt and glue them on, giving each ghost its own expression: angry triangles with a jagged grin, ovals with a round O mouth, and droopy comma eyes. Keep the hems a few inches above the dirt, because cheesecloth soaks up mud. Beginner, about 20 minutes each.
3. Hanging handkerchief ghost
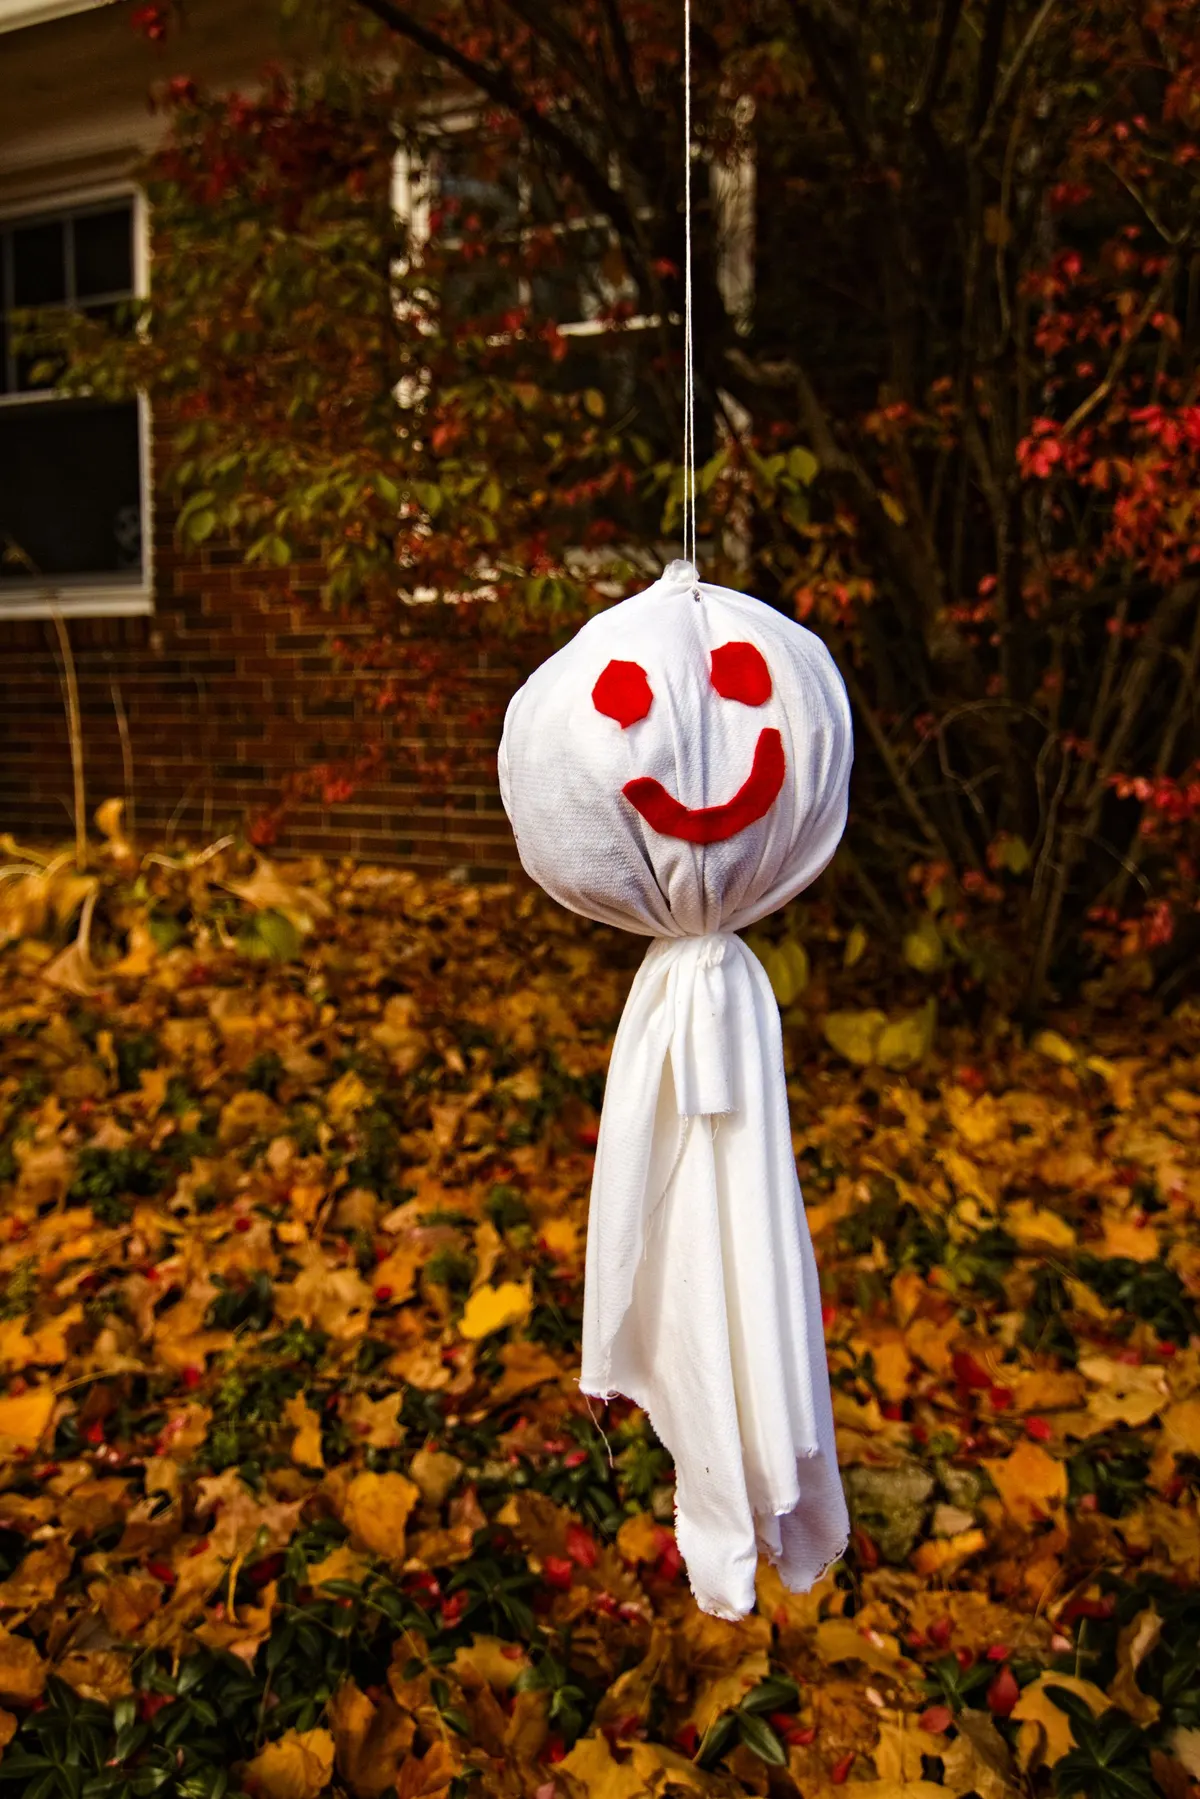
This is the classic hanky ghost, scaled up. Center a white dish towel or a square of waffle-weave cotton over a foam or rubber ball. Tie it tight under the ball with string to make the head, and let the rest hang loose.
Cut two eyes and a wide smile from red felt and glue them on, or use black for a spookier face. Tie fishing line to the top of the head and hang it from a branch, porch hook or curtain rod. Beginner, about 15 minutes.
4. Paper ghosts on straws
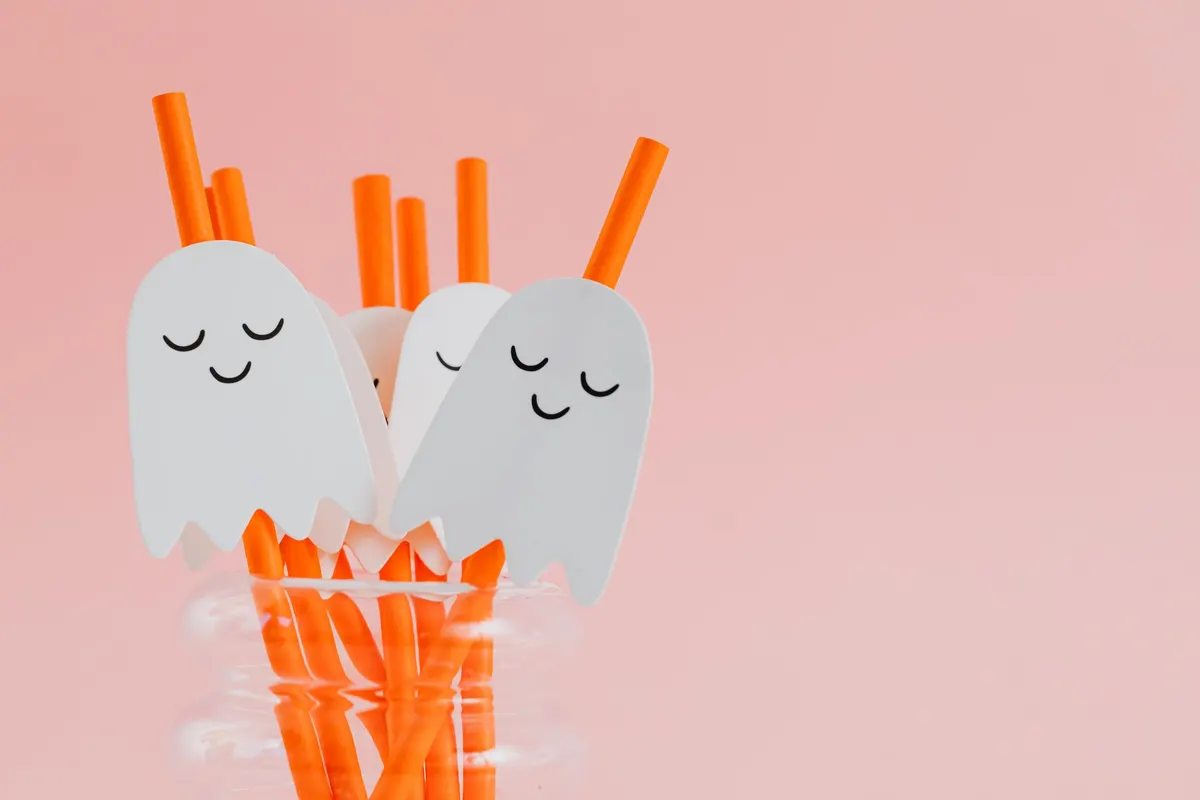
Ghost straws dress up a drink cart or a party table for almost nothing. Cut ghost shapes about 3 inches tall from white cardstock and draw sleepy closed eyes and a small smile on each with a fine black marker.
Tape the ghosts to orange paper straws, leave a few straws bare, and stand seven or eight in a clear glass vase or jar. Vary the heights so the ghosts don't block each other. Kids can draw while an adult cuts. Beginner, about 20 minutes.
5. Needle-felted wool ghost
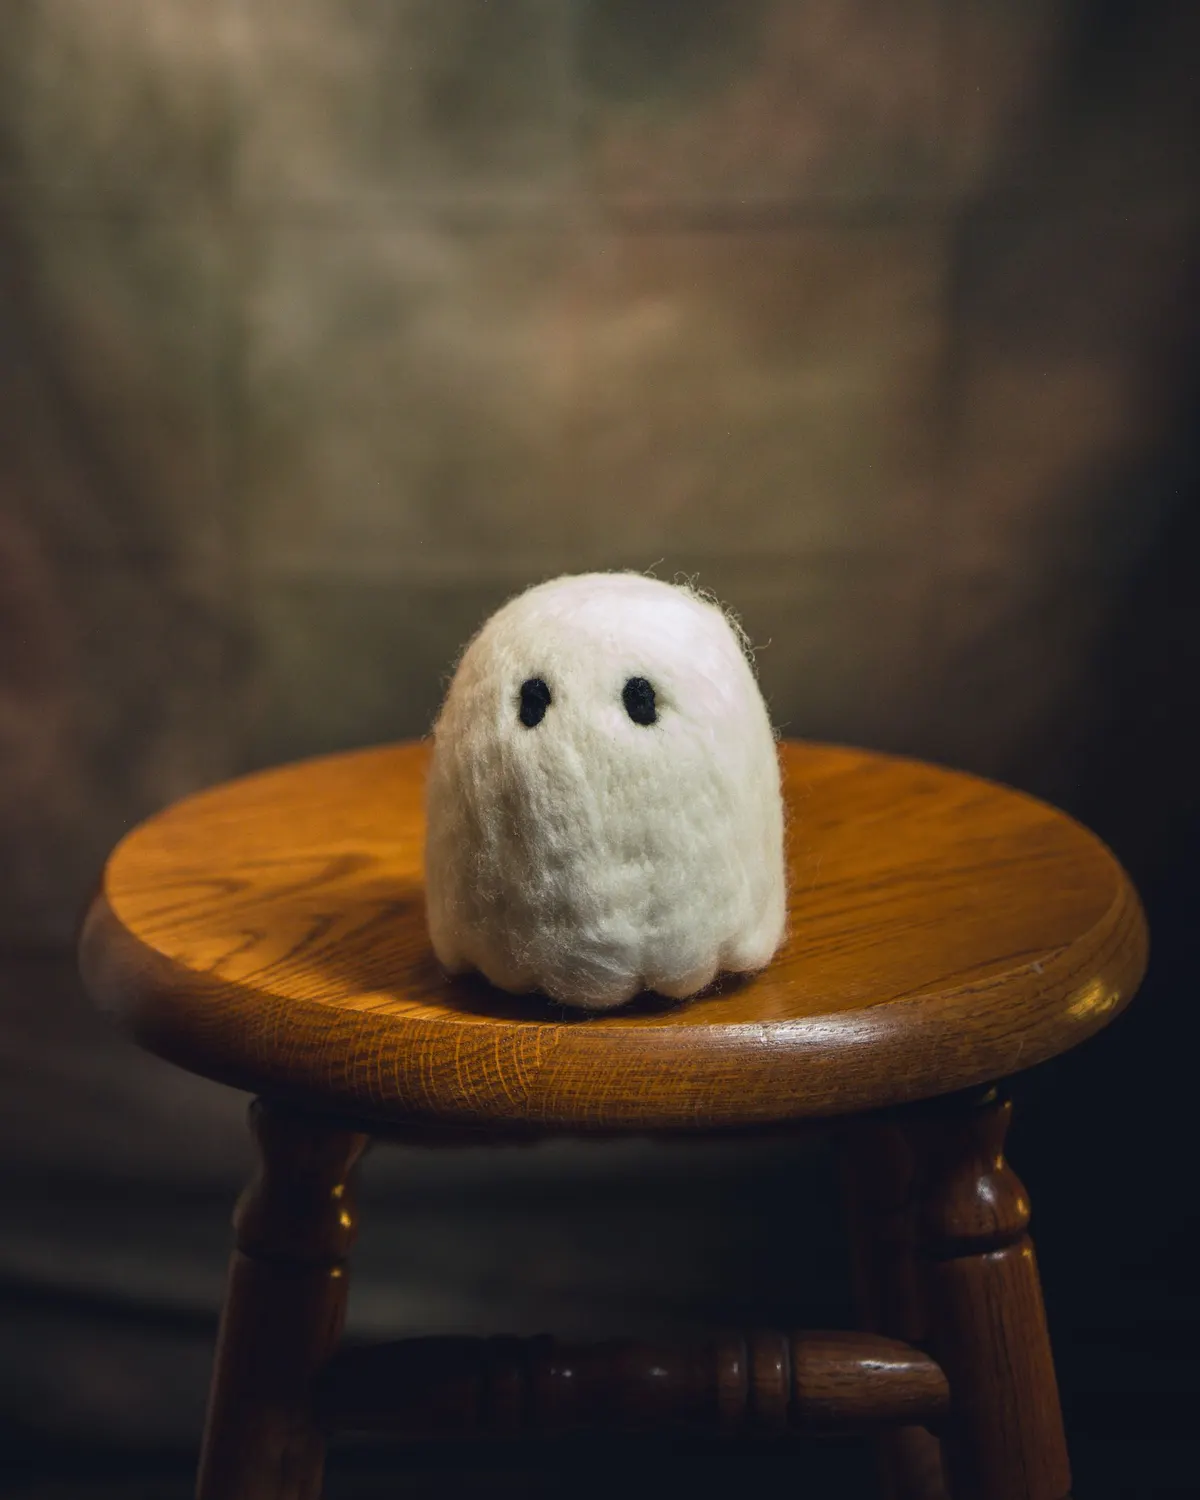
A palm-sized wool ghost makes a shelf piece that lasts for years. Roll a handful of white wool roving into a loose dome, set it on a foam felting pad, and stab it repeatedly with a felting needle until it firms up into a bell shape about 4 inches tall.
Pull the bottom edge into three or four soft scallops. Felt in two small ovals of black wool for eyes and leave off the mouth. Felting needles are barbed and very sharp, so use a finger guard and keep them away from kids. Beginner, about 1.5 hours.
6. Ghost light string
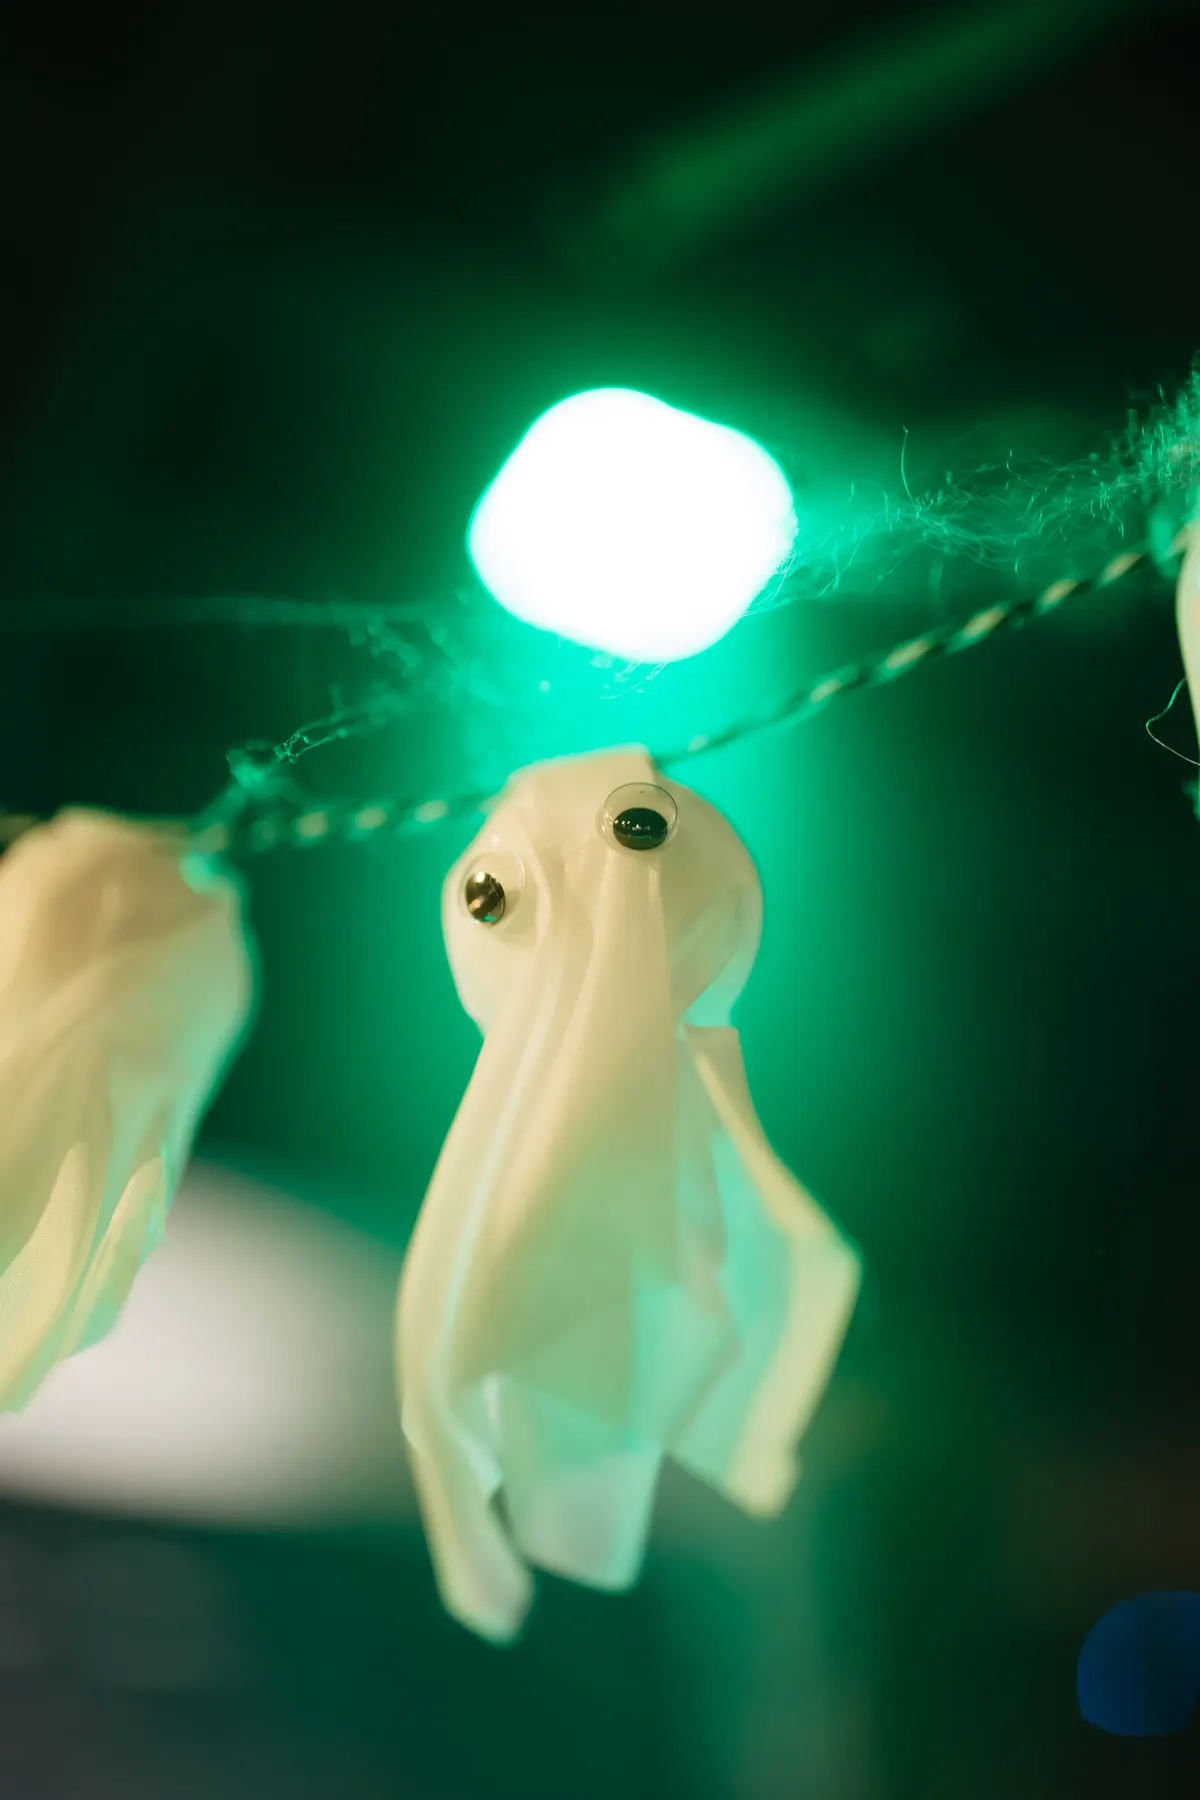
Turn a plain LED light strand into a string of floating ghosts. Wrap a cotton ball in a 6-inch square of cream fabric or thin satin and tie it at the neck with white thread to make a small ghost.
Tie the ghosts to the wire between the bulbs, one every second or third bulb, and glue on mismatched googly eyes. Use LED strands only, since they run far cooler than old mini-lights. A green LED strand or a single green bulb gives the eerie glow in the photo. Drape a little stretch cobweb over the wire to finish. Beginner, about 1 hour for a 10-foot strand.
7. Toilet paper tube bats
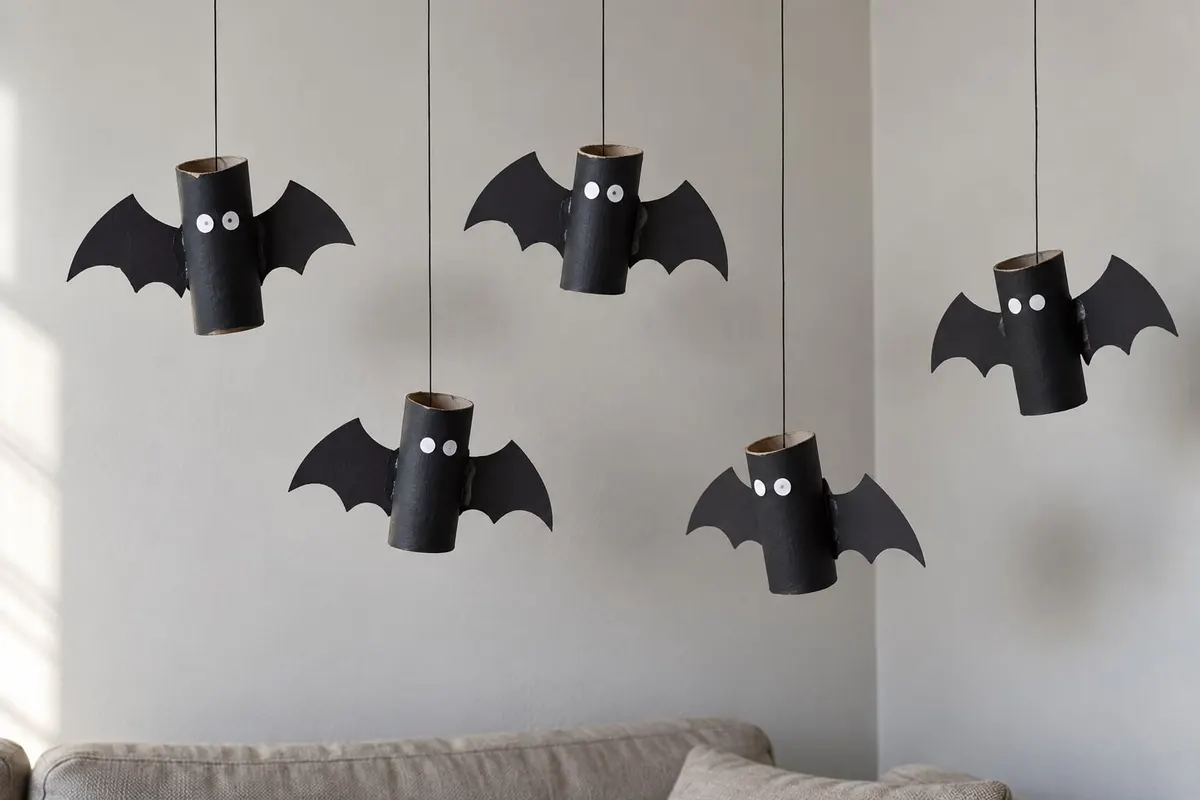
Five tube bats hung at different heights look like a colony. Paint toilet paper tubes matte black with acrylic paint and let them dry for 20 minutes. Fold a sheet of black cardstock in half and cut scalloped bat wings about 8 inches across.
Glue a wing to each side of the tube. Add two round white paper eyes and dot pupils on with a marker, or leave some plain white. Punch a hole near the top, thread black string through, and hang the bats in a corner from a removable ceiling hook or a tension rod. A good one for kids to paint. Beginner, about 10 minutes per bat.
8. Paper bat wall
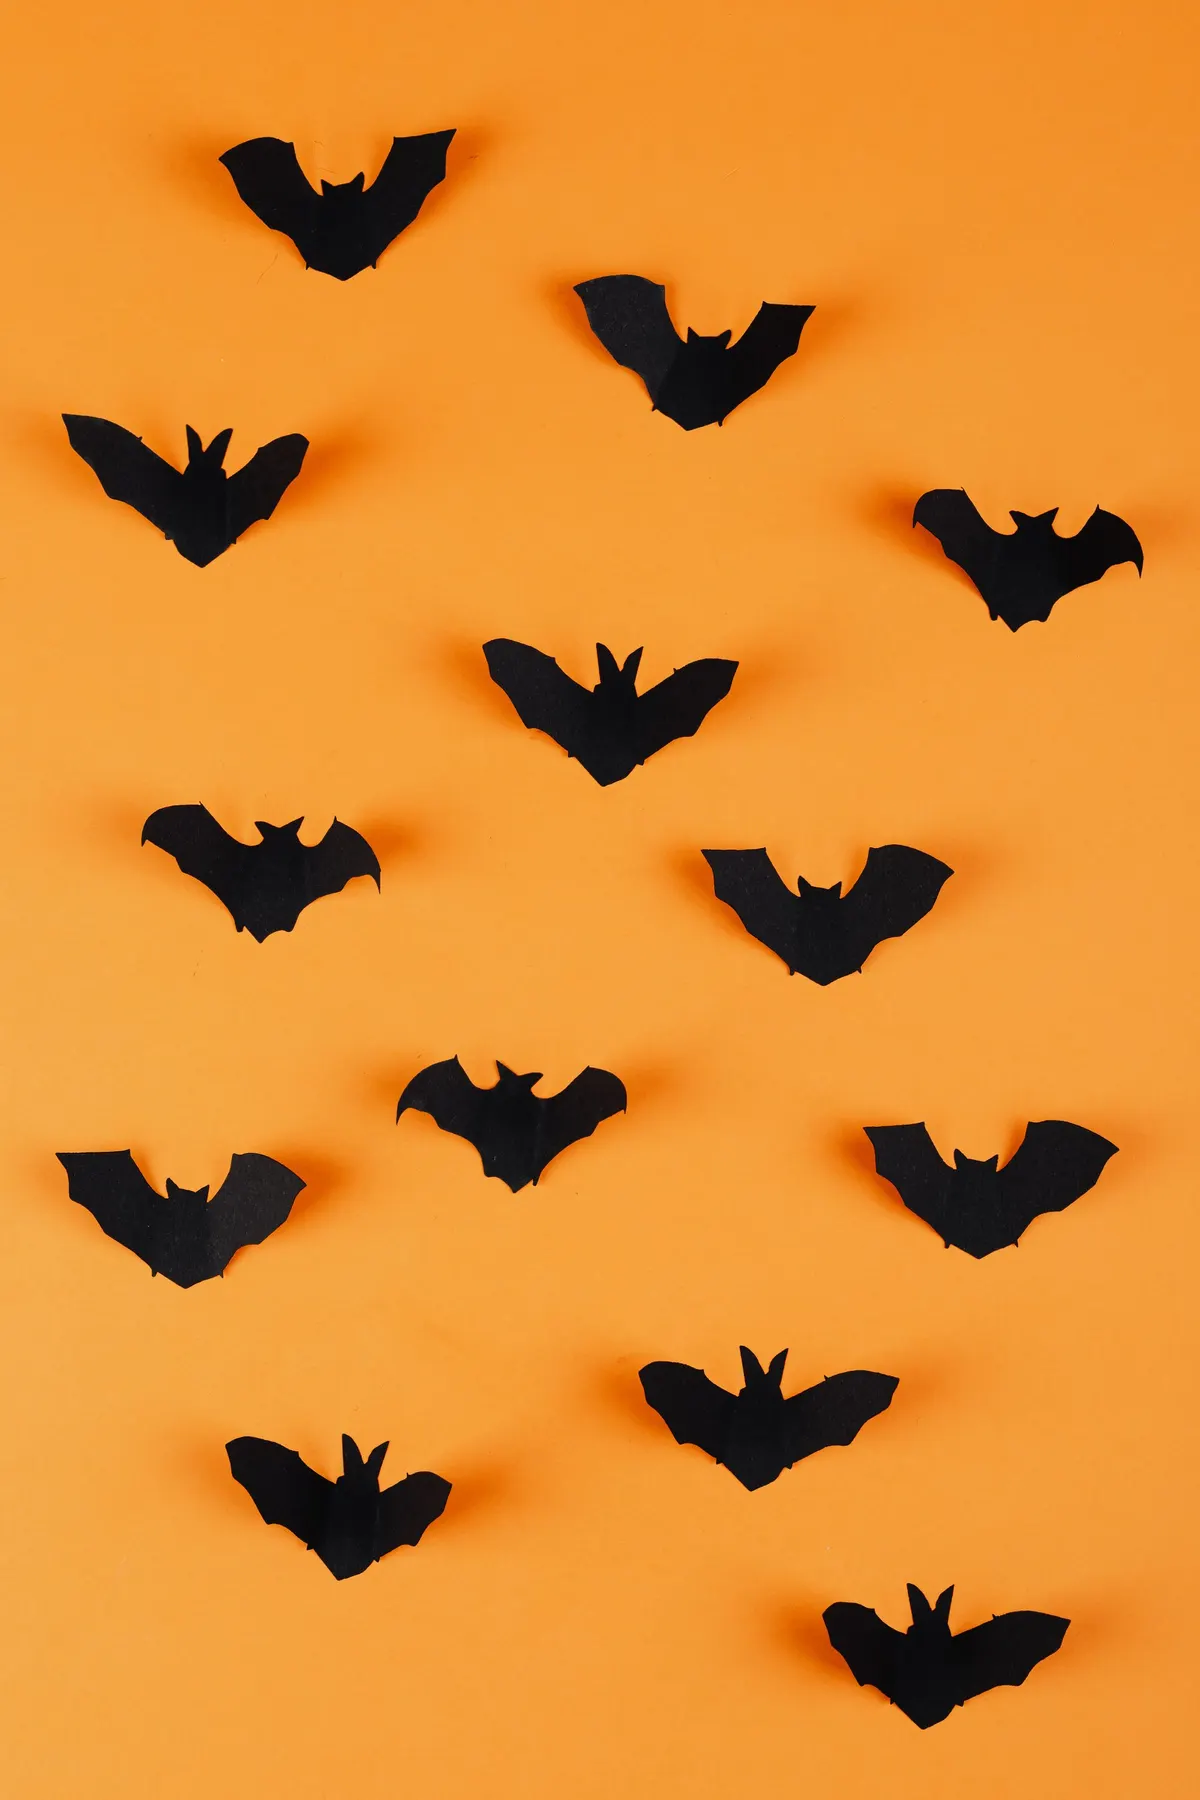
A cluster of paper bats fills an empty wall for the price of a few sheets of black cardstock. Draw one bat about 6 inches across, cut it out, and trace it to make 12 more, or cut several at once from a folded stack.
Fold each bat down the middle so the wings lift off the wall and cast small shadows. Stick them up with a loop of painter's tape or a pea of mounting putty, in staggered rows that thin out toward one side. Thirteen bats fill a 3-foot patch. Kids can trace while an adult cuts. Beginner, about 45 minutes.
9. Monster silhouettes on a window
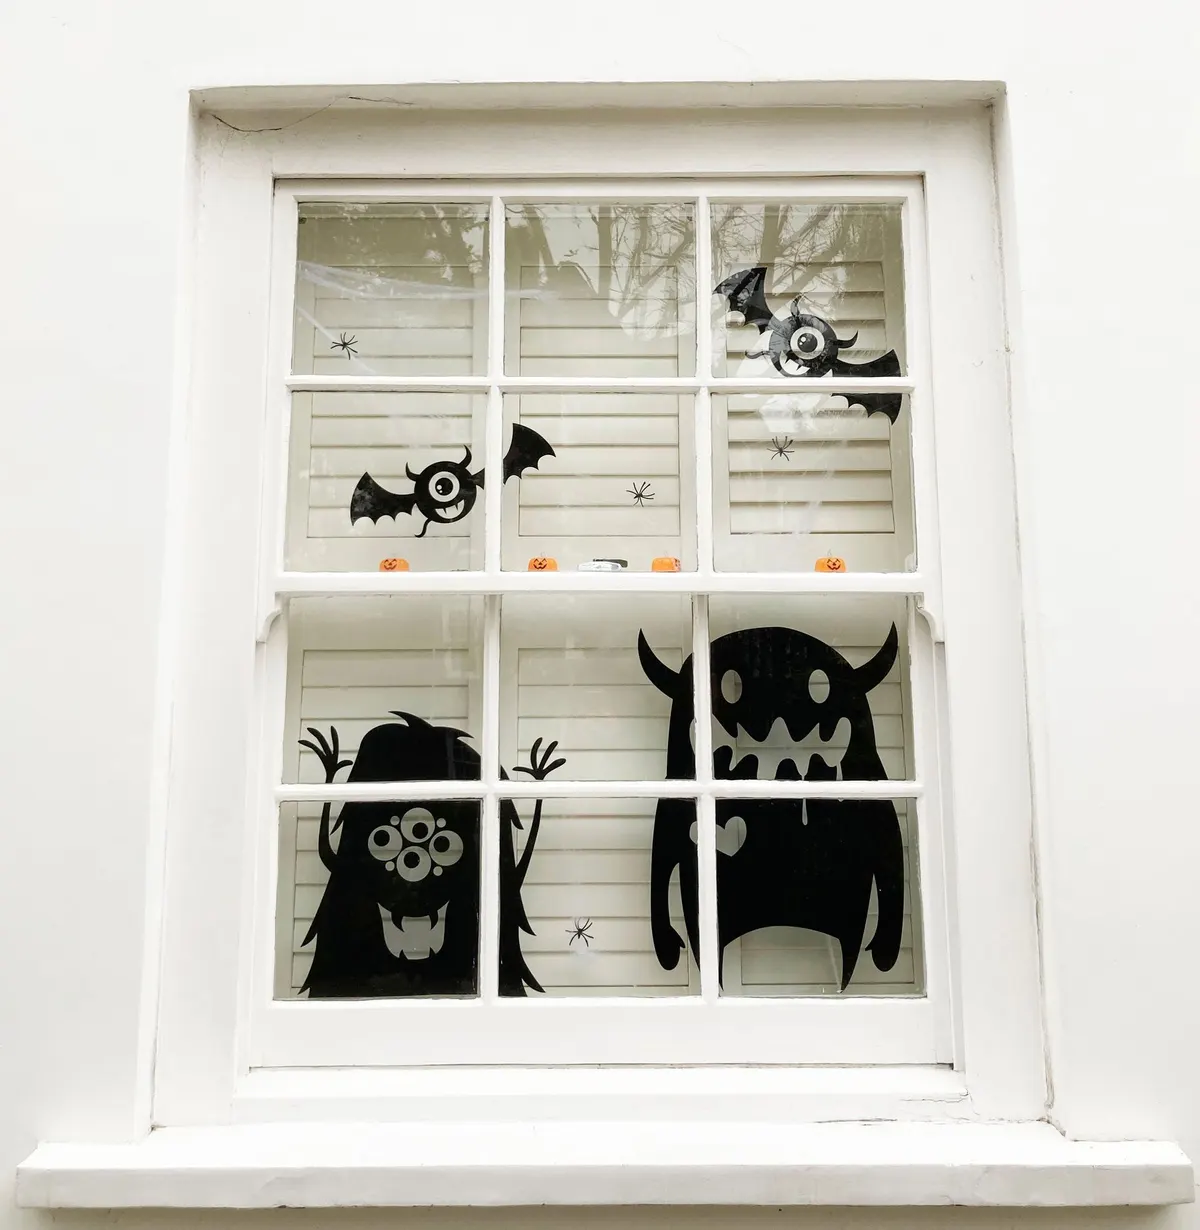
Black silhouettes read from the street day and night. Draw two big monsters, two one-eyed bats and a few small spiders on black cardstock or black adhesive shelf liner, then cut them out.
Tape the shapes to the inside of the glass facing out, or stick the shelf liner straight onto the glass, since it usually peels off glass cleanly. Test a corner first. Put the biggest monsters on the lower sash so they look like they are climbing in. Set a row of mini pumpkins on the window rail and pull some stretch cobweb into the top corners. Beginner, about 1 hour.
10. Cobweb and spiders on a window
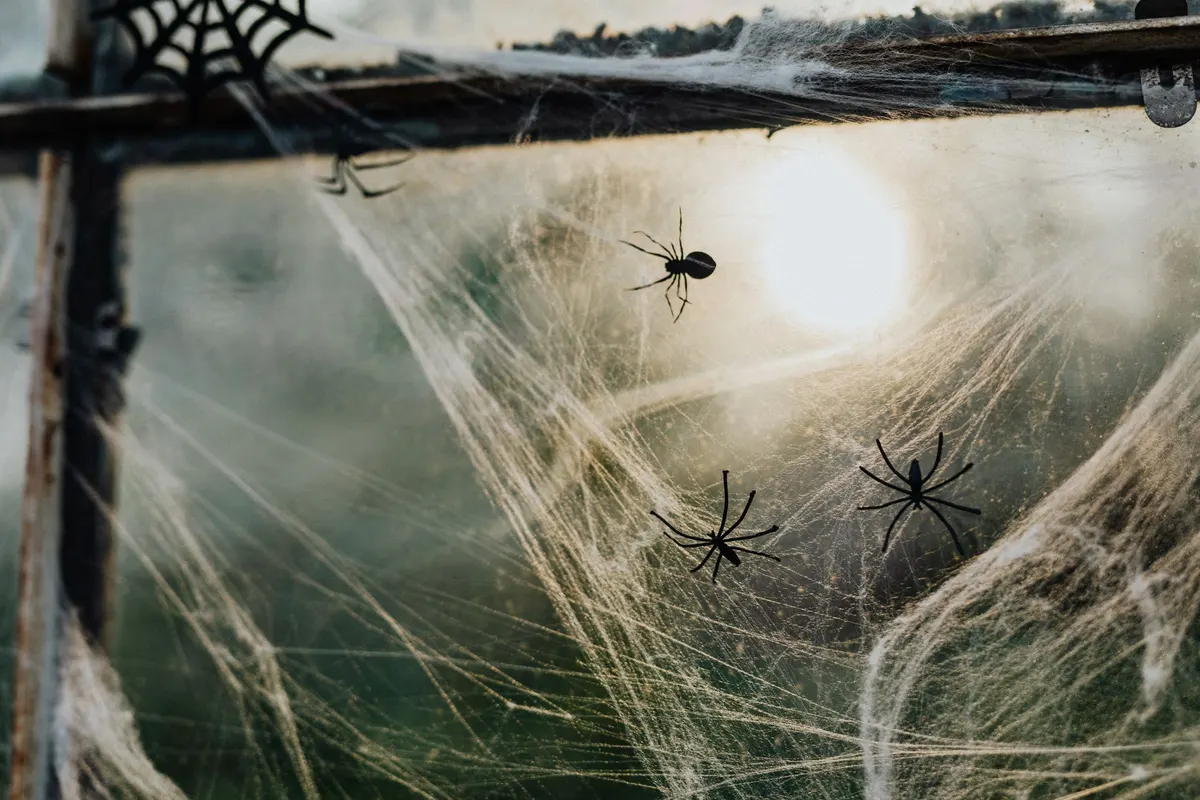
Stretch cobweb is the fastest spooky look there is, if you pull it thin. Tear off a piece the size of your palm and stretch it in every direction until you can see through it, then catch the edges on the window frame.
Scatter four plastic spiders across the web at different heights. One big wad looks like cotton, while a thin layer looks like old webbing. Keep it indoors or on glass, because outdoor webbing can trap birds and small animals. It is also flammable, so keep it away from candles and hot bulbs. Beginner, about 10 minutes.
11. Yarn spiderweb in a hoop
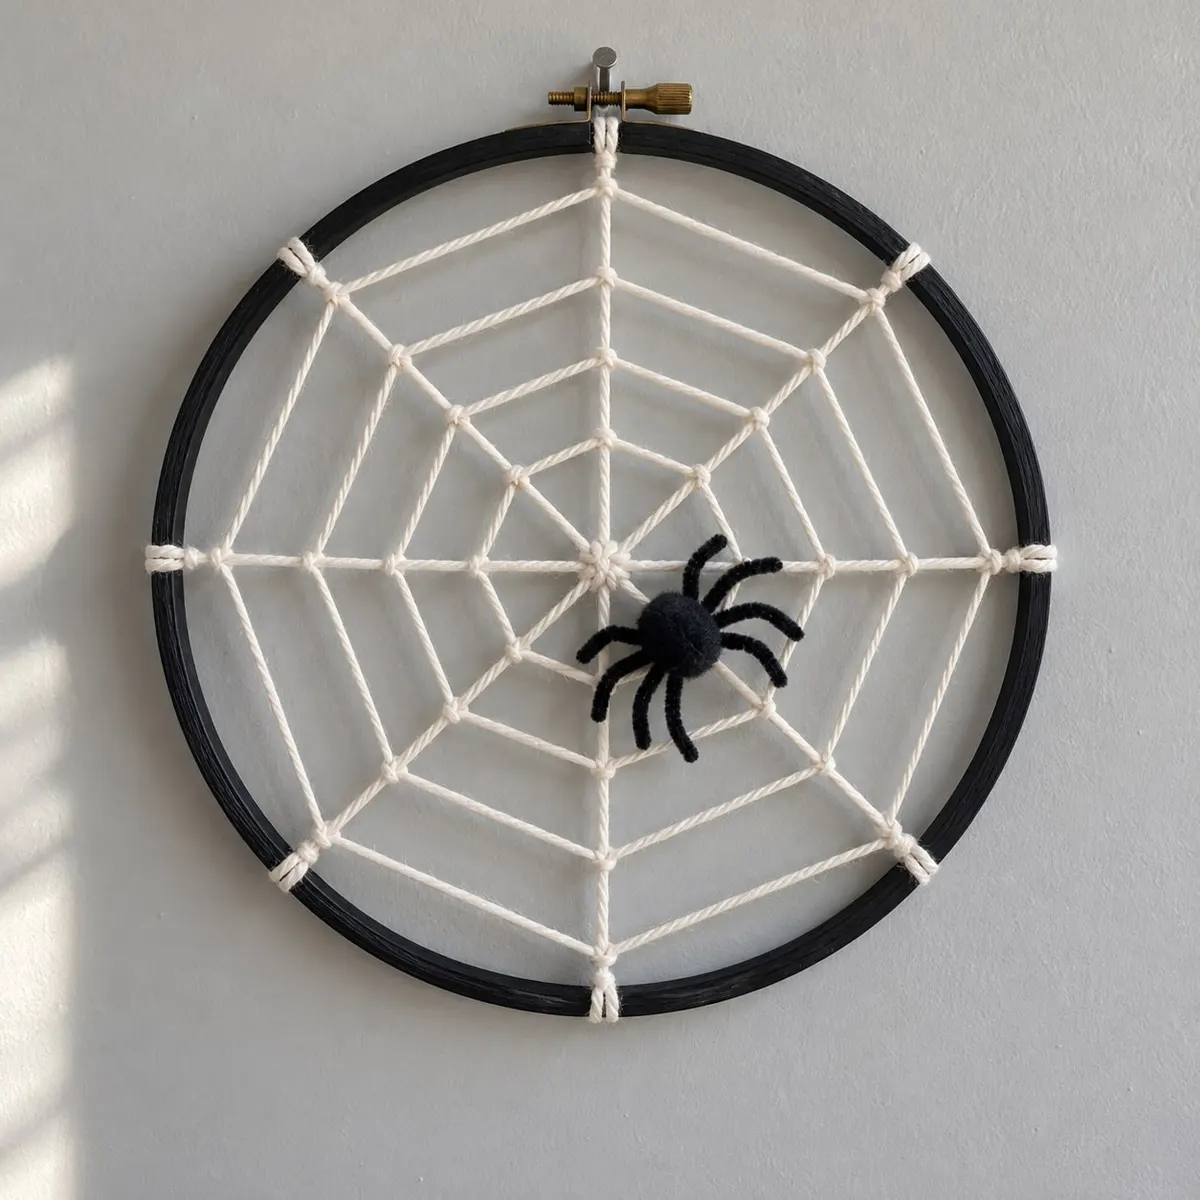
An embroidery hoop gives you a neat yarn web you can hang on a nail. Use a 10-inch hoop and white or cream cotton yarn. Tie eight spokes across the hoop so they all cross at the center, and knot them together there.
Starting at the center, tie the yarn to one spoke, then wrap it once around each spoke as you spiral outward. Six rings fill a 10-inch hoop. Make a spider from black chenille or a pompom with four black pipe cleaners cut in half for legs, and glue it slightly off center. Paint the hoop black first if you want contrast. Beginner, about 45 minutes.
12. Felt spiderwebs for a table
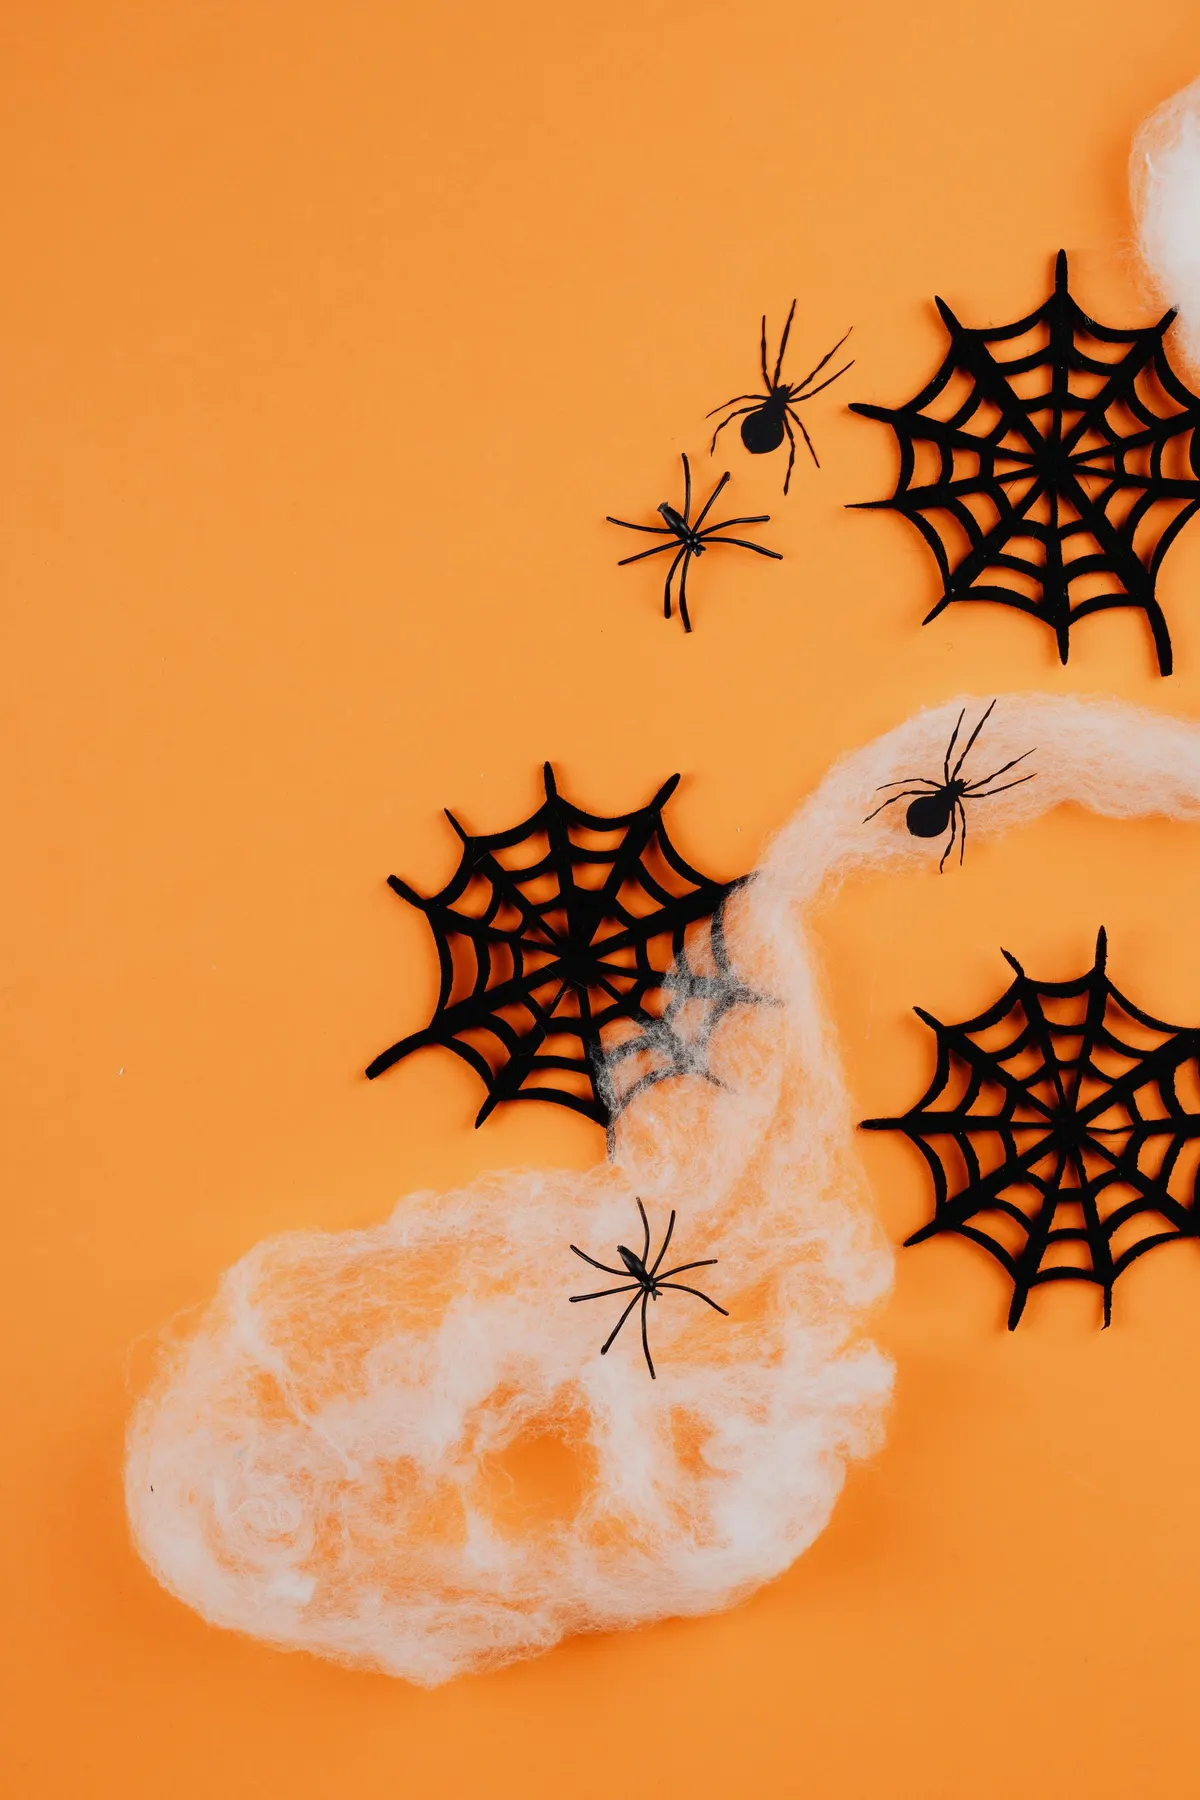
Felt webs make a table scatter that you can fold up and reuse every year. Fold a square of thin black craft felt or paper into eighths, cut scalloped arcs and slits like a paper snowflake, leaving the folds uncut, then unfold it into a web.
Make three in different sizes and lay them on an orange runner or tablecloth. Add four plastic spiders and a strand of stretch cobweb from one corner. Beginner, about 30 minutes.
13. Skull in a feather nest
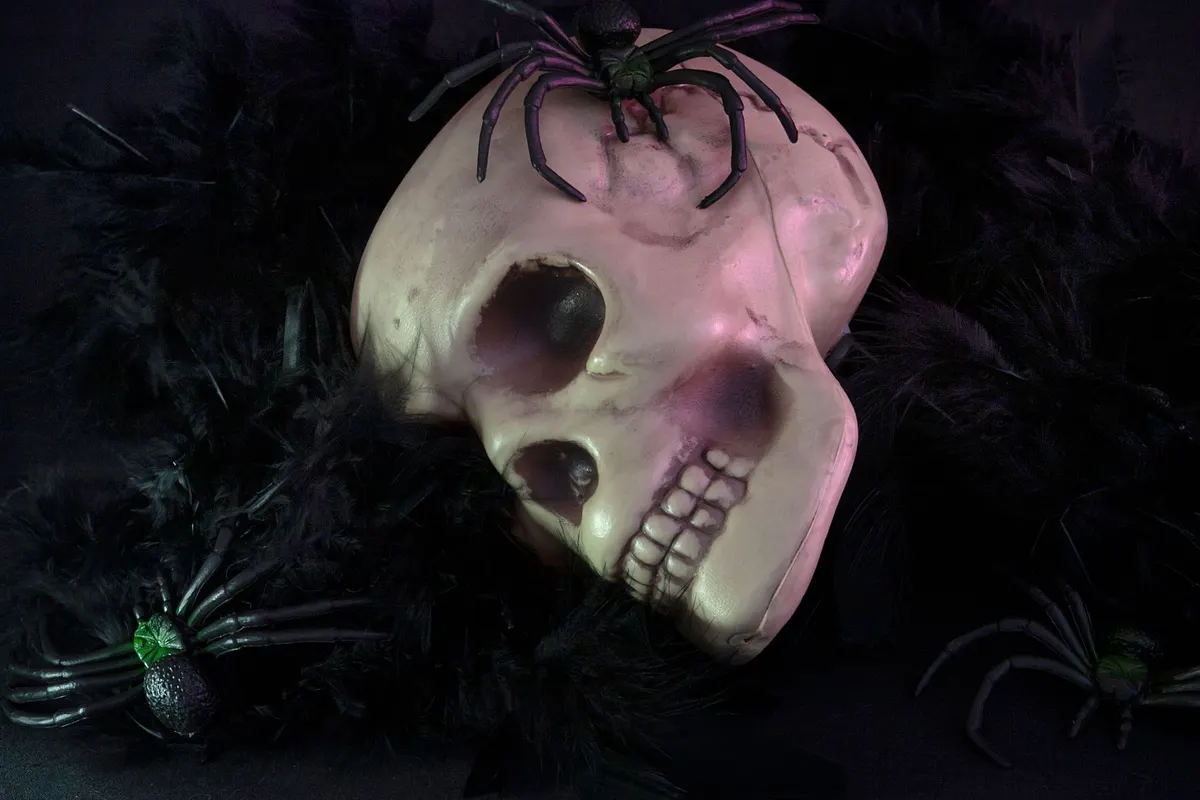
A Dollar Tree plastic skull looks better once it has a setting. Coil a black feather boa into a ring on a plate or cake stand and set the skull inside, tilted slightly.
Arrange three plastic spiders so one sits on top of the skull and two crawl out of the feathers. A light dry-brush of brown acrylic paint, wiped off with a paper towel, makes a shiny plastic skull look aged. Feather boas shed and catch fire easily, so keep this one well away from candles. Beginner, about 15 minutes.
14. Potion jars
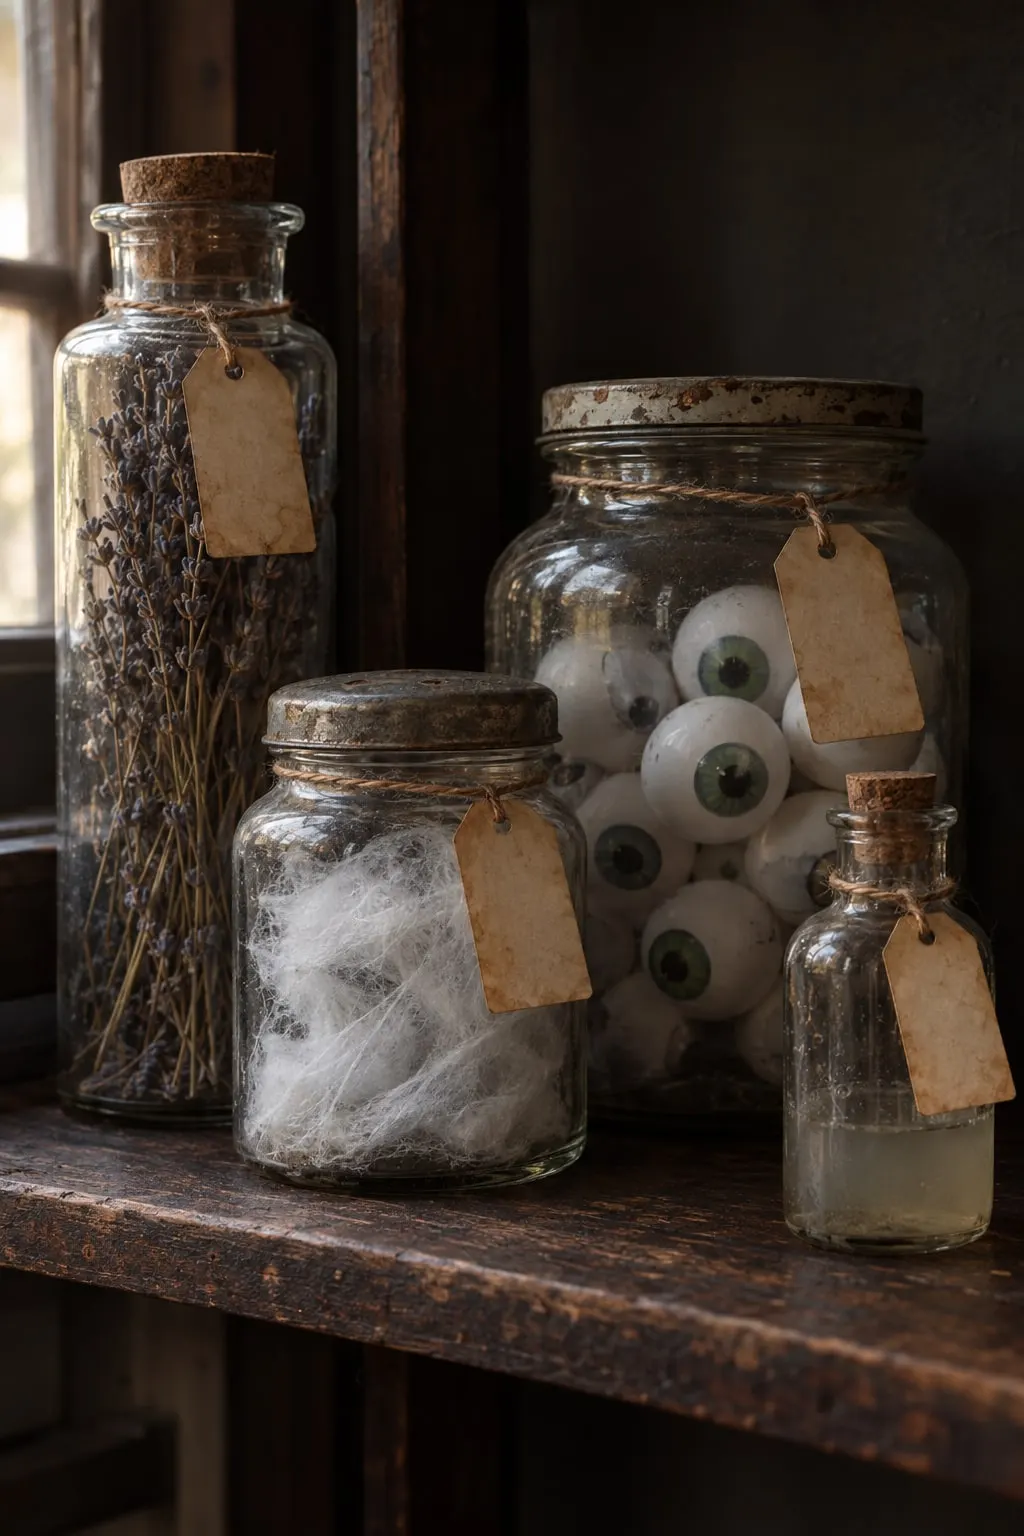
Three jars and a small corked bottle from the recycling bin make a potion shelf. Soak the labels off and fill each one with something different: dried lavender, a wad of stretch cobweb, fake eyeballs or ping-pong balls with painted green irises, and tinted water.
To age paper tags, brush them with strong black tea, let them dry, and tear the edges. Tie one to each jar neck with twine, then leave them blank or write potion names in pencil. Vary the heights and keep corks or lids on. Beginner, about 45 minutes.
15. Tissue paper jar ghosts
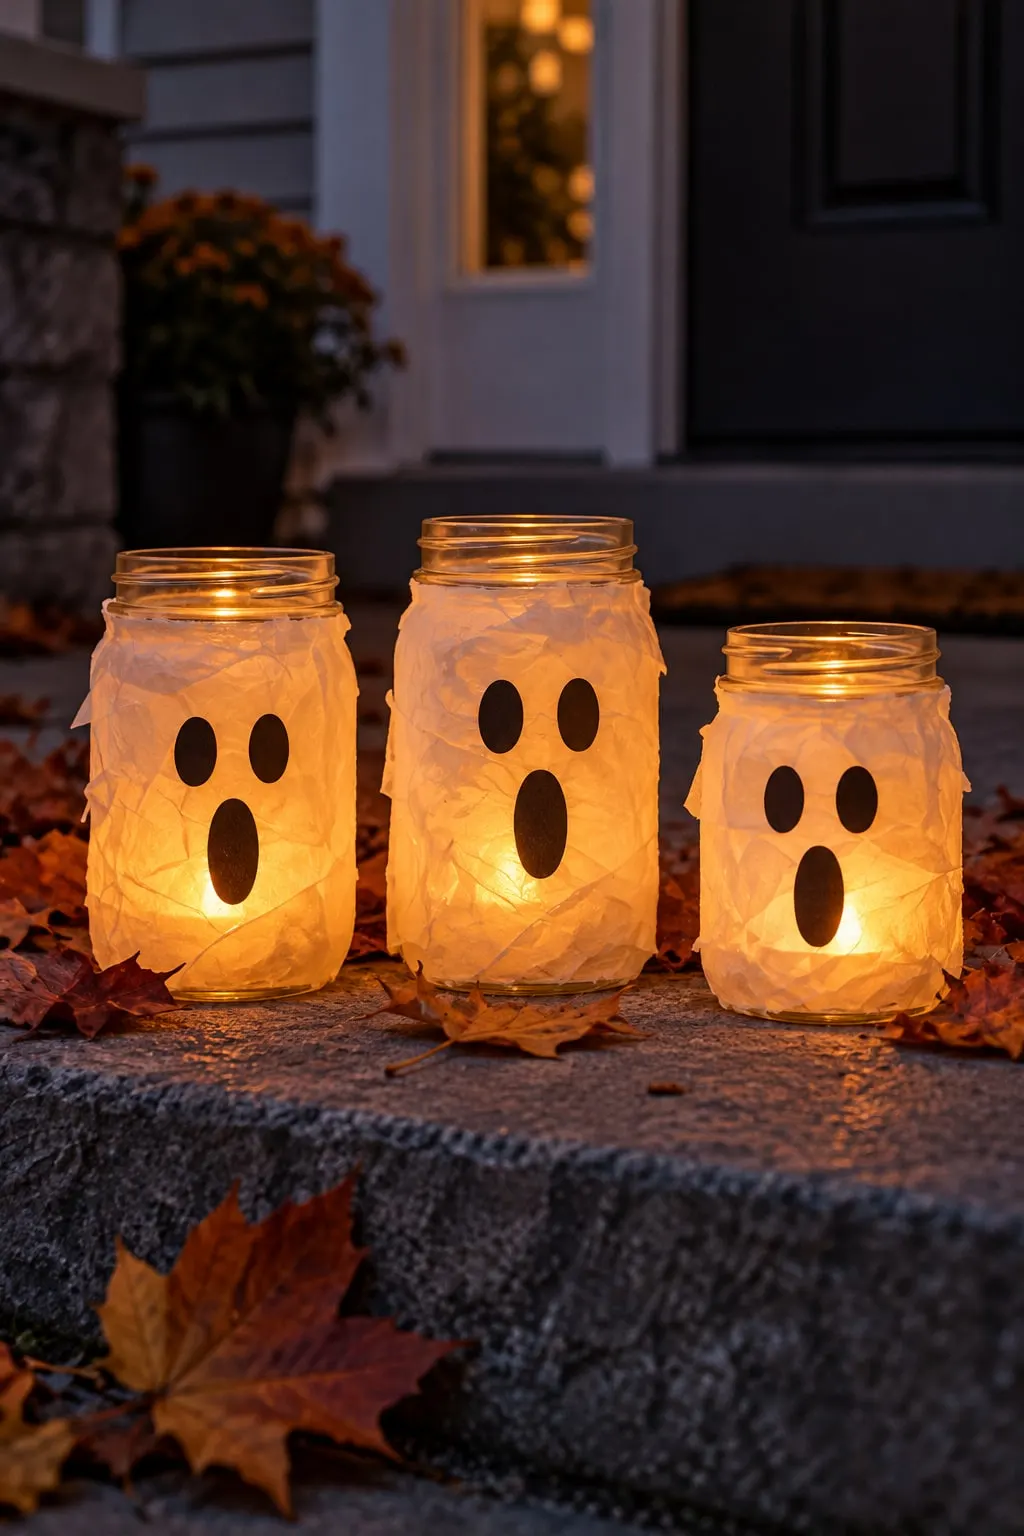
Clean pasta-sauce or mason jars turn into glowing ghost lanterns. Brush the outside of each jar with decoupage glue or white glue thinned with a little water, then press on torn white tissue paper. Let it overlap and crinkle.
When it is dry, cut two tall oval eyes and an O mouth from black paper and glue them on. Drop a flickering LED tea light inside. Three jars of different heights look best grouped on a step or windowsill. Beginner, about 20 minutes per jar plus drying. More lit ideas are in our outdoor Halloween decorations.
16. Cardboard tombstones for the mantel
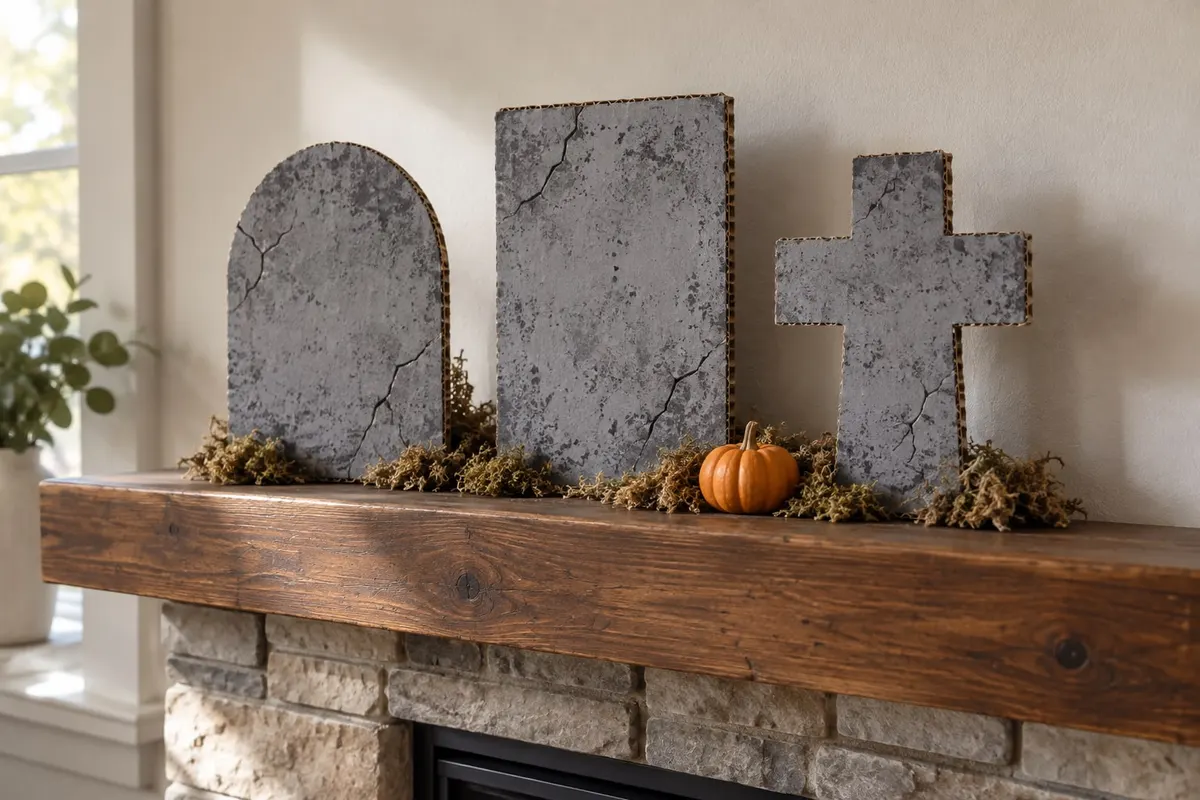
Tombstones 10 to 14 inches tall fit on a mantel. Draw an arch, a flat-top slab and a cross on a flattened shipping box and cut them out with a craft knife.
Paint them mid-gray, then dab on darker and lighter gray with a crumpled paper towel to look like stone. Draw cracks with a fine black marker. Glue a folded cardboard easel to the back of each, add a pea of mounting putty underneath, and tuck dried moss and a mini pumpkin around the base. Keep moss and cardboard off a mantel above a fire you are using. Beginner, about 1 hour. More mantel ideas are on our mantel page.
17. Spray-painted plastic pumpkins
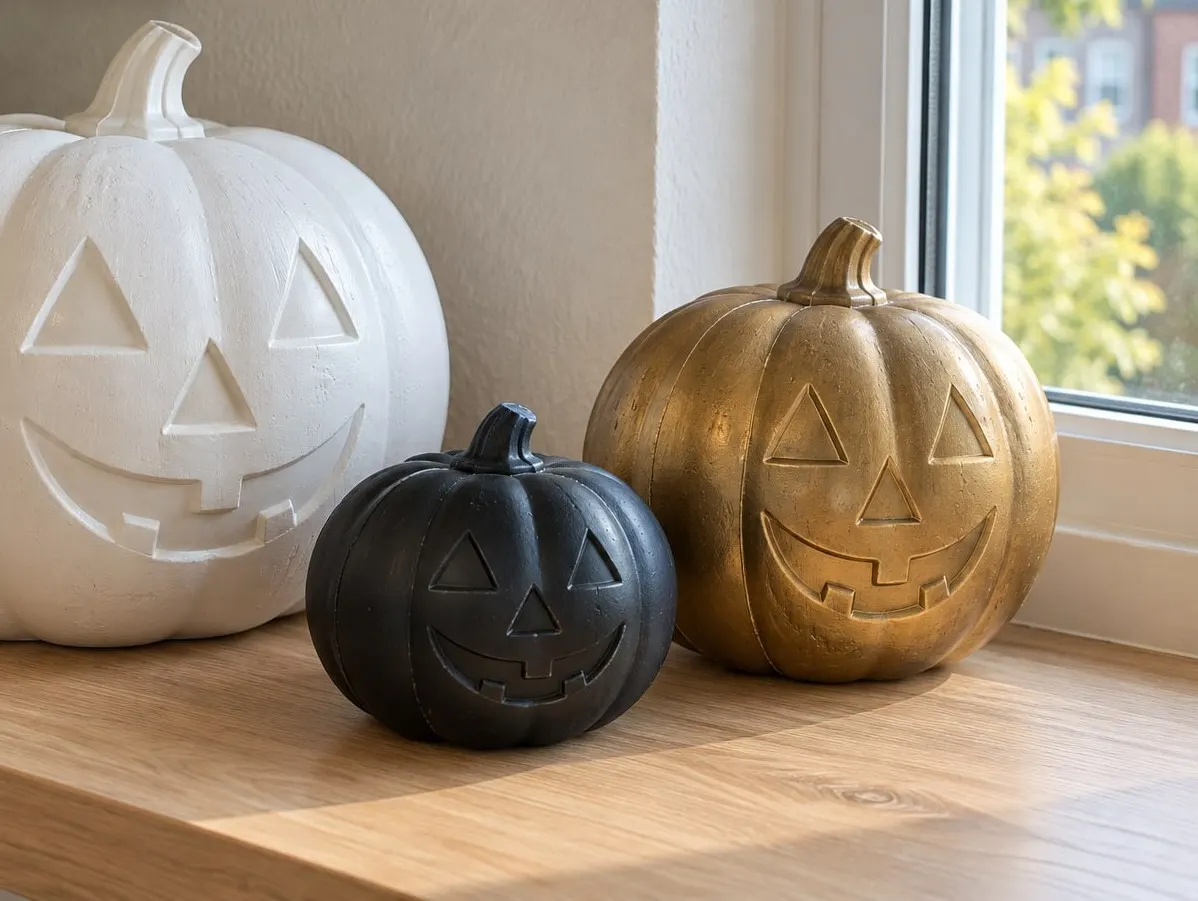
Dollar-store plastic jack-o'-lantern pails with molded faces look expensive in matte white, matte black and metallic gold. Pull off the handles first, and skip foam pumpkins, since most spray paint melts foam.
Scuff each pumpkin lightly with fine sandpaper, wipe off the dust, and spray a primer made for plastic outdoors or somewhere well ventilated. Follow with two light coats of color, holding the can about 10 inches away. Let them dry overnight. Group three sizes on a windowsill or shelf, with the largest at the back. Beginner, about 30 minutes plus drying.
18. Pumpkin lantern lights
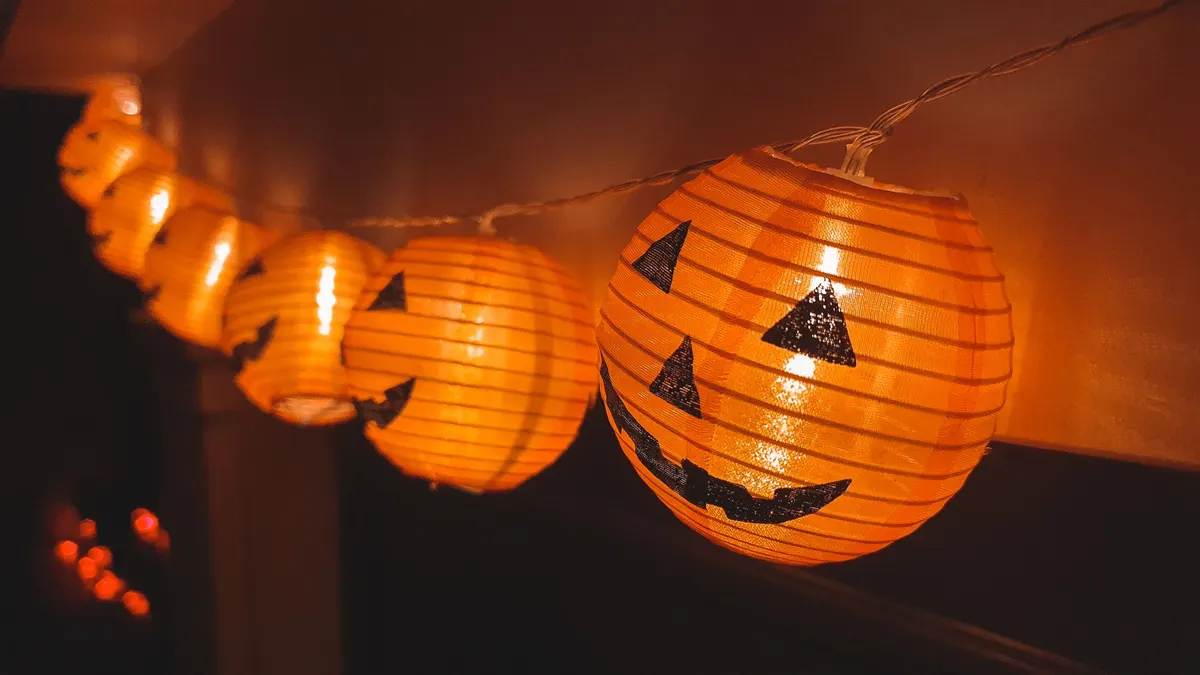
Small round orange lantern lights on an LED strand glow like a row of tiny jack-o'-lanterns. If your strand came with plain lanterns, cut triangle eyes and jagged grins from black paper or vinyl and glue one face on each.
Point the faces in slightly different directions so a few show from every angle. Run the strand along a bookshelf, a headboard or the top of a window frame, held up with removable clear hooks. A battery pack with a timer means no cord to hide. Beginner, about 40 minutes for a strand of 10.
19. Thrifted frames with paper silhouettes
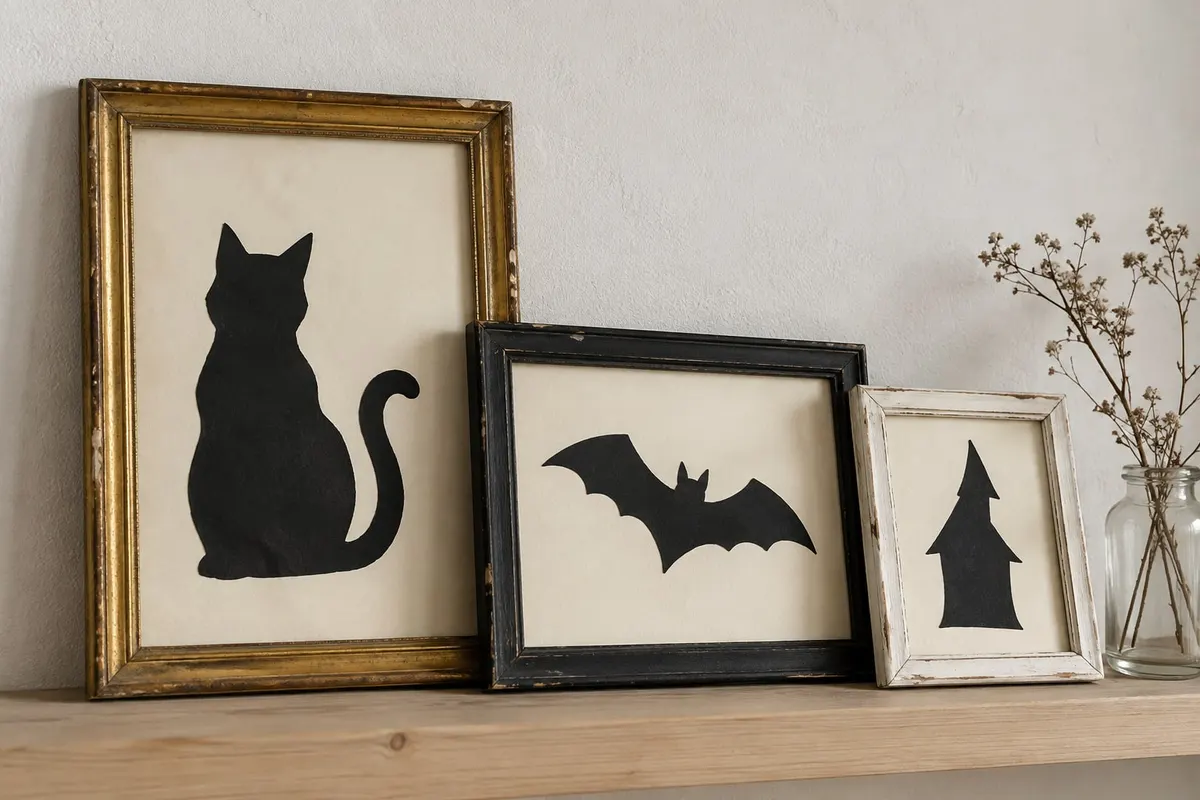
Three mismatched thrift-store frames turn a shelf into a small gallery. Pick one gold, one black and one white frame in stepped sizes, and take out any old art. Cut cream paper to fit each one.
Draw a sitting cat, a bat with spread wings and a tall pointed-roof house on black cardstock, cut them out, and glue one to the center of each sheet with a glue stick. Slightly wobbly hand-cut edges look fine. Lean the frames against the wall so they overlap a little, largest on the left, and add a jar of dried branches. Beginner, about 30 minutes.
20. Dressed-up witch hat
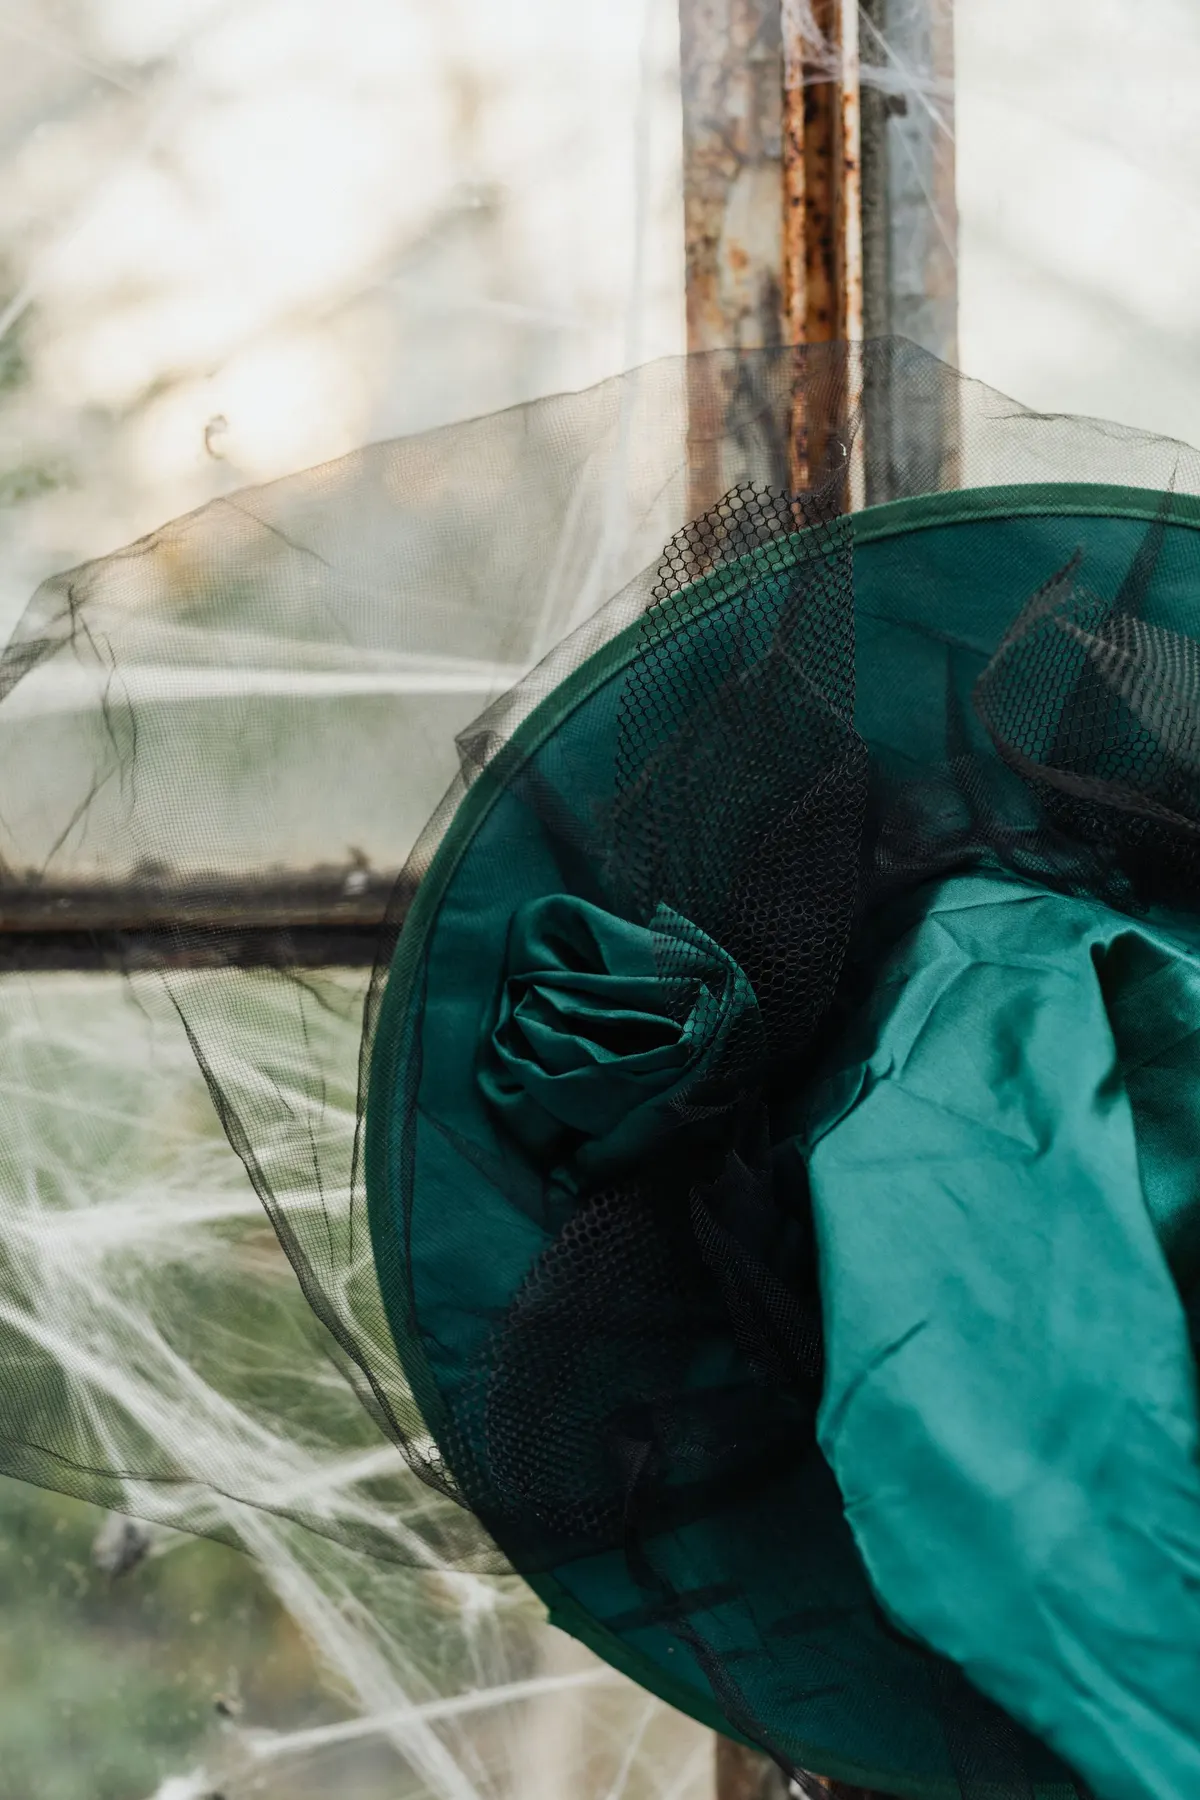
An inexpensive costume witch hat looks custom with a few extras. Roll a 12-inch length of satin ribbon into a rosette and hot glue it to the band. Wrap a strip of black netting around the crown.
Cut about a yard of black tulle and glue one end under the brim at the side so it trails like a veil. Crush the tip of the hat into a slump so it doesn't look new. Hang it from a removable hook over a window or mirror, and pull a little cobweb around it. Beginner, about 30 minutes.
21. Paper pennant banner
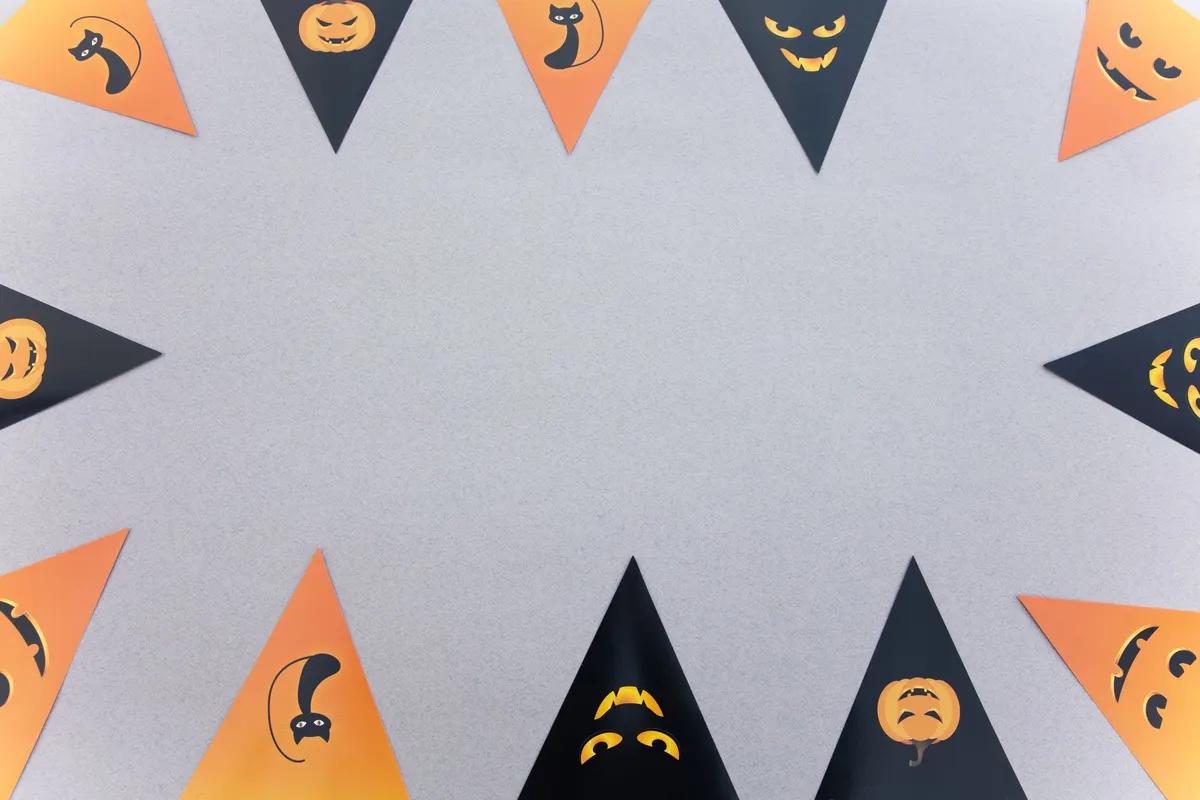
A paper pennant banner works over a mantel, a bed or a doorway. Cut 12 triangles about 6 inches wide and 8 inches long from orange and black cardstock, about seven orange and five black.
Draw or print black cats, jack-o'-lantern faces and small pumpkins on the orange pennants, and use orange or yellow on the black ones. Punch two holes along the top of each and thread them onto twine, alternating colors. Leave 2 inches between pennants. Kids can draw the motifs. Beginner, about 1 hour. For the front door, see our Halloween door decoration ideas.
22. Candlelit staircase corner
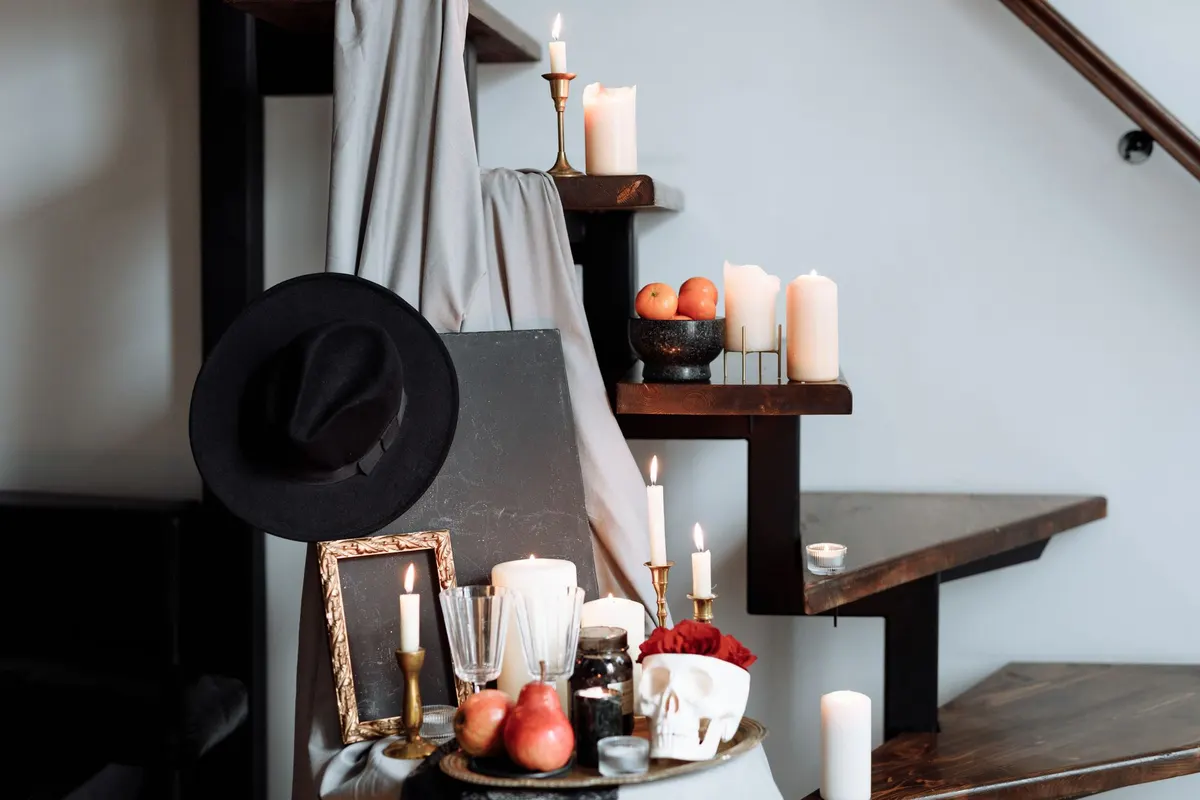
This styled vignette is all thrift-store parts: four brass candlesticks and a few white pillars. The photo shows real tapers, but a stair is a walkway, so swap in LED tapers and flameless pillars and keep them to the outer edge of a wide step.
Set a ceramic skull planter with a jar of red roses inside on a tray or small table beside the stairs, not on a tread. Hang a black wide-brim hat on the wall or newel post over a gray throw, and add a brass tray with a red apple and a pear plus a black bowl of tangerines. Keep every tread clear. Beginner, about 45 minutes.
Final tips
- Start with one color story, such as black and white or orange and black, so a mix of crafts still looks planned.
- Use flameless candles in and near every paper, fabric and cobweb piece.
- Bring paper and cheesecloth indoors on rainy nights, and store flat pieces between sheets of cardboard for next year.
- Find more ideas on the Halloween hub.
- Decorating a shared workspace? See office Halloween decorations, or try Halloween window ideas for cut-paper silhouettes.
Frequently asked questions
What are the cheapest DIY Halloween decorations to make?
Paper is the cheapest material. Black cardstock bats, cut-paper window silhouettes and a paper pennant banner cost little more than a few sheets and some tape. Toilet paper tubes, glass jars and cardboard boxes from the recycling bin make bats, lanterns and tombstones. Cheesecloth ghosts need only cheesecloth, glue and water.
How do you make cheesecloth stiff for ghosts?
Soak the cheesecloth in liquid fabric stiffener, or in white school glue thinned about half and half with water. Wring it out, drape it over a form such as a balloon or a foam ball on a bottle, and let it dry for about 24 hours until it holds its shape.
How far ahead should you make DIY Halloween decorations?
Indoor paper, felt, yarn and jar crafts can be made in September and stored flat or boxed until you decorate. Stiffened cheesecloth needs about a day to dry, and spray paint needs overnight, so start those at least a weekend before you want them up.
Which DIY Halloween decorations are good for kids to help with?
Kids can trace paper bats, decorate ghost straws, draw pennant motifs and paint toilet paper tubes. Adults should cut curved shapes and handle hot glue, craft knives, spray paint and felting needles. Keep googly eyes, pompoms, plastic spiders, ping-pong balls and battery tea lights away from children under 3, because they are choking and button-battery hazards.
Can you use real candles with paper and fabric decorations?
It is safer not to. Paper, cheesecloth, stretch cobweb, feather boas and dried moss all catch fire easily, and the NFPA recommends battery-operated candles for jack-o'-lanterns and other Halloween decorations. Use flameless tea lights and LED tapers in jars, lanterns and centerpieces.
You might also like
 Halloween
22 No-Carve Pumpkin Ideas: Paint, Fabric, Tape and Stacks
 Halloween
22 Carved Pumpkin Ideas, From Easy Faces to Showstoppers
 Halloween
22 Halloween Door Decoration Ideas for Houses and Apartments
 Halloween
20 Halloween Window Ideas: Painting, Silhouettes & Lights
 Halloween
21 Office Halloween Decorations for Desks, Cubicles & Break Rooms
 Halloween
21 Outdoor Halloween Decoration Ideas for Yards, Trees and Paths