20 Painted Pumpkin Ideas: Cute, Scary, Witch & Ghost Designs

Jump to an idea (20)
- Before you start
- 1. Cover a pumpkin in tiny painted ghosts
- 2. Paint a classic sheet ghost on a white pumpkin
- 3. Letter a big BOO in white on a blue pumpkin
- 4. Paint a witch pumpkin with a green nose
- 5. Doodle a witch's kit on a white pumpkin
- 6. Silhouette a black cat under a yellow moon
- 7. Write trick or treat in black on lavender
- 8. Paint a skull on a small white pumpkin
- 9. Write Happy Halloween in script
- 10. Give a pumpkin a screaming face
- 11. Stitch a patched monster face
- 12. Paint a row of grinning cartoon faces
- 13. Let kids paint rainbow dots, stripes and spirals
- 14. Dot a blue pumpkin with silver and gold glitter
- 15. Paint a mini pumpkin trio in blue, aqua and peach
- 16. Stripe a white pumpkin in thin gold lines
- 17. Dip a black pumpkin in dripping gold
- 18. Paint white daisies on a sage-green pumpkin
- 19. Give a pumpkin a spa day with a face mask
- 20. Brush a black buffalo check
- Final tips
These 20 painted pumpkin ideas cover easy faces, cute minis, scary designs, witch pumpkins and painted ghost pumpkins. Each one lists the colors, the sizes and the order to paint in, so you can copy the look with a few craft paints and a fine brush.
Start with the easy ones if you are new to pumpkin painting, and keep the detailed ones for a quiet afternoon. If you would rather skip painting on a few of them, our no-carve pumpkin ideas mix in tape, fabric and decoupage, and the carved pumpkin ideas cover the knife route.
Before you start
Choose firm pumpkins with a sturdy stem, no soft spots and a fairly smooth skin. Wash each one with mild soapy water and dry it completely, then wipe the skin with rubbing alcohol so paint sticks. Carry pumpkins from the bottom, because a stem can snap off.
Acrylic craft paint is the easiest option on real pumpkins. Use two thin coats and let each dry before the next. A white base coat makes pale colors and pastels show true. Paint pens give clean lines and lettering. Spray paint and sealer go on outdoors in light coats. Sketch every design in pencil first, since pencil wipes off and paint does not. Keep small parts like googly eyes away from kids under 3, and keep painted pumpkins away from candles and other open flames.
1. Cover a pumpkin in tiny painted ghosts
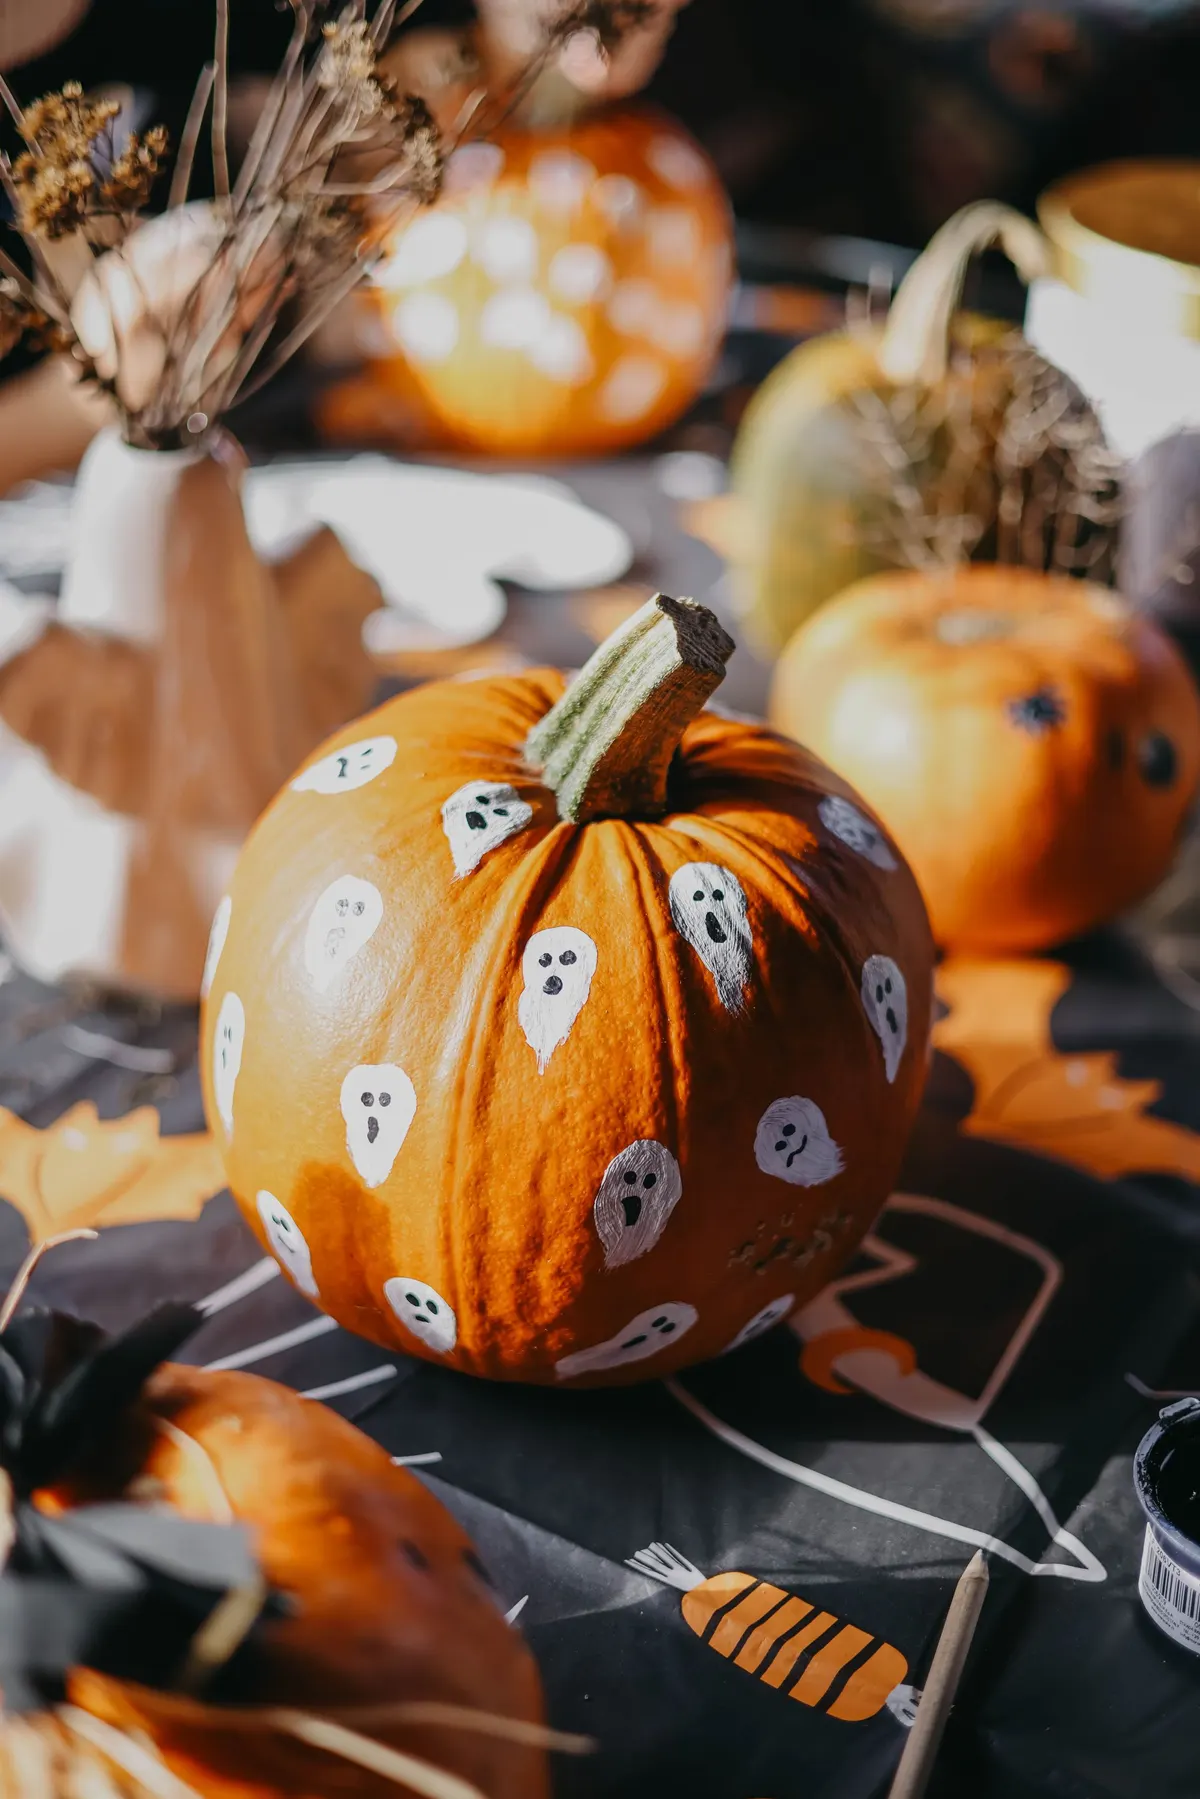
One large orange pumpkin covered in about fifteen small white ghosts looks busier than it is. Each ghost is a rounded blob with a wavy bottom edge, two black dot eyes and a mouth that is a small oval, a crooked line or a curve. Mix the mouths on purpose, because a crowd of identical ghosts looks stamped while a mixed crowd looks alive.
Paint the white with a small round brush and two thin coats, since white goes streaky over orange. Add the eyes and mouths with a black paint pen once the white is dry. Plan on about 45 minutes. Leave the stem natural, so the orange and the white do the work.
2. Paint a classic sheet ghost on a white pumpkin
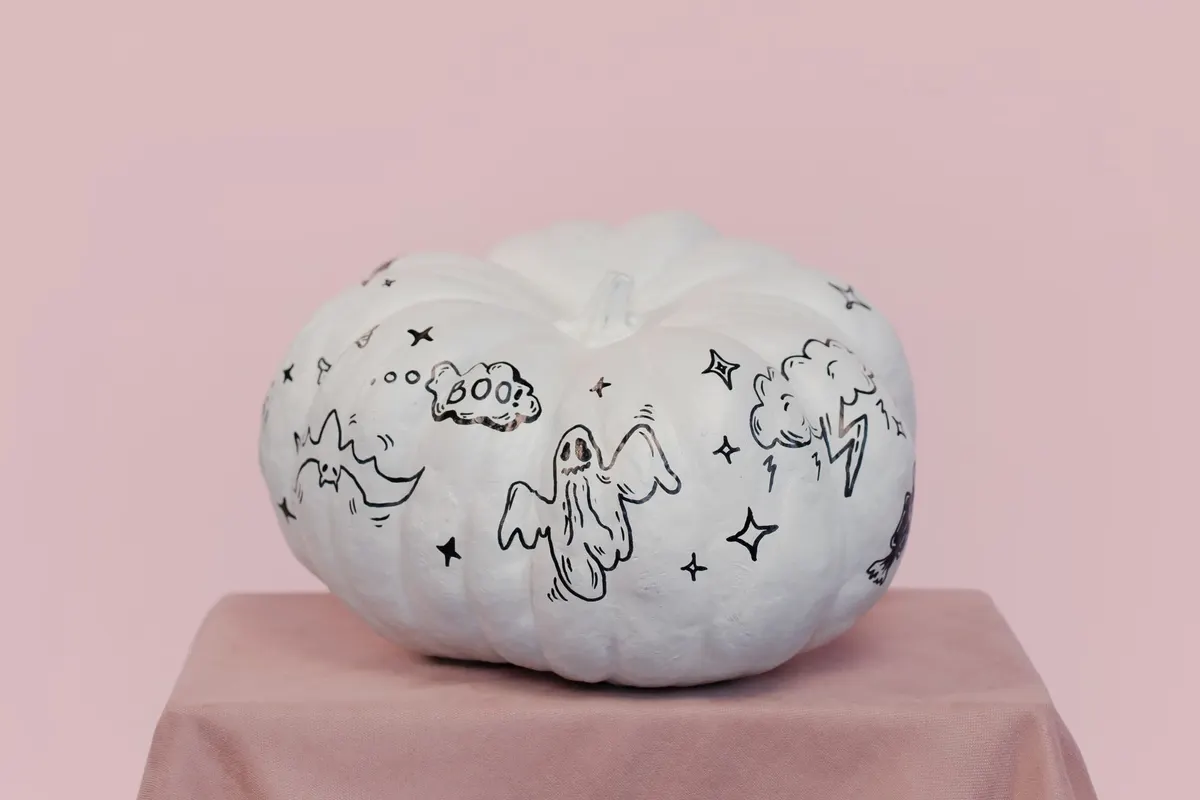
Here is the ghost pumpkin in its simplest form. Start with a white pumpkin, or paint an orange one white, then outline one big sheet ghost with raised wavy arms in black paint pen. Add a small flying ghost beside it, a cloud-shaped BOO bubble, a storm cloud with two lightning bolts and a scatter of four-point stars.
The stars and dots fill gaps and hide small mistakes. Draw everything in pencil first and let the shapes wrap around the ribs of the pumpkin. For a painted ghost pumpkin that kids can do, skip the clouds and let them add stars and a face. About 30 minutes.
3. Letter a big BOO in white on a blue pumpkin
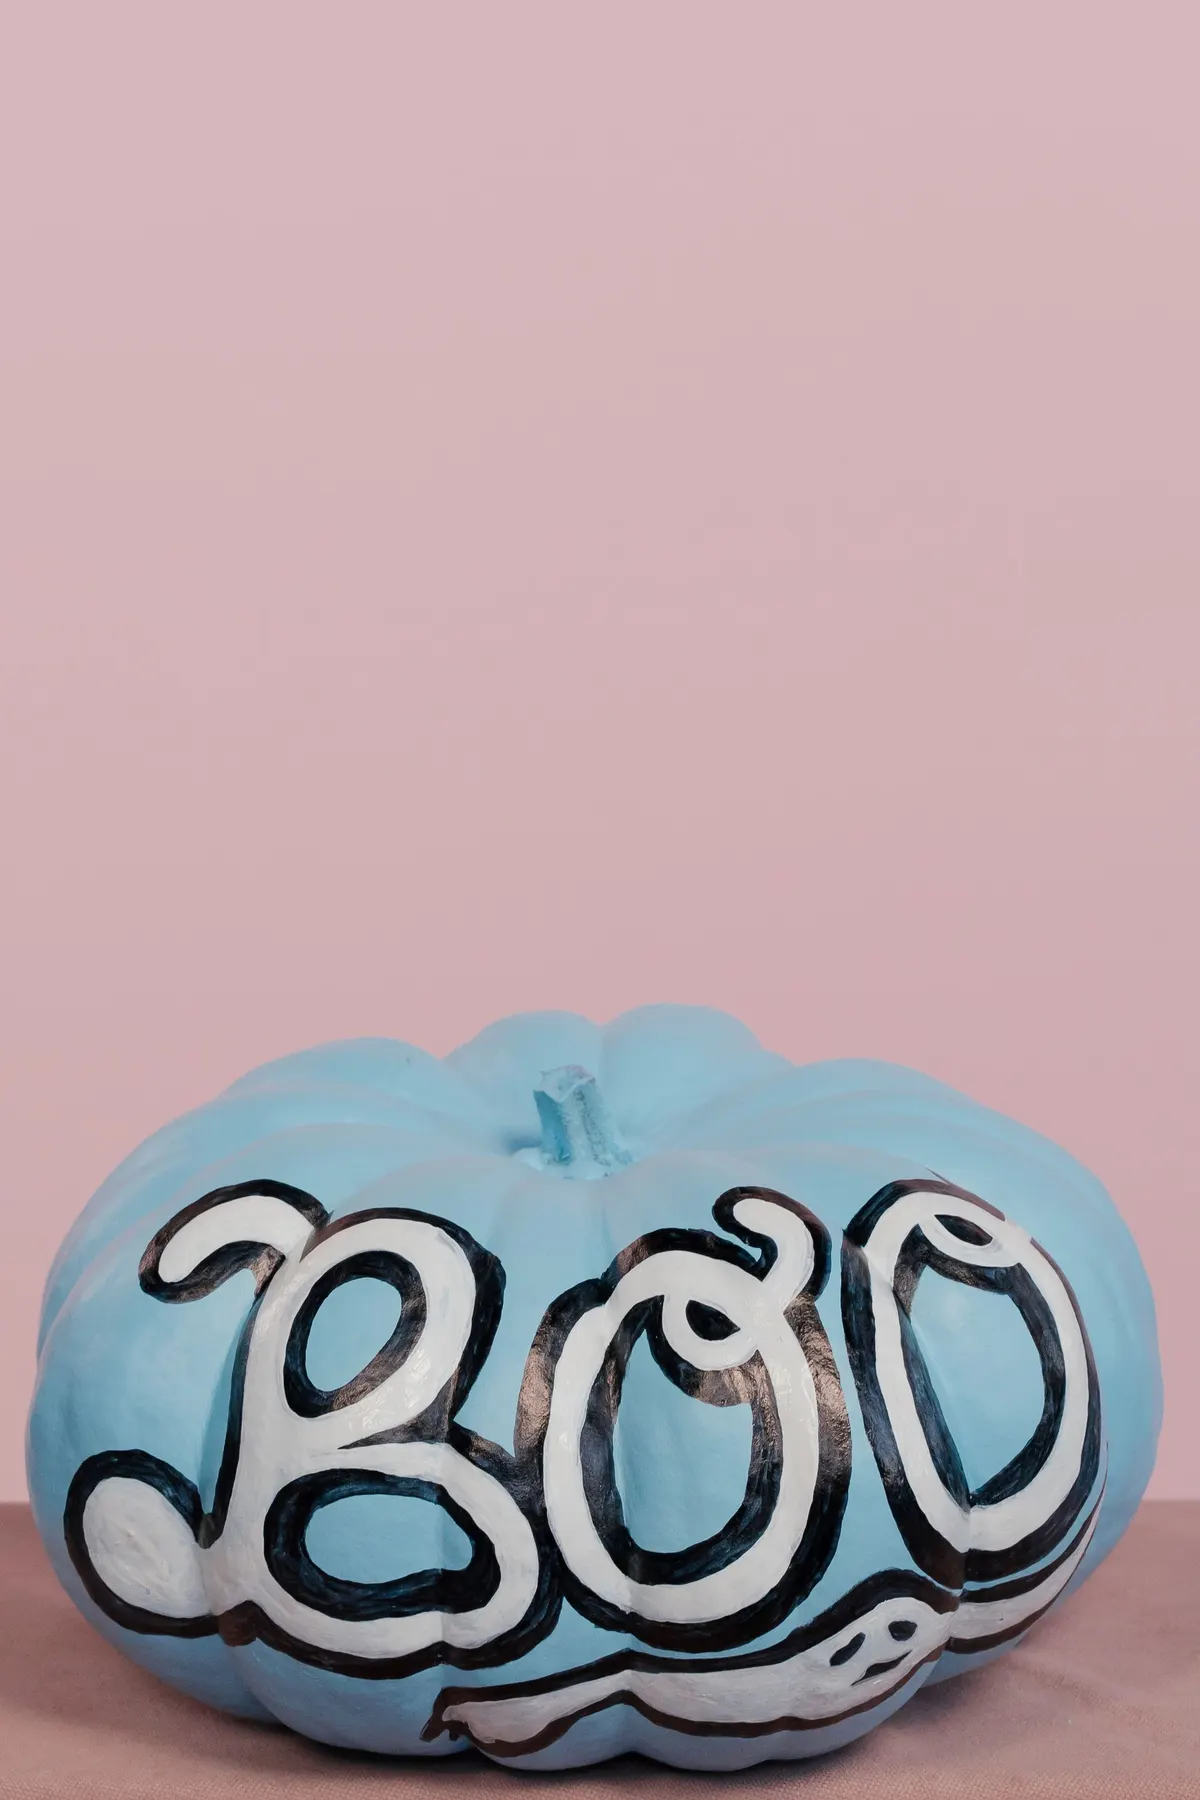
A pale blue base turns a pumpkin into a modern Halloween piece. Paint the pumpkin and its stem blue in two coats, then pencil BOO in fat block letters across the widest part. Fill the letters with white and outline them in black, shifting the outline slightly to one side so the letters look raised. A long curved white ghost shape under the letters finishes the front.
Fat letters are easier than thin ones, and three letters fit even on a small pumpkin. Mix a little gray into the white for the shadow side if you want depth. Allow a full evening, with drying time between coats.
4. Paint a witch pumpkin with a green nose
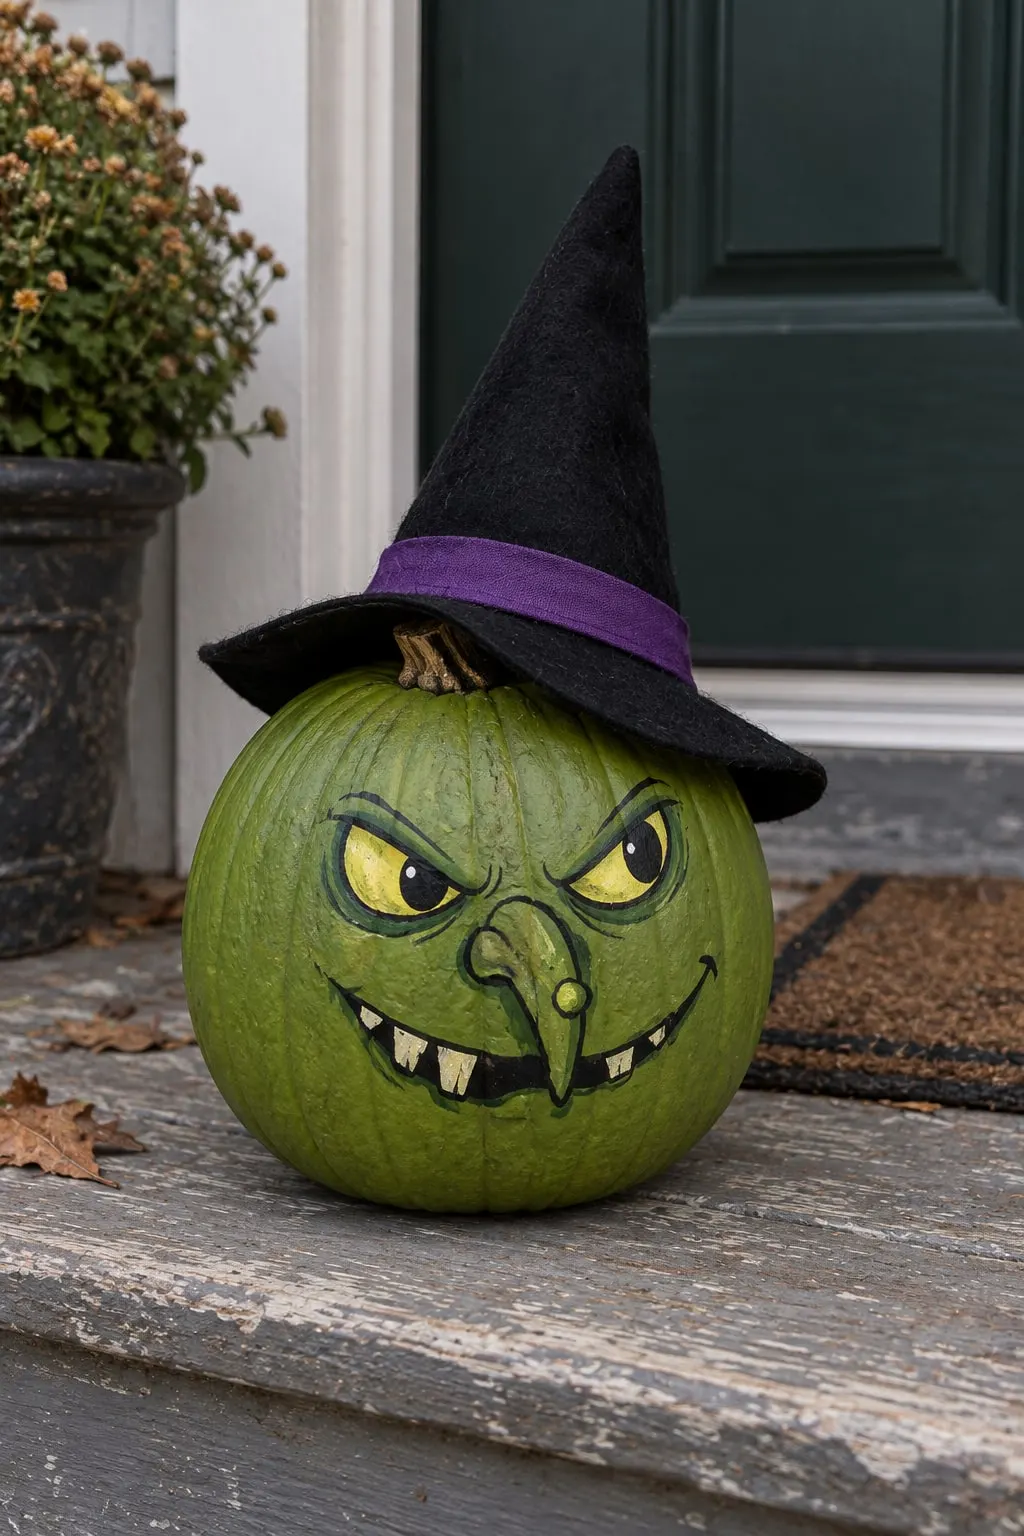
For a paint witch pumpkin, start with an olive-green base. Add two slanted yellow eyes outlined in black, a white dot in each as a highlight, heavy arched brows, a long hooked nose with one round wart and a wide black grin with five cream teeth. The face gets its personality from how lopsided you make it.
Set a black witch hat on top, either a real cone hat or one cut from black card with a purple band. Porches are a good spot because the hat shows against a door. Painting time is about an hour, plus a green base coat that needs to dry.
5. Doodle a witch's kit on a white pumpkin
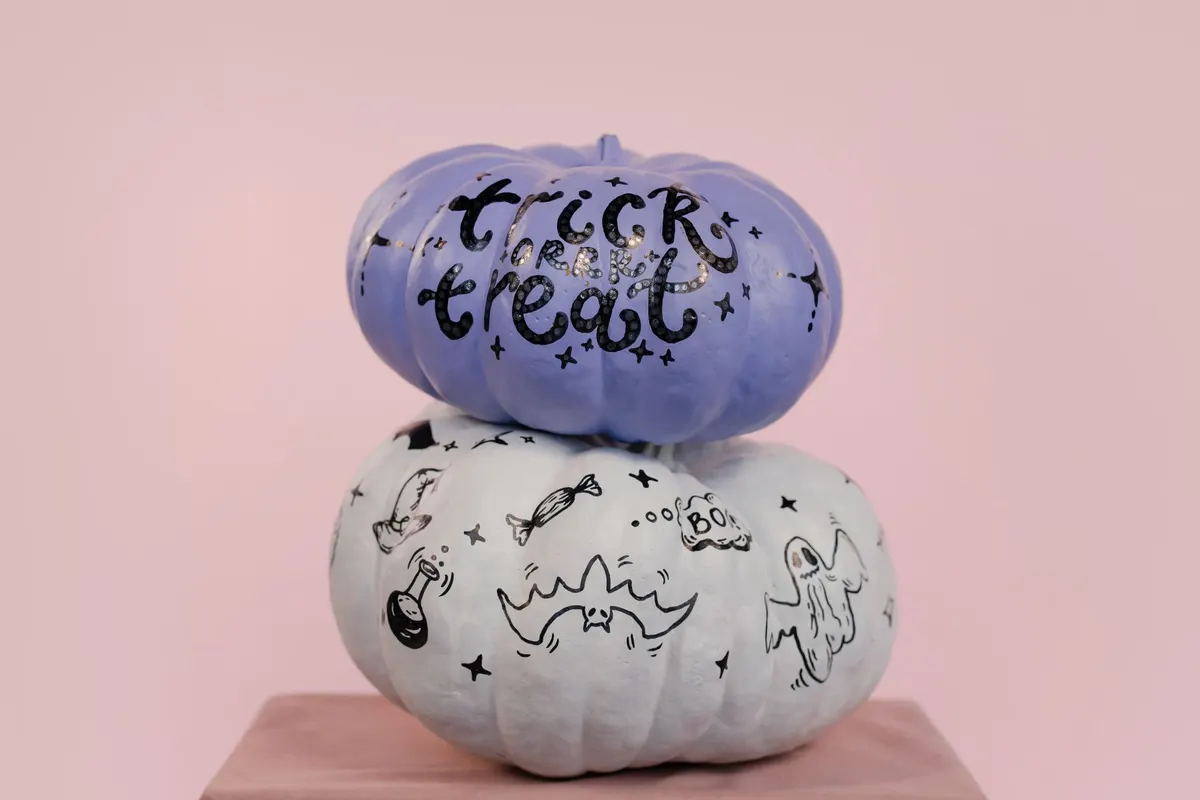
Not every witch pumpkin needs a face. On a white pumpkin, draw a witch hat, a round potion flask, a wrapped candy, a spread-wing bat and a small ghost with a thin black paint pen. Add a BOO bubble and a few stars, then let the pumpkin sit while you stack a lavender one above it.
Use one pen width so everything looks like part of one set. Doodles suit beginners because there is no shading and no color mixing. If one drawing goes wrong, turn it into a star or a cloud. This takes about 40 minutes.
6. Silhouette a black cat under a yellow moon
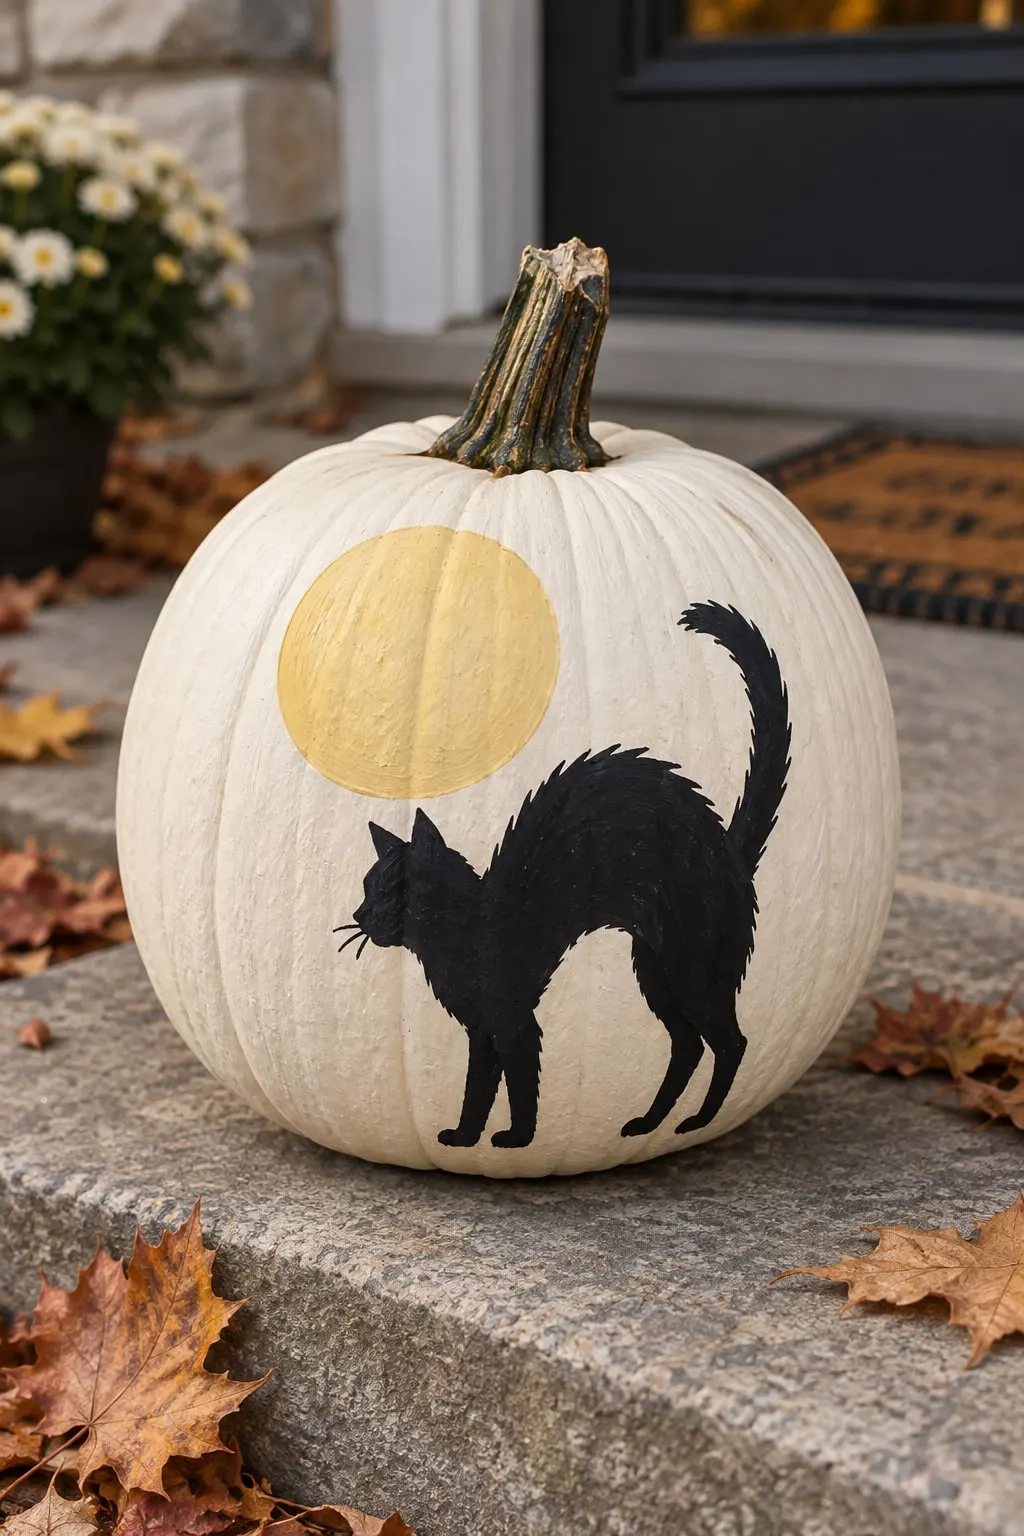
Pick an ivory or white pumpkin for this one. Paint a solid pale yellow circle about 3 inches across for the moon, then add a black cat in profile with pointed ears, an arched back, four legs and a curled tail rising off the moon. Silhouettes need no face and no detail, only a clean shape.
Draw the cat on paper first and trace it onto the pumpkin with pencil. A thin brush handles the whiskers. The cat reads well from the sidewalk, so set the pumpkin on a porch step with a few dry leaves. About 45 minutes.
7. Write trick or treat in black on lavender
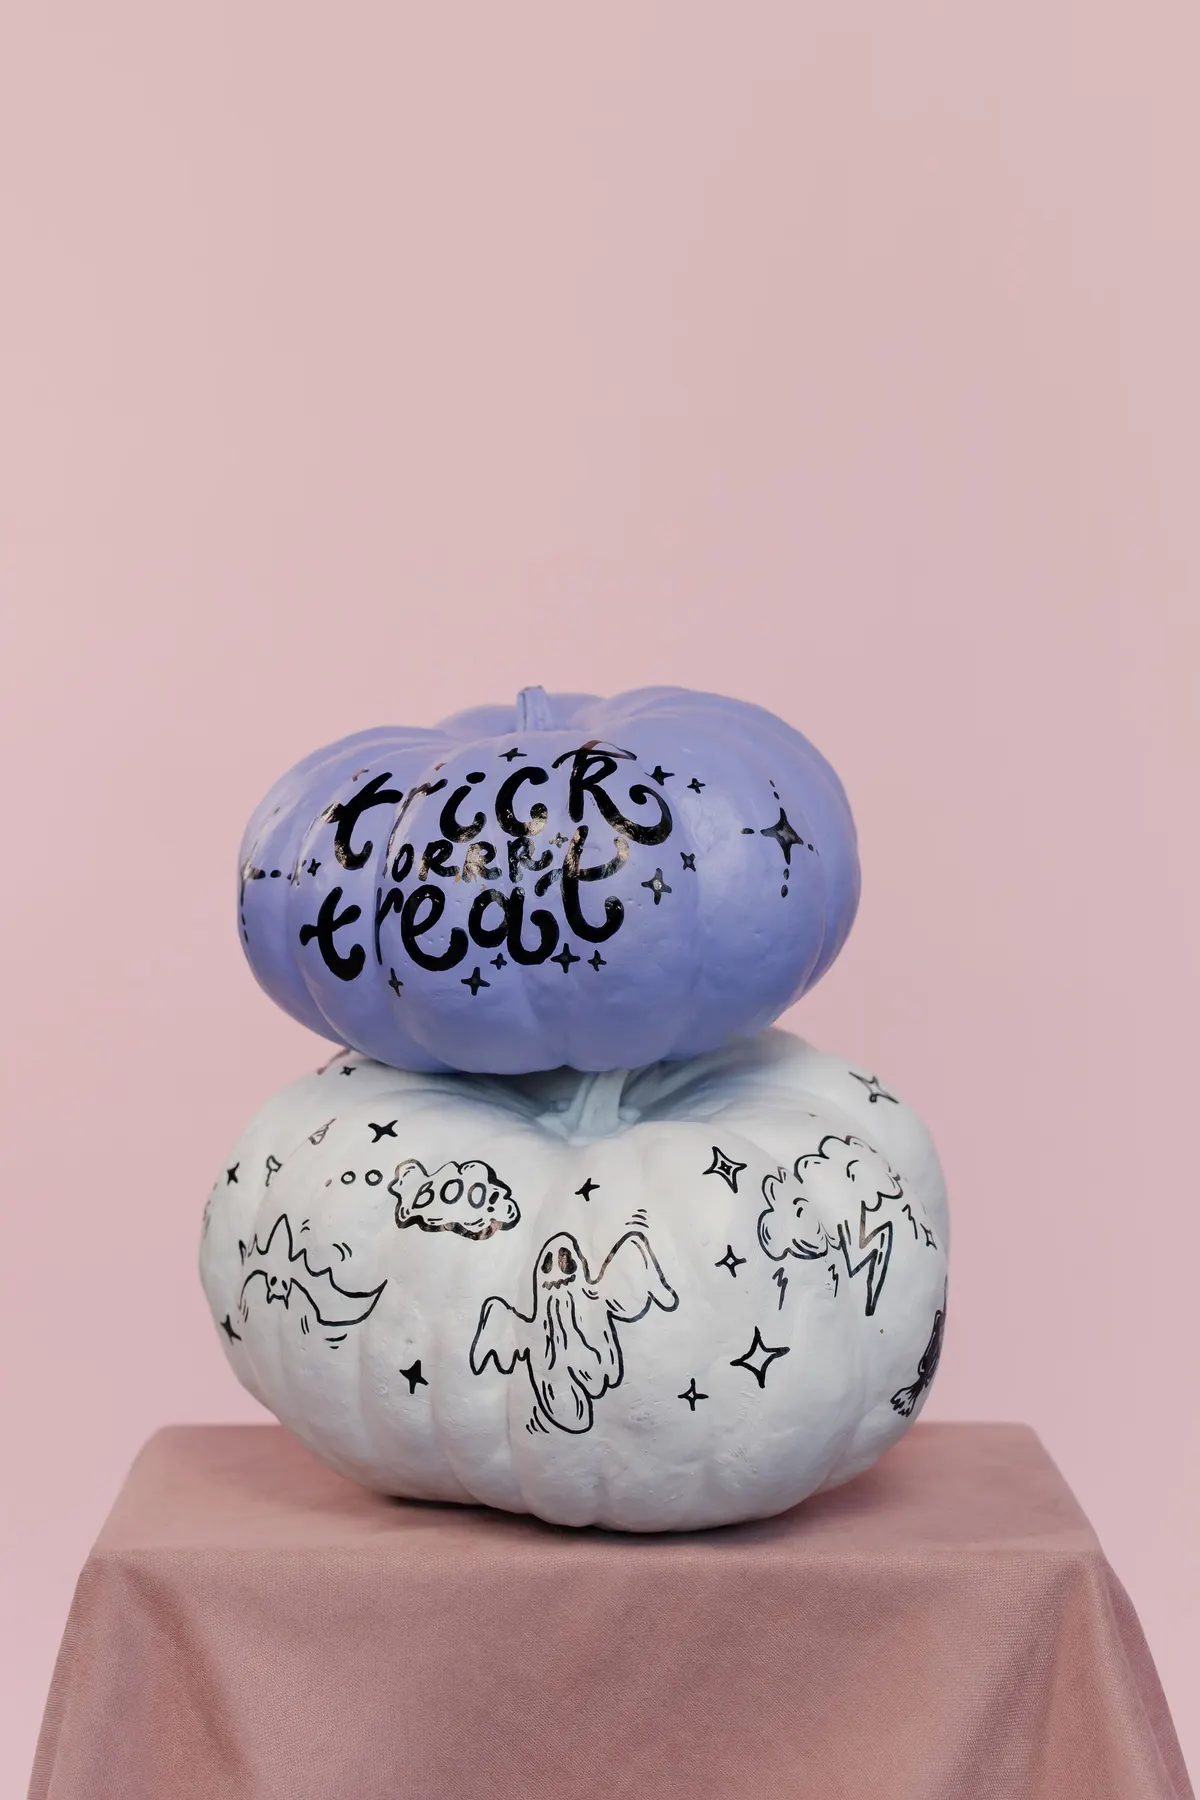
Lavender is a quiet color on a pumpkin and black lettering pops on it. Paint a small pumpkin lavender, then write trick or treat across it with a paint pen, making trick and treat large and the or small between them. Add four-point stars, dots and short dashes around the words. A little silver paint inside the letters catches the light.
Practice the lettering on paper first. Place it low on the pumpkin so the stem and top stay clear. Stack it on a pale ghost pumpkin like the one in idea 2 for a matched pair. About 30 minutes.
8. Paint a skull on a small white pumpkin
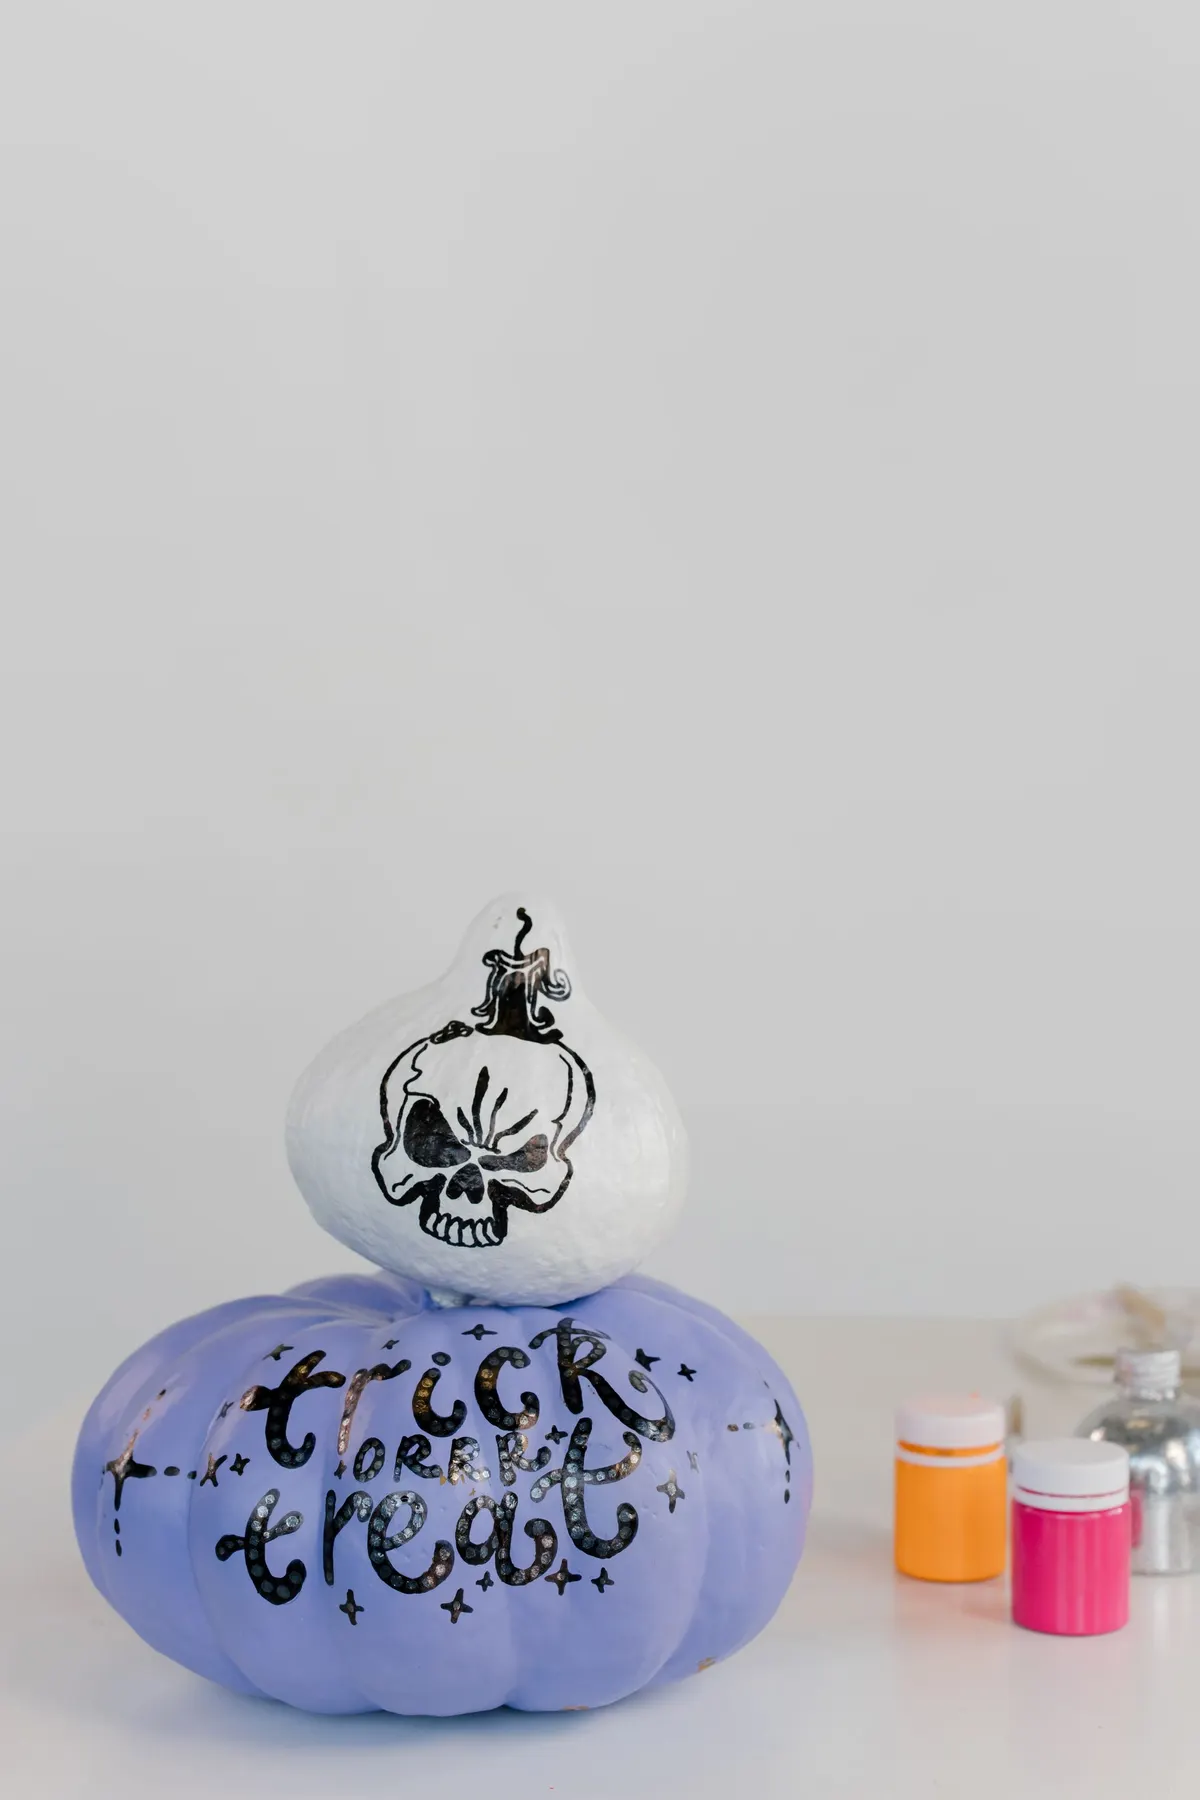
A small white or pear-shaped pumpkin is a good canvas for a skull. Use black for the eye sockets and a triangle nose, then draw the teeth as outlined rectangles and add a few short strokes on the forehead. Black swirls around the stem make it look like a crown.
Skulls are a scary pumpkin painting idea that you can do on a gourd as well as on a pumpkin, and they look good when set on a purple pumpkin lettered with trick or treat. Keep the lines thin and let the white skin do the work. Around 30 minutes.
9. Write Happy Halloween in script
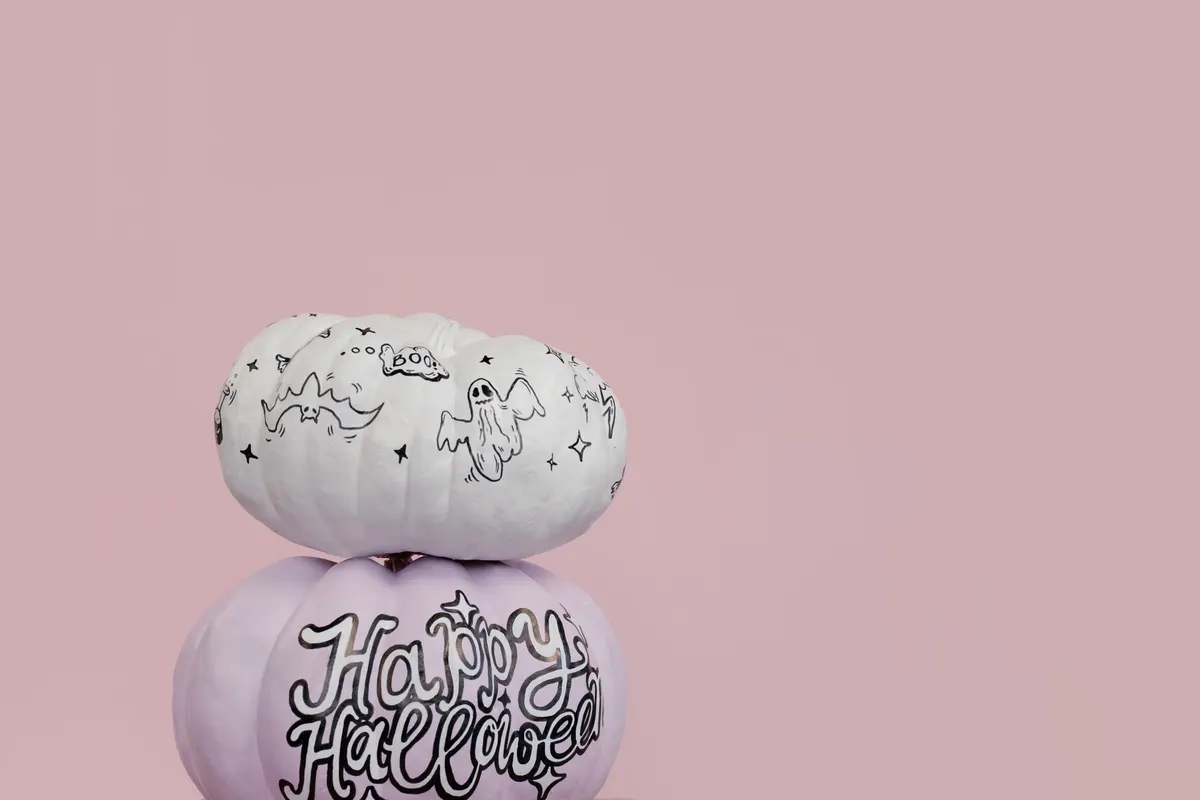
Wide, squat pumpkins carry cursive well. Paint the pumpkin pale lavender, pencil Happy Halloween in big flowing script across the front, then fill the letters with a lighter shade and outline them with a black pen. Dot four-point sparkles above and below the words.
Keep the script to the middle third of the pumpkin so the curve of the sides does not swallow the last letters. The ribs break the lines, so go slowly over them. Plan for an hour. For a quicker version, write only Boo in the same style.
10. Give a pumpkin a screaming face
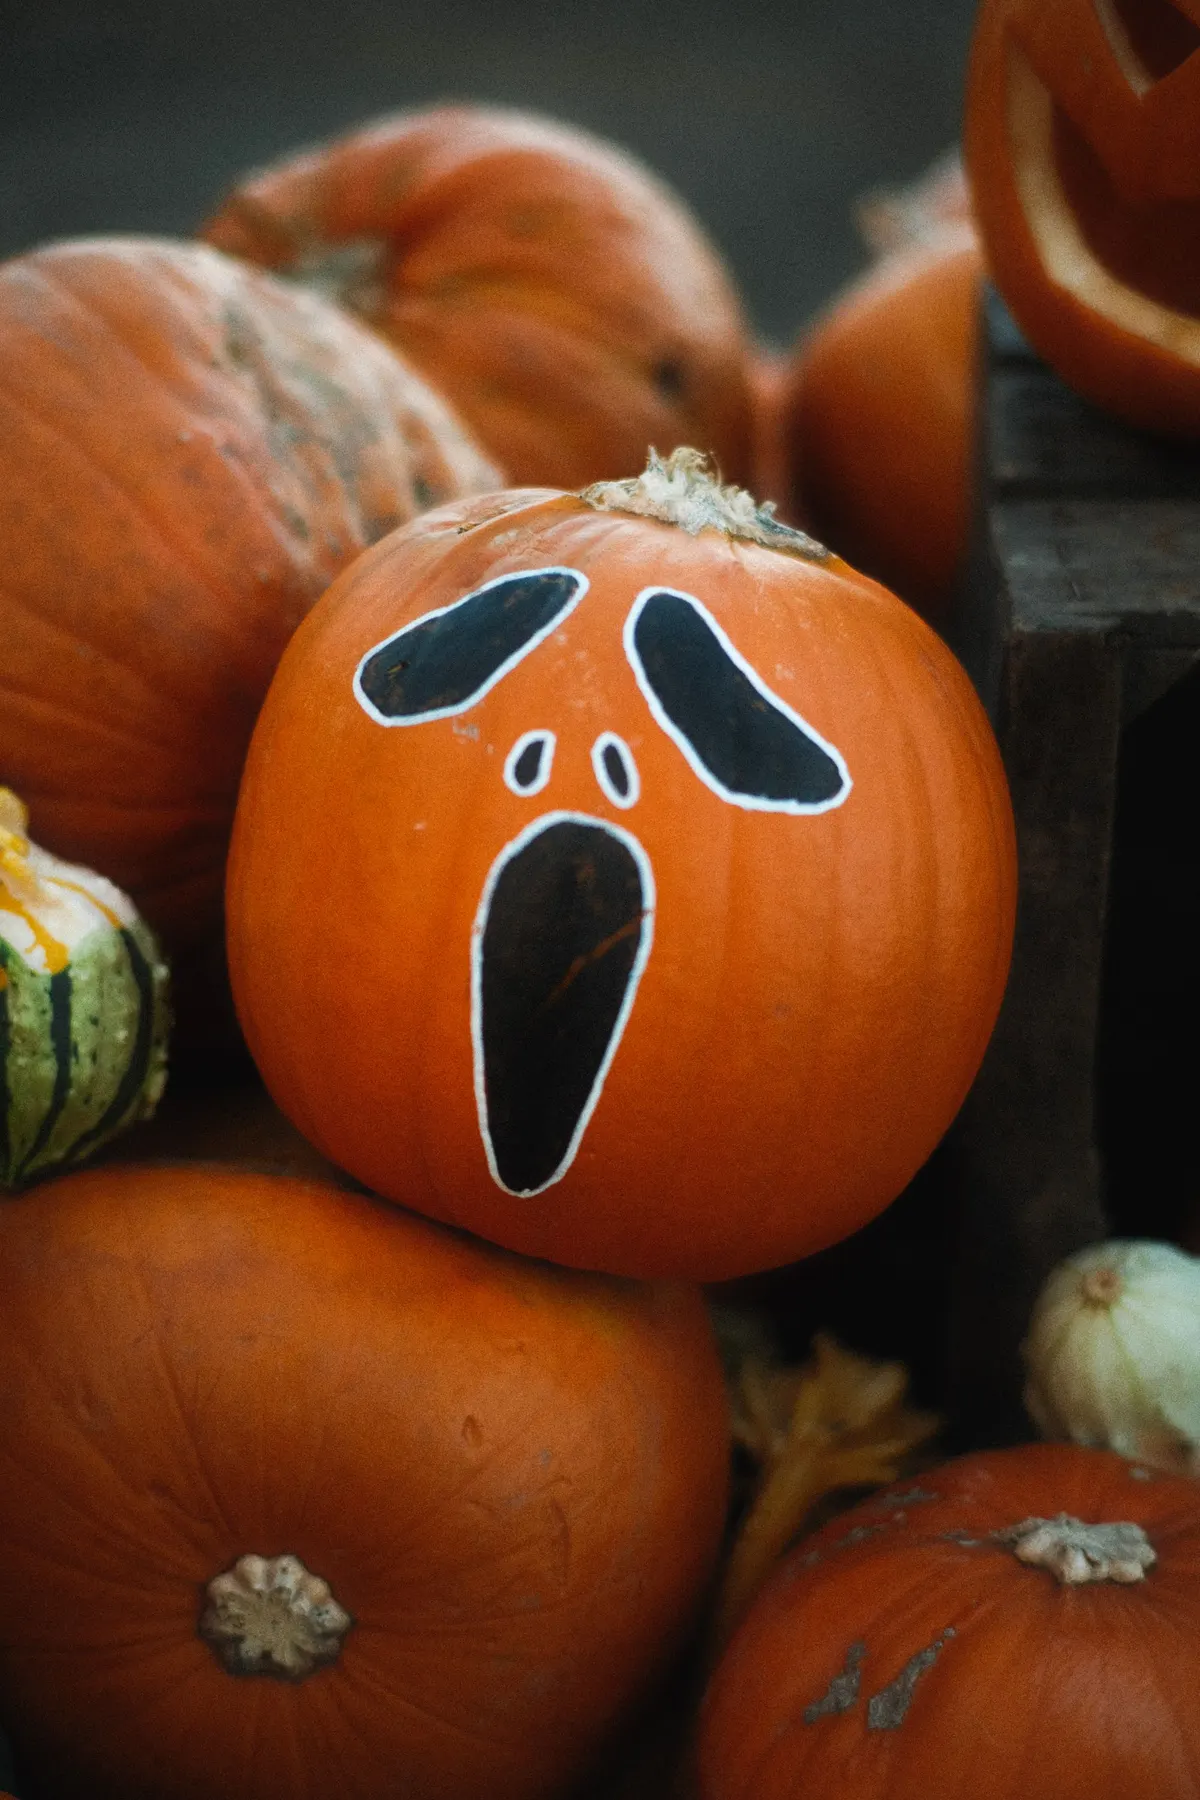
Leave the orange skin as it is and paint a screaming face with two tall black ovals for eyes, two small nostrils and one long open mouth. Outline each shape in white so the face stays visible on a dark porch or at dusk.
This is a quick scary pumpkin painting idea because there are only three shapes. Make the mouth taller than it is wide for the most horror, and stretch the eyes down toward it. Use black acrylic with a flat brush. About 20 minutes, with the white outline taking the longest.
11. Stitch a patched monster face
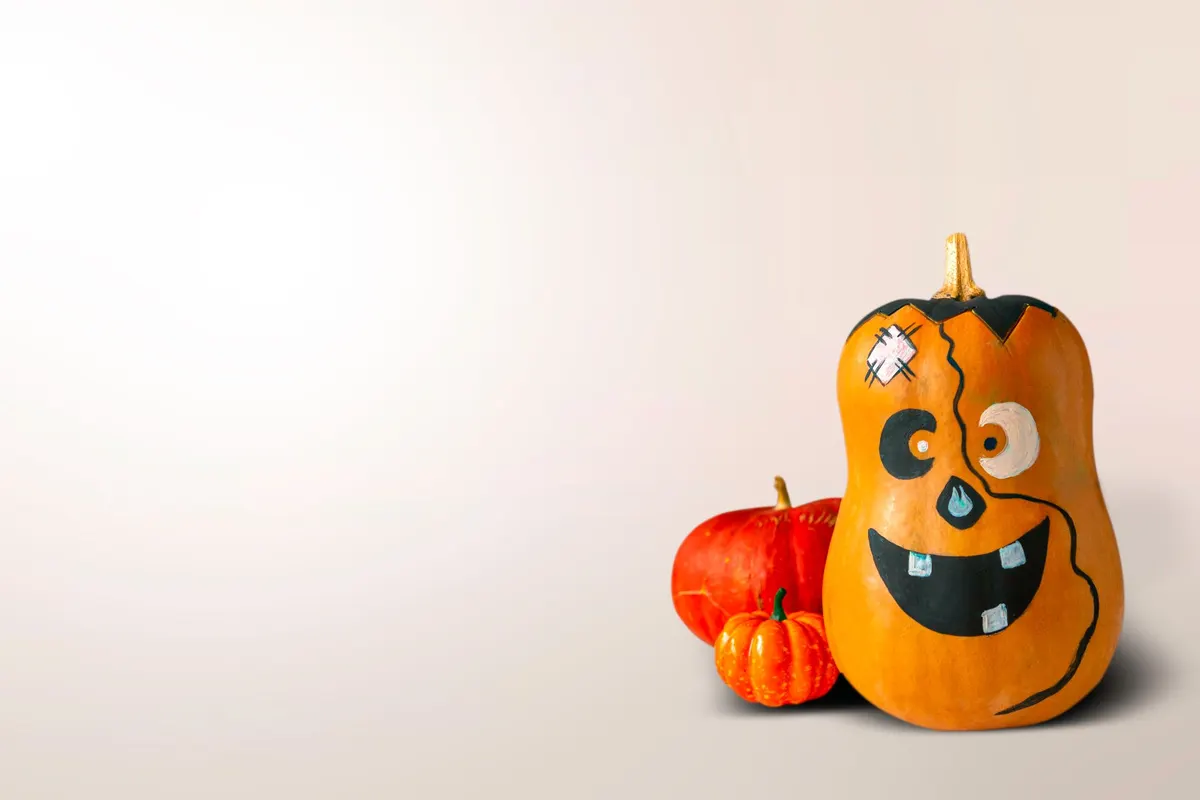
For a monster pumpkin, paint a jagged black cap across the top, a pale patch with black stitch marks at one side, two mismatched eyes (one black, one white with an orange center), a turquoise nose and a wide smile with three pale teeth. A winding black line down the middle ties the face together.
The charm is in the mismatch, so do not aim for symmetry. Pick a tall or oddly shaped pumpkin, since the odd shape suits a made-up creature. Pencil the main lines, then fill in the colors. Plan for about 90 minutes.
12. Paint a row of grinning cartoon faces
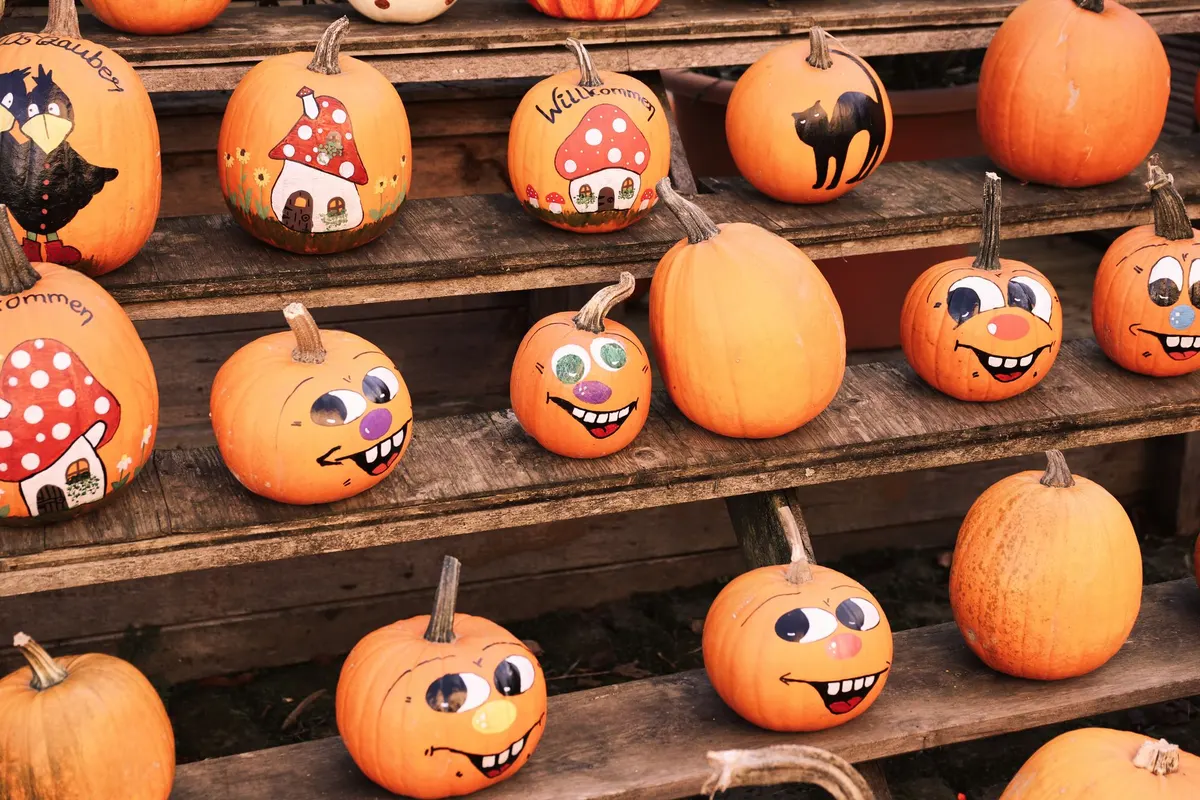
Cartoon faces are the cute painted pumpkin idea that kids can handle. Paint two white eyes with dark pupils, a bright nose in purple, blue, pink or yellow, curved eyebrows and a wide black grin with white teeth and a red tongue. Each pumpkin gets a different nose color.
Line up a dozen on steps or a bench and leave a few plain, so the painted ones stand out. Small mushroom houses with red spotted caps also work on a round pumpkin, and a single black cat adds a spooky one. For a set of six, set aside about three hours.
13. Let kids paint rainbow dots, stripes and spirals
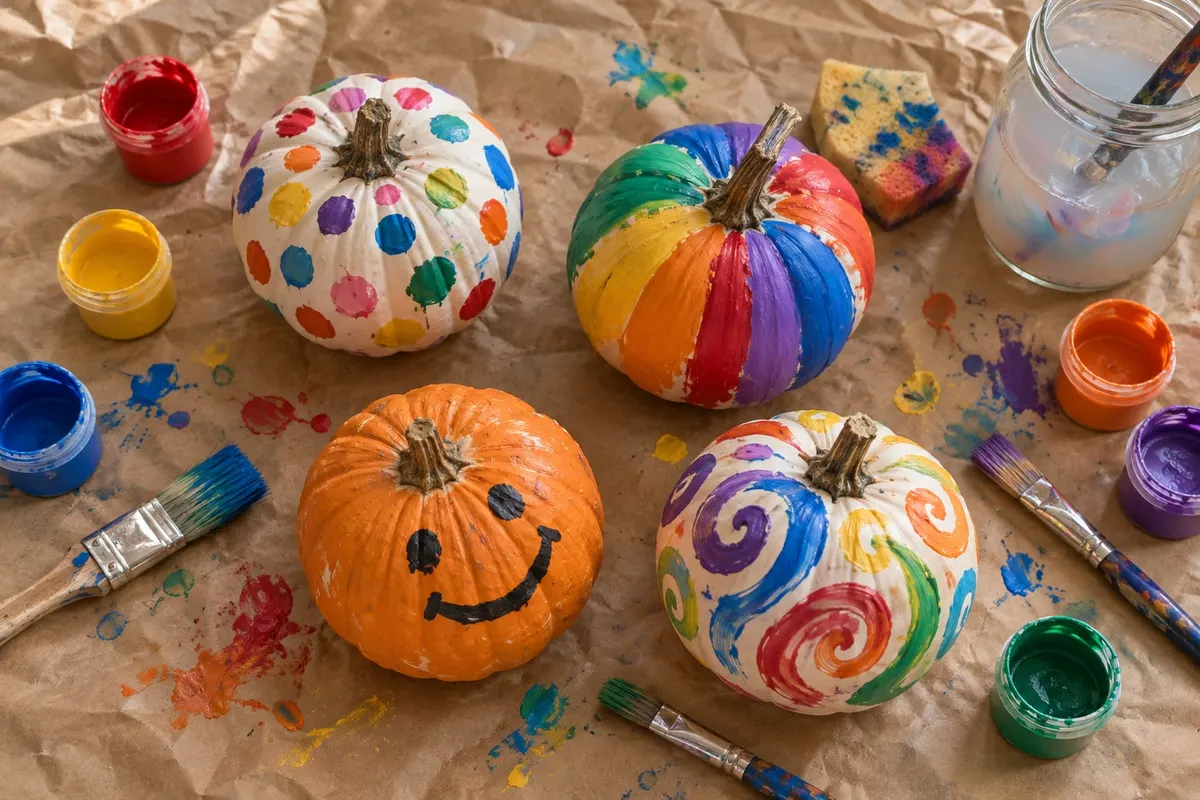
Put a few white pumpkins on brown kraft paper, set out six paint pots (red, yellow, blue, orange, purple and green) and let kids go. Dots made with a sponge dauber or the end of a brush, stripes that follow the ribs and loose spirals all work, and one orange pumpkin with a plain black smile gives younger kids a face to finish.
Use washable paint and a jar of rinse water, and cover the table. Pie pumpkins about 6 to 8 inches wide are easy for little hands. Allow 30 minutes of painting, then a day for the paint to cure.
14. Dot a blue pumpkin with silver and gold glitter
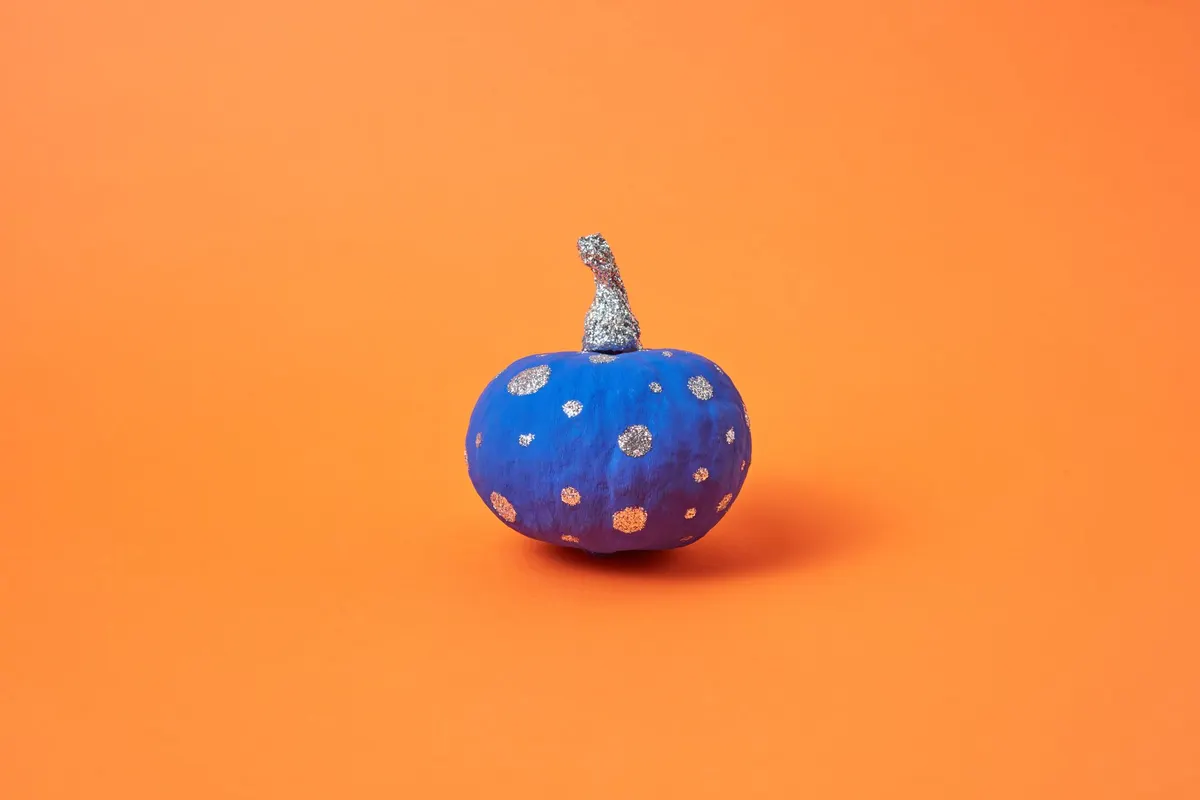
Paint a pumpkin royal blue, fading to purple toward the bottom. Dab on scattered dots in different sizes using the end of a brush or a dotting tool, in silver and a few in gold. Paint the stem silver and sprinkle on glitter while it is wet.
Dots are the easiest pattern for beginners, because there is no wrong spot. Vary the sizes and keep the spacing loose. Apply glitter outdoors or over a tray and seal it with clear spray. About an hour.
15. Paint a mini pumpkin trio in blue, aqua and peach
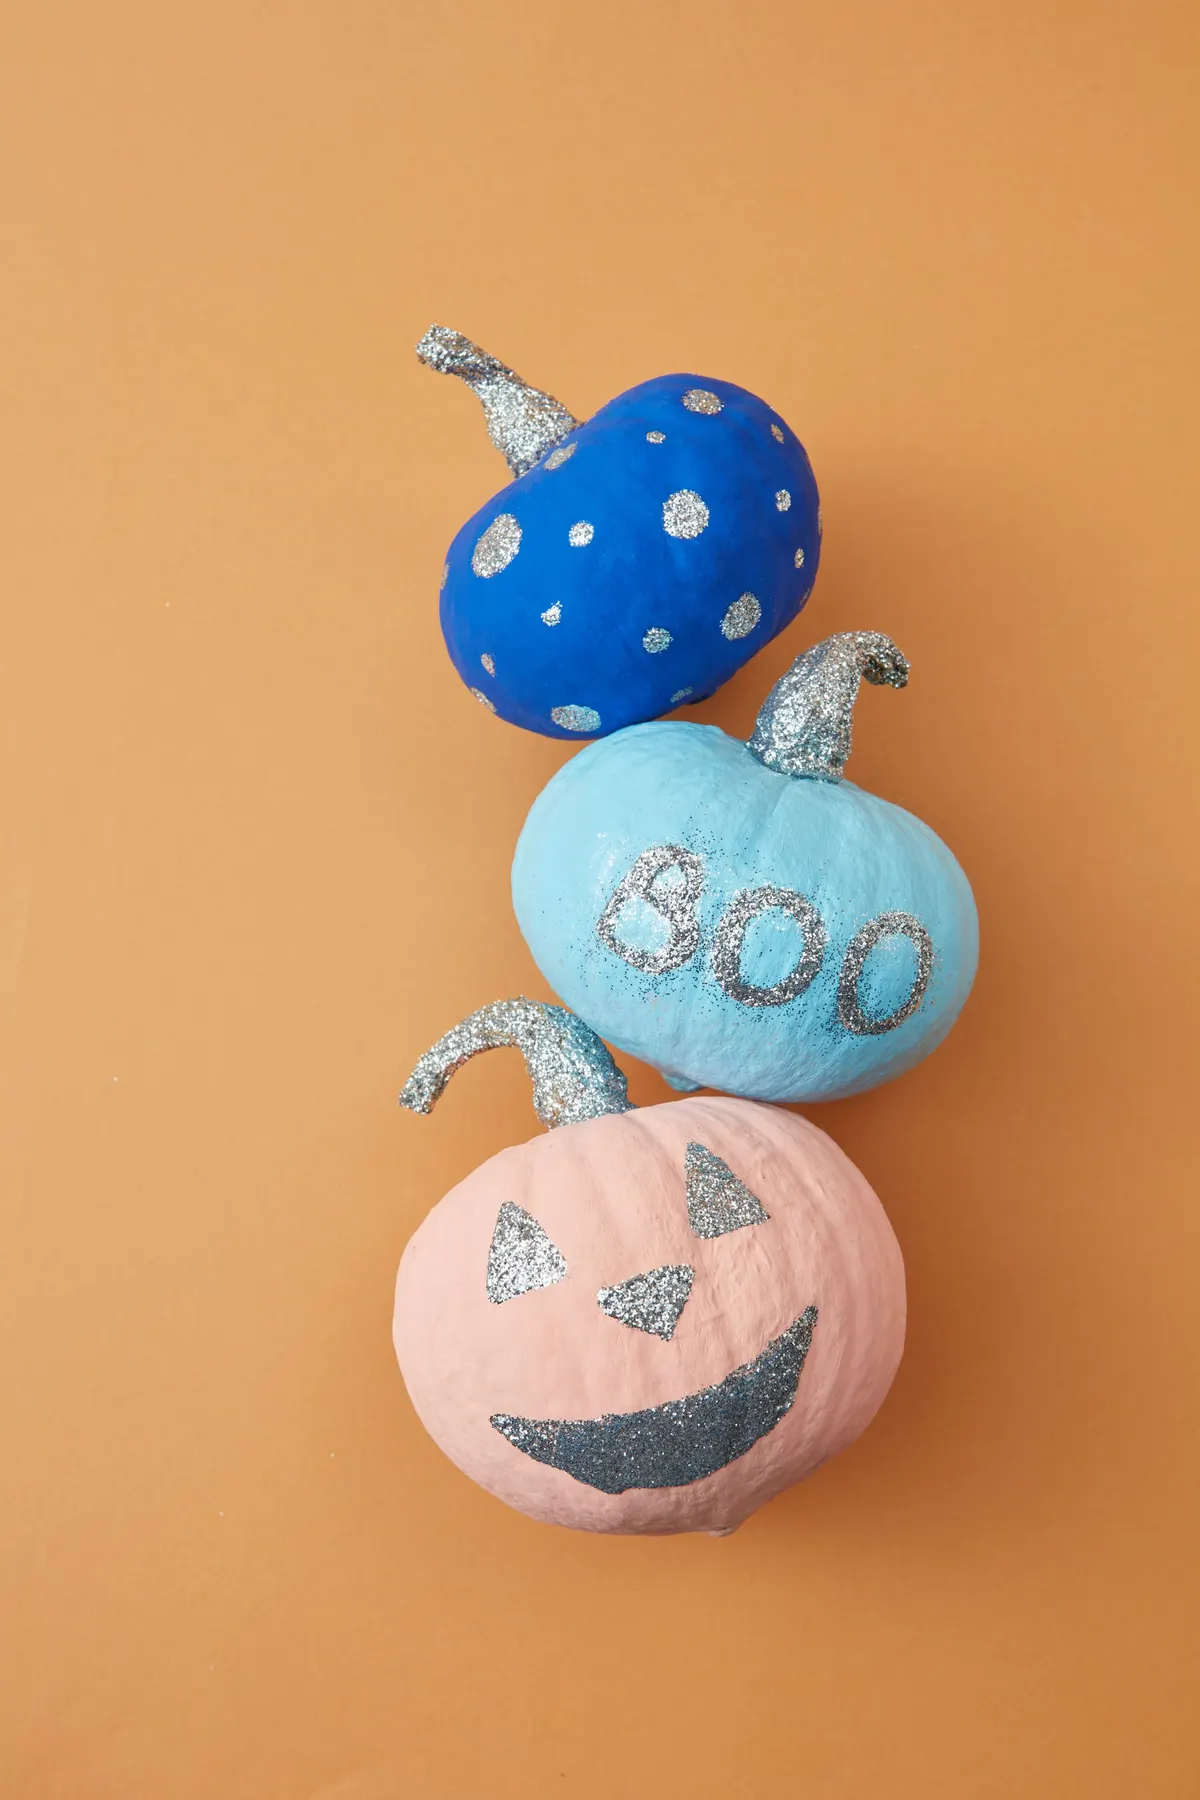
Three small pumpkins with three simple jobs look like a set. Paint one royal blue with silver dots, one aqua with BOO in silver, and one peach pink with a jack-o'-lantern face: two triangle eyes, a triangle nose and a curved smile in silver. Silver stems tie the three together.
These small painted pumpkin ideas fit a mantel, a desk or a windowsill. Paint pumpkins about 3 to 5 inches wide so the face stays readable, and use a paint pen for the face. Allow 20 minutes per pumpkin, plus drying time.
16. Stripe a white pumpkin in thin gold lines
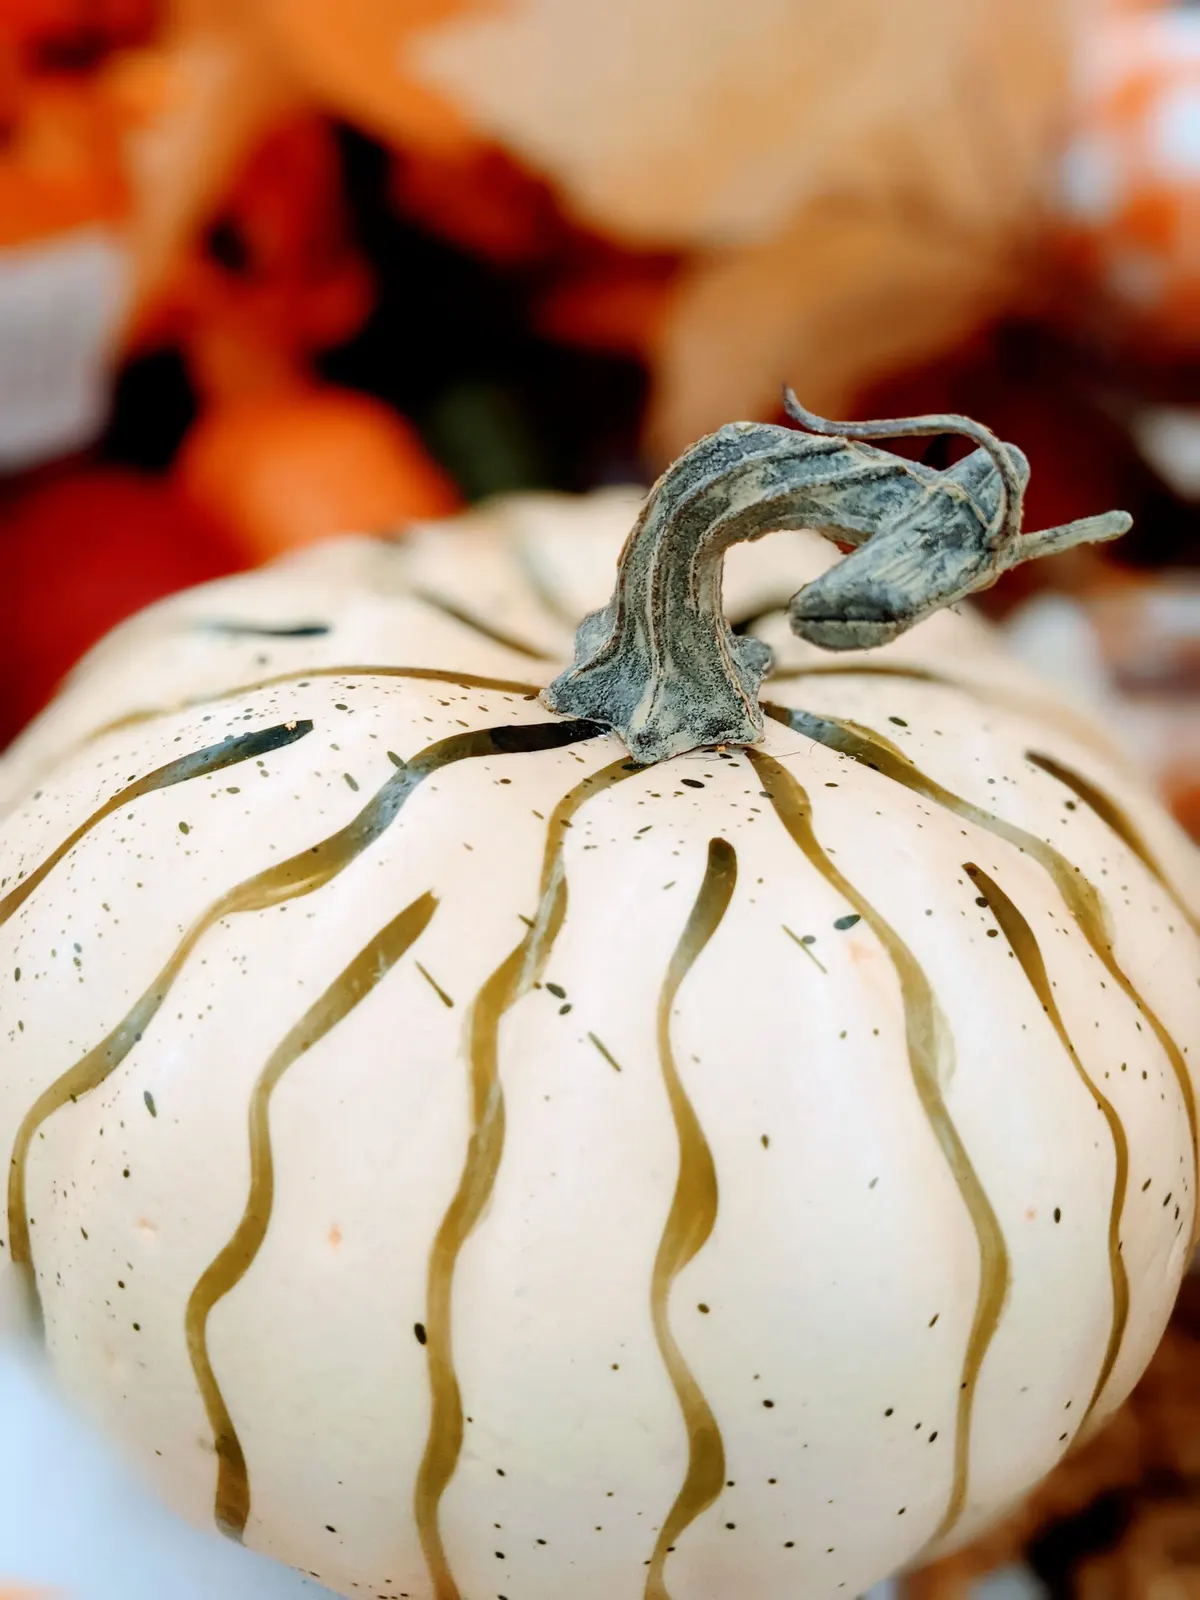
For a calm, grown-up look, paint a white or cream pumpkin with narrow wavy stripes in gold or olive that follow the ribs. Add a few tiny speckles in the same color. A thin brush or a metallic paint pen does the lines, and your hand does not need to be steady, because the lines are meant to wobble.
This design does not look Halloween-specific, so it works through Thanksgiving. Put it on a table with a candle in a glass holder, away from open flames. Plan on 30 to 40 minutes.
17. Dip a black pumpkin in dripping gold
For a dramatic option, paint a pumpkin matte black in two coats. Once it is dry, pour or brush metallic gold across the top and let it run down the sides in long drips. Gold paint also covers the stem.
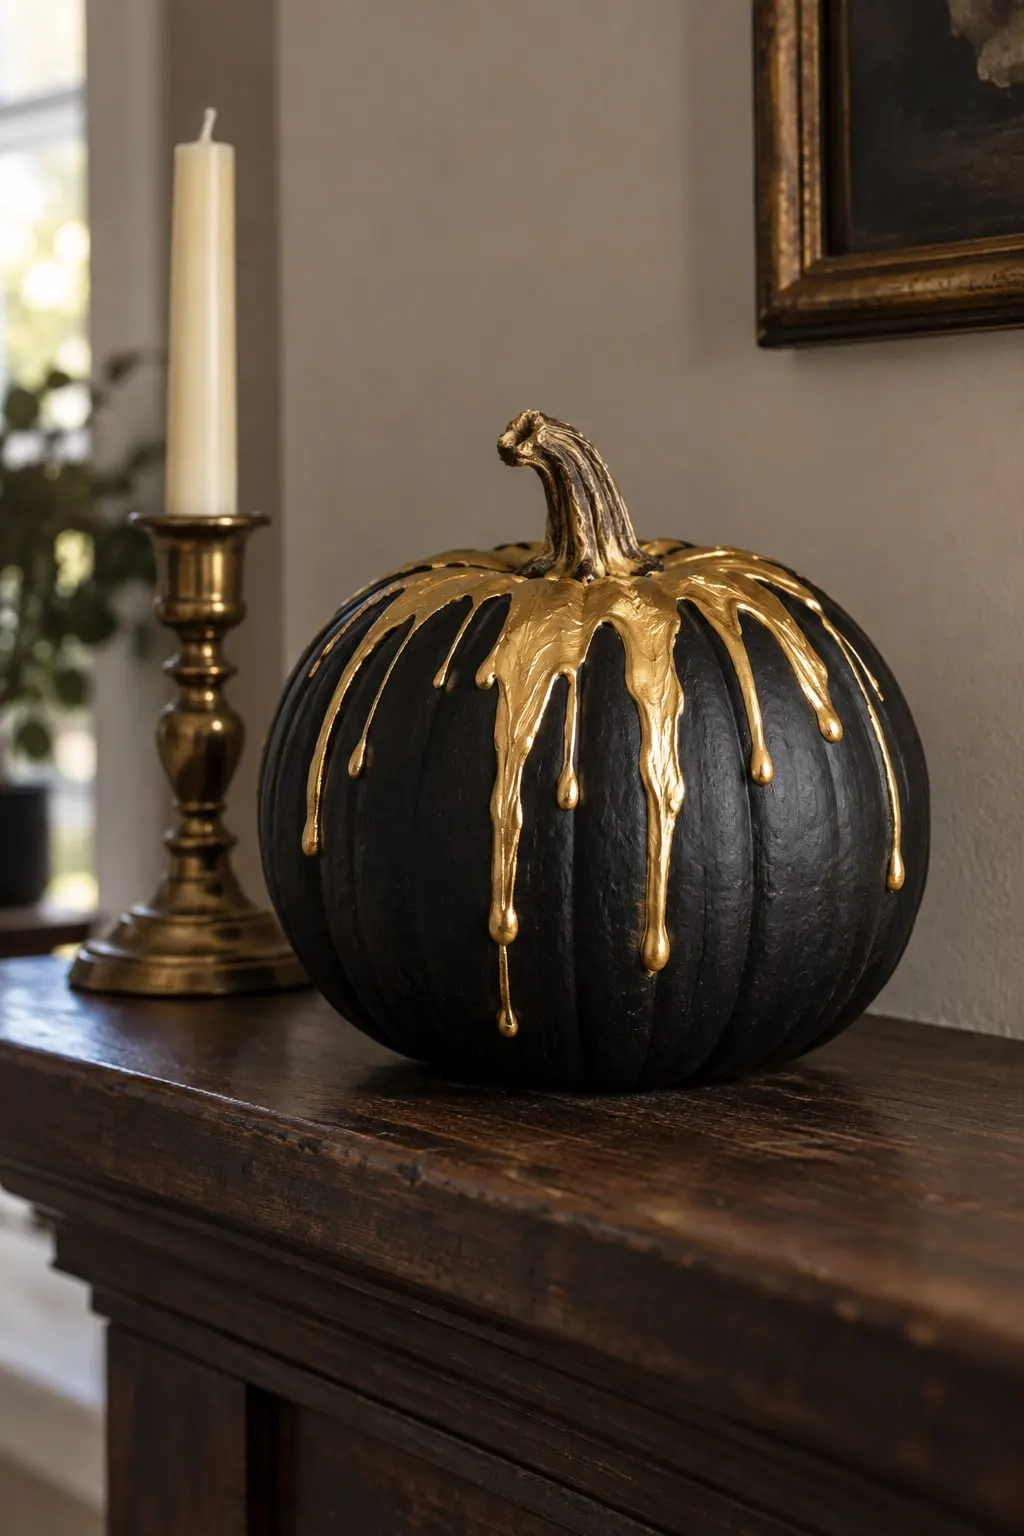
Prop the pumpkin on a cup so the drips run evenly, and work on a covered surface. Thicker paint gives longer drips, and a paint thinned with a drop of water gives shorter ones. Set it on a mantel next to a candlestick (use a flameless candle if the paint is fresh). Allow an hour, plus a day to dry.
18. Paint white daisies on a sage-green pumpkin
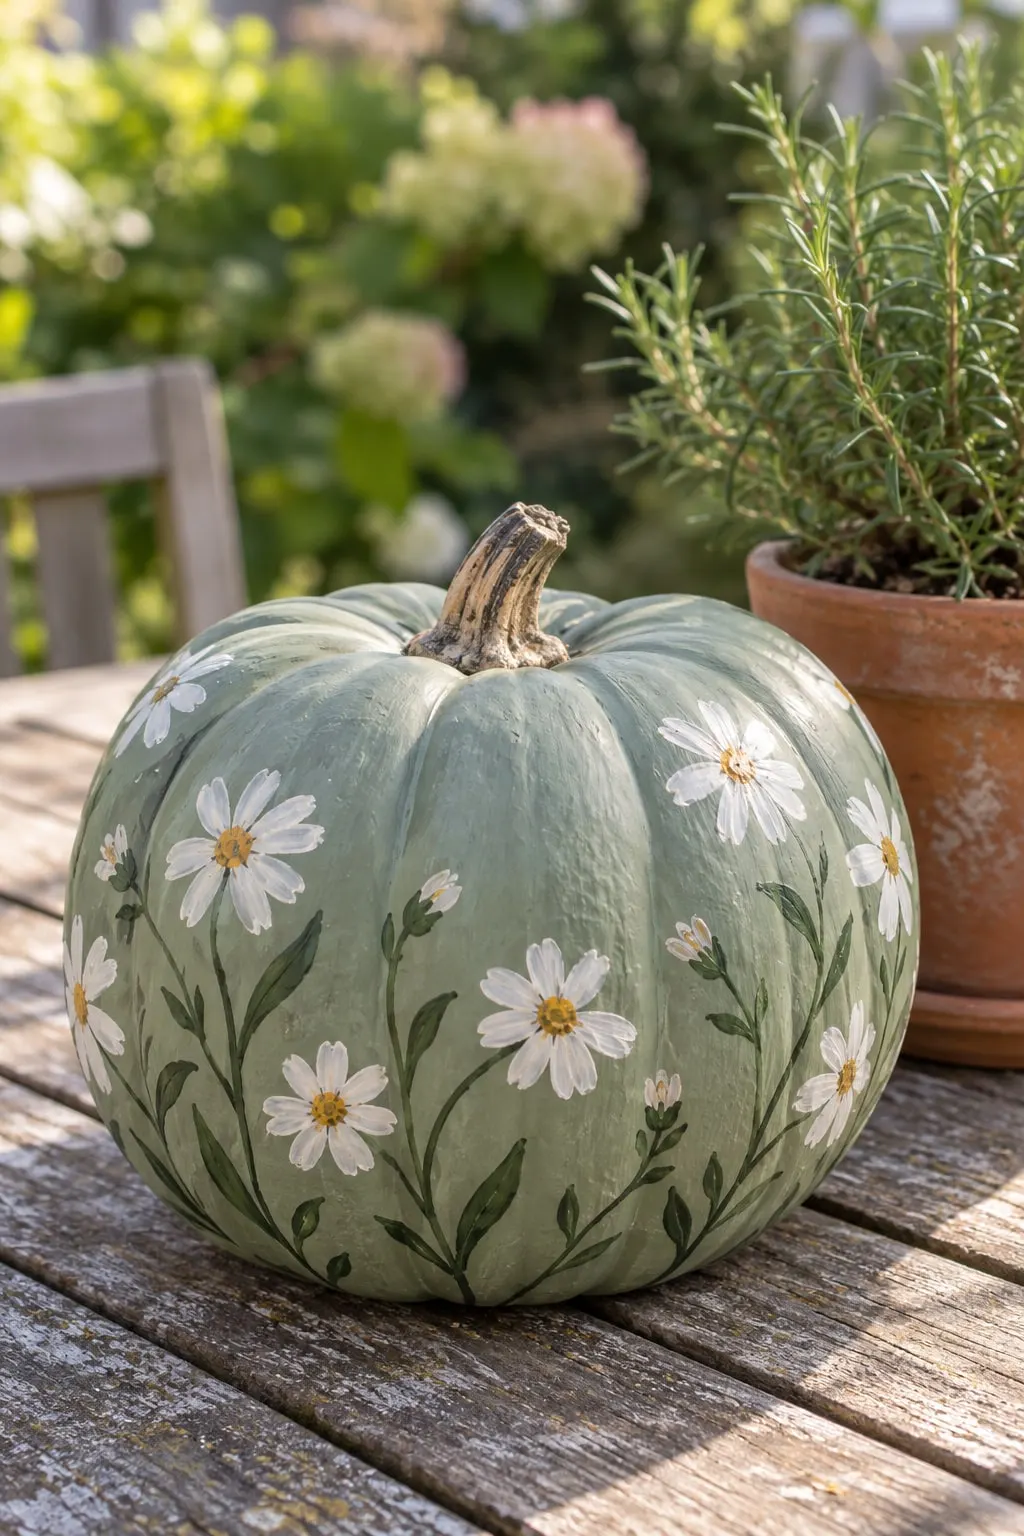
Painted flowers soften a pumpkin. Cover a pumpkin in pale sage green, then paint white daisies with gold centers on thin dark green stems with pointed leaves, about eight flowers and a few small buds. Make each petal with one press of a round brush.
The brush marks should show, because the loose edges are part of the charm. Put it beside a potted herb on a wooden table and it works for fall as well as Halloween. Allow about 75 minutes.
19. Give a pumpkin a spa day with a face mask
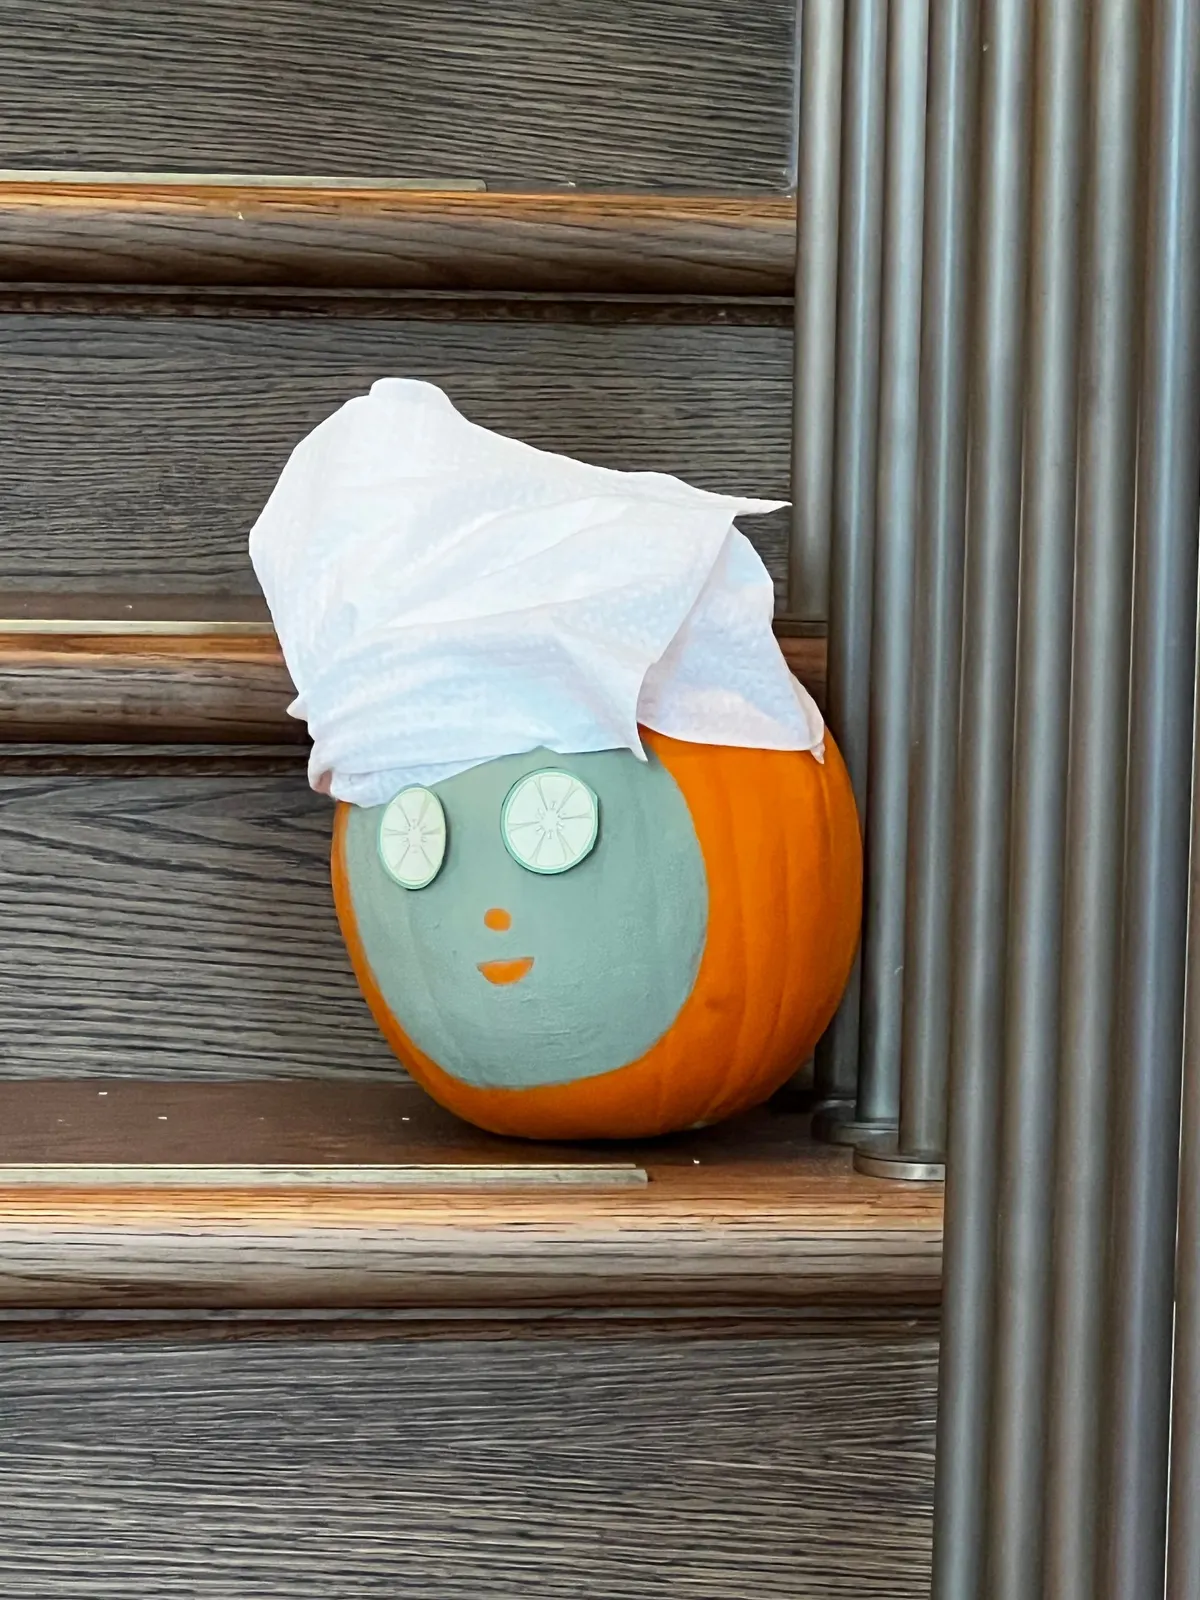
This one is for laughs. Paint a big pale green oval across the front, add two round pale-green circles as eyes with thin radial lines like cucumber slices, a small orange nose and a curved smile. Wrap a paper towel around the top like a towel turban and tape it behind.
It costs almost nothing and gets the biggest reaction on a porch or a stoop. Use a small pumpkin, since a big one makes the turban hard to tie. About 30 minutes, and the paper towel comes off before rain.
20. Brush a black buffalo check
For a farmhouse look, paint a cream pumpkin in a buffalo check. Paint wide black vertical stripes first, about an inch apart, then let them dry. Paint horizontal stripes in a gray tone across them, so the overlaps turn charcoal. Use painter's tape for straight edges on a smooth pumpkin.
Ribbed pumpkins bend the lines, and that is fine, since the curve gives the pattern a hand-painted feel. Place it on a knit blanket with a chunky throw. Plan on two hours with the drying time.
Final tips
- Pencil every design first and paint over it, because pencil erases and paint does not.
- Use two thin coats, and let each dry before the next so the paint does not lift.
- Pick the pumpkin by shape: tall for faces and witches, wide for lettering, tiny for single motifs.
- Prop pumpkins on cups or egg cartons while they dry, so the paint does not stick to the table.
- Keep painted pumpkins out of heavy rain and strong sun, and never leave them near an open flame.
- Pair painted pumpkins with a carved one from our carved pumpkin ideas, or group them on the steps with ideas from fall porch decor and the Halloween hub.
Frequently asked questions
What kind of paint works best on pumpkins?
Acrylic craft paint is the usual choice because it covers the waxy skin and dries fast. Wash and dry the pumpkin first, then wipe it with rubbing alcohol so the paint grips. Use two thin coats instead of one thick one. Paint pens work for lines and lettering, and spray paint suits solid colors and metallics when used outdoors.
Do you need a base coat on a pumpkin before painting?
For light colors, yes. Orange skin shows through pastels, white and yellow, so one or two thin coats of white give the true color. Dark paint, black marker lines and bold colors cover orange fine without a base. If the skin has bumps or green patches, a base coat also evens out the surface.
How do you make painted pumpkins last longer?
Pick firm pumpkins with a stem and no soft spots, and clean them before painting. Paint is not a seal, so keep them out of heavy rain and direct midday sun. A coat of clear acrylic sealer slows scuffing. Do not carry them by the stem.
What is the easiest pumpkin painting idea for beginners?
Start with a solid color and one simple shape. A white pumpkin with a black BOO, a row of polka dots in a paint pen, or a plain ghost made from an oval and two dots all take under 30 minutes. Pencil the design first, because pencil wipes off and paint does not.
Can you paint small pumpkins and mini pumpkins?
Yes, and they are easier for kids and for tabletop sets. Mini pumpkins are often 2 to 4 inches wide, so use fine brushes, paint pens or dotting tools and keep each design to one simple motif. Let each layer dry fully before the next, and prop them in an egg carton or on cups while they dry.
You might also like
 Halloween
22 Carved Pumpkin Ideas, From Easy Faces to Showstoppers
 Halloween
21 Outdoor Halloween Decoration Ideas for Yards, Trees and Paths
 Halloween
22 Halloween Door Decoration Ideas for Houses and Apartments
 Halloween
20 Halloween Window Ideas: Painting, Silhouettes & Lights
 Halloween
22 No-Carve Pumpkin Ideas: Paint, Fabric, Tape and Stacks
 Halloween
20 Trunk or Treat Ideas for Any Car (SUV, Sedan, Minivan)